10 Affordable Kitchen Backsplash Ideas That Look High-end (without the Drama)
Let’s be real: a killer backsplash can make your kitchen feel custom in about five minutes. But dropping thousands? Hard pass. The good news: you can get a designer look on a Target budget with smart materials, clever installation, and a few styling tricks.
Here are 10 affordable kitchen backsplash ideas that look high-end—with zero beige boredom and lots of “wait, you did that yourself?” energy.
Tired of snacking when you’re not even hungry? This reset helps you stop the loop and feel back in control.
A simple reset for moments when cravings take over. Easy to use, easy to repeat, and designed to help you feel satisfied instead of stuck.
1. Peel-and-Stick Tiles That Don’t Look Cheap
Peel-and-stick has come a long way. Skip the flimsy plastic sheets and go for gel or vinyl tiles with grout lines that look legit. Subway, hex, marble, even patterned “cement” looks—you’ve got options.
Why it works
- Budget-friendly with minimal tools.
- Renters rejoice: Most remove cleanly.
- Quick install for instant gratification.
Pro tips
- Order samples (light hits finishes differently).
- Start on the most visible wall and work outward.
- Use a sharp utility knife and metal ruler for clean edges.
Style it high-end: Keep patterns simple and run the tile to the bottom of your upper cabinets for a seamless look.
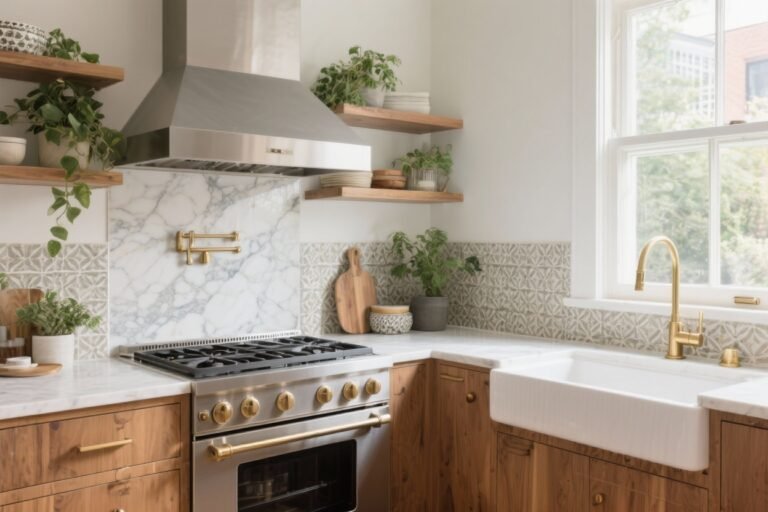
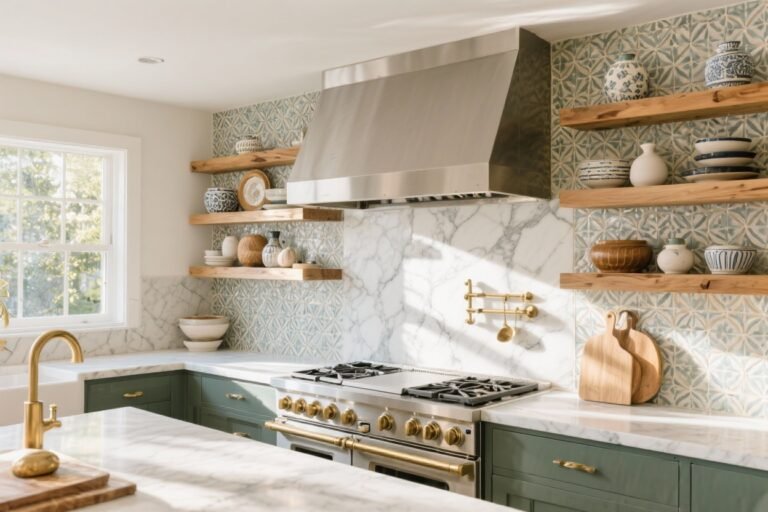
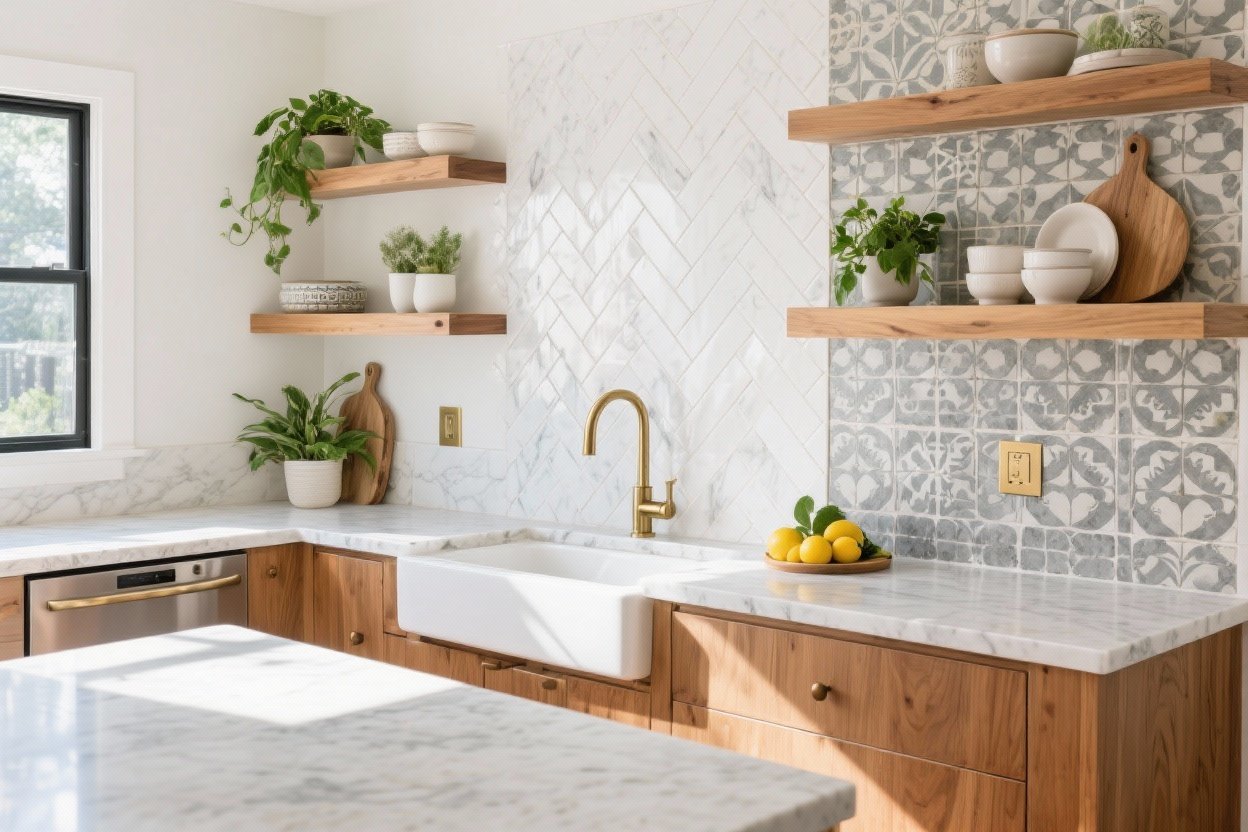
2. Real Marble—But Make It a Sliver
Love marble but not the price? Try a short marble slab backsplash (4–8 inches high) and paint the wall above. You get the luxury material where it counts without the slab-to-ceiling sticker shock.
Why it works
- Real stone = instant elevation.
- Easy to clean where splashes actually happen.
- Pairs beautifully with simple paint or limewash above.
Pro tips
- Ask stone yards for remnants or offcuts.
- Choose honed over polished for fewer etch marks (and a softer look).
- Seal it—no excuses.
Style it high-end: Color-match your wall paint to a marble vein for that designer cohesion.
Transform Your Home With 7,250+ Stunning Landscaping Designs—No Expensive Designers Needed!
- 🌿 Access 7,250+ stunning landscaping designs.
- 💰 Save thousands—no pro designer needed.
- 🏡 Plans for gardens, patios, walkways, and more.
- ✨ Simple, beginner-friendly DIY layouts.
- 🛠️ Customize any design to fit your yard.
3. Painted Backsplash With Scrubbable Sheen

Yup, paint. It’s the cheapest redo with the biggest payoff. You’ll want a semi-gloss or satin finish for wipeability and a washable enamel product if you cook like you mean it.
Why it works
- Cost-per-square-foot? Practically free.
- Looks clean and modern.
- Perfect for tricky walls and quick updates.
Pro tips
- Prep is everything: degrease, fill, sand, prime.
- Try limewash for subtle movement (very “French farmhouse,” IMO).
- Add a clear topcoat behind the stove for extra durability.
Style it high-end: Choose an elevated neutral—think warm greige or mushroom—not stark white. It reads designer, not basic.
4. Beadboard or V-Groove for Cottage-Chic

Wood paneling as a backsplash? It’s a classic. Beadboard or V-groove adds texture, warmth, and charm for not a lot of cash. Painted a creamy tone, it’s pure Cotswolds meets coastal kitchen.
Why it works
- Material is affordable and easy to cut.
- Instant character—no tile saw required.
- Great for older homes or farmhouse vibes.
Pro tips
- Use moisture-resistant MDF or PVC in splash zones.
- Run panels vertically to emphasize height.
- Seal edges at the counter with a bead of caulk.
Style it high-end: Add a slim picture ledge for art, oil bottles, and tiny vases. Looks custom, costs pennies.
5. Statement Sheet Materials (Think Metal or Stone Look)
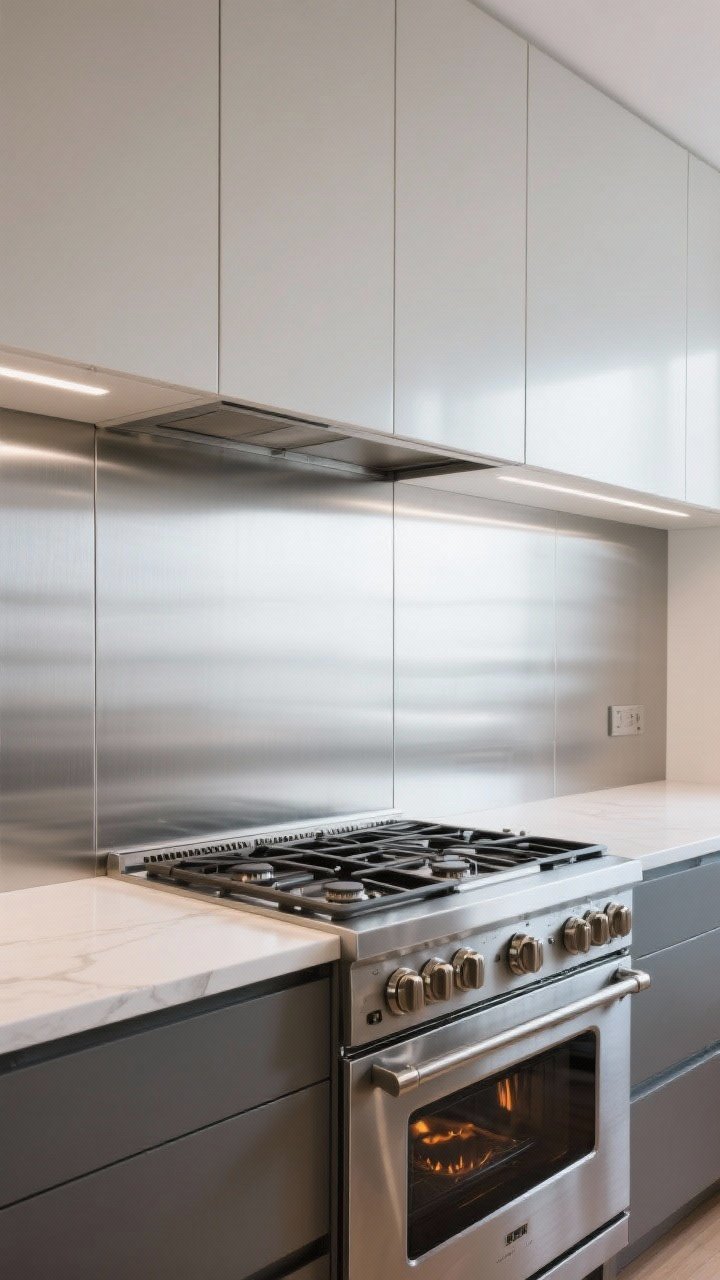
Instead of tiny tiles, cover your backsplash with a single sheet material. Stainless steel, brushed aluminum, faux marble laminate, or acrylic “glass” panels make a clean, modern statement.
Why it works
- No grout to scrub. Ever.
- Seamless and sleek—hello chef’s kitchen energy.
- Materials like compact laminate look luxe at low cost.
Pro tips
- Take accurate measurements and order a single continuous piece if possible.
- Use construction adhesive and finish with sleek edge trims.
- For the stove area, pick a heat-safe material (stainless or stone lookalikes rated for heat).
Style it high-end: Match your sheet finish to your hardware tone (brushed nickel with brushed aluminum, etc.) for a pulled-together look.

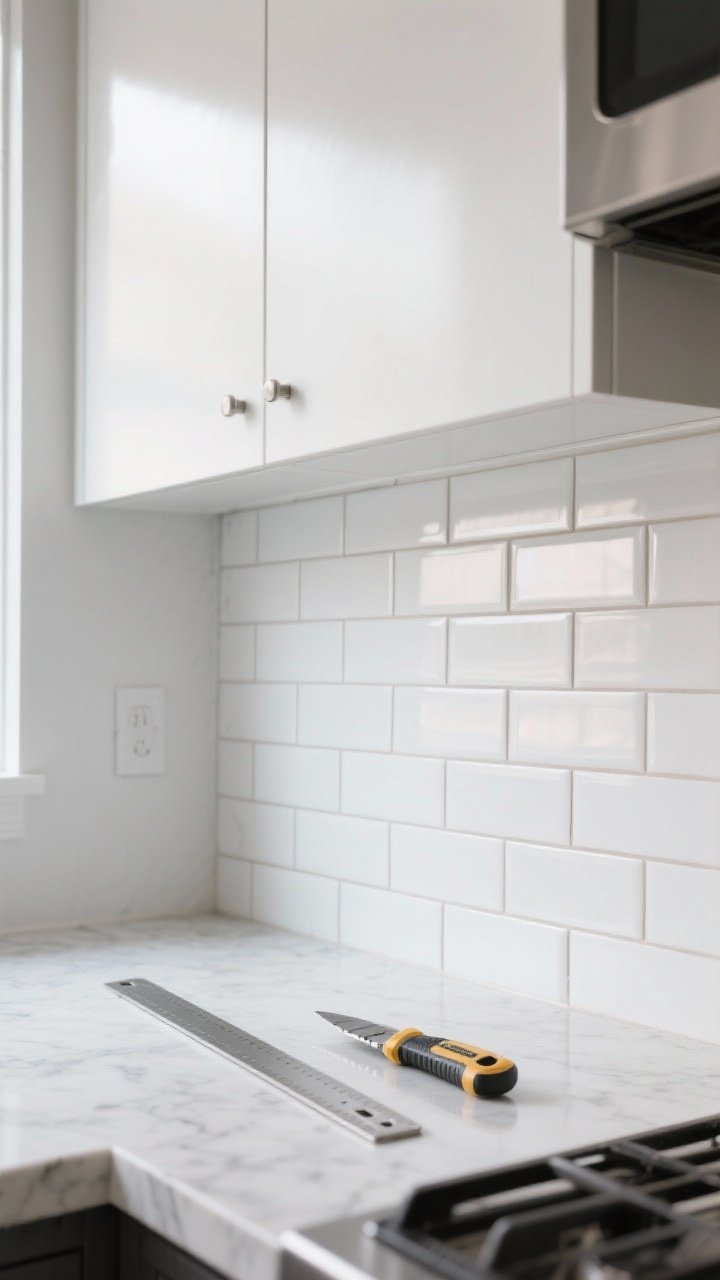
6. Classic Subway Tile, But Better
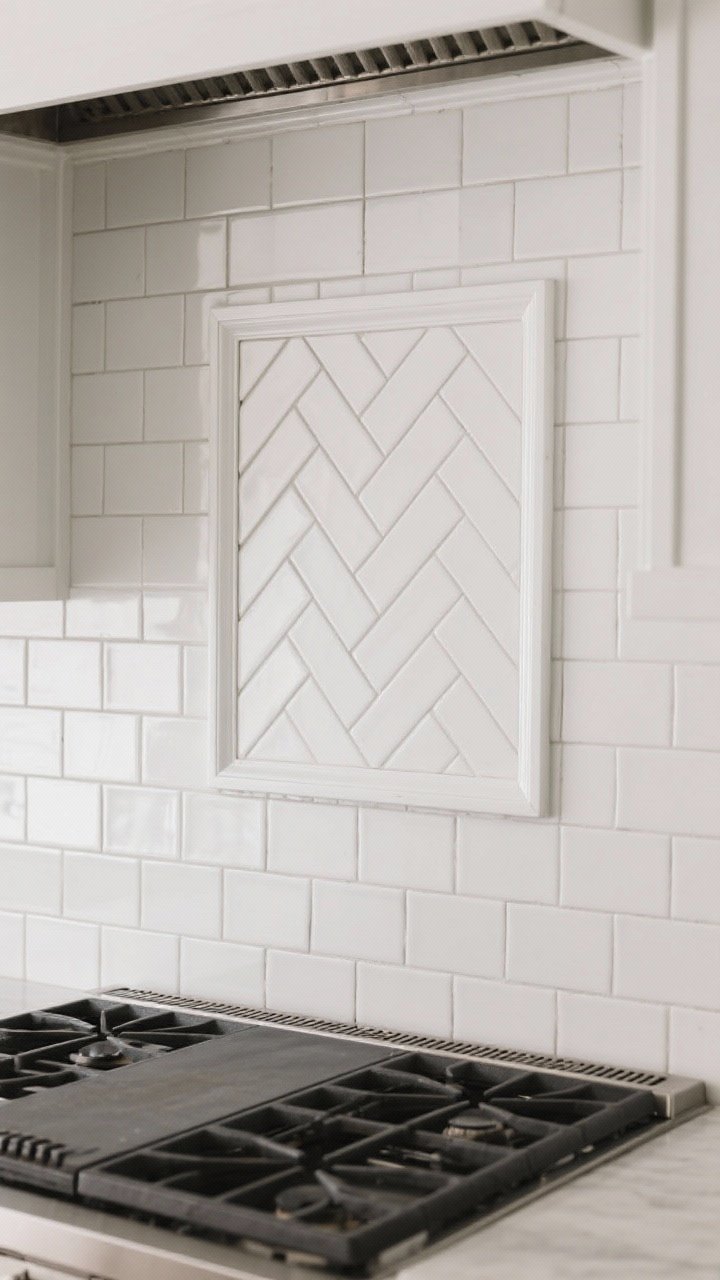
Subway tile is the little black dress of backsplashes—timeless, affordable, and versatile. To make it look pricier, play with layout, grout, and scale.
Design twists
- Vertical stack for a modern twist.
- Herringbone behind the range for a focal point.
- Oversized 4×12 tiles for fewer grout lines.
Pro tips
- Use color-matched grout for a seamless, higher-end look.
- Finish edges with schluter trim instead of raw ends.
- Go matte for elevated texture and fewer fingerprints.
Style it high-end: Run the tile to the ceiling on at least one wall. It stretches the space and reads custom.
7. Faux Zellige or Glazed Ceramic With Soul
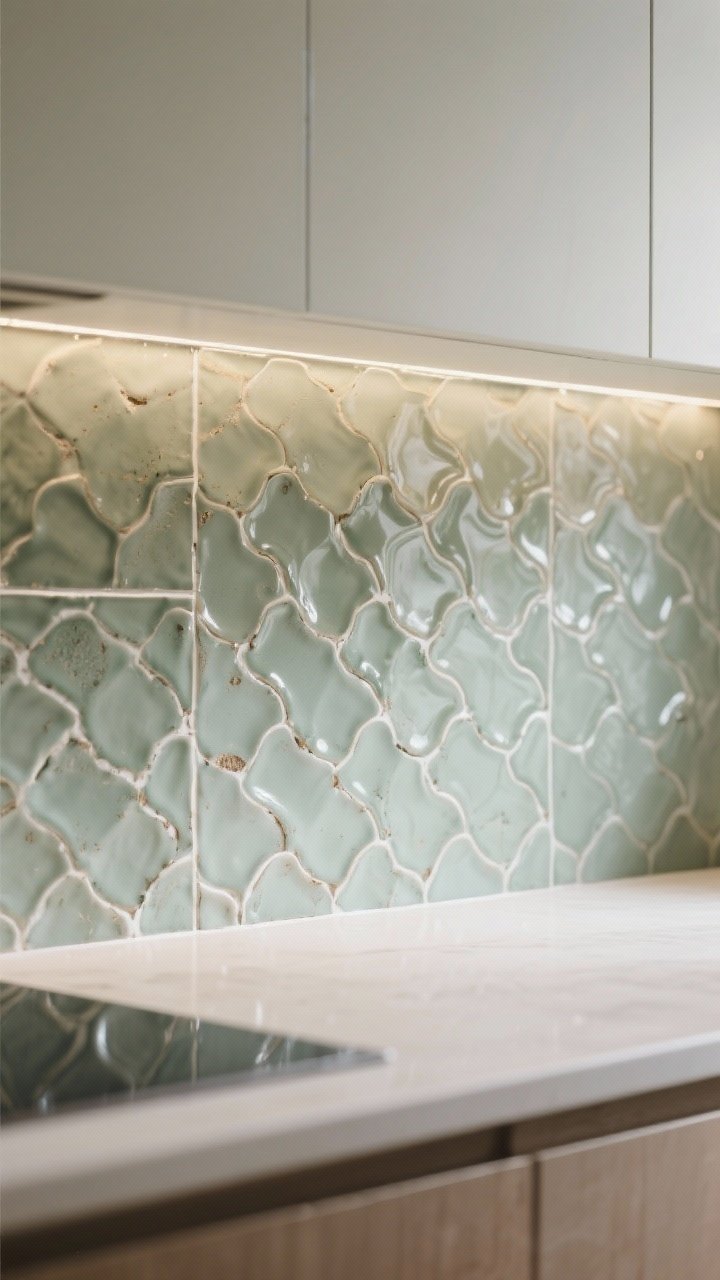
Those uneven, handcrafted tiles you see all over Pinterest? Pricey. But there are faux zellige and glazed ceramic options that mimic the tonal variation and wavy surface—for way less.
Why it works
- Light bounces off the glossy, imperfect surface.
- Color variation looks artisanal (read: expensive).
- Pairs with modern or traditional cabinets.
Pro tips
- Buy 10–15% extra and hand-select tiles for a beautifully mixed look.
- Use a tight grout line to spotlight the tile, not the grout.
- Warm white grout keeps the vibe soft.
Style it high-end: Choose a desaturated color—sage, bone, ink blue—and keep counters simple so the tile shines.
8. Patterned Vinyl or Wallpaper (Sealed!)

Want bold pattern without committing to real cement tile? Try vinyl backsplash panels or washable wallpaper sealed with a clear topcoat. It’s renter-friendly, budget-friendly, and totally fun.
Why it works
- Endless patterns: Moroccan, Art Deco, geometric, floral.
- Low cost and easy to switch later.
- Great for galley kitchens that need personality.
Pro tips
- Use peel-and-stick wallpaper labeled washable.
- Add a clear, matte water-based polyurethane topcoat in splash zones.
- Frame edges with slim wood or metal trim for a finished look.
Style it high-end: Limit bold pattern to one wall and keep everything else quiet. It reads intentional, not chaotic.
9. Brick Veneer or Thin Brick for Loft Vibes
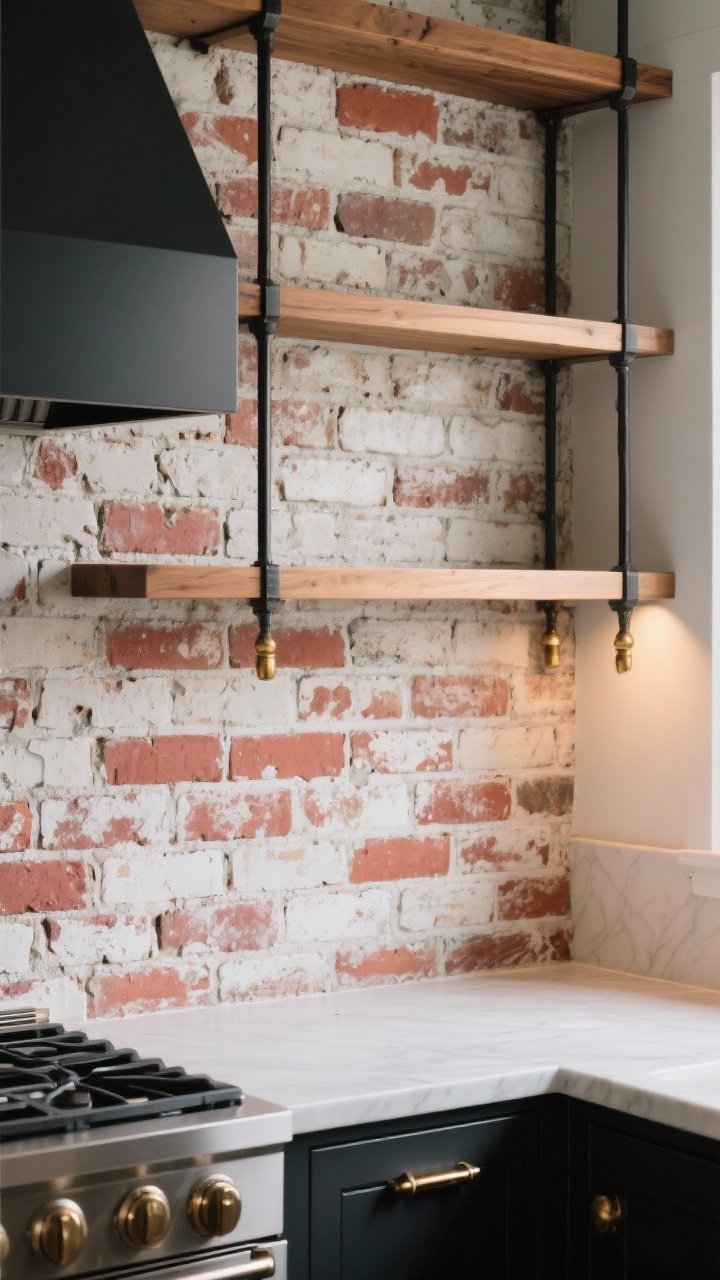
Get that loft-kitchen look without a structural brick wall. Thin brick veneer gives texture and patina, then you can seal, limewash, or paint it for the exact vibe you want.
Why it works
- Authentic texture that looks custom.
- Durable and forgiving—hides scuffs.
- Pairs beautifully with wood, black, or brass accents.
Pro tips
- Choose lightweight thin brick for easier install.
- Use pre-mixed mortar and a notched trowel—slow and steady.
- Seal with matte sealer to keep that dusty, natural look.
Style it high-end: A soft limewash brings Old World charm and softens red tones for a more elevated feel.
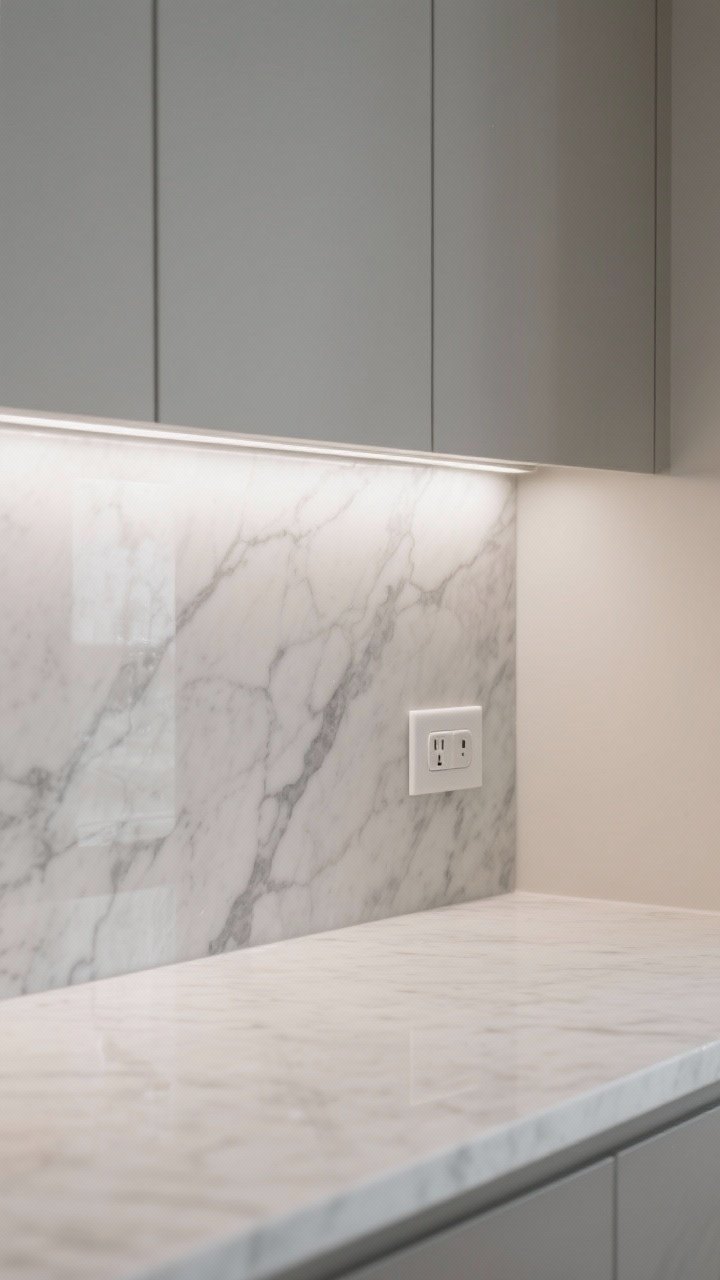
10. Slab-Look With Large-Format Porcelain
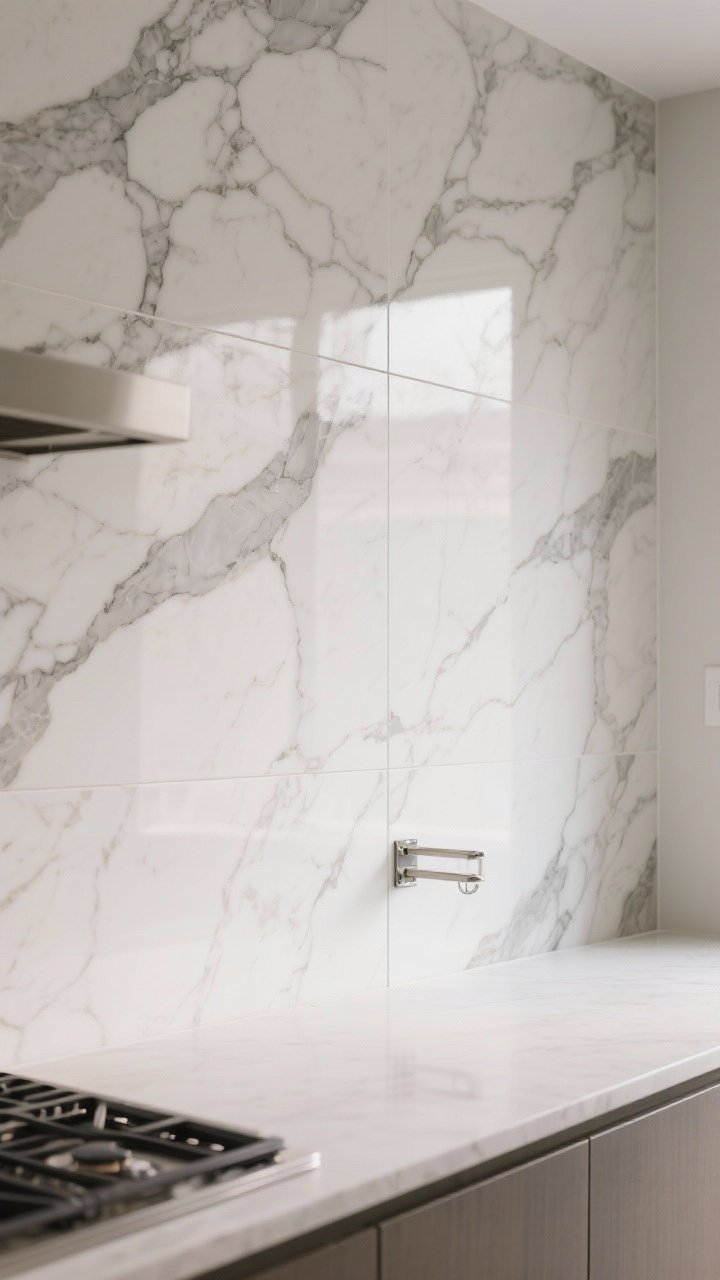
Marble slab walls are chef’s kiss—also $$$. Get the same sleek look with large-format porcelain tiles in marble or stone patterns. Fewer grout lines = more luxury.
Why it works
- Porcelain is durable, stain-resistant, and heat-friendly.
- Large pieces create the illusion of slab.
- Patterns are getting shockingly realistic.
Pro tips
- Choose the largest tile your space allows (24×48 is common).
- Use leveling clips for perfectly flush seams.
- Opt for matching grout to minimize lines.
Style it high-end: Continue a small backsplash “return” on the ends of your counter run. It’s a small detail that looks custom.
Bonus Styling Tips To Seal the Luxe Look
- Edge trims matter: finish cut edges with schluter or slim wood.
- Lighting is everything: Add under-cabinet LEDs to make textures pop.
- Color cohesion: Tie backsplash tones to counters, hardware, and wall color.
- Less clutter: Edit the counter. A gorgeous backsplash needs breathing room.
Budgeting + Planning Cheat Sheet
- Measure twice, order 10% extra material.
- Rent tools you’ll use once (tile saw, laser level).
- Do the prep: degrease, patch, prime, and plan your layout.
- Respect splash zones around the stove and sink—choose materials accordingly.
FYI: Even a simple backsplash upgrade can change the whole mood of your kitchen. Whether you go for high-gloss faux zellige or a minimal painted wall with a marble lip, the right choice will make your space feel intentional and elevated—without emptying your savings. You’ve got this.
Now pick your favorite idea, grab a sample or two, and start plotting. Your “wow, where’d you get that done?” moment is officially loading.