10 Backyard Grill Ideas for the Perfect Outdoor Cooking Setup You’ll Want Now
You know that magical moment when someone yells “Dinner’s ready!” and the entire backyard shifts into party mode? That’s the power of a great grill setup. Whether you’re a charcoal purist, a pellet fan, or you just want your patio to not look like a Home Depot aisle exploded, I’ve got you. These 10 backyard grill ideas will make your outdoor cooking space feel intentional, stylish, and ridiculously functional. Let’s turn your grill zone into everyone’s favorite hangout.
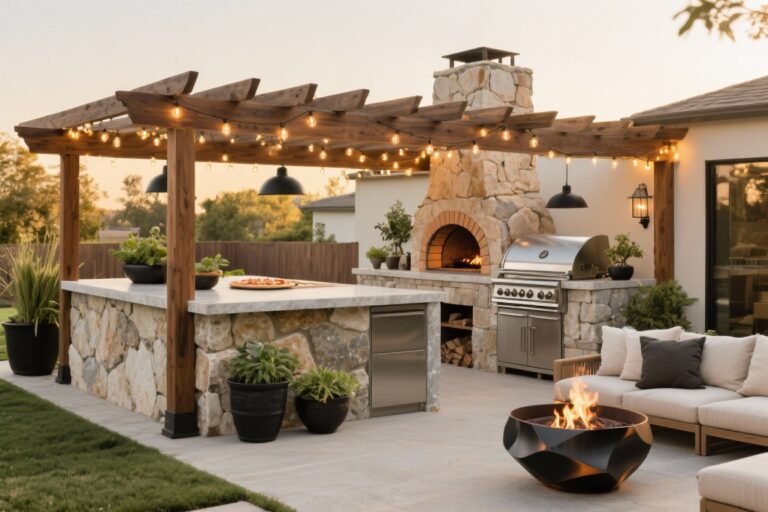
1. Create a Grill Island That Actually Works
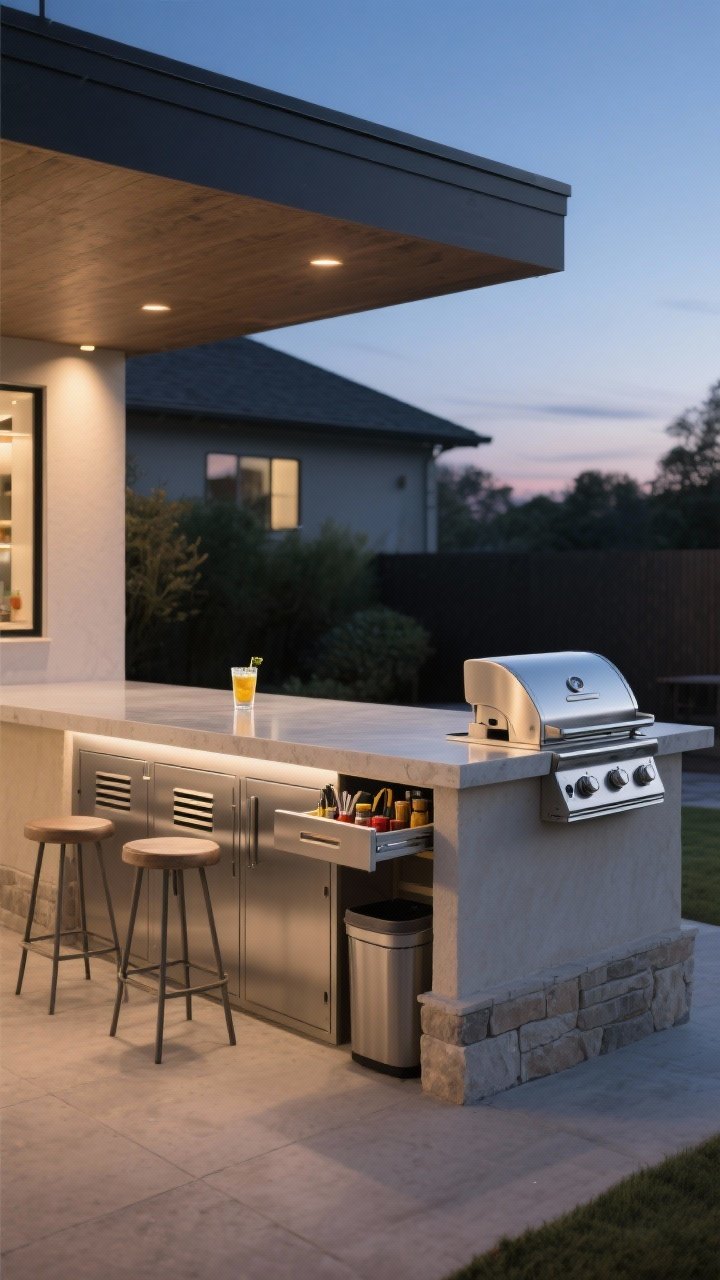
What’s better than a standalone grill? A grill island that lets you prep, cook, and plate without sprinting back inside. Think countertop real estate, tucked-away storage, and a spot to park your drink while you flip burgers like a pro.
Tired of snacking when you’re not even hungry? This reset helps you stop the loop and feel back in control.
A simple reset for moments when cravings take over. Easy to use, easy to repeat, and designed to help you feel satisfied instead of stuck.
What to Include
- Counter space: 24–36 inches on at least one side for prep and plating.
- Closed storage: Keep tools, spices, and cleaning supplies close but hidden.
- Trash pull-out: You’ll use it constantly—no more juggling foil and food scraps.
Material Tips
- Concrete or porcelain countertops for heat and stain resistance.
- Stucco or stone veneer for the base; it can handle weather and looks high-end.
- Use stainless steel doors and vents for airflow and durability.
Bonus: Add a bar overhang on one side so friends can sit and chat while you cook. It’s basically a front-row seat to flavor town.
2. Go Hybrid: Gas, Charcoal, And a Smoker (Yes, All Three)
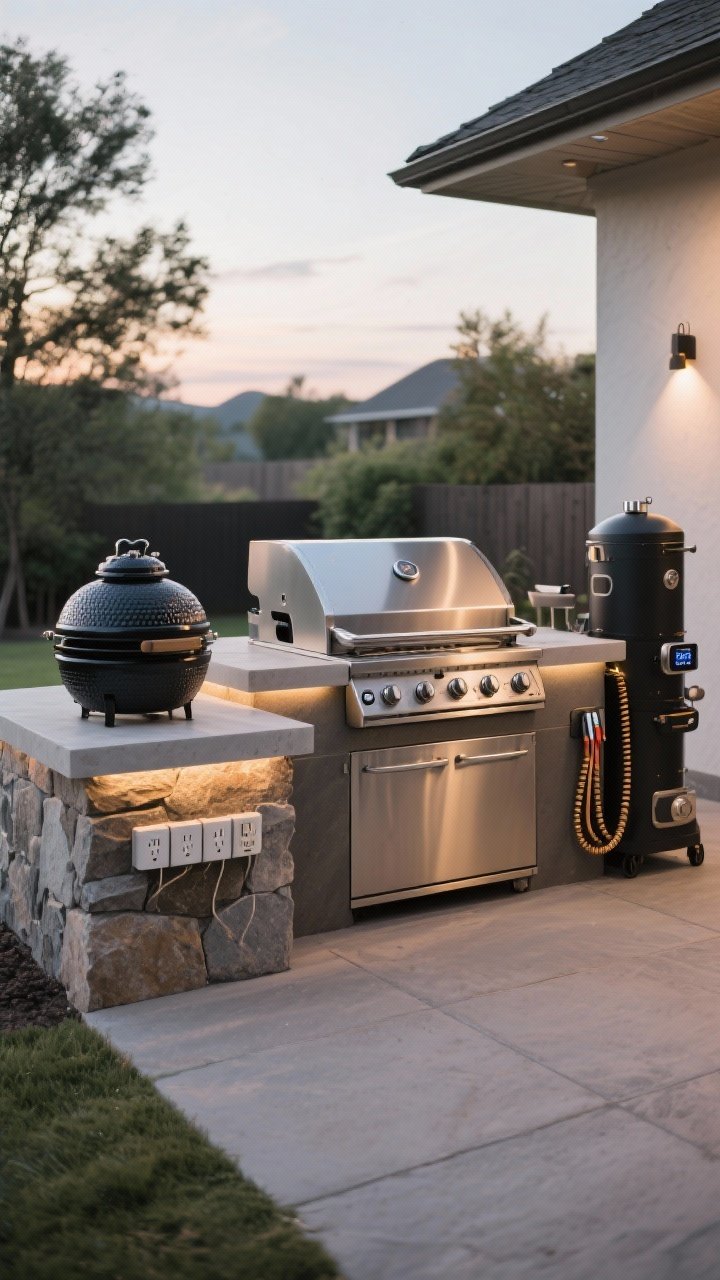
If you love options, build a hybrid grill station. Gas for quick weeknights, charcoal for flavor, and a smoker for those slow Saturdays when you become a brisket whisperer.
Layout That Flows
- Place gas grill center for everyday use.
- Set charcoal grill or kamado to one side with a heat-safe landing zone.
- Add a vertical or pellet smoker tucked slightly away—low-and-slow doesn’t need constant attention.
FYI: Add a shared thermometer dock and outlet strip. Your future self (and your rib rack) will thank you.
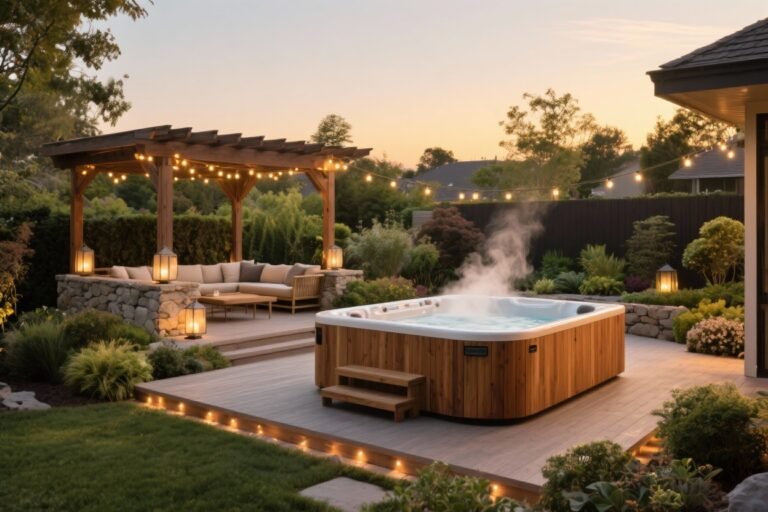
3. Build a Ventilated Pergola Kitchen

Shade is great—smoke buildup, not so much. A pergola with smart ventilation gives you the best of both: cover from sun and rain with open air for grilling.
Transform Your Home With 7,250+ Stunning Landscaping Designs—No Expensive Designers Needed!
- 🌿 Access 7,250+ stunning landscaping designs.
- 💰 Save thousands—no pro designer needed.
- 🏡 Plans for gardens, patios, walkways, and more.
- ✨ Simple, beginner-friendly DIY layouts.
- 🛠️ Customize any design to fit your yard.
Design Moves
- Louvered roof panels you can tilt open to release smoke.
- High clearance over the grill to reduce heat buildup.
- Use non-combustible panels on the back wall as a heat shield.
Lighting is clutch here. Layer dimmable sconces, under-shelf LEDs, and a task light over the grill so you can sear without guessing.
4. Add a Prep Sink and Mini-Fridge (Your Future Self Insists)
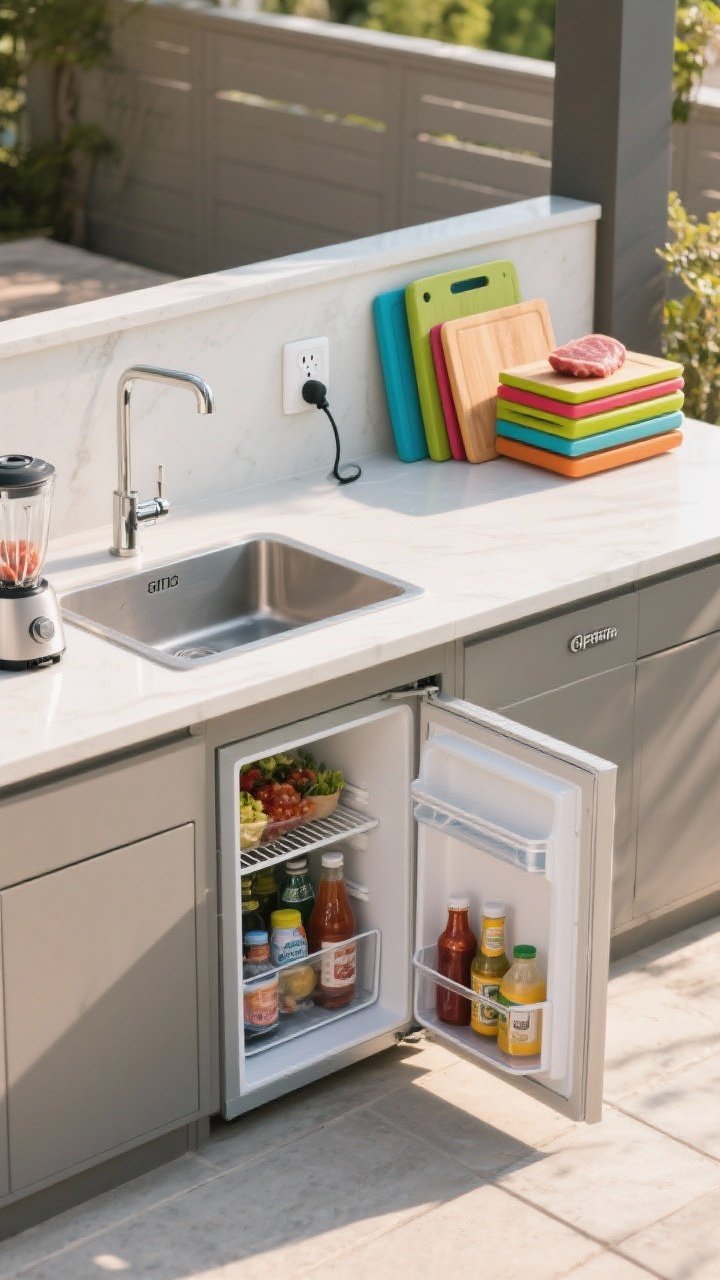
Running inside every five minutes is a vibe killer. Install a prep sink and a compact outdoor-rated fridge so everything you need is right there—marinades, cold drinks, the works.
Smart Placement
- Sink to the left of your main prep zone if you’re right-handed (reverse if not).
- Fridge below the landing area for easy access to meats and sides.
- Include a GFCI outlet nearby for blenders and vac-seal gadgets.
Pro tip: Keep raw and ready-to-eat zones separate. A simple color-coded cutting board set is a small upgrade that saves the day.
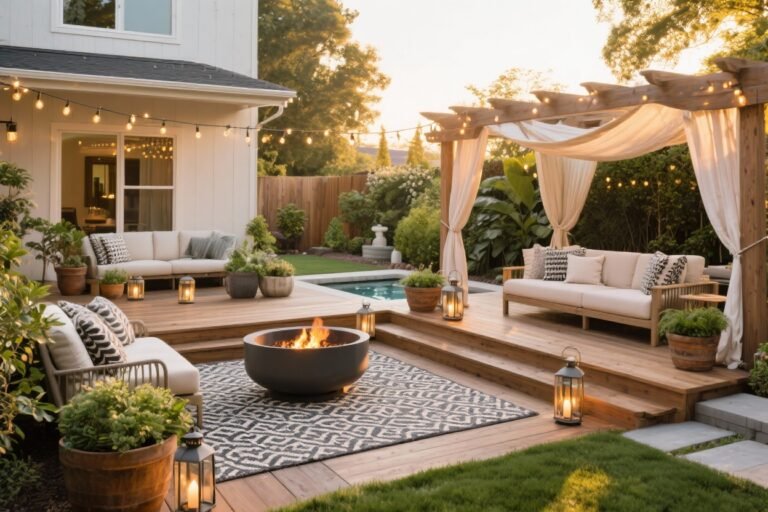
5. Style a Cozy Grill Lounge (So People Actually Hang Out)
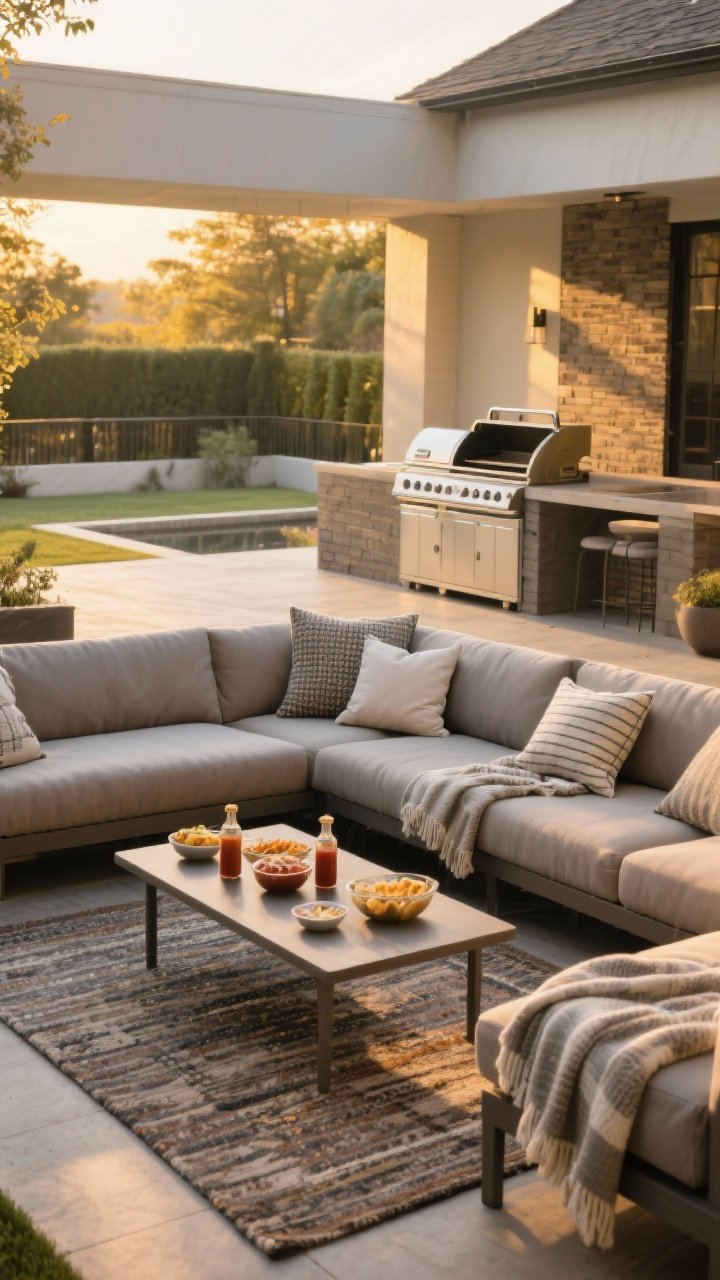
People love to gather near the action. Design a grill lounge with comfy seating and a clear view of the chef. You get conversation while you cook, and nobody’s hovering over the hot zone.
Layout That Makes Sense
- U-shape or L-shape seating facing the grill station, 6–8 feet away.
- Add low tables for snacks, sauces, and chill vibes.
- Use outdoor rugs to define zones and soften hard surfaces.
Sprinkle in weatherproof pillows and a throw for cooler nights. Instant backyard living room, minus the “don’t spill on the sofa” energy.

6. Master Heat Management With Zones

The secret to great grilling? Heat zones. Build your setup so you can sear, roast, and rest—all at once.
Zone Strategy
- High heat near the main burners or charcoal pile for quick sears.
- Medium heat in the middle for finishing and indirect cooking.
- Rest zone with a warming rack or insulated cutting board for holding food.
Add a portable induction burner for sauces and sides. It’s the tiny sous-chef you didn’t know you needed.
7. Make It Mood: Lighting, Sound, And Fire

Set the tone and your backyard suddenly feels like an outdoor bistro. Think layered lighting, a little music, and a touch of fire for ambiance.
Layer Your Lighting
- Task lights over the grill and prep areas (no guessing doneness).
- String lights or lanterns for a warm glow that flatters everyone.
- Path lights to guide guests safely to seating and the bar.
Sound & Fire
- Weatherproof speakers tucked under eaves for even sound.
- Gas fire bowl or tabletop fire for cozy vibes without smoke competition.
Keep flames at least 6–10 feet from the grill area. Two fires is…a lot.
8. Organize Like a Chef With Drawers, Rails, And Zones
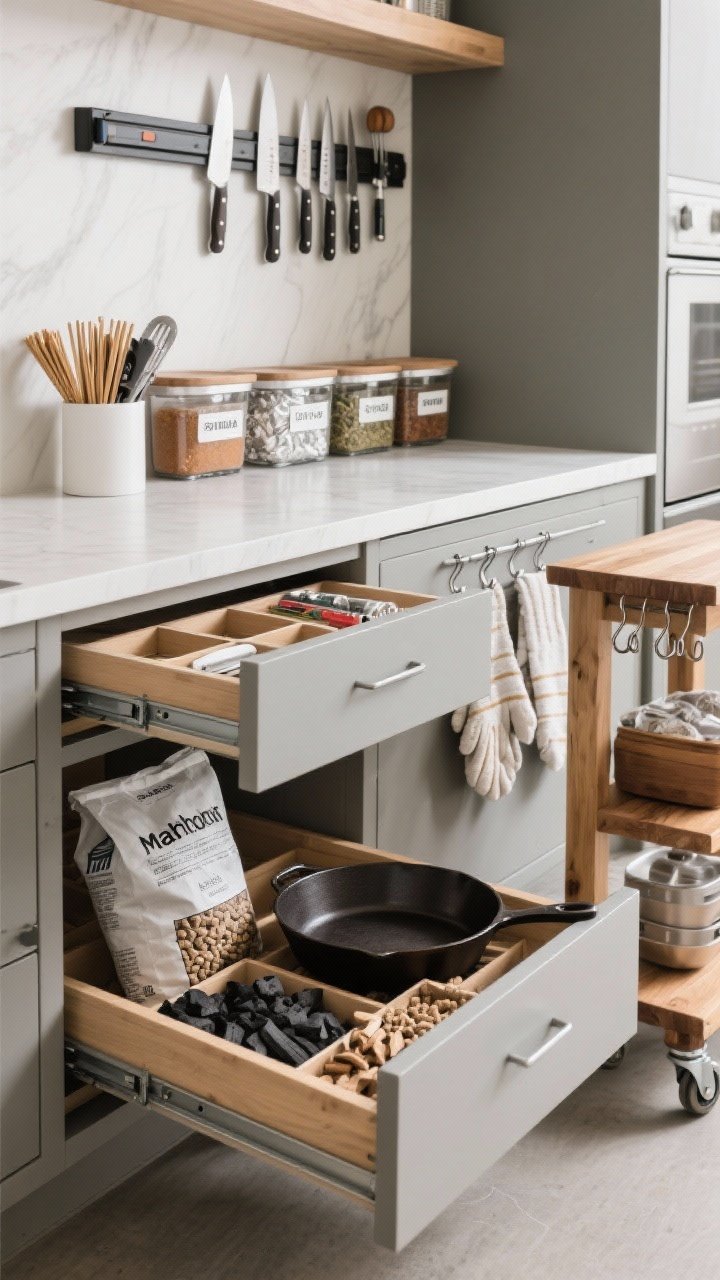
Clutter kills momentum. Make your grill setup chef-level organized so you can focus on the food (and the compliments).
Storage You’ll Actually Use
- Shallow drawers for tools, thermometers, and skewers.
- Deep drawers for charcoal, pellets, and cast iron.
- Magnetic knife strip or tool rail near the prep zone.
Label Your Life
- Bin for marinades, another for rubs, and a foil/parchment drawer.
- Use heat-proof hooks for towels and gloves—no more “where’s my mitt?” panic.
IMO, a butcher-block cart on wheels is the MVP. Park it where you need extra workspace, then roll it away when the party moves.
9. Add a Pizza Zone (Because Dough + Flames = Happiness)
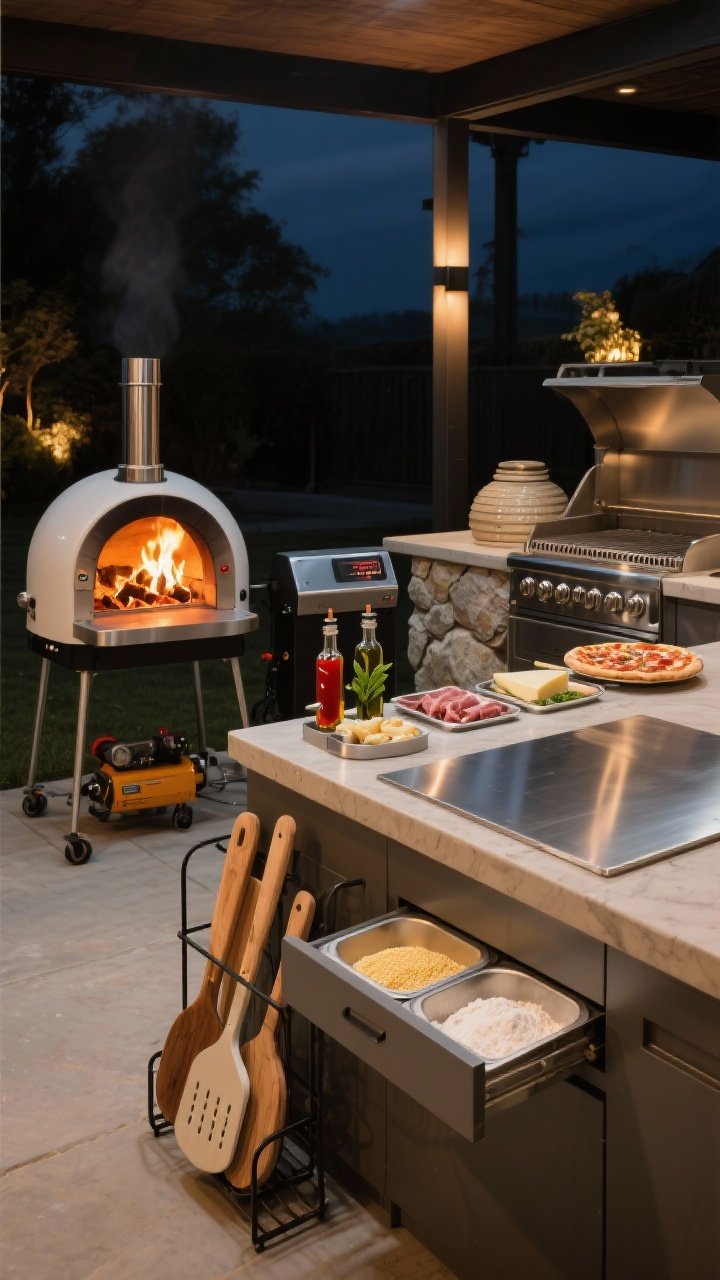
Pizza night outdoors is a power move. Add a pizza oven or a grill-top stone setup so you can crank out pies, flatbreads, and roasted veggies like a Tuscan grandma.
Pick Your Oven
- Portable gas pizza ovens heat fast and are easy to store.
- Wood-fired ovens deliver that smoky flavor and serious bragging rights.
- Kamado with stone works if you’re maximizing space.
Setup Tips
- Create a topping station with chilled inserts for cheese and meats.
- Keep peels, flour, and cornmeal in a nearby drawer.
- Use a steel or stone that fits your grill to avoid overheated crusts.
Pro move: Finish pizzas with a drizzle station—chili oil, basil oil, balsamic. Suddenly you’re a pizzaiolo.
10. Weatherproof Like a Pro So It Lasts

The prettiest setup won’t matter if it falls apart after one season. Choose weatherproof materials and protect your investment so grilling is a year-round sport.
Materials That Survive
- Marine-grade covers for grills and appliances (well-fitted, vented).
- Powder-coated aluminum or stainless steel for frames and hardware.
- Performance fabrics for cushions—solution-dyed acrylic is your friend.
Smart Protection
- Add a wind break with planters or slatted screens so flames behave.
- Install rubber leveling feet under cabinets to prevent water damage.
- Use a deck mat under charcoal or kamado grills to catch embers.
FYI: A quick seasonal deep clean—descale grates, oil hinges, reseal countertops—keeps everything working and looking sharp.
Quick Safety Reminders (Because We Like Eyebrows)
- Keep 10 feet between grill and structures unless using rated insulation and shields.
- Have a fire extinguisher within reach (Class B or multipurpose).
- Check local codes if you’re adding gas lines or built-ins.
Conclusion: Your Backyard, Your Signature Grill Scene

Whether you go full grill island with every bell and whistle or just tighten up your storage and lighting, these 10 backyard grill ideas will make your space feel intentional, inviting, and honestly, kind of addictive. Start with one or two upgrades—maybe a better prep zone and some mood lighting—and let your setup grow as you host.
Now grab your tongs, cue the playlist, and let the backyard bragging rights commence.