10 Budget-friendly Kitchen Island Ideas That Look Custom-made You’ll Love
Want a kitchen island that looks designer without the designer price tag? You’re in the right place. These ideas are high-impact, low-cost, and totally doable—even if your toolkit is just a drill and an “I’ll figure it out” attitude.
We’re talking paint hacks, thrift flips, and clever storage moves that make your island look elevated and intentional. Ready to make guests ask, “Wait, where did you get that?” Let’s go.
Tired of snacking when you’re not even hungry? This reset helps you stop the loop and feel back in control.
A simple reset for moments when cravings take over. Easy to use, easy to repeat, and designed to help you feel satisfied instead of stuck.
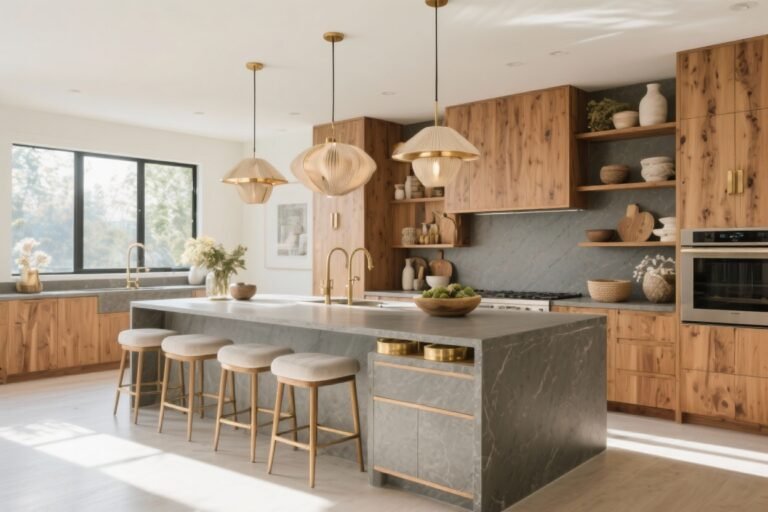
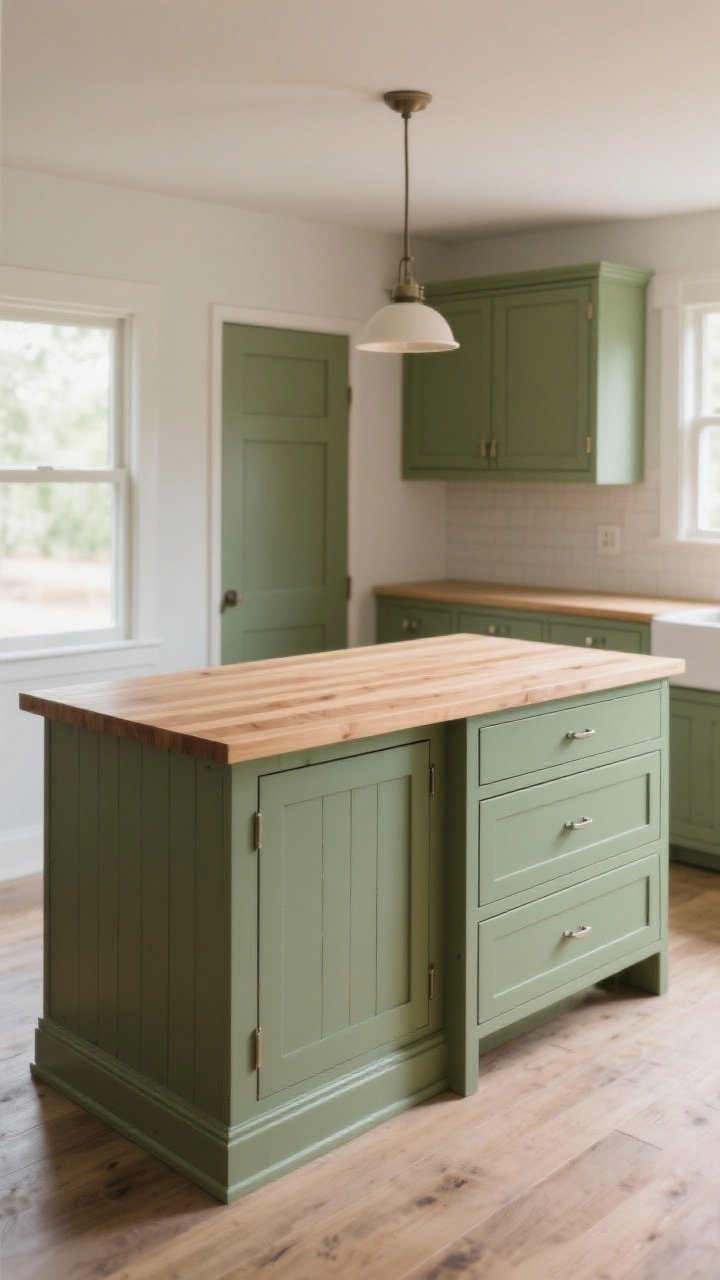
1. Paint It Like It’s Custom Millwork
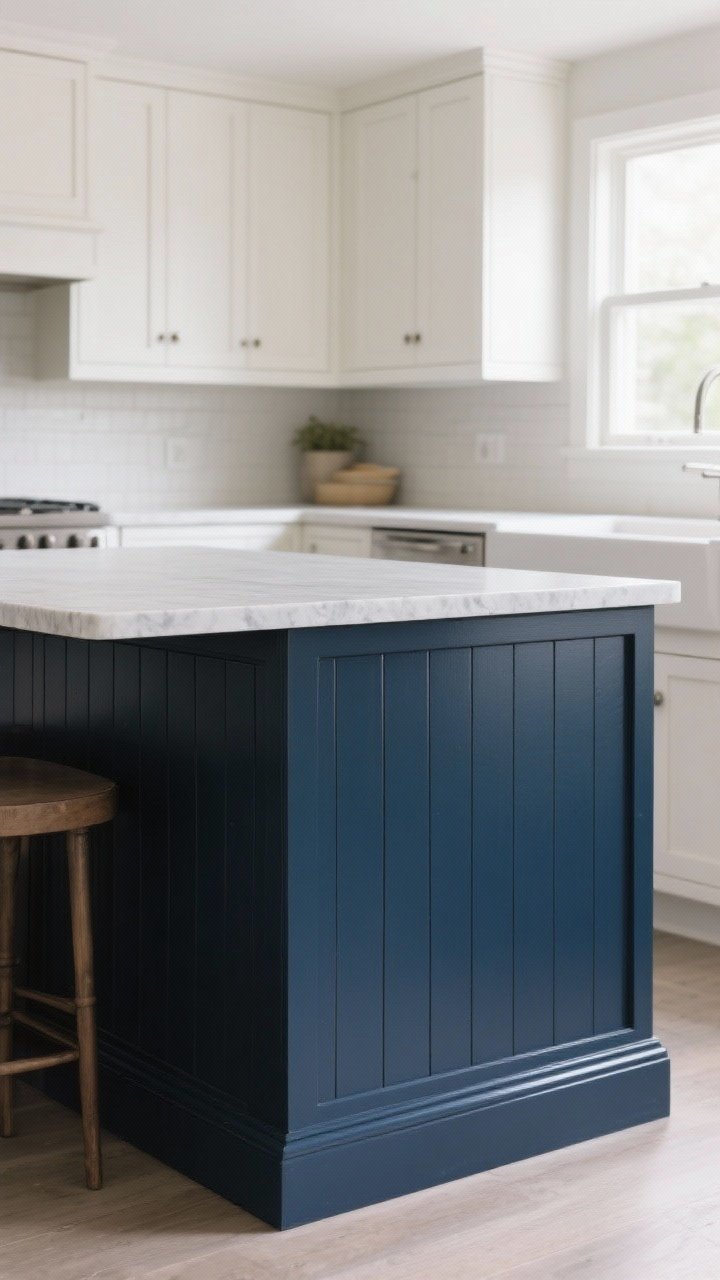
Nothing transforms faster than paint. A rich, moody color instantly makes an island look pricey. Think deep navy, olive, charcoal, or a putty beige. Bonus points if you contrast the island color with your perimeter cabinets.
Pro Trick: Satin Finish, Always
- Finish: Satin or semi-gloss = wipeable and polished.
- Color: Go darker on the island to ground the space.
- Prep: Light sand + primer = professional-looking results.
Quick upgrade: Paint the toe-kick and back panel too so the whole mass reads as one custom piece. If your island is a freestanding cabinet, wrap the sides in thin plywood or beadboard before painting for a built-in vibe.
2. Add Faux Panels With Trim (Instant Architectural Detail)
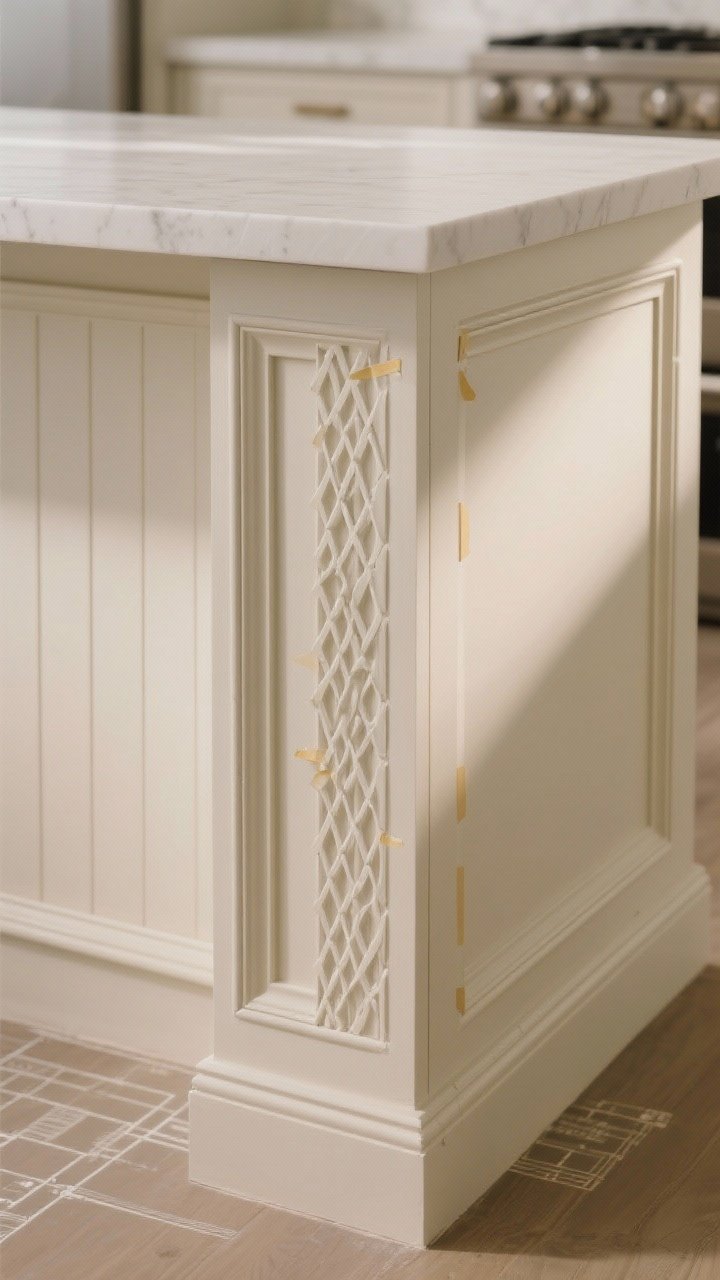
Flat boxy island? Give it soul with trim. Adding simple picture-frame moulding or shiplap to the front and sides creates texture that looks pricey but costs next to nothing.
How-To in Two Steps:
- Measure & map: Use painter’s tape to layout panel shapes.
- Attach & caulk: Use 1x2s or lattice trim with brad nails, then caulk and paint to match.
Style options: Vertical beadboard for cottage charm, skinny fluted trim for a modern vibe, or wide frames for classic “custom millwork” energy. FYI, fluted MDF strips are trending and look insanely high-end once painted.
Transform Your Home With 7,250+ Stunning Landscaping Designs—No Expensive Designers Needed!
- 🌿 Access 7,250+ stunning landscaping designs.
- 💰 Save thousands—no pro designer needed.
- 🏡 Plans for gardens, patios, walkways, and more.
- ✨ Simple, beginner-friendly DIY layouts.
- 🛠️ Customize any design to fit your yard.
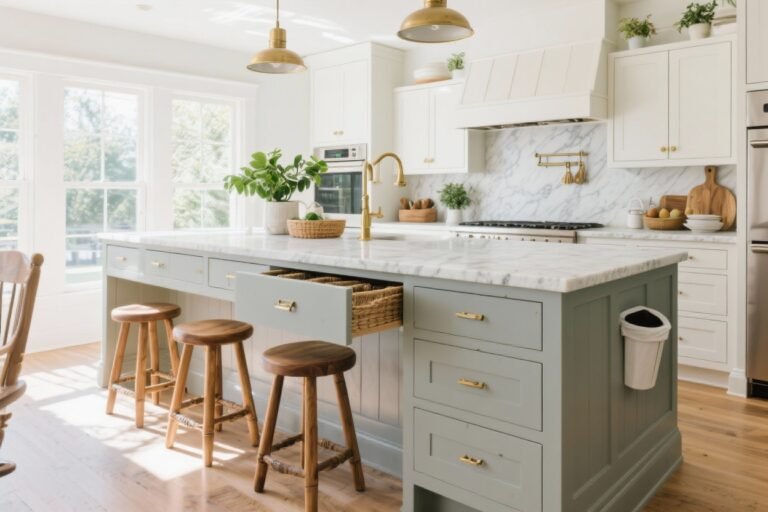
3. Upgrade Hardware Like You Mean It
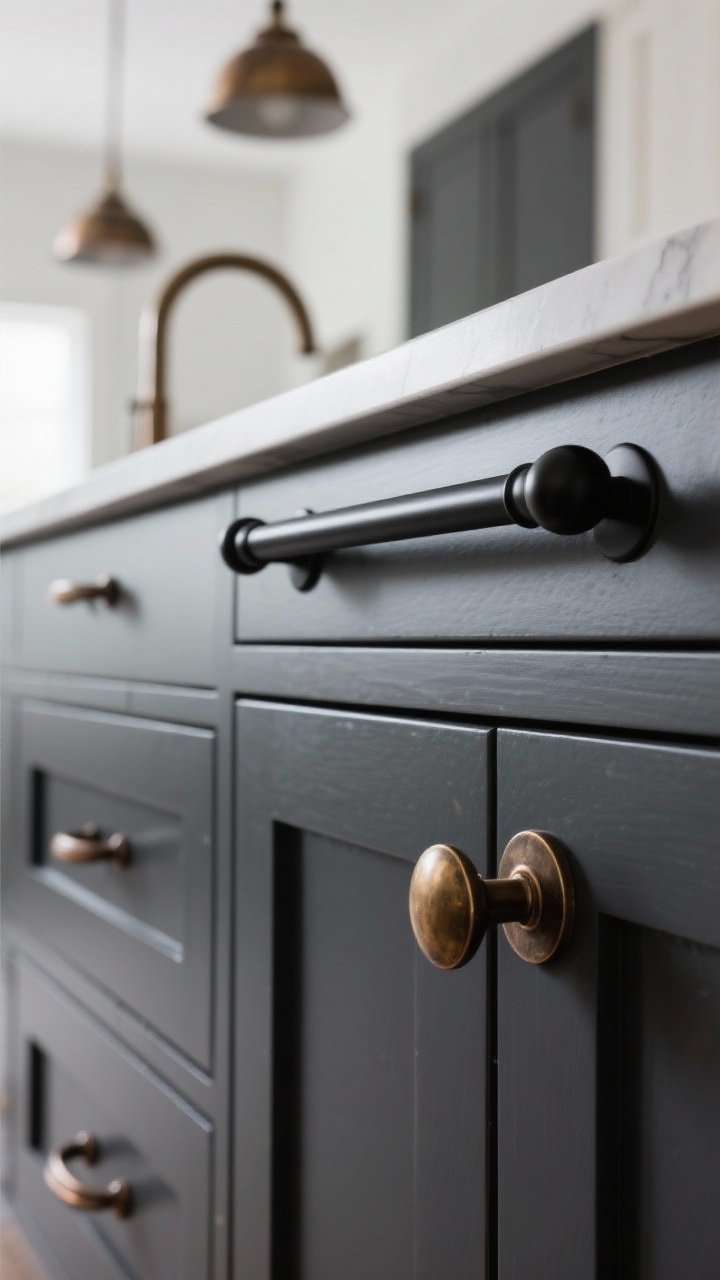
Small hardware, small impact. Oversized pulls and knobs make your island look intentional and expensive. Think chunky brass, matte black, or antique bronze—whatever matches your kitchen’s story.
Try This Mix:
- Drawers: Long pulls (8–12 inches) for that designer look.
- Cabinets: Statement knobs or cup pulls.
- Bonus: Add decorative corner brackets or a metal footrail if you’ve got seating.
Pro move: Match finishes across lighting and faucet—or purposefully contrast with a “jewelry” finish on the island to make it pop.
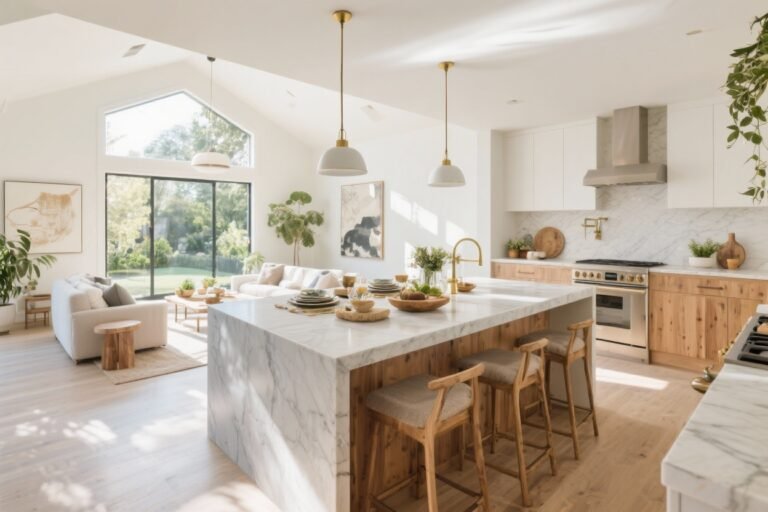
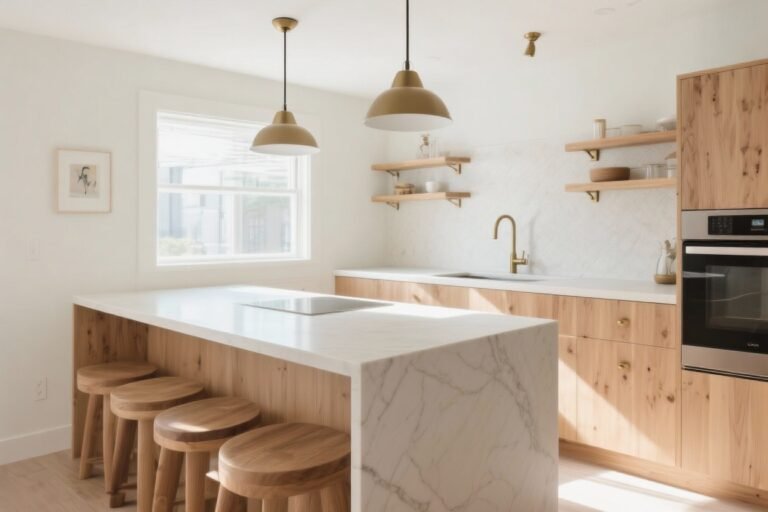
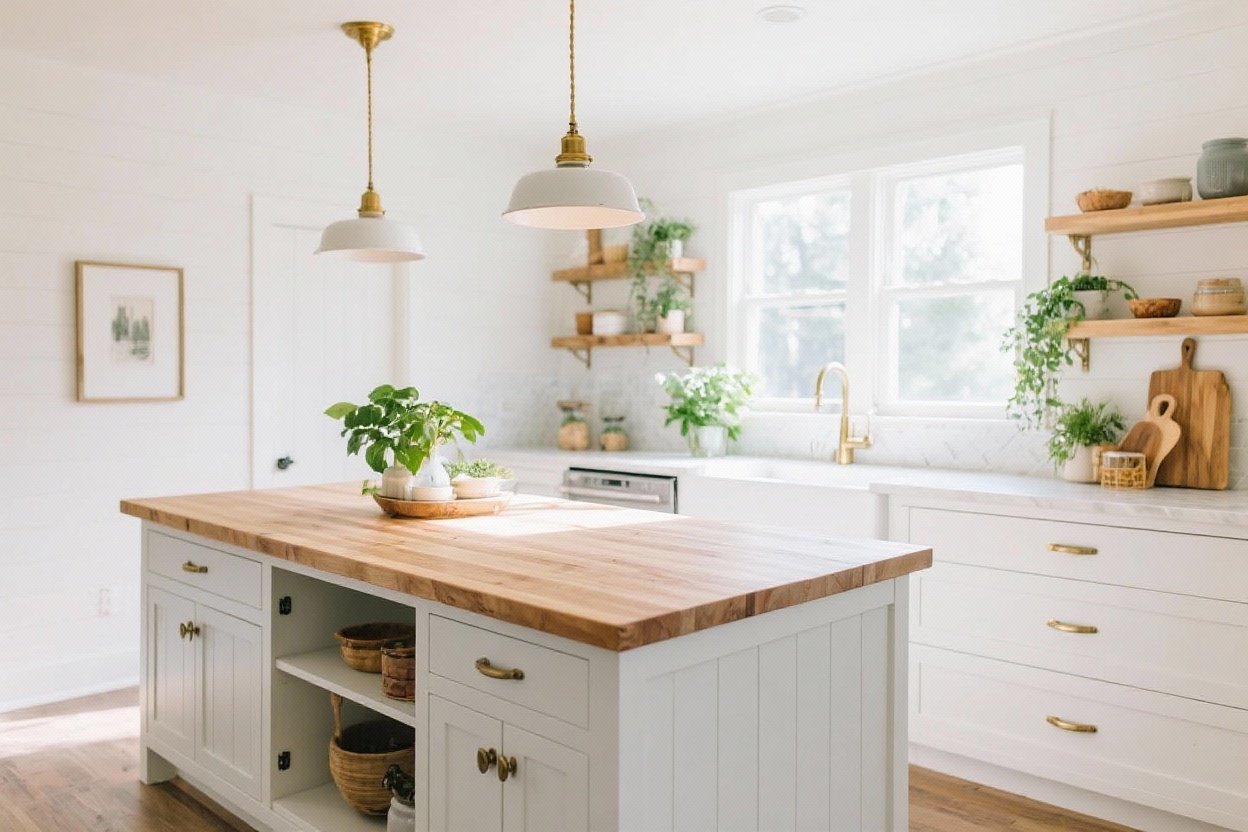
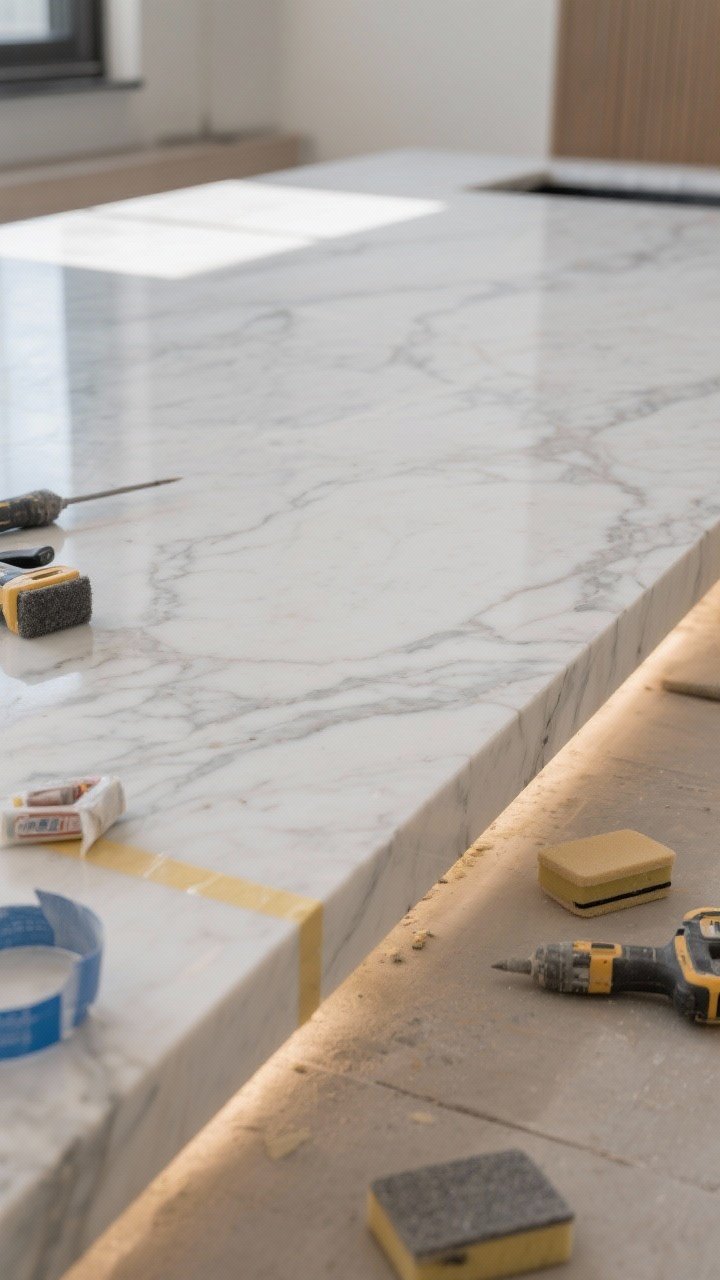
4. Create a Luxe Countertop (Without the Slab Price)
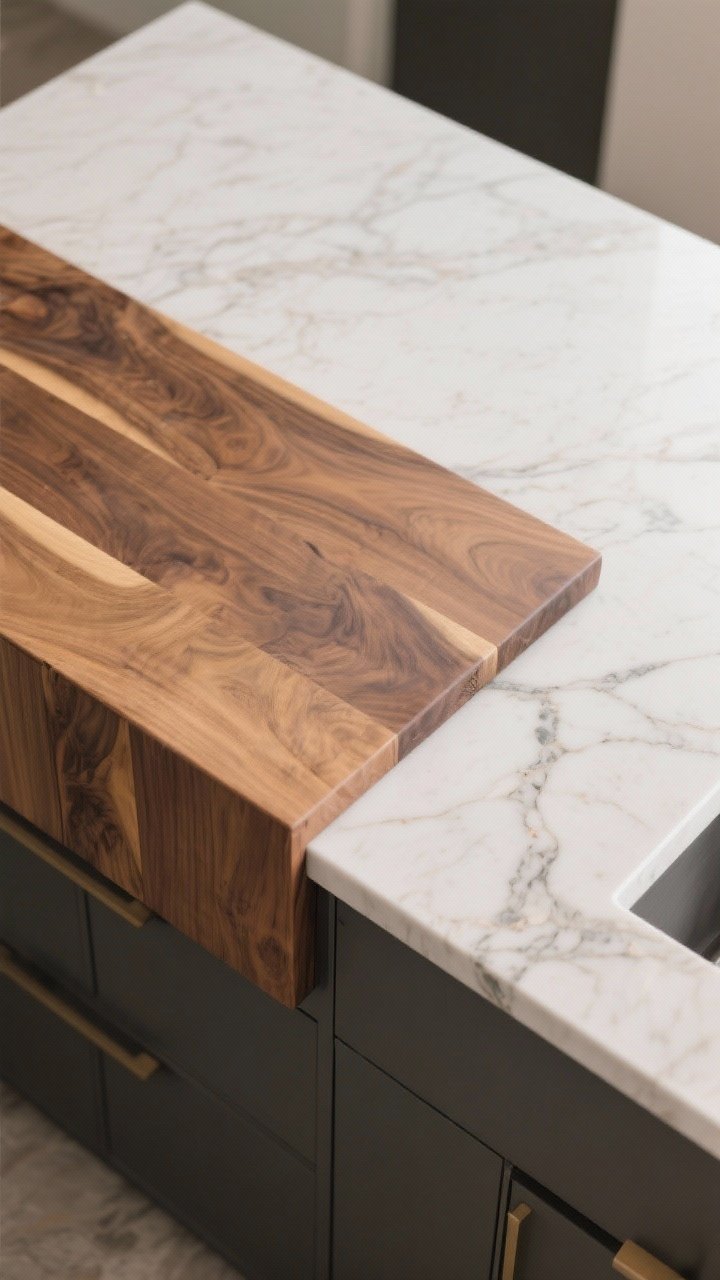
Can’t swing a stone slab? No problem. There are budget-friendly countertop hacks that look chic from any angle.
Smart Surface Swaps:
- Butcher block: Warm, classic, and DIY-trimmable. Oil for a matte finish or polyurethane for durability.
- Laminate glow-up: New laminates mimic marble or soapstone shockingly well—ask for a square edge for a modern look.
- Faux stone paint: Epoxy and countertop kits that recreate marble veining—practice on a scrap first.
Visual upgrade: Add a 1–2 inch edge build-up (with scrap wood under the perimeter) to fake a thicker, custom slab. Paint or laminate over. It’s a surprisingly convincing trick.
5. Build From Stock Cabinets (Hello, Custom on a Budget)
You can create a “custom-build” island using off-the-shelf base cabinets from IKEA, Home Depot, or Habitat ReStore. Arrange two or three back-to-back, add a toe-kick and a unified top, and boom—custom island vibes.
Layout Ideas:
- Two 24-inch bases back-to-back: Deep storage plus a thick top.
- One base + open shelves: Mix closed and display storage.
- Skin the sides: Use plywood or beadboard to wrap the exterior for a built-in finish.
Don’t forget: Add furniture feet or decorative base moulding to elevate the look—literally and aesthetically.

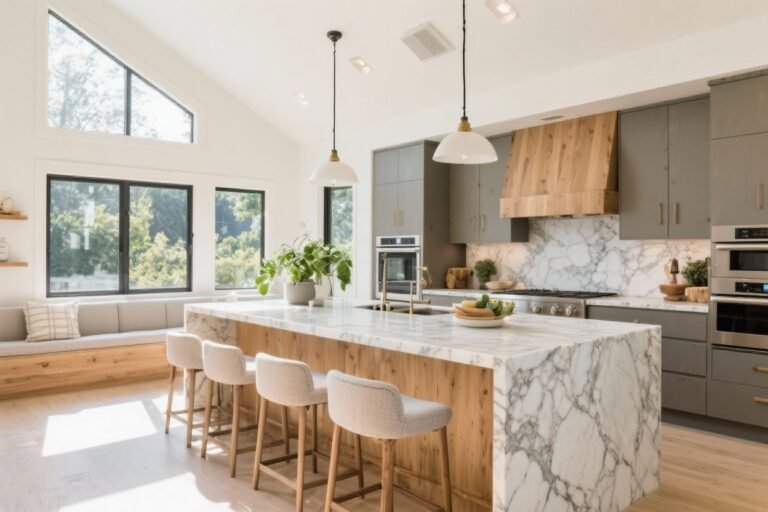
6. Add Seating With an Overhang (But Make It Comfortable)
Bar seating transforms an island into a hangout zone. The trick is the overhang depth. For actual comfort, aim for 12 inches. More if you can. Your knees will thank you.
How to Make It Work:
- Support it: Use wood corbels, steel L-brackets, or hidden countertop supports for overhangs over 10 inches.
- Pick stools wisely: Counter height is 24–26 inches for a 36-inch island top.
- Leave space: About 24 inches width per stool, 12–15 inches depth to sit comfortably.
Style tip: Mix upholstered stools with a wood island or go acrylic for modern lightness. The stool choice alone can shift the vibe from farmhouse to minimalist or coastal.
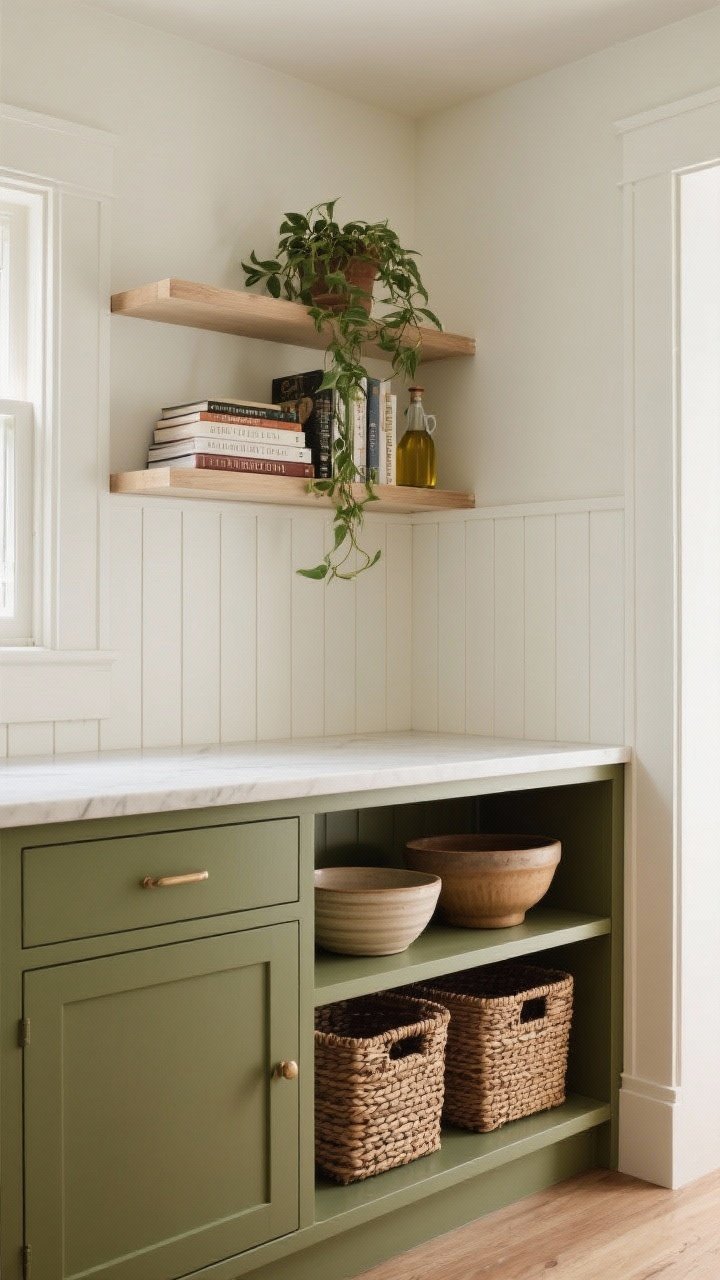
7. Add Open Shelves or a Bookcase End

Give your island personality with an open-shelf end cap. It’s the dream spot for cookbooks, baskets, or pretty bowls—and it makes the whole piece look custom-built.
Easy Build:
- Use a prefab bookshelf: Secure it to one end and wrap with trim for a seamless look.
- DIY shelves: Screw in cleats and add stained or painted shelving boards.
- Back panel: Beadboard or contrasting paint adds charm.
Decor strategy: Keep the bottom shelf functional (baskets, bowls) and the top shelf styled (plants, pottery, pretty oils). It’s practical without being cluttered.
8. Go Mobile: Cart, Table, or Dresser Turned Island
Renters and commitment-phobes, this one’s for you. Repurpose a sturdy dresser, vintage workbench, or big console table as a rolling island. Add a butcher-block top and locking casters, and suddenly it’s a feature, not a placeholder.
Where to Hunt:
- Facebook Marketplace/ReStore: Dressers with solid frames. Look for dovetail drawers and real wood.
- Restaurant supply stores: Stainless carts with serious durability and industrial chic energy.
- Old worktables: Sand and seal; they clean up beautifully.
Finishing touches: Add towel bars to the sides, swap in nicer knobs, and top with a removable butcher block or stone remnant. IMO, a good vintage piece adds character you can’t buy off the shelf.
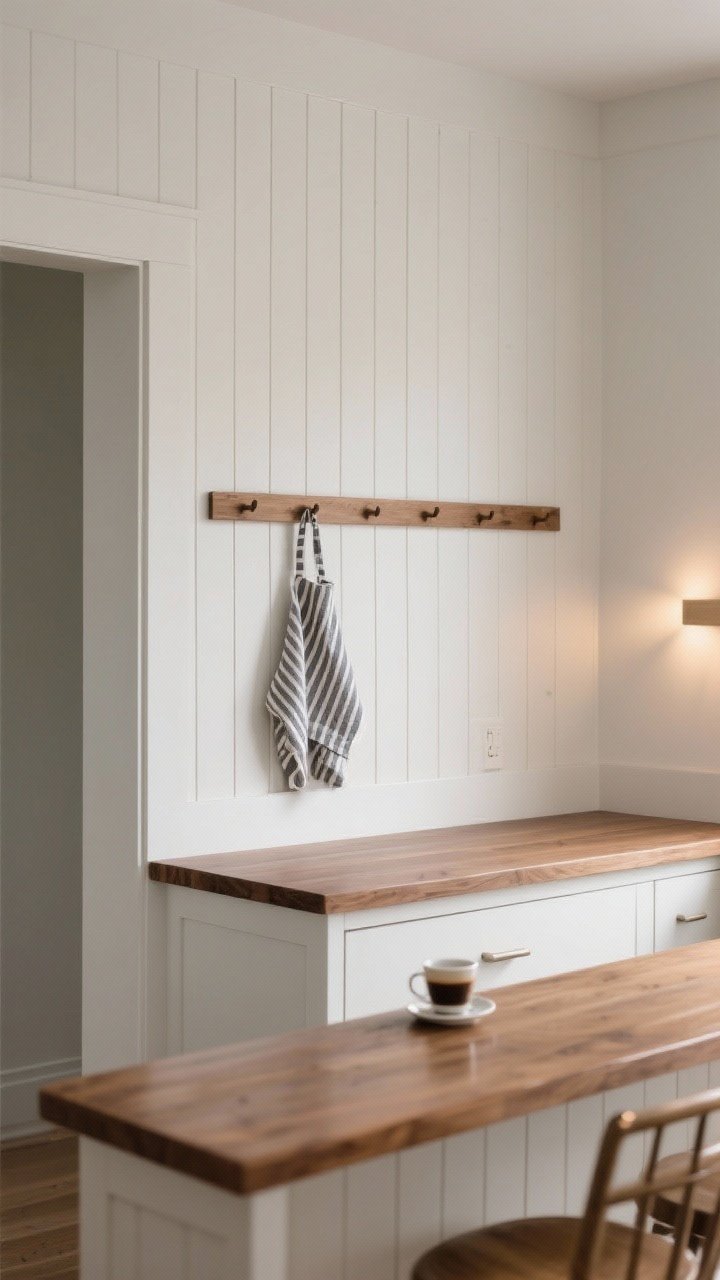
9. Dress the Back With Seating Nooks and Hooks

The back of your island is prime real estate. Turn it into a designer moment with paneling, hooks, and a built-in vibe that fools everyone.
Design Ideas:
- Slatted or fluted panel: Vertical lines feel modern and elegant.
- Peg rail: Mount a rail for towels, aprons, or measuring cups—functional and cute.
- Bistro ledge: Add a slim 4–6 inch ledge for drinks or small plates during parties.
Materials to use: Thin MDF panels, lattice strips, or reclaimed wood. Stain for warmth or paint to match the island. A matte clear coat protects from scuffs.
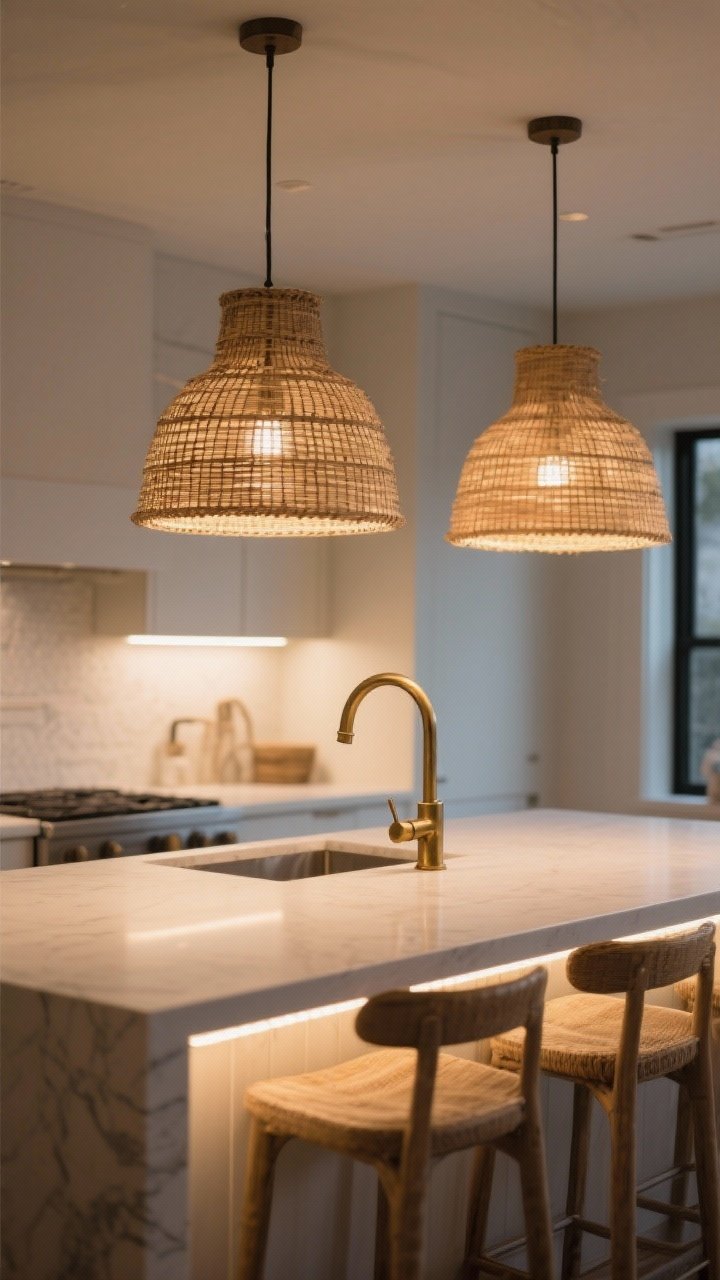
10. Light It Like a Showpiece
Lighting can make a budget island look like it came from a high-end showroom. Scale is everything: bigger pendants often look more expensive, even if they’re not.
Lighting Rules of Thumb:
- Two pendants: Works for islands 5–7 feet long; hang 30–36 inches above the countertop.
- One big pendant or a linear fixture: Perfect for shorter or longer islands to avoid visual clutter.
- Mix materials: Rattan, milk glass, aged brass, or matte black—choose what echoes your hardware and faucet.
Bonus move: Add under-counter LED strips or puck lights on the seating side for a soft glow. It’s subtle luxury that costs less than a fancy candle habit.
Conclusion
You don’t need a contractor or a scary budget to get a kitchen island that looks custom. A little paint, thoughtful trim, smarter storage, and good lighting go a long way. Pick two or three ideas from this list and stack them—and you’ll have an island that looks like it cost 5x more. Now go make your kitchen the place everyone wants to hang out.