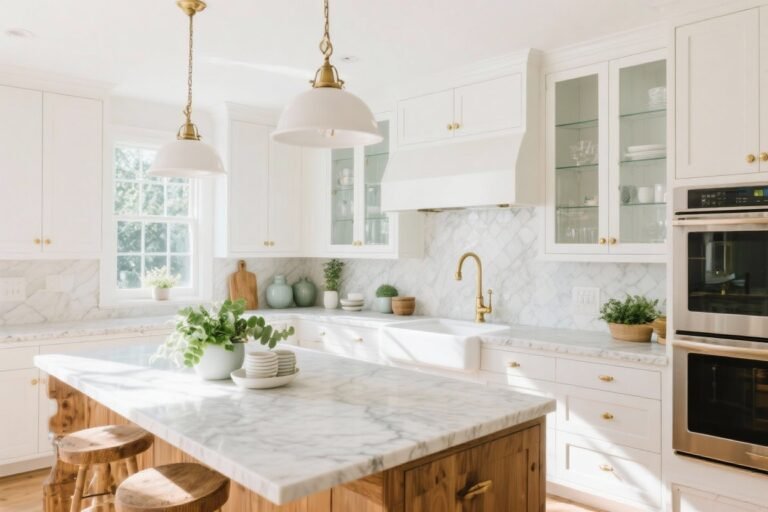
10 Kitchen Cabinet Storage Ideas That Eliminate Clutter You’ll Wish You Tried Sooner
Your kitchen isn’t small—you’re just not using it like a Tetris master. The secret? Smarter cabinet storage that makes everything easy to grab and even easier to put back. Let’s turn that chaotic spice avalanche into a neat little system you’ll actually keep up with. Ready to make your cabinets work harder than your coffee maker?
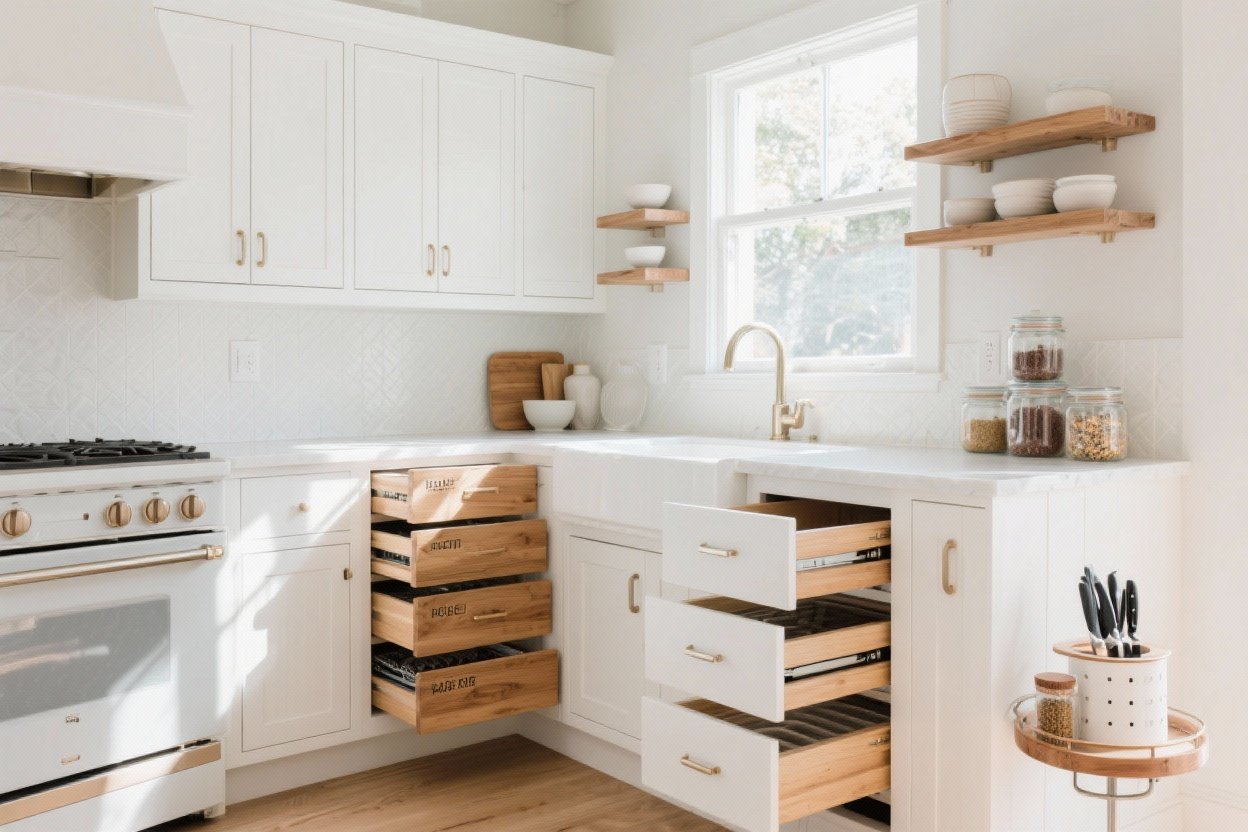
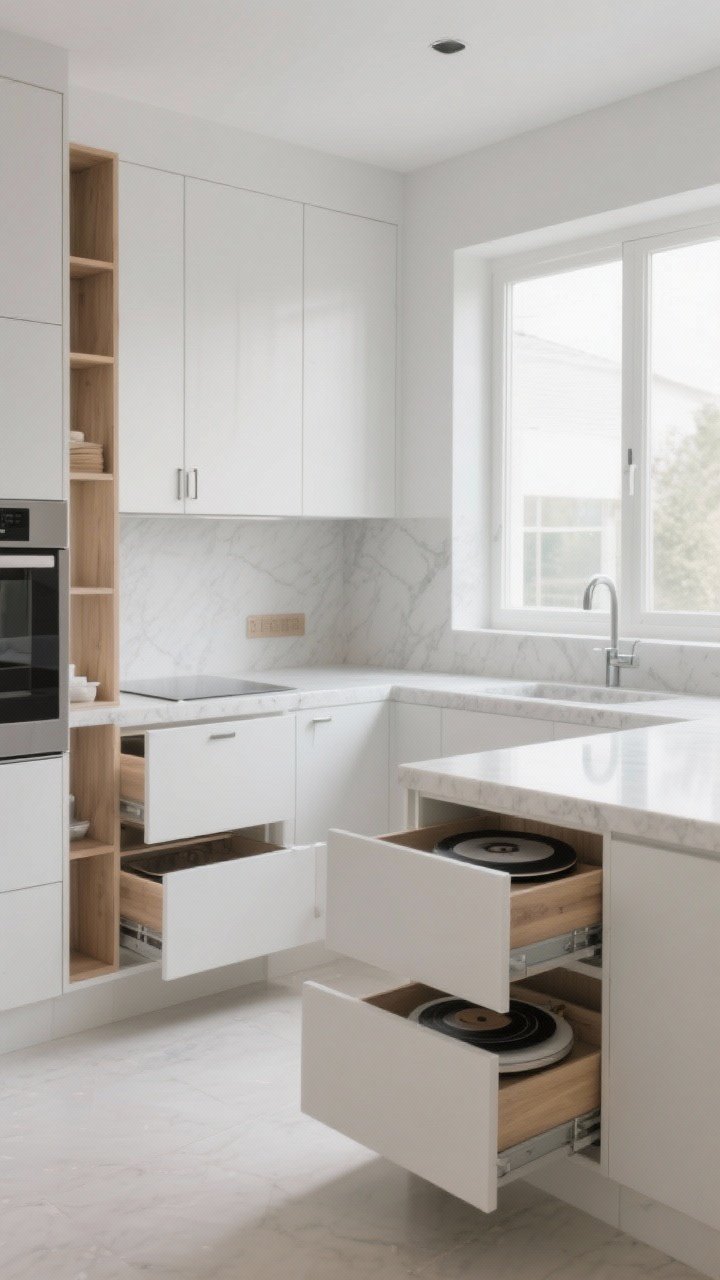
1. Pull-Out Shelves That Save Your Back (And Your Sanity)

Bending and digging around in dark cabinets is a villain origin story. Pull-out shelves bring everything to you—no acrobatics required. They’re basically drawers inside your cabinets, and they make the entire space usable, front to back.
Tired of snacking when you’re not even hungry? This reset helps you stop the loop and feel back in control.
A simple reset for moments when cravings take over. Easy to use, easy to repeat, and designed to help you feel satisfied instead of stuck.
Why They’re Game-Changers
- Max visibility: You can finally see the can of tomatoes hiding in the back.
- Zero wasted space: Use the full depth of your cabinets without sacrificing access.
- Customizable: Choose full-extension slides, different heights, and materials.
Quick Tips
- Measure the cabinet opening, not just the interior. Hinges and face frames matter.
- Install full-extension glides for maximum reach. Half-extension is a tease.
- Dedicate one pull-out to baking pans using tall sides or dividers to keep stacks tidy.
2. Vertical Dividers For Trays, Lids, And Pans (No More Clanging)
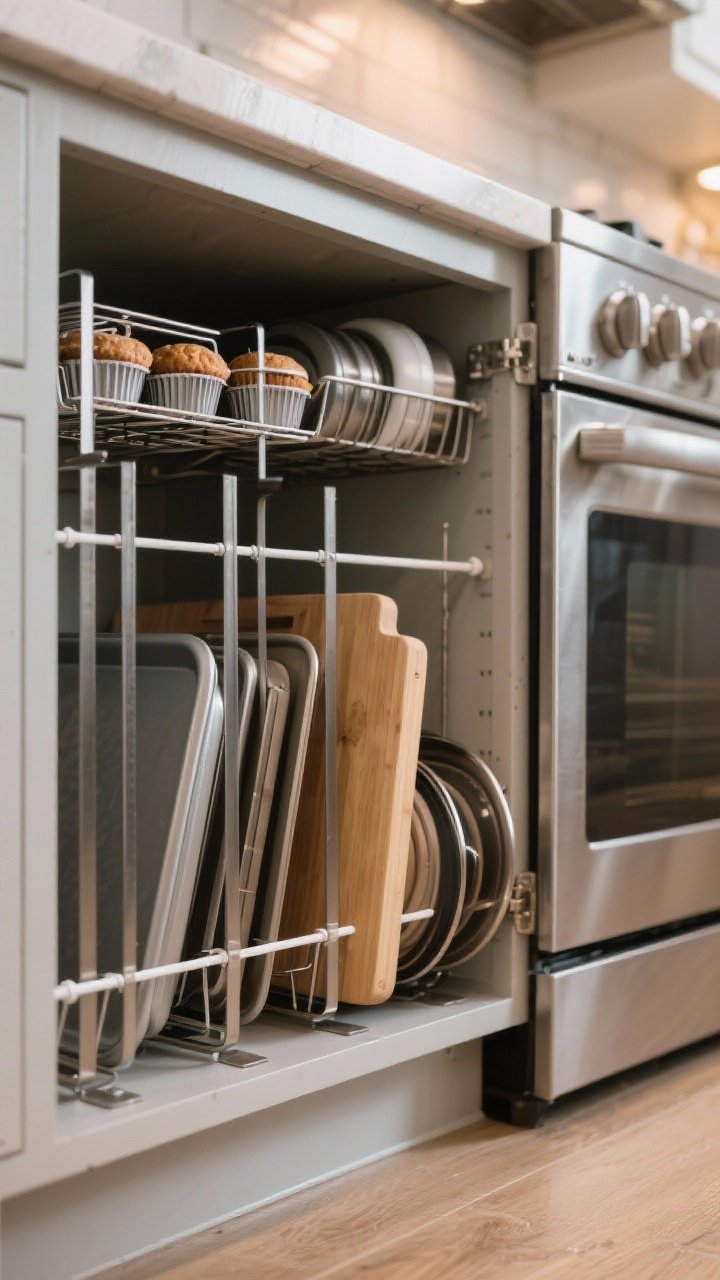
If you’re playing cymbals every time you grab a sheet pan, it’s time for vertical dividers. Store cutting boards, baking sheets, muffin tins, and even platters on their sides instead of stacking.
What To Use
- Upright dividers (adjustable or fixed) that screw into the cabinet base.
- Tension rods for a budget hack in narrow cabinets.
- Lid-specific organizers for pot lids so they stop sliding everywhere.
Placement Ideas
- Use a lower cabinet near the oven for baking trays and cooling racks.
- Keep cutting boards in a narrow pull-out with three or four dividers.
- Assign one narrow section to serving platters for easy entertaining prep.
3. Tiered Risers And Turntables For Pantries-In-Disguise
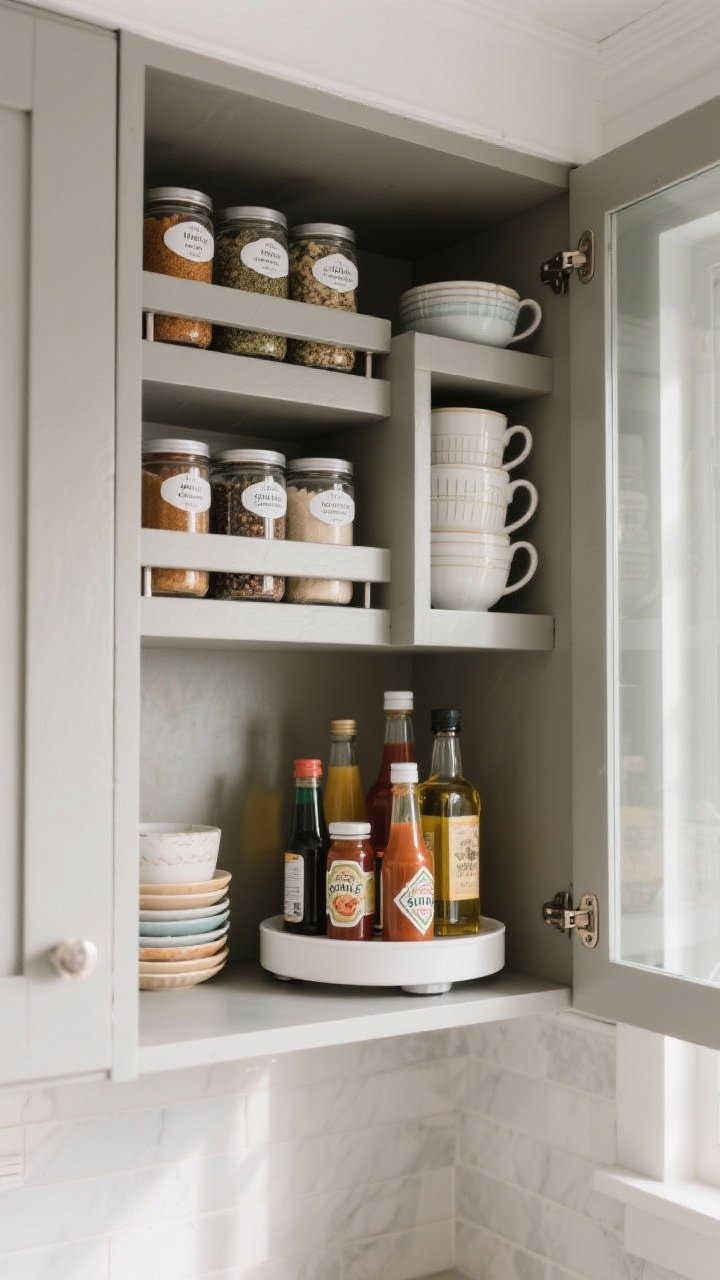
Inside cabinets, vertical space is gold—and most of us waste it. Add shelf risers and lazy Susans to stop stacking chaos and make use of every inch.
Perfect For
- Spices and small jars: Tiered risers let you see labels at a glance.
- Oils and sauces: A turntable keeps bottles reachable without knockdowns.
- Mugs or bowls: Add a riser to double your shelf space instantly.
Pro Tips
- Choose a rimmed turntable so items don’t slide off during spin class.
- Go rectangular riser for cabinets, round turntables for corners.
- Group by use: one turntable for Asian sauces, one for baking essentials, etc.
4. Door-Back Storage That Works Overtime
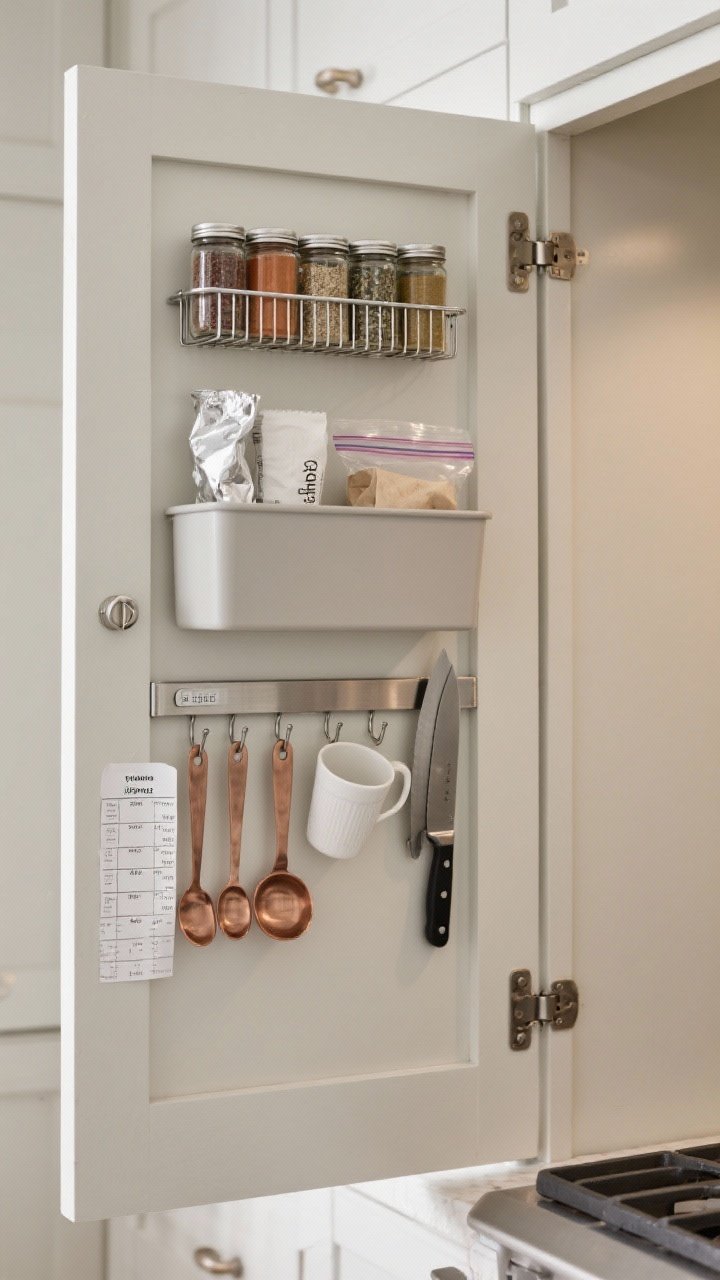
The inside of your cabinet doors is prime real estate. Add shallow racks, hooks, or magnetic strips to store flat or narrow items without crowding shelves.
Smart Door Add-Ons
- Spice racks for upper cabinets—short jars, perfect fit.
- Small bin for foil, parchment, and zip bags to free up drawers.
- Measuring spoons and cups on hooks with a conversion chart taped inside. Chef vibes.
- Magnetic knife strip inside a pantry door if you’re low on counter space.
Installation Notes
- Check for hinge clearance before mounting anything bulky.
- Keep door storage shallow (under 3 inches) to avoid collisions with shelves.
- Use 3M adhesive for lightweight racks if you’re renter or commitment-phobic.
5. Deep Drawer Inserts That Tame Utensils And Tupperware
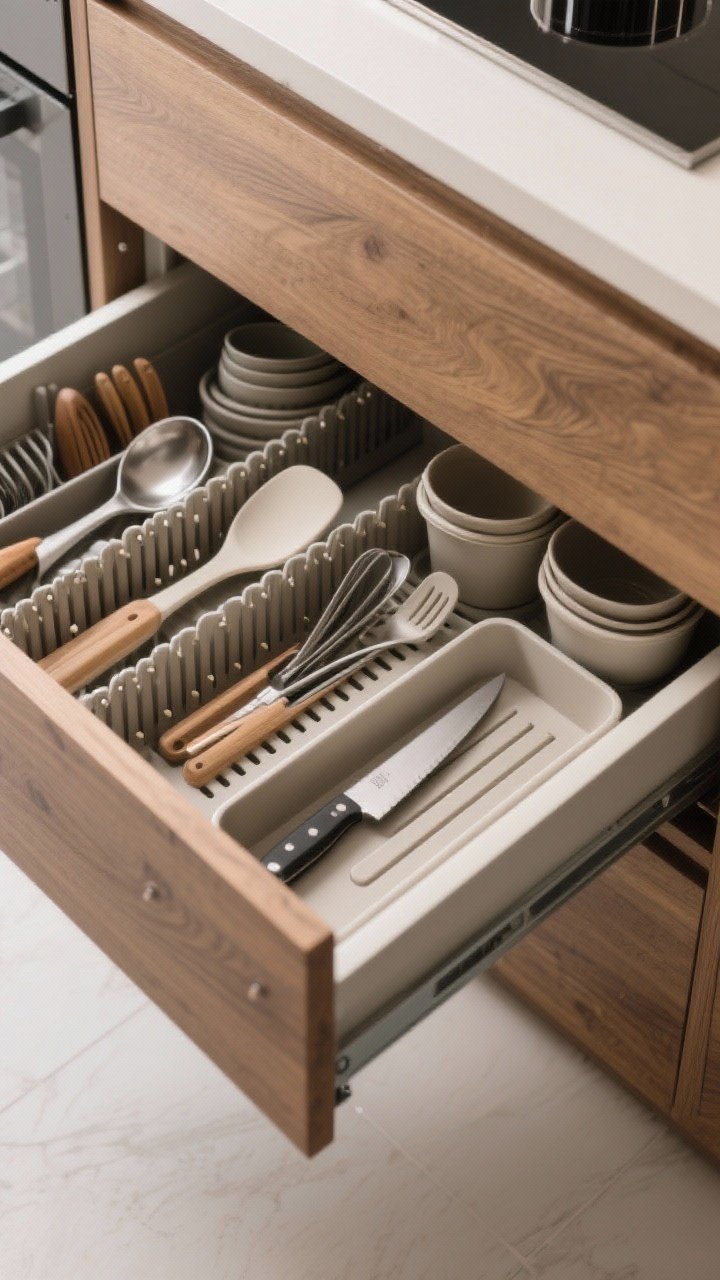
Drawers are the true heroes. Upgrade yours with customizable inserts to corral utensils, gadgets, and food containers so they don’t breed overnight.
Transform Your Home With 7,250+ Stunning Landscaping Designs—No Expensive Designers Needed!
- 🌿 Access 7,250+ stunning landscaping designs.
- 💰 Save thousands—no pro designer needed.
- 🏡 Plans for gardens, patios, walkways, and more.
- ✨ Simple, beginner-friendly DIY layouts.
- 🛠️ Customize any design to fit your yard.
What To Organize
- Cooking utensils: Use deep, adjustable dividers to separate ladles, spatulas, and tongs.
- Food storage containers: Store containers nested with lids upright in a slotted insert.
- Knife drawer: If you don’t want a block, get a knife tray insert.
Setup Tips
- Measure interior height so inserts sit flush and don’t slide.
- Use drawer pegs to create flexible zones for bowls or plates.
- Keep the top drawer for daily-use tools, not 17 melon ballers (unless you’re into fruit art, IMO).

6. The Zone Method: Store By Task, Not By Category
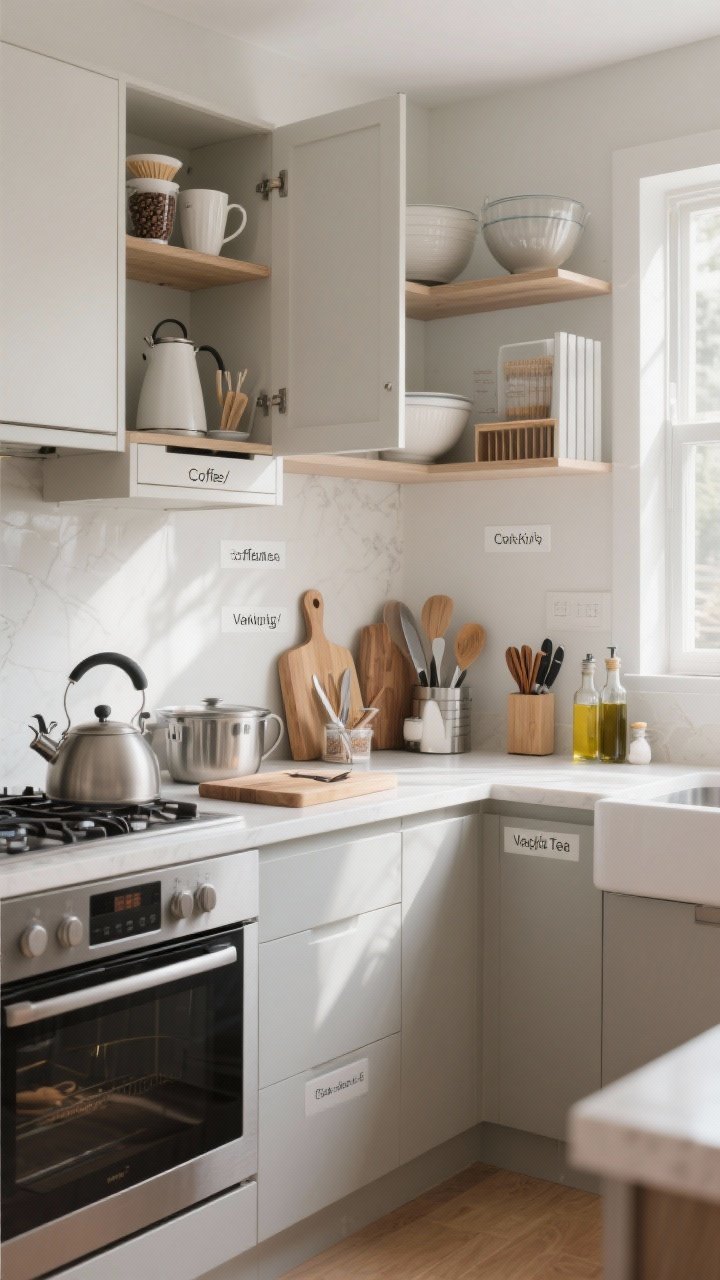
This one’s a mindset shift that changes everything. Create zones so items live where you use them, not where they “fit.” Suddenly, your kitchen stops feeling like a scavenger hunt.
Example Zones
- Coffee/Tea Zone: Mugs, filters, beans, kettle, sweeteners, teaspoons—all in the same upper cabinet and nearby drawer.
- Baking Zone: Mixing bowls, measuring tools, baking trays with vertical dividers, and spices like cinnamon and vanilla extract.
- Prep Zone: Cutting boards, knives, mixing bowls, oils, and salt near the main counter.
- Cooking Zone: Pots and pans under the cooktop, with spatulas and lids nearby.
How To Start
- Pick your top three daily tasks. Build zones around those first.
- Relocate anything that makes you move more than two steps to use it.
- Label shelves temporarily until the new locations become habit. FYI, labels work magic on roommates and kids.
7. Corner Cabinet Solutions That Don’t Waste Space
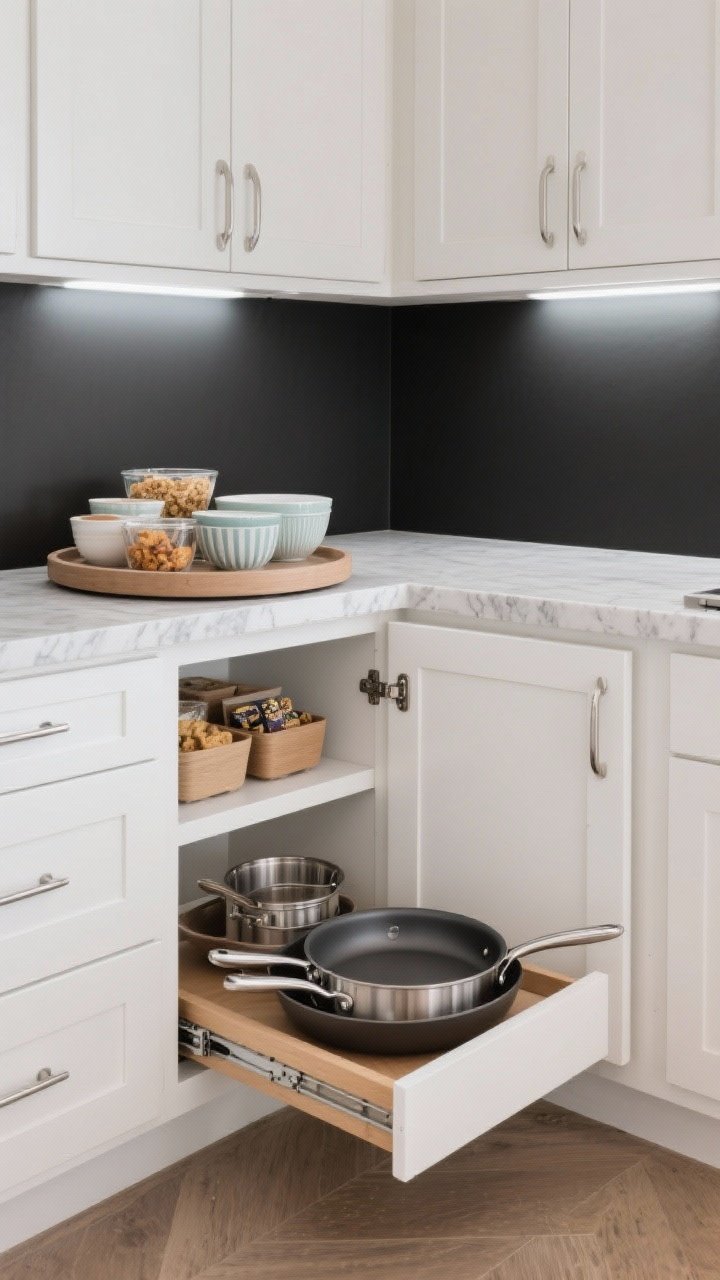
Corner cabinets are like black holes. Fix that with carousels, blind-corner pull-outs, or LeMans shelves so every inch actually earns its keep.
Choose Your Weapon
- Lazy Susan (full or half-moon): Best for bulky items like mixing bowls and snacks.
- Blind-corner pull-out: Shelves glide out in sequence, bringing the back to the front. Very satisfying.
- LeMans system: Kidney-shaped trays that swing fully out—ideal for pots and pans.
What To Store
- Bulky, lightweight items like plastic pitchers, salad spinners, and snack bins.
- Backstock of pantry staples if you don’t have a separate pantry.
8. Under-Sink Order: Corral The Chaos
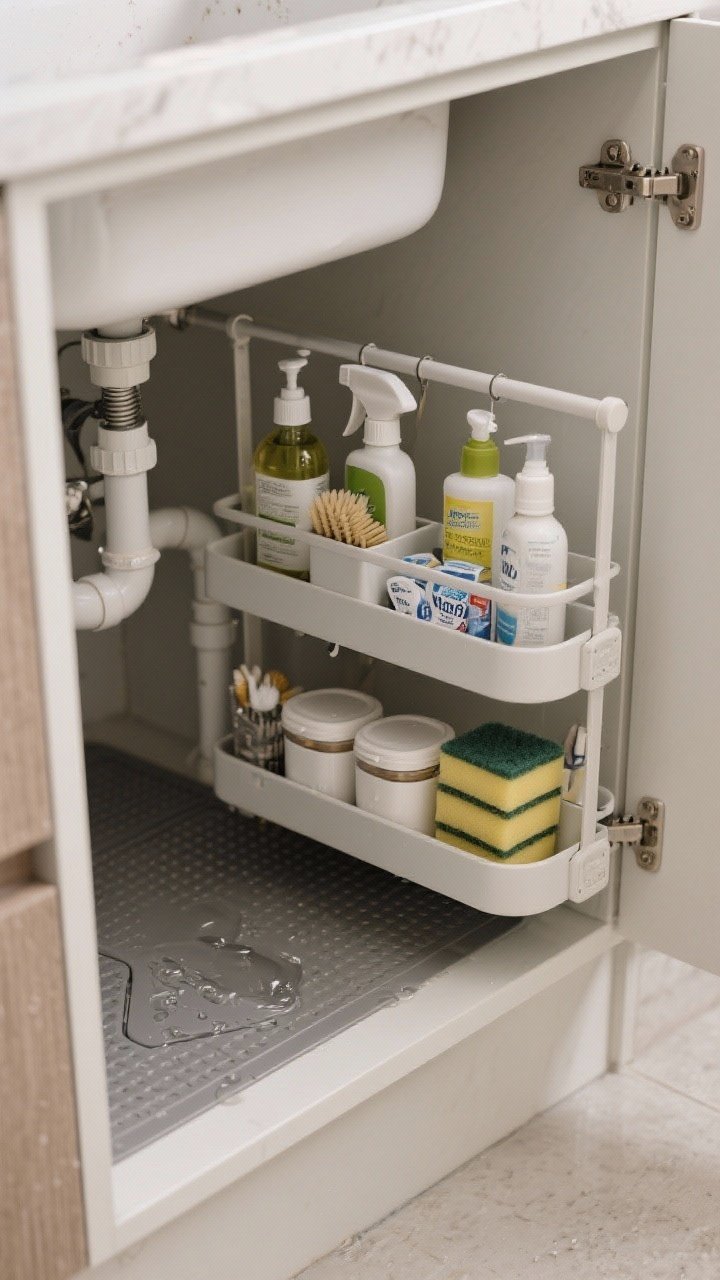
The under-sink cabinet is usually chaos central. Add tiered pull-outs, caddies, and tension rods to create order around the plumbing.
Smart Setup
- Use a U-shaped pull-out designed to avoid the pipes.
- Hang spray bottles from a tension rod to free up space below.
- Place a waterproof mat or tray to catch drips and protect the cabinet base.
What Belongs Here
- Cleaning supplies in a lift-out caddy so you can take it room to room.
- Dish tools: Sponges, brushes, dishwasher tabs in lidded containers.
- Only one backup of each product—this is not a warehouse.
9. Labeling And Containers That Actually Fit Your Cabinets
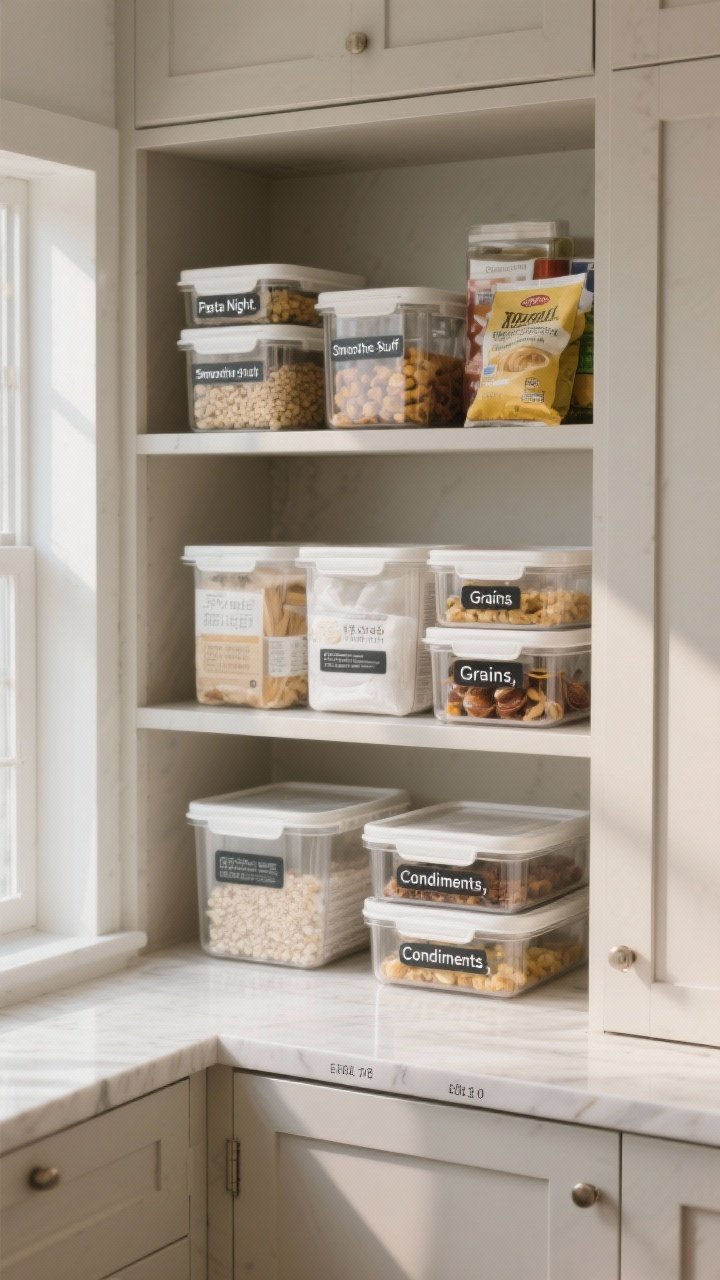
Pretty containers are great, but they must fit the space and your habits. The goal is easy access, not a Pinterest shrine that’s impossible to maintain.
Container Rules
- Go with square or rectangular bins to maximize shelf real estate.
- Buy one brand/line so lids are interchangeable. Future you will be grateful.
- Use clear bins for snacks, baking items, and packets. No mystery zones.
Label Like A Pro
- Label by use (“Pasta Night,” “Smoothie Stuff”) or by category (“Grains,” “Condiments”).
- Put expiration dates on the back or bottom if decanting.
- Choose removable labels so you can pivot as your cooking habits change.
10. The One-In, One-Out Rule (Plus A Quarterly Reset)
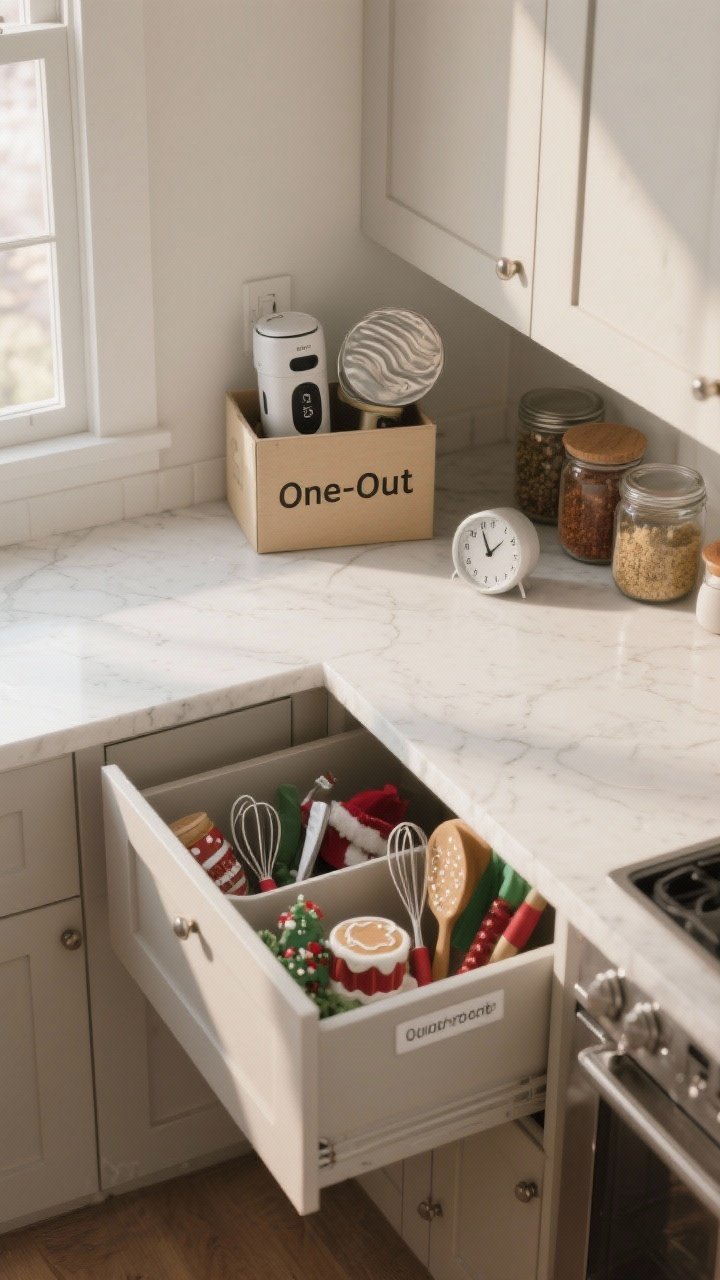
Even the best systems crumble under clutter creep. Keep your cabinets calm with a simple maintenance plan: one-in, one-out and a quick quarterly reset.
How To Do It
- Every time you buy a new tool or container, donate or toss one you don’t use.
- Set a 15-minute timer every three months to scan for duplicates, expired goods, and broken gadgets.
- Revisit zones and labels as seasons change—swap in holiday baking gear, then swap it back.
What To Ditch (Ruthlessly)
- Warped lids with no matching container. Be brave.
- Appliances you use less than twice a year—borrow or store elsewhere.
- Spices older than two years. If it smells like dust, it tastes like dust.
Conclusion
Your cabinets can be calm, functional, and dare I say…satisfying. Start with one idea—pull-outs, a few vertical dividers, or a turntable—and build from there. A little strategy goes a long way, and soon your kitchen will feel bigger, faster, and way more fun to cook in. Go make those cabinets earn their keep.