10 Kitchen Organization Ideas That Will Save You Time Every Day—and Your Sanity
Let’s be real: a chaotic kitchen is a time thief. You know that “where’s the whisk” scavenger hunt five minutes before guests arrive? Hard pass. These smart, stylish, and totally doable ideas will streamline your kitchen so you cook faster, clean easier, and actually enjoy being there. Bonus: they look good, too.
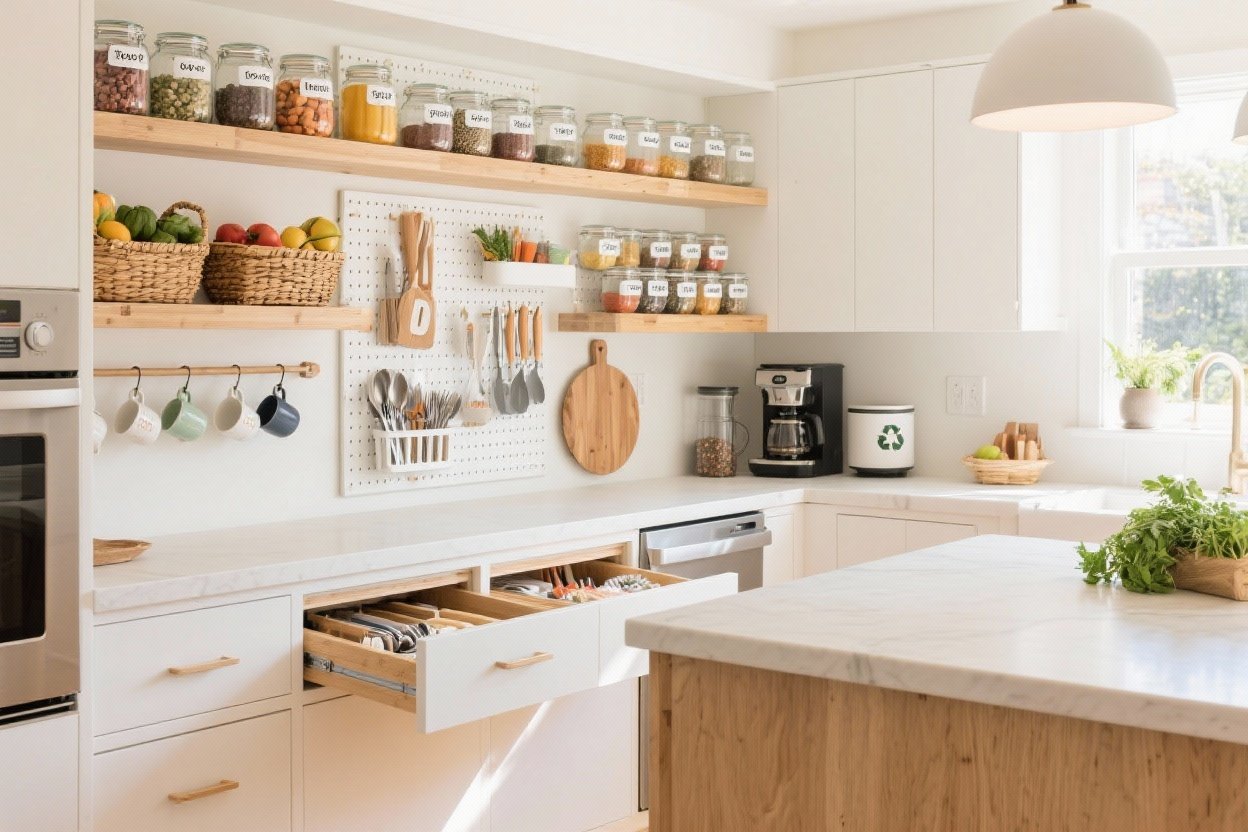
1. Create High-Traffic Zones (So You Stop Doing Laps)

Think like a barista who lives for efficiency. Group items by purpose and create dedicated zones you can reach without thinking. No more crisscrossing the kitchen for coffee filters or the olive oil.
Tired of snacking when you’re not even hungry? This reset helps you stop the loop and feel back in control.
A simple reset for moments when cravings take over. Easy to use, easy to repeat, and designed to help you feel satisfied instead of stuck.
Build Zones That Make Sense
- Coffee Station: Mugs, beans, filters, kettle, and sweeteners all in one cabinet or corner.
- Prep Zone: Cutting boards, knives, mixing bowls, and spices right by your main counter.
- Cooking Zone: Oils, tongs, spatulas, and pot holders near the stove.
- Clean-Up Zone: Dish soap, sponges, towels, and trash bags under or near the sink.
Label shelves inside cabinets so family members can help out without asking where everything lives. You’re welcome.
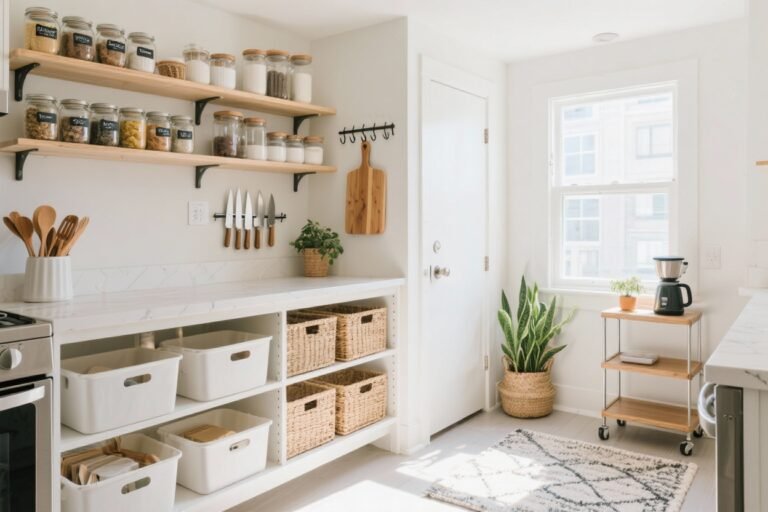
2. Decant Your Staples (And Ditch the Box Jenga)

Boxes and half-open bags eat up space and your patience. Decanting into clear, stackable containers creates instant order and lets you see when you’re low—no surprise “we’re out of rice” moments.
What To Decant
- Dry Goods: Flour, sugar, pasta, rice, oats, and breadcrumbs.
- Snacks: Crackers, nuts, granola, and cookies (if they last that long).
- Baking Essentials: Chocolate chips, cocoa powder, baking soda, etc.
Use airtight, stackable containers with uniform footprints to maximize shelf space. Add a small label with the item name and use-by date (write it on a piece of tape or the bottom with a dry-erase marker). FYI: this also reduces food waste big time.
3. Upgrade Your Drawers With Smart Dividers

Drawers are prime real estate—don’t let them turn into utensil soup. A few clever dividers can cut your rummaging time in half.
Transform Your Home With 7,250+ Stunning Landscaping Designs—No Expensive Designers Needed!
- 🌿 Access 7,250+ stunning landscaping designs.
- 💰 Save thousands—no pro designer needed.
- 🏡 Plans for gardens, patios, walkways, and more.
- ✨ Simple, beginner-friendly DIY layouts.
- 🛠️ Customize any design to fit your yard.
Divide And Conquer
- Cutlery Trays: Adjustable organizers keep forks from fraternizing with cocktail picks.
- Knife Inserts: In-drawer knife blocks save counter space and protect blades.
- Expandable Dividers: Create zones for spatulas, whisks, and microplanes so everything has a lane.
- Deep Drawer Bins: Store lids upright or stack mixing bowls neatly.
Pro tip: Keep duplicates to a minimum. Do you need six spatulas? Probably not. Curate like a minimalist chef.
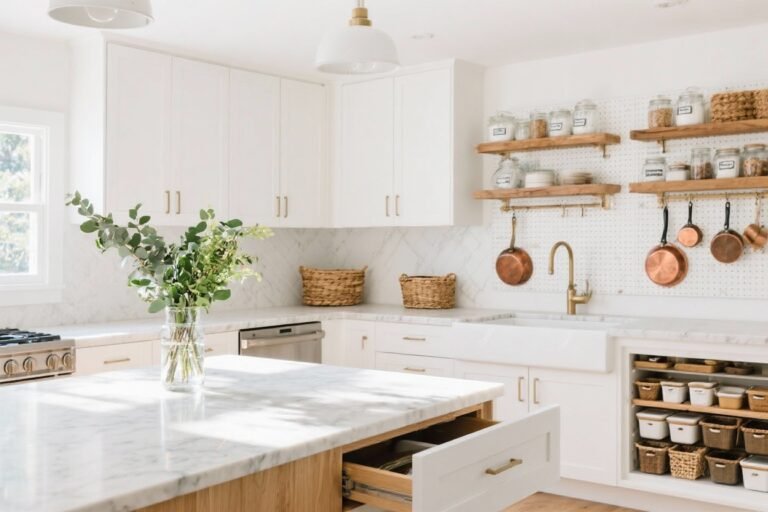
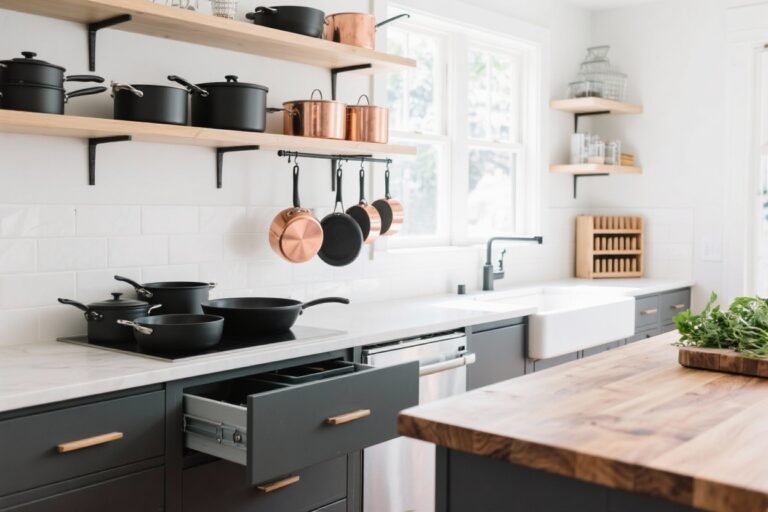
4. Turn Your Vertical Space Into Storage Gold

Walls and cabinet sides are the secret sauce. Use them and your counters will instantly breathe.
Go Up, Not Out
- Magnetic Strips: For knives, metal lids, and measuring spoons—clean, safe, and cool-looking.
- Rail Systems: Hang utensils, small pots, or even a mini herb garden.
- Over-the-Door Racks: On pantry or cabinet doors for wraps, foils, and spices.
- Undershelf Baskets: Slide under shelves to store lightweight items like dish towels or snacks.
Keep it curated. Leave some breathing room so it looks intentional, not like a hardware store exploded.
5. Corral the Fridge With Zones and Clear Bins
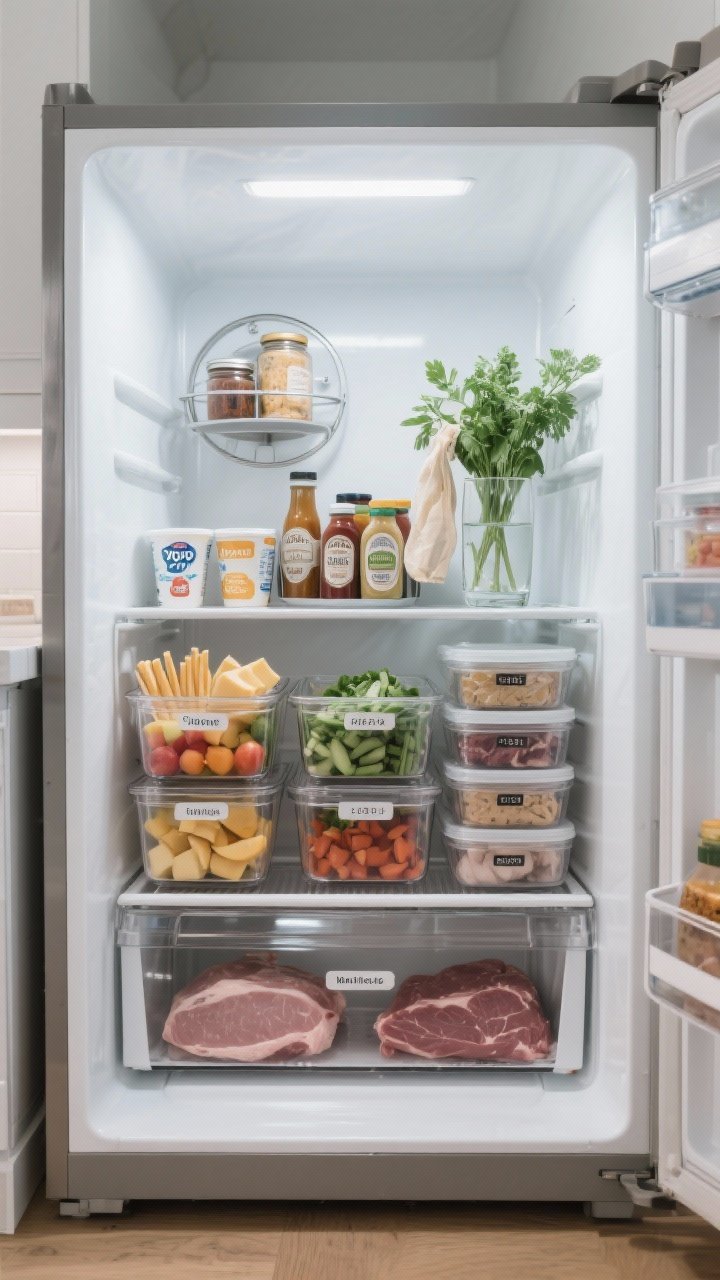
Fridge clutter leads to sad produce and forgotten leftovers. A few clear bins and labels turn it into a smooth-running system.
Smart Fridge Categories
- Snack Bin: Yogurts, cheese sticks, cut fruit—great for kids or hangry adults.
- Meal Prep Bin: Chopped veg, marinated proteins, ready-to-go containers.
- Condiment Caddy: Group similar sauces so you’re not playing Tetris with hot sauce bottles.
- Leftovers Shelf: Dedicate one area and use clear, stackable containers with dates.
Use a lazy Susan for jars, and store herbs in a glass with water and a loose bag cover—they’ll last days longer. Pro tip: Keep raw meats on the bottom shelf to avoid drips. Basic, but lifesaving.

6. Master the Spice Situation (No More Duplicates, Promise)

Spices are tiny but mighty—until you own three cumin jars. Create a system that’s easy to maintain and you’ll season like a pro.
Spice Storage That Works
- Pull-Out Spice Drawers: Lay jars flat with labels on top for instant visibility.
- Tiered Shelf Risers: In a cabinet, so back-row spices aren’t invisible.
- Magnetic Jars: On the side of the fridge or a wall-mounted board if counter space is tight.
Alphabetize or group by cuisine—whichever your brain prefers. Keep the top 10 most-used spices by the stove and stash the rest together elsewhere. Easy, breezy, perfectly seasoned.
7. Use Trays and Turntables to Tame Counter Chaos

Cluttered counters slow you down. Trays and turntables keep daily essentials handy but contained—like a chic little island for your olive oil and salt.
Containment Is Cute
- Tray by the Stove: Oil, salt cellar, pepper grinder, and vinegar—your holy grail quartet.
- Countertop Coffee Tray: Sugar, stirrers, syrups, and a tiny spoon rest.
- Lazy Susan in Corner: Perfect for fruit, honey, and nut butters.
Choose materials that wipe clean—stone, metal, or sealed wood. If it gets dirty, the mess is contained to the tray. Simple and satisfying.
8. Give Every Lid and Container a Home (No More Orphaned Tupperware)

Food storage containers can spark joy—or rage. The key is keeping lids and bottoms together in a way that’s easy to maintain.
The Container Command Center
- Nest Containers: Stack by shape and size to save space.
- File Lids Vertically: Use a bakeware rack or adjustable divider so you can grab the right lid fast.
- One Brand Strategy: If possible, stick to one system so pieces are interchangeable. IMO, worth the switch.
- Glass for Everyday: They stack well, don’t stain, and go from fridge to oven.
Do a quick audit every few months. If a lidless container appears, it’s not a mystery—it’s a goodbye.
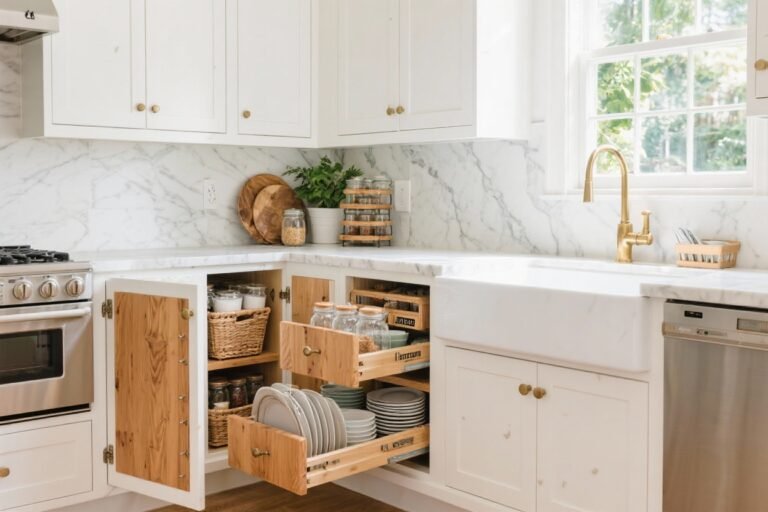
9. Install Pull-Outs and Slide-Outs for Deep Cabinets

If you can’t see it, you won’t use it. Sliding shelves eliminate the kneel-and-dig routine and reclaim those dark cabinet corners.
Where Slide-Outs Shine
- Pots and Pans: Store pans on one pull-out and lids vertically on another.
- Cleaning Supplies: Under-sink pull-outs keep sprays visible and prevent the mystery sticky zone.
- Pantry Staples: Slide-out wire baskets make grabbing canned goods and snacks painless.
- Baking Station: A pull-out shelf for your stand mixer saves counter space and your back.
Measure carefully and choose sturdy hardware with full extension. It’s an upgrade that feels custom without the reno dust.
10. Set Up a “Tonight’s Dinner” Grab Zone

Even the most organized kitchen can fall apart at 6 p.m. Solve it with a dedicated dinner hub that keeps you moving.
Your Weeknight Lifesaver
- Fridge Bin: Label a bin “Tonight” and put in prepped ingredients or proteins to thaw safely.
- Counter Caddy: Keep tonight’s recipe, spices, and a clean cutting board together.
- Backup Plan: Store a couple of shelf-stable meal kits (pasta + sauce + jarred veggies) in one pantry bin for emergency nights.
And if you meal prep on Sundays, portion chopped aromatics (onions, garlic, celery) in small containers so weeknights feel like you have a sous-chef. The future you will send thanks.
Quick Maintenance Routine (Because Habits > Overhauls)
- Daily: Five-minute reset—clear counters, return items to trays, quick wipe-down.
- Weekly: Fridge tidy, toss sad produce, re-label leftovers, and restock the “Tonight” bin.
- Monthly: Donation sweep of extras and duplicates. Your drawers will breathe again.
Final Word: Organization isn’t about perfection—it’s about creating systems that fit your life. Pick two or three ideas to start, then build from there. Your kitchen will run smoother, your meals will be faster, and honestly, cooking might even feel fun again (wild, I know).