10 Statement Kitchen Island Ideas That Become the Focal Point—and Steal the Show
Your kitchen island can be the moment. It doesn’t need to be big, it just needs to be bold, clever, and a little bit fearless. If you’re ready to turn your island into the star of your space, these ideas bring drama, function, and a little “whoa, where’d you get that?” energy.
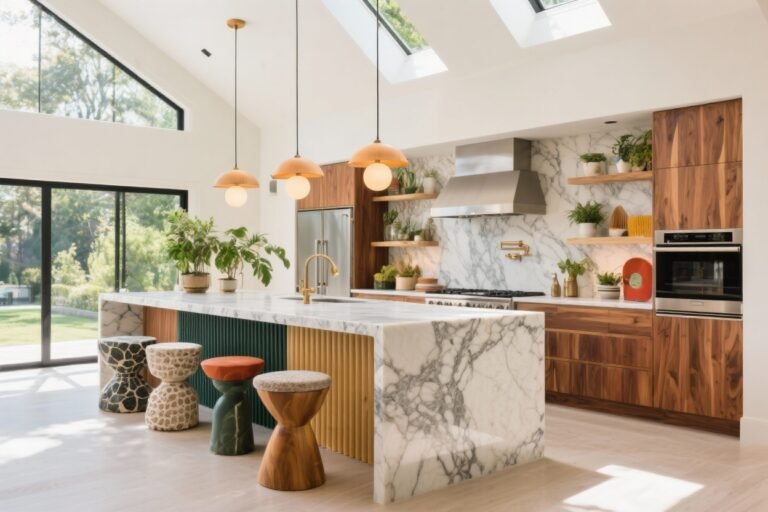
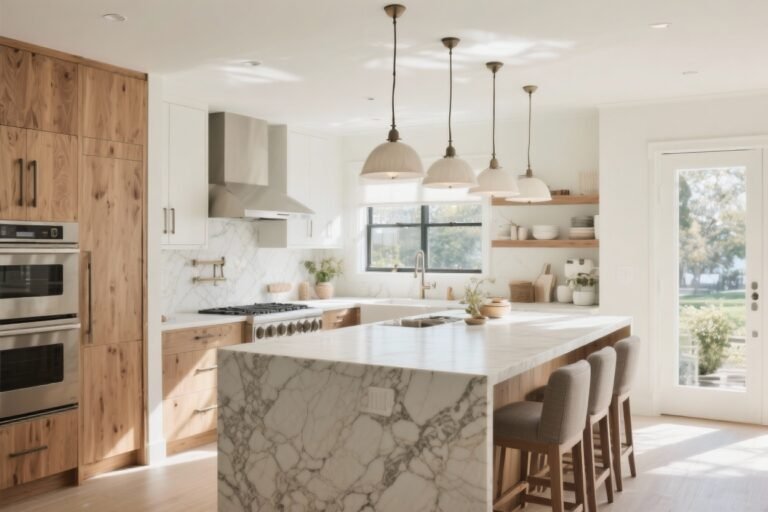
1. Go Bold With Stone That Makes You Stare
If you want a guaranteed gasp, choose a dramatic stone slab for your island. Think veiny Calacatta marble, inky soapstone, or richly patterned quartzite. Let the stone waterfall over the sides so it looks sculptural and custom (because it is).
Tired of snacking when you’re not even hungry? This reset helps you stop the loop and feel back in control.
A simple reset for moments when cravings take over. Easy to use, easy to repeat, and designed to help you feel satisfied instead of stuck.
How to Pull It Off
- Pick your moment: If the stone is loud, keep the surrounding cabinets quieter.
- Seal the deal: Marble is gorgeous but high-maintenance; quartzite or quartz gives you drama with less stress.
- Edge detail matters: A mitered or beveled edge can make the slab look thicker and more luxe.
FYI: Lighting loves stone. Under-island LED strips or focused pendants will make those veins pop in the best way.
2. Paint It A Saturated Color (And Own It)
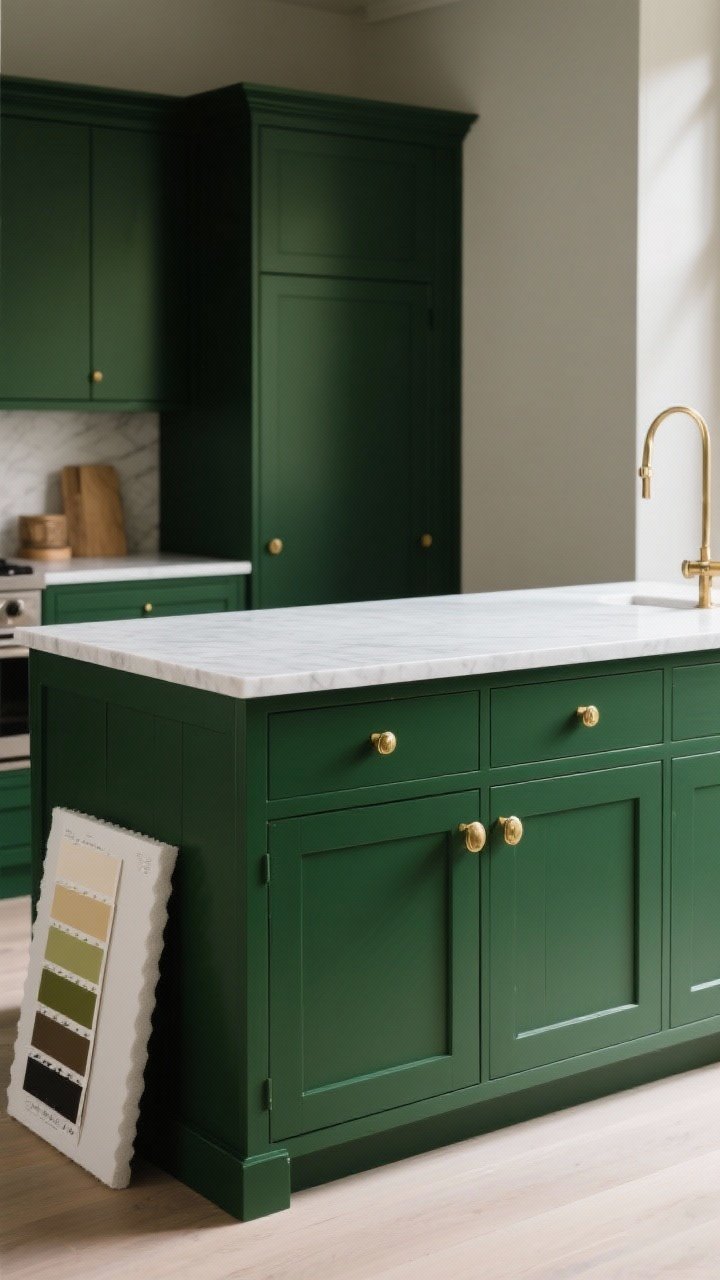
Neutral islands are cute. Moody or vibrant islands are unforgettable. Deep green, oxblood, denim blue, even terracotta—pick a tone that plays with your backsplash or hardware and let it anchor the whole room.
Make Color Work For You
- Test swatches big: Paint a foam board and move it around to see how light changes it.
- Balance with warm metals: Brass or champagne hardware keeps saturated colors from feeling flat.
- Top it right: Pair bold bases with a simple white or pale stone to keep the whole look breezy.
Pro tip: If you’re commitment-shy, paint the island only. It’s the easiest place to change later without a full kitchen overhaul.
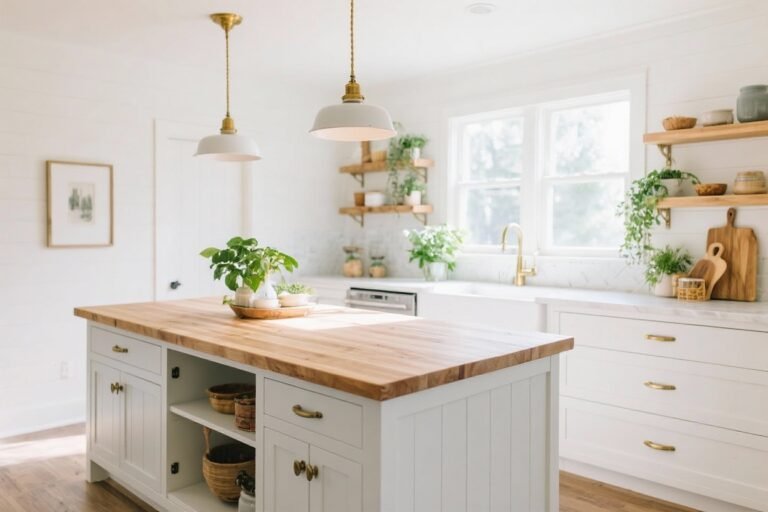
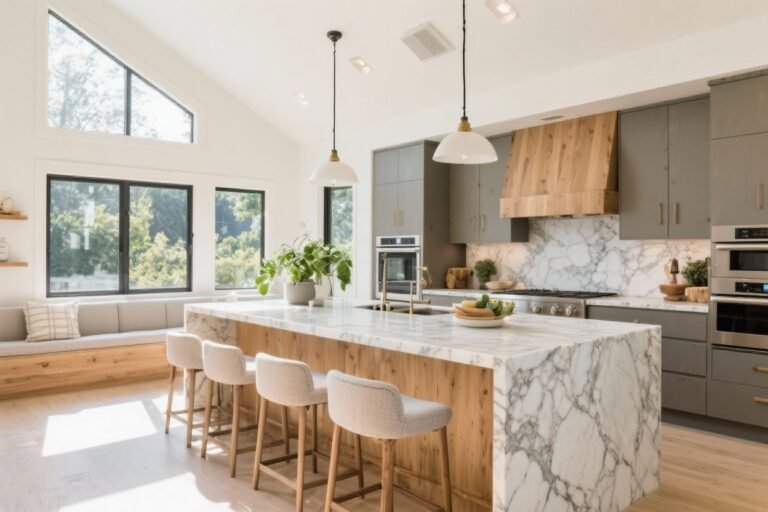
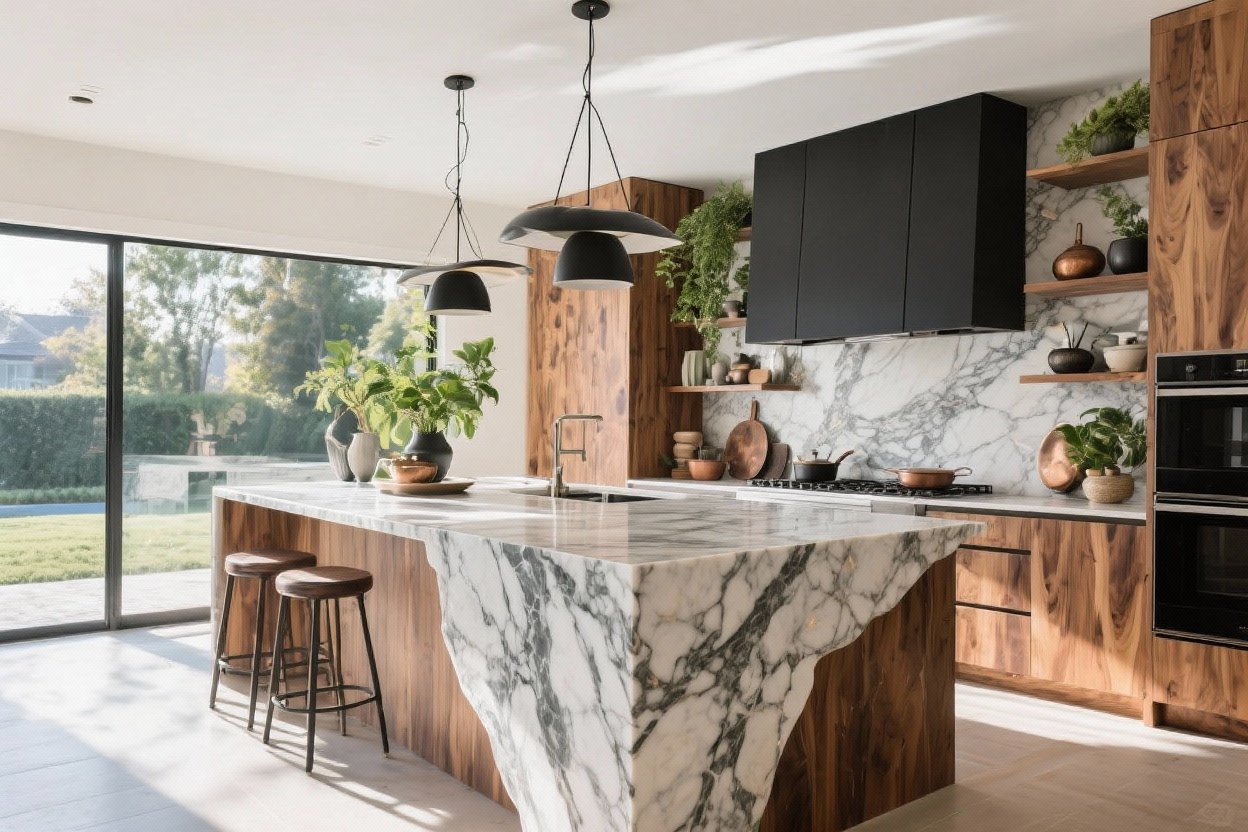
3. Mix Materials Like A Designer
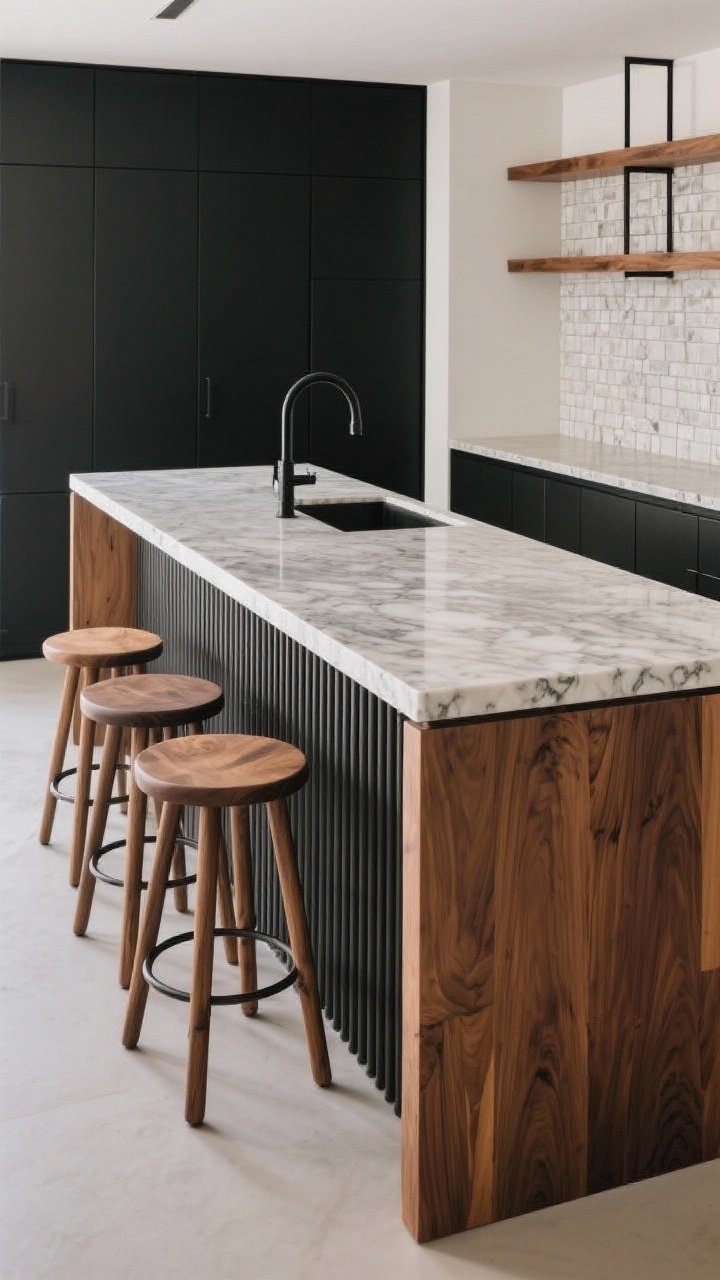
Why pick one finish when you can layer two or three? A mixed-material island feels bespoke. Try a stone top with a fluted wood base, or a metal-clad panel with an oak butcher-block extension.
Transform Your Home With 7,250+ Stunning Landscaping Designs—No Expensive Designers Needed!
- 🌿 Access 7,250+ stunning landscaping designs.
- 💰 Save thousands—no pro designer needed.
- 🏡 Plans for gardens, patios, walkways, and more.
- ✨ Simple, beginner-friendly DIY layouts.
- 🛠️ Customize any design to fit your yard.
Material Combos That Slap (In A Good Way)
- Stone + Wood: Classic contrast—cool and warm, smooth and textured.
- Metal + Stone: Brushed brass or blackened steel panels add edge and reflect light.
- Tile + Timber: Tiled face with wood stools brings texture without visual clutter.
Just keep your palette tight: three finishes max and repeat them elsewhere (like on shelves or hardware) so it all feels intentional.
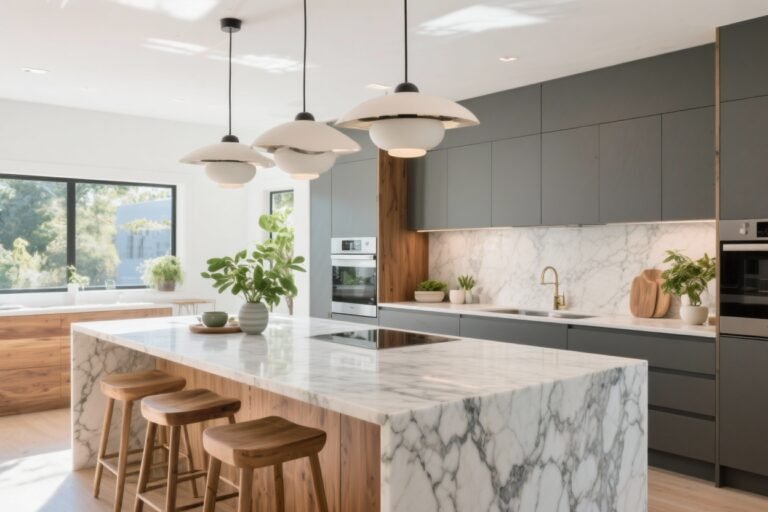
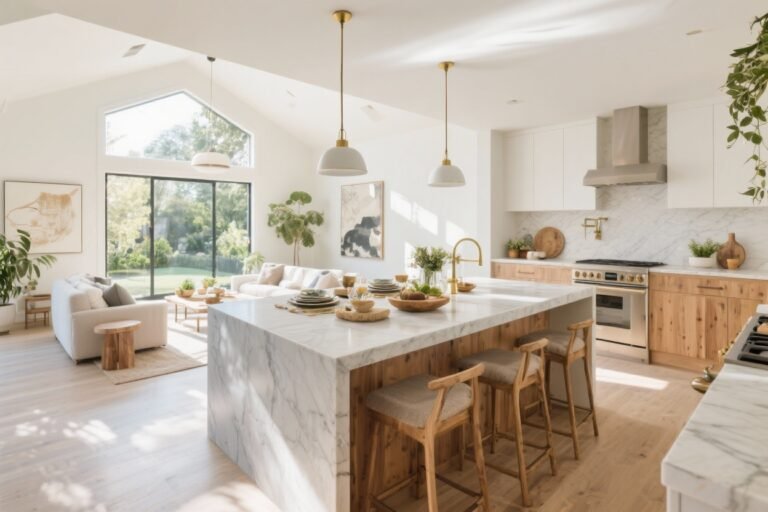
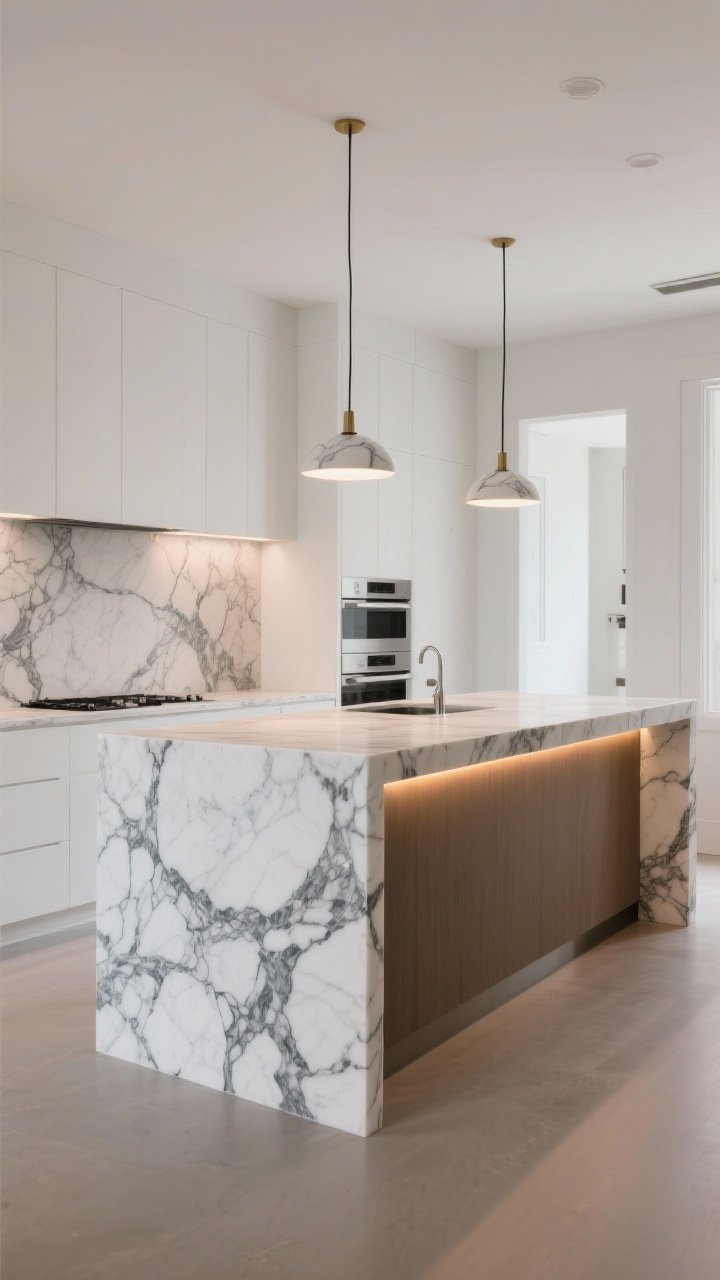
4. Try A Waterfall Edge (Or Two)
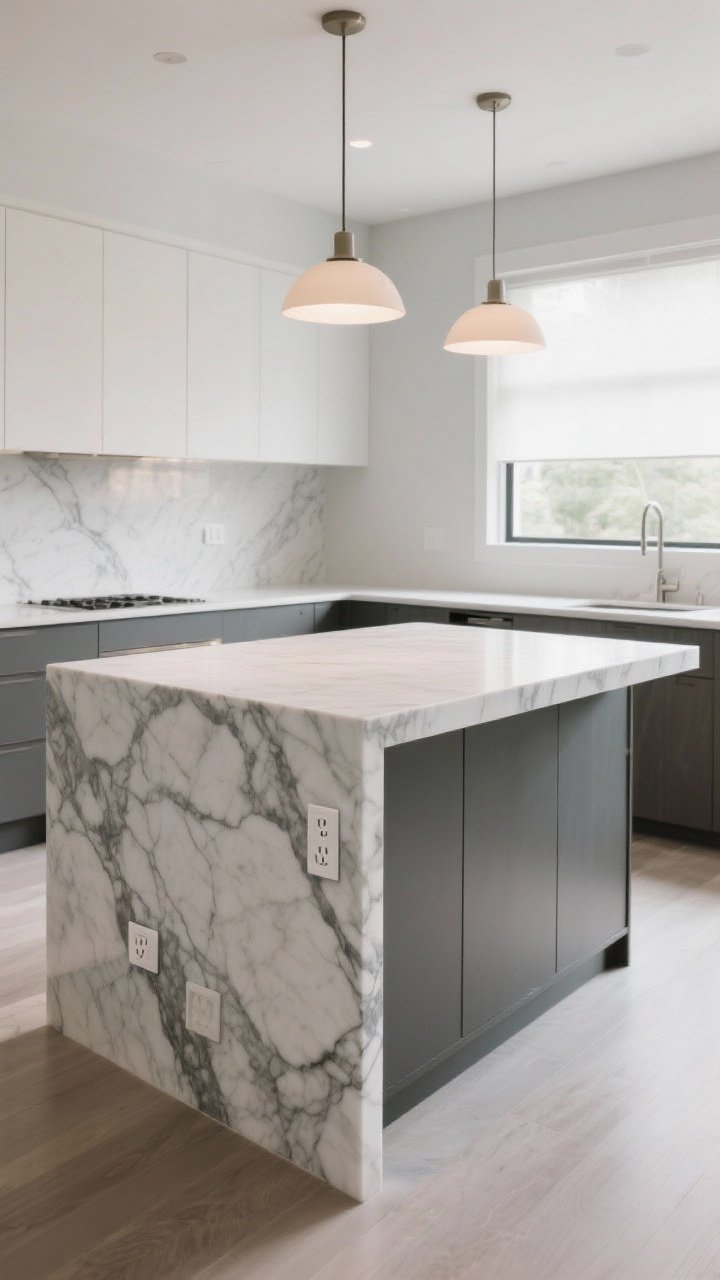
A waterfall island instantly looks high-end, even in a simple kitchen. The countertop cascades down the sides to the floor, wrapping the island like a chic tuxedo. If you want luxe with minimal fuss, this is it.
Design Details That Matter
- Bookmatch the veining: Align the pattern across the top and sides for a seamless look.
- Keep outlets discreet: Use pop-up outlets or color-matched faceplates under the overhang.
- Counter height check: Standard counters are 36 inches; bar-height waterfalls can feel bulky. Stick to standard unless you’re going for a bar vibe.
Bonus: Waterfalls protect the base from scuffs, so they’re pretty and practical. Win-win.
5. Add Fluted Or Reeded Details For Texture
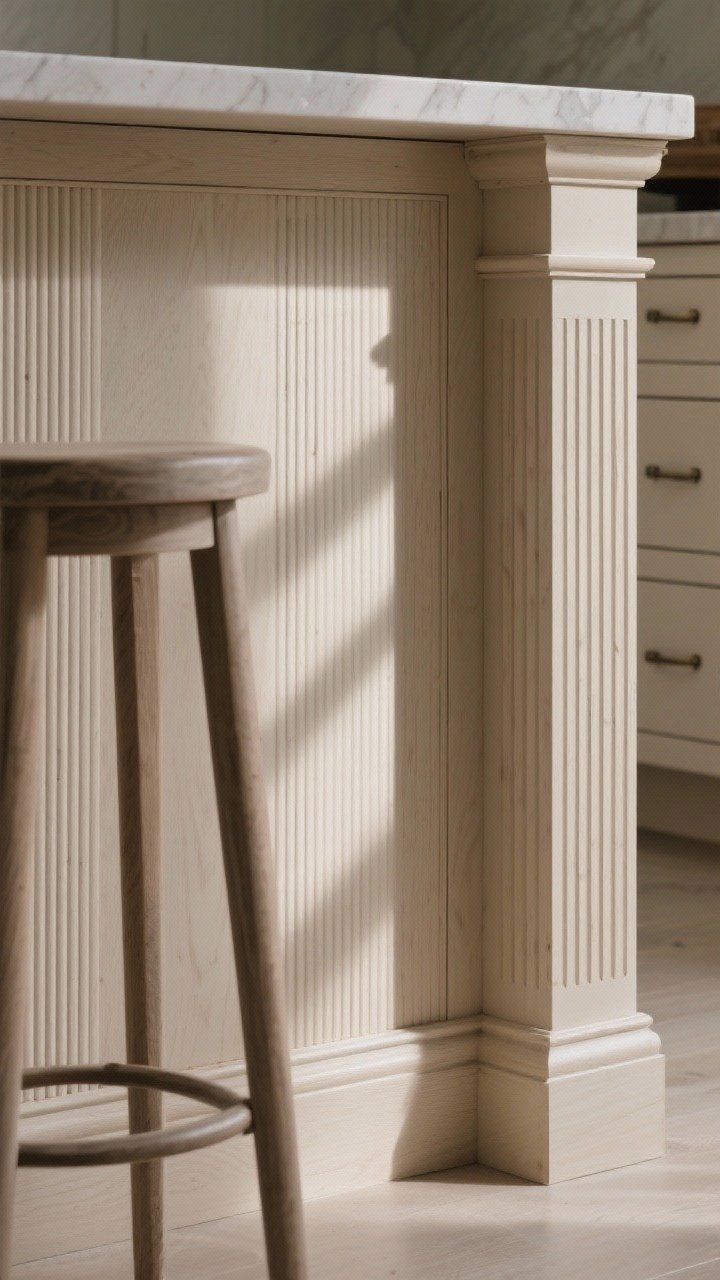
Fluting is having a moment, and your island is the perfect place to use it. A fluted or reeded island face adds refined texture and shadow play without screaming for attention. It’s understated drama—like good mascara.
Where To Use The Flutes
- On the paneling: Fluted MDF or wood slats on the stool side make a big statement.
- On the legs: Fluted corner posts feel furniture-grade and timeless.
- On the drawers: Try slim reeded fronts with simple finger pulls to keep it clean.
Keep cleaning in mind: choose wider, shallow flutes or a finish that’s easy to wipe down if you’ve got small kids or messy cooks (so… all of us).

6. Build A Workhorse With Hidden Function
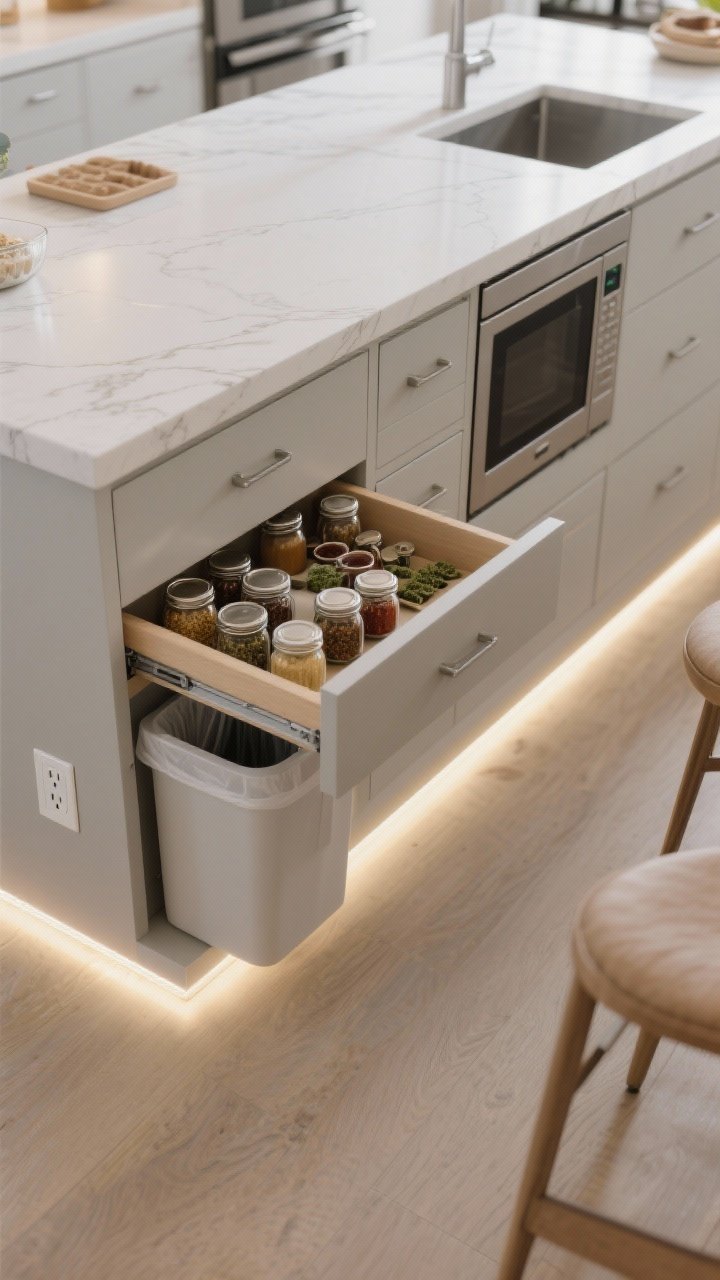
Statement doesn’t have to mean just looks. A truly iconic island also works hard: hidden charging, trash/recycling pull-outs, built-in spice drawers, or even a microwave drawer. Imagine less clutter and more flow—chef’s kiss.
Smart Features To Consider
- Power where you need it: Add outlets under the counter lip for mixers and laptops.
- Zones, zones, zones: Prep sink on one side, baking drawers on the other, seating on the far end.
- Appliance garages: Tuck small appliances behind tambour doors to keep the counter photo-ready.
IMO, the most underrated upgrade is a trash + compost combo with soft-close. It keeps everything tidy and your workflow smooth.
7. Go Sculptural With Curves And Unexpected Shapes
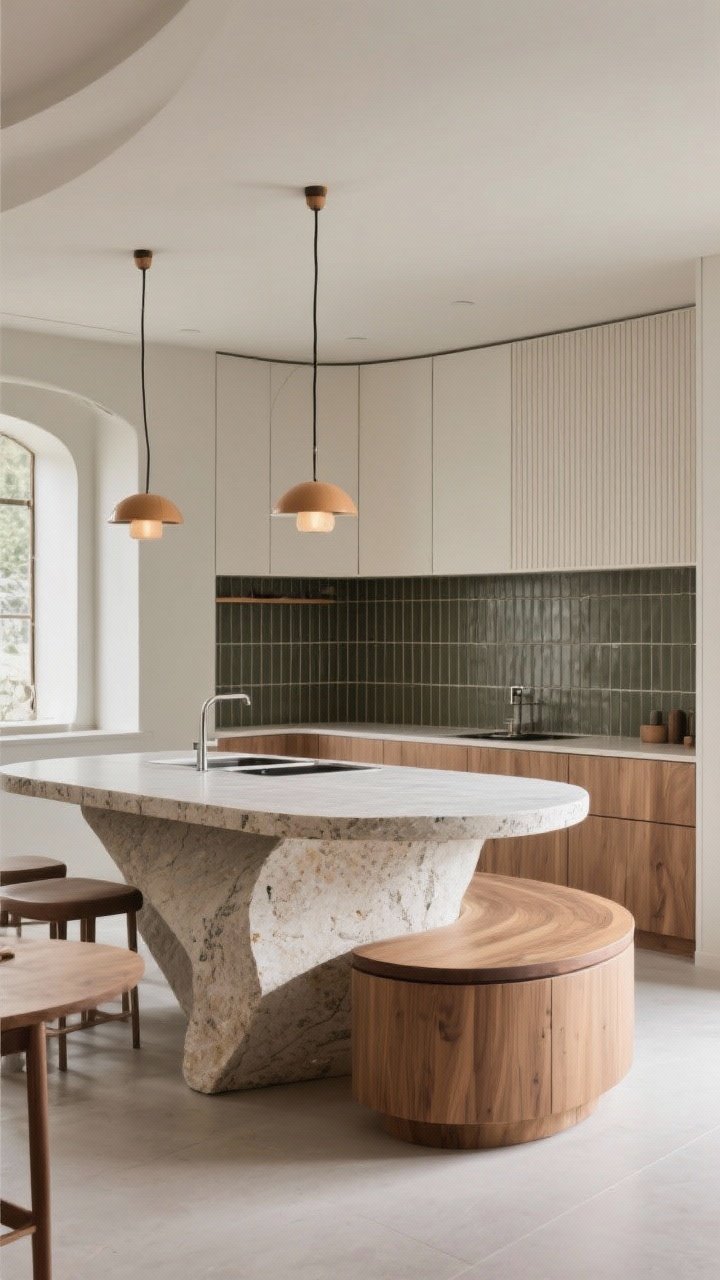
Squares are fine; curves are unforgettable. A rounded end for seating, a pill-shaped countertop, or a wavy waterfall softens the room and makes traffic flow easier. It also feels custom without shouting about it.
Shape Ideas That Wow
- Pill-shaped stone: No sharp corners, just soft edges and major style points.
- Half-moon dining ledge: A curved wood extension turns your island into a bistro moment.
- Asymmetrical profile: One straight prep side, one sculpted seating side—it’s practical art.
Remember: curves love contrast. Pair a rounded island with linear backsplash tile or ribbed cabinetry to keep the look dynamic.
8. Light It Like A Magazine Cover
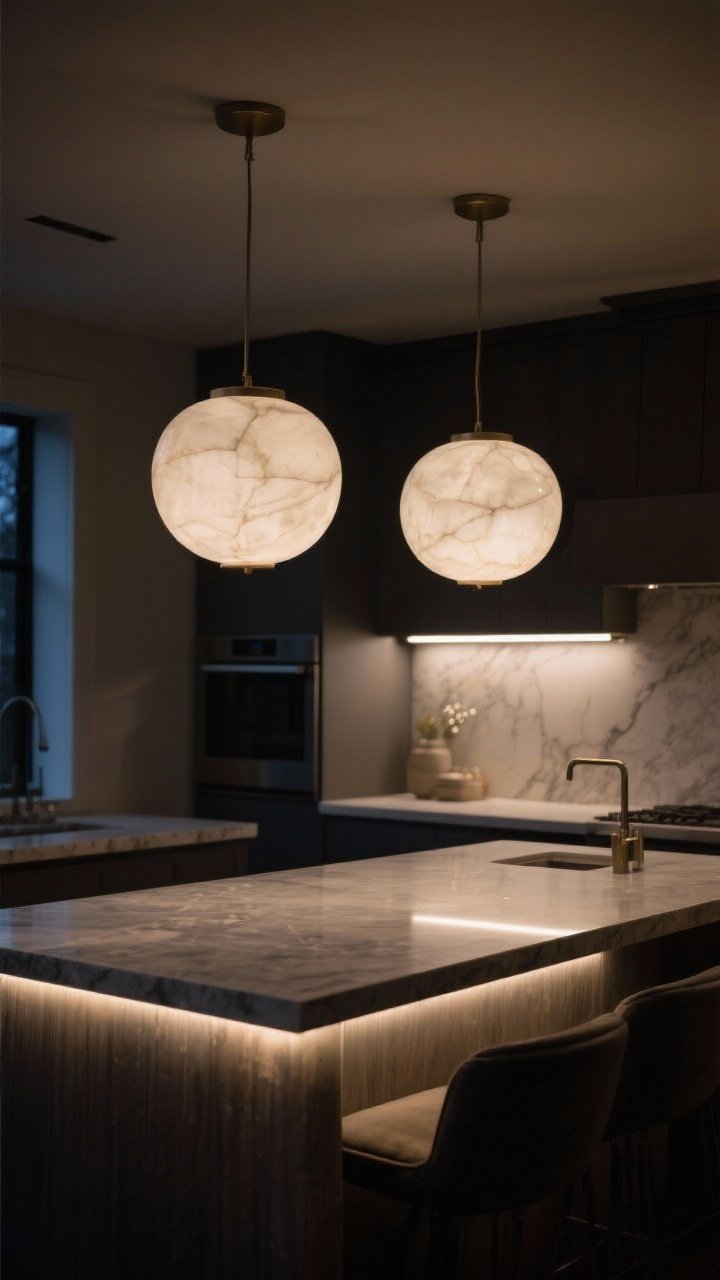
Your island isn’t the focal point until the lighting gives it a spotlight. The right pendants (or a linear light) turn a pretty island into a showpiece. Scale and spacing are everything here.
Lighting Rules That Always Work
- Size matters: For two pendants, 12–20 inches in diameter each is typical; go larger for long islands.
- Hang height: Aim for 30–36 inches above the counter so you don’t whack your forehead.
- Layer it: Add toe-kick LEDs under the island and dimmers for instant ambiance.
Want instant drama? Choose pendants with smoked glass, alabaster, or metal shades. They act like jewelry—no, better than jewelry, because they also help you see your chopping board.
9. Add Seating That Feels Like A Lounge
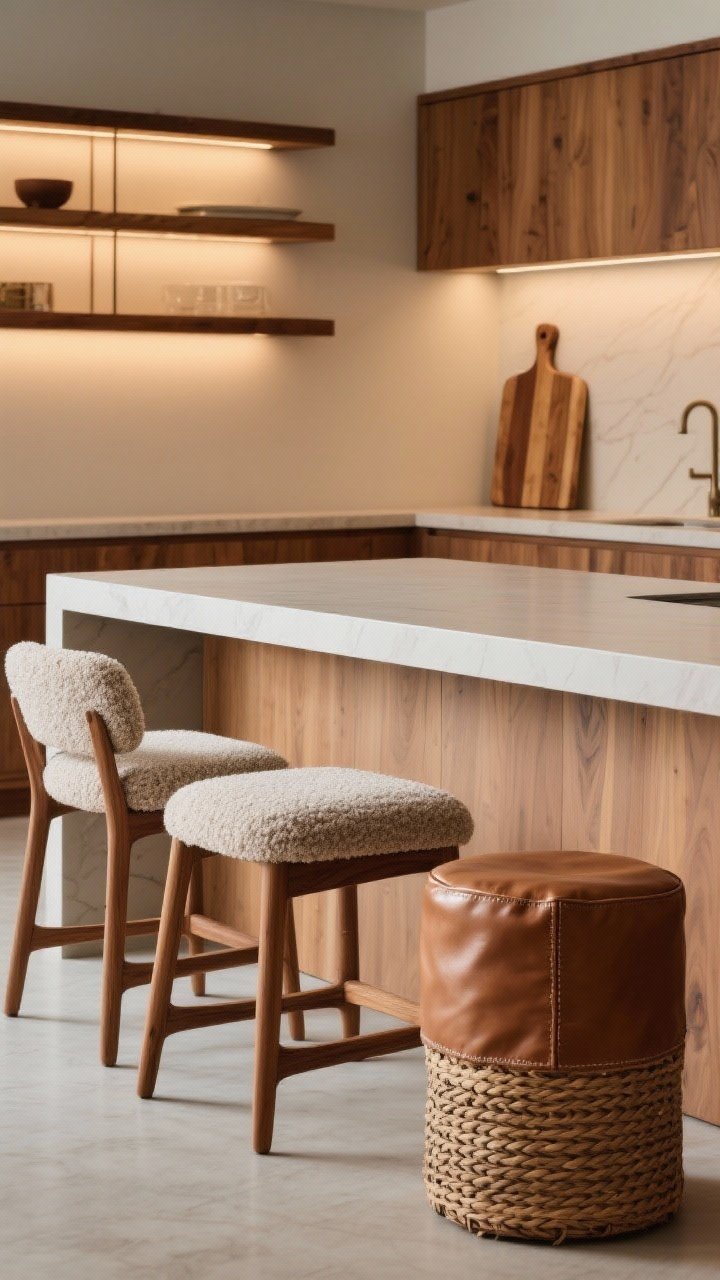
An island with gorgeous seating? That’s a gathering magnet. Upgrade to stools with personality—think boucle upholstery, woven leather, or low-slung backs in warm wood. Comfort keeps guests there; style keeps them talking.
Seating That Earns Its Keep
- Overhang matters: 12–15 inches of knee space is ideal for real comfort.
- Count the legs: Three seats look best on most standard islands; four works if it’s longer than 7 feet.
- Fabric smarts: Performance fabric or wipeable faux leather saves your sanity.
Matching wood tones across stools, shelves, and cutting boards makes the whole space feel curated without trying too hard.
10. Turn The Island Into A Furniture Moment
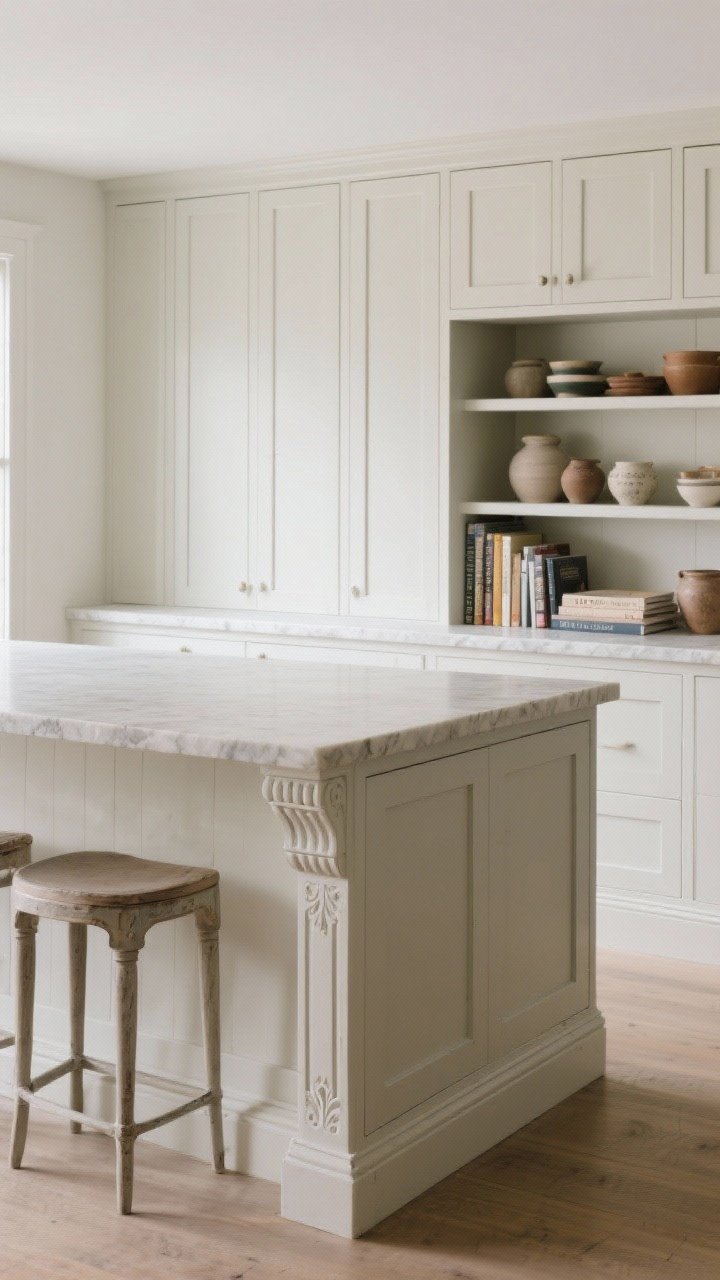
What if your island looked more like a piece of furniture than a block of cabinets? Think inset panels, furniture-style legs, open shelving at the ends, or even an antique base topped with modern stone. It brings soul and instantly feels custom.
How To Nail The Furniture Look
- Open ends: Add shallow display shelves for cookbooks, pottery, or everyday bowls.
- Legs and rails: Use turned legs or simple tapered ones to create airiness at the corners.
- Mixed-age magic: Pair a vintage table or workbench with a new stone top for a one-of-a-kind, collected vibe.
Pro move: Keep the cabinet toe-kick recessed but add a decorative furniture base trim on the visible sides. It’s subtle and stunning.
Bonus Tips To Make Any Island Pop
- Keep the counter styled but functional: One tray for daily items (salt, pepper, olive oil), one vase or bowl. Done.
- Mind the proportion: Your island should work with your kitchen’s footprint—36–42 inches of walkway all around is the sweet spot.
- Repeat one detail: Echo your island’s finish in hardware, shelves, or lighting so the design feels cohesive.
Ready to make your island the main character? Pick one bold move—stone, color, shape, or lighting—and commit. The best islands aren’t shy; they’re confident, hardworking, and a little bit glam. Your kitchen’s about to get a serious upgrade, and yes, your friends will ask who designed it. You can say “me,” because, well, you did.