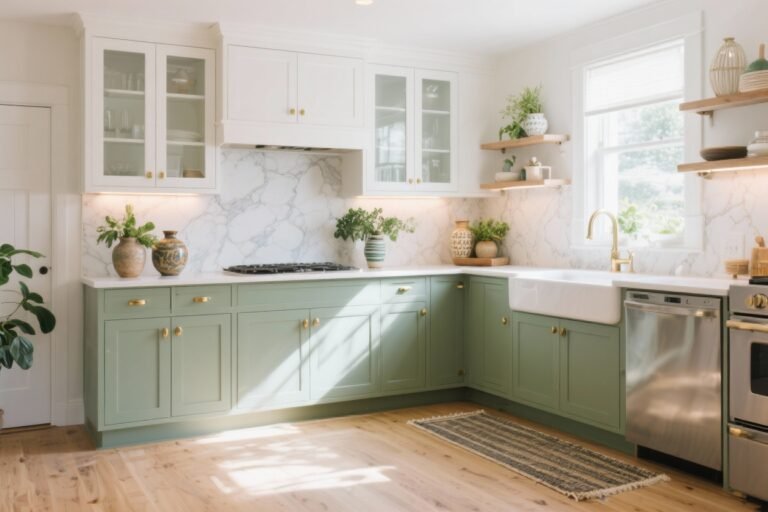
10 Open Shelving Vs Upper Cabinet Ideas You’ll Wish You Tried Sooner
Let’s settle it: open shelving looks amazing on Instagram, but are upper cabinets the real MVP in daily life? Short answer: it depends on your kitchen, your habits, and your tolerance for dust. Let’s break down ten smart, stylish ways to choose (or mix!) the two—without regrets, clutter, or constant crumb anxiety.
1. Edit Ruthlessly: The “Show vs Stow” Strategy
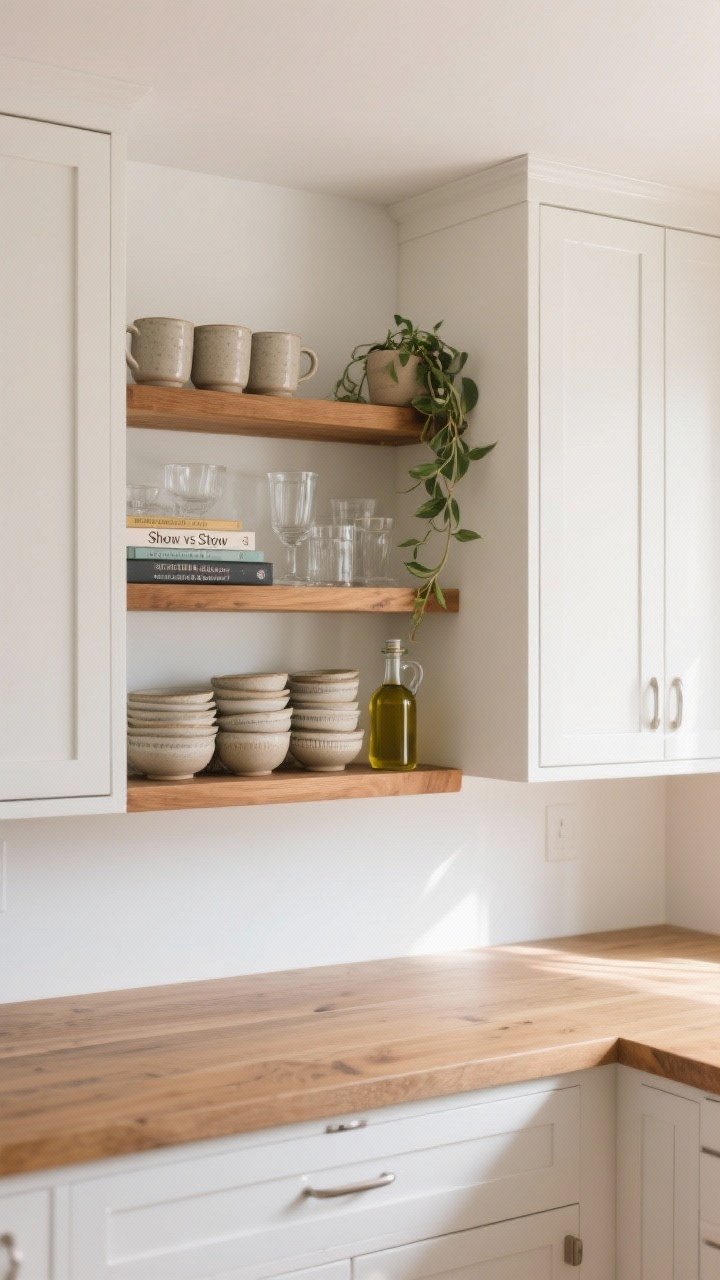
Open shelves are for pretty things. Upper cabinets are for everything else. Simple, right?
Tired of snacking when you’re not even hungry? This reset helps you stop the loop and feel back in control.
A simple reset for moments when cravings take over. Easy to use, easy to repeat, and designed to help you feel satisfied instead of stuck.
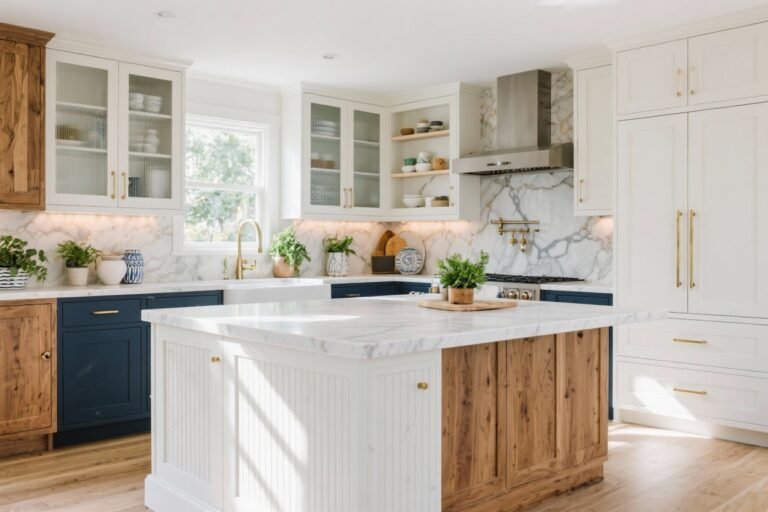
Use open shelving to display the items you love seeing every day: your stoneware mugs, your vintage bowls, that cute little olive oil jug. Then let upper cabinets hide the backup stash: bulk bags of almonds, mismatched Tupperware, and the blender you claim you use weekly (you don’t).
What Goes Where
- Open Shelves: Everyday plates, stacks of bowls, pretty glassware, cookbooks, plants, ceramics
- Upper Cabinets: Pantry overflow, appliances, plastic storage, baking gear, kids’ cups
Pro Tip: If it’s not cute or used daily, it doesn’t live on an open shelf. FYI, visual clutter is real.
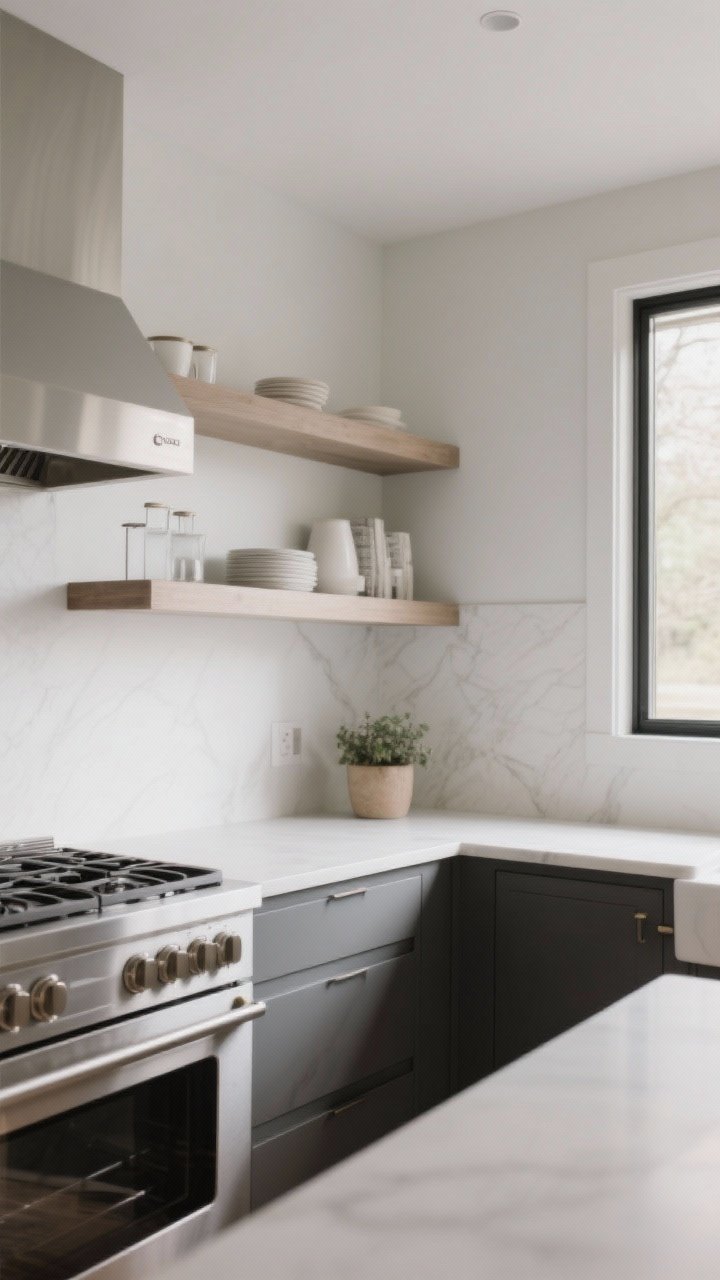
2. Zone Your Kitchen Like a Hotel Bar
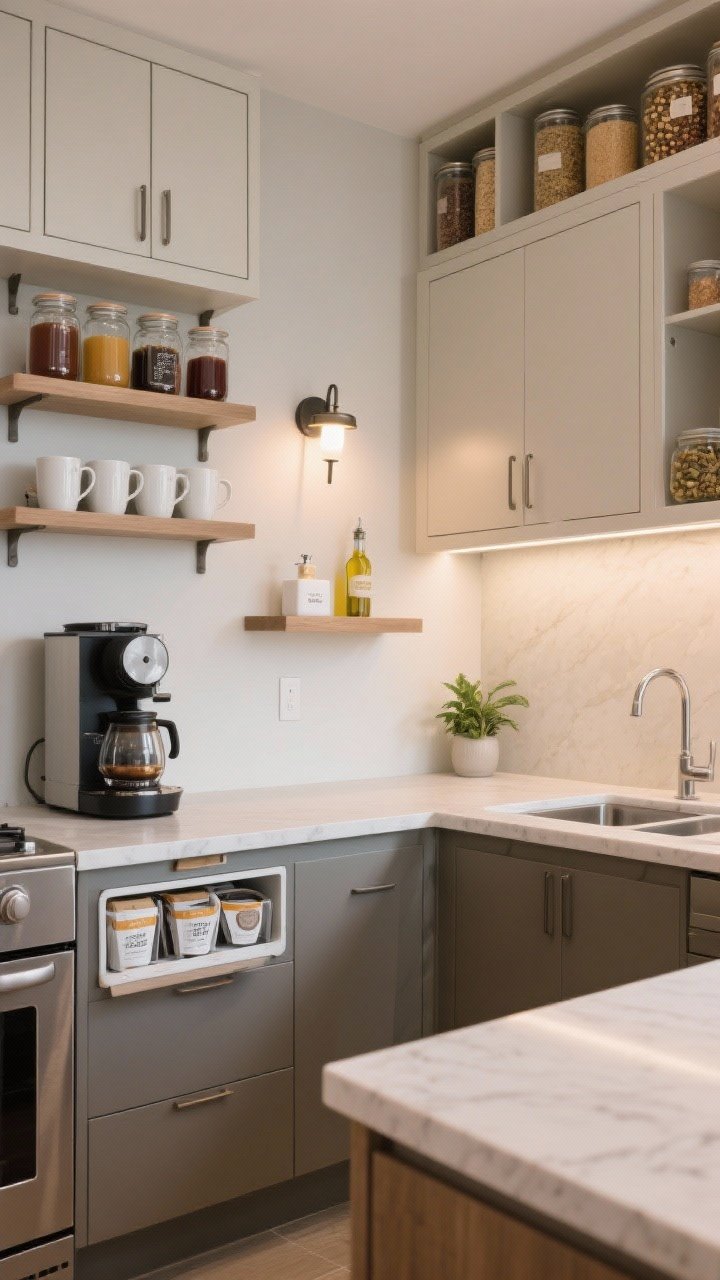
Instead of picking one style for the entire kitchen, create zones. This makes the layout feel intentional—not like you ran out of cabinets.
Use open shelves in “moments” where you need quick access or visual softness. Keep upper cabinets where storage needs are heavier or where grease splatter is a thing (hello, stove).
Transform Your Home With 7,250+ Stunning Landscaping Designs—No Expensive Designers Needed!
- 🌿 Access 7,250+ stunning landscaping designs.
- 💰 Save thousands—no pro designer needed.
- 🏡 Plans for gardens, patios, walkways, and more.
- ✨ Simple, beginner-friendly DIY layouts.
- 🛠️ Customize any design to fit your yard.
Smart Zones
- Coffee Station: Open shelves for mugs, syrups, jars; cabinet below for filters and pods
- Prep Area: Upper cabinets for spices and dry goods; one small shelf for oils and salt
- Sink Wall: One floating shelf for hand soap + plants; uppers elsewhere for dishes
Pro Tip: Use wall sconce lighting over open shelves for a boutique vibe. It’s mood-setting and practical.
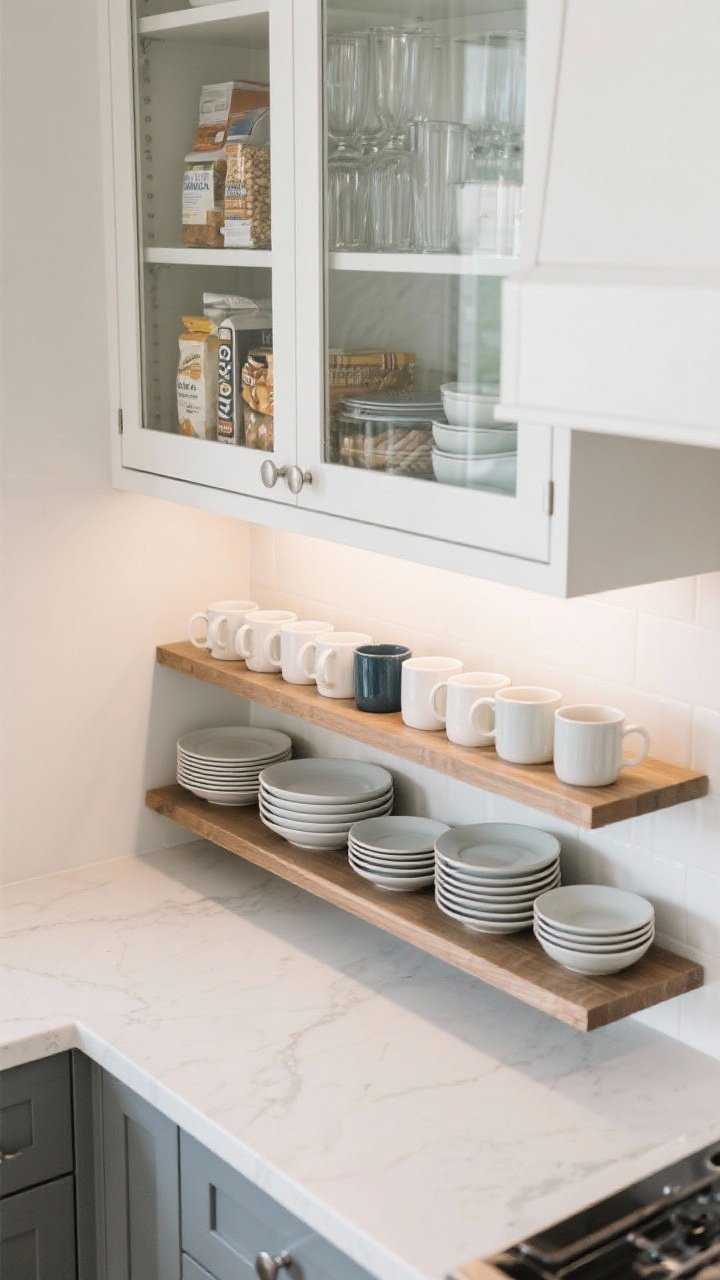
3. The Cleanability Question (Grease, Dust, and Reality)
Let’s talk maintenance. Open shelves can collect dust and grease mist, especially near the range. If you’re tidy-ish, you’ll be fine. If you’re not? Upper cabinets will be your best friend.
Maintenance Cheats
- Keep Shelves 24–36 inches from the stove to dodge grease residue
- Choose sealed or satin-finish shelves—wipe-down-friendly, not dust magnets
- Rotate items seasonally to clean quickly while you restyle
Pro Tip: Glass-front cabinets give you the airy look with less cleaning chaos.
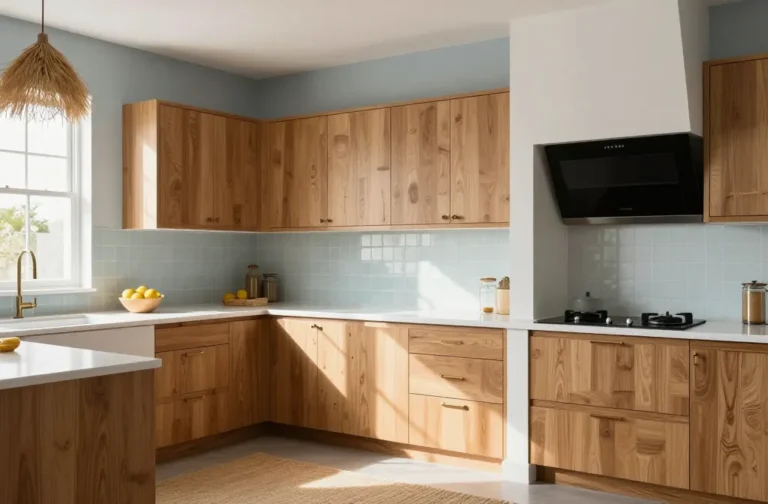
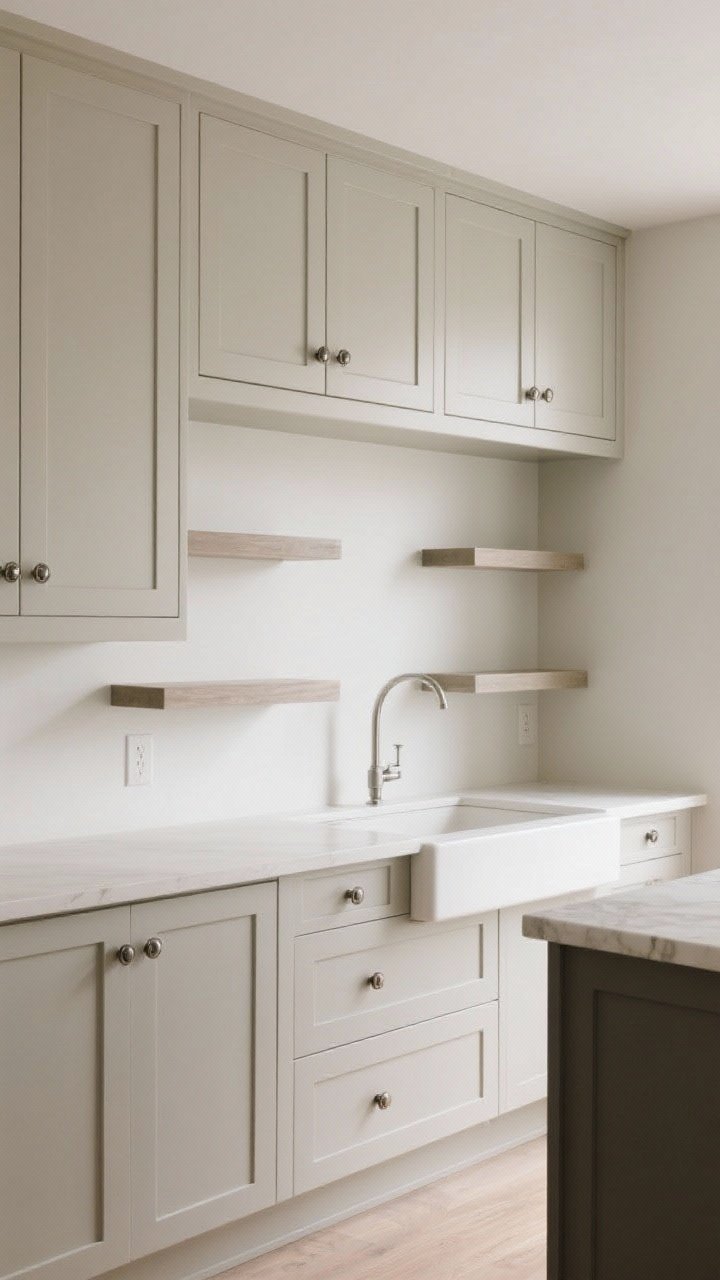
4. Small Kitchen? Use This Hybrid Formula
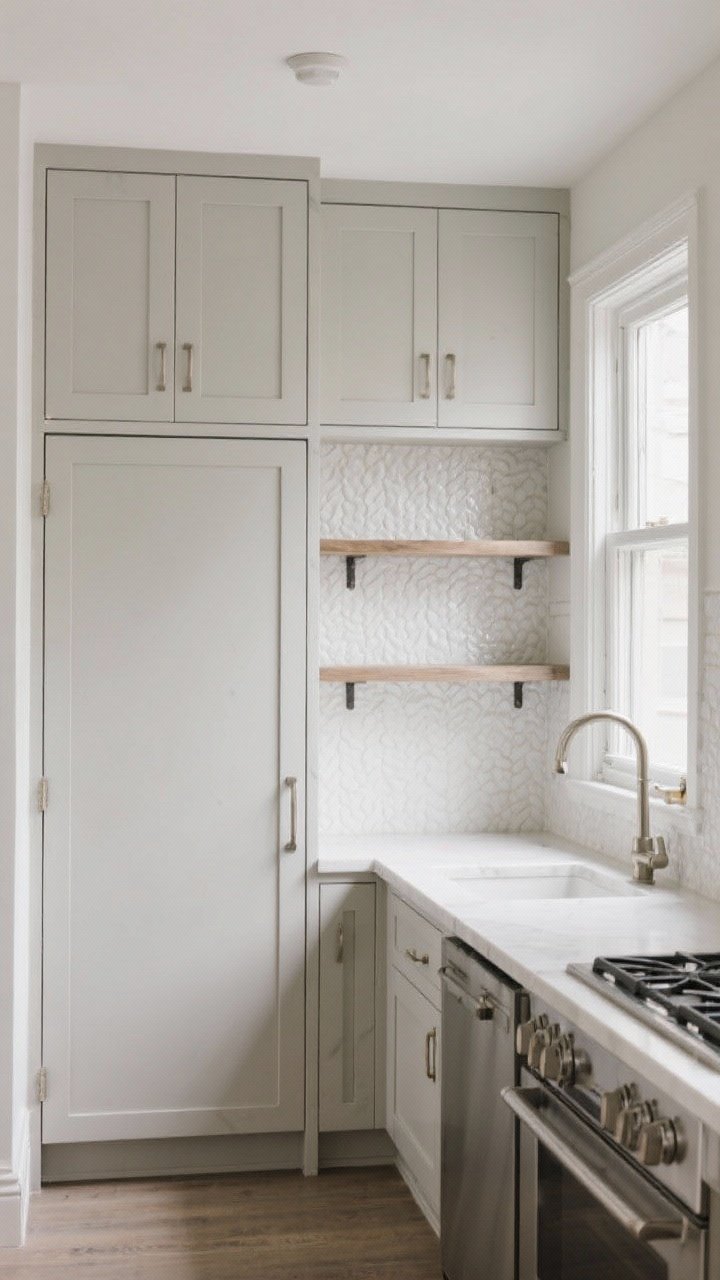
In compact kitchens, full open shelving can be stressful. But a wall of solid uppers can feel heavy. Solve it with a hybrid: one or two open shelves + mostly uppers.
Layout That Works
- Left/Right Balance: Uppers on one side, open shelves over a short run to “lighten” the wall
- Window Wall: Open shelves flanking the window; uppers elsewhere for storage density
- Tall Pantry + Open Shelves: Add a pantry cabinet to keep clutter off shelves
Pro Tip: Finish the back wall behind open shelves in tile or wood to make the area feel designed—not like you forgot cabinet doors.
5. Style Points: Make Open Shelves Look Curated, Not Chaotic
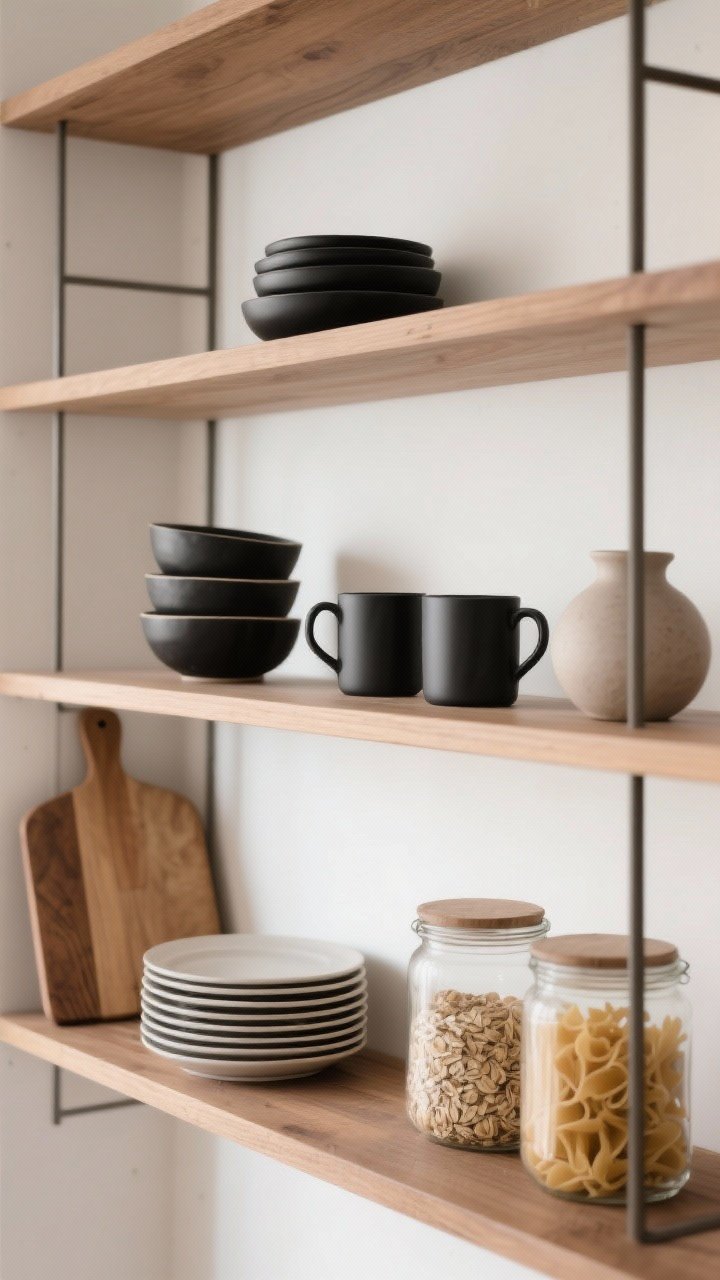
Open shelves shine when they’re styled with intention. Keep the color palette tight and repeat shapes. This is where the magic happens.
Styling Rules That Always Work
- Color Cohesion: Stick to 2–3 colors with warm wood and white or black accents
- Groupings of Three: Use odd-number groupings for bowls, mugs, or jars
- Mix Heights: Layer a cutting board, a stack of plates, and a vase for depth
- Functional Pretty: Decant salts, oats, or pasta into glass jars
Pro Tip: Keep one shelf “breathing”—aka negative space—so it doesn’t read as clutter.

6. Budget & Impact: Where to Splurge, Where to Save
Open shelving is usually cheaper than uppers, especially custom ones. But that doesn’t automatically mean it’s the budget move—because you’ll probably buy nice things to put on them. Just saying.
Money-Smart Moves
- Use stock cabinets for uppers and invest in a cool shelf wall as the focal point
- Floating shelf thickness matters—1.5–2 inches looks custom on a budget
- Hardware is your friend: Splurge on knobs/pulls for the uppers; go minimal on shelves
Pro Tip: If your cabinet box quality is mid, choose a high-end paint color and nice knobs. No one will know.
7. Storage Math: How Much Space Do You Actually Need?
Numbers time (brief, I promise). One 36-inch upper cabinet usually holds more than two typical open shelves because you can use the full depth and height—plus doors let you stack aggressively.
Quick Capacity Check
- Open shelves: Great for items you grab daily—think 8–12 mugs, 12 plates, 8 bowls
- Upper cabinets: Best for tall glasses, pantry goods, and rarely used bakeware
- Glass-front uppers: Middle ground with vertical storage + display vibes
Pro Tip: If you’re a maximalist cook, lean cabinets; if you’re a minimalist, open shelves won’t scare you.
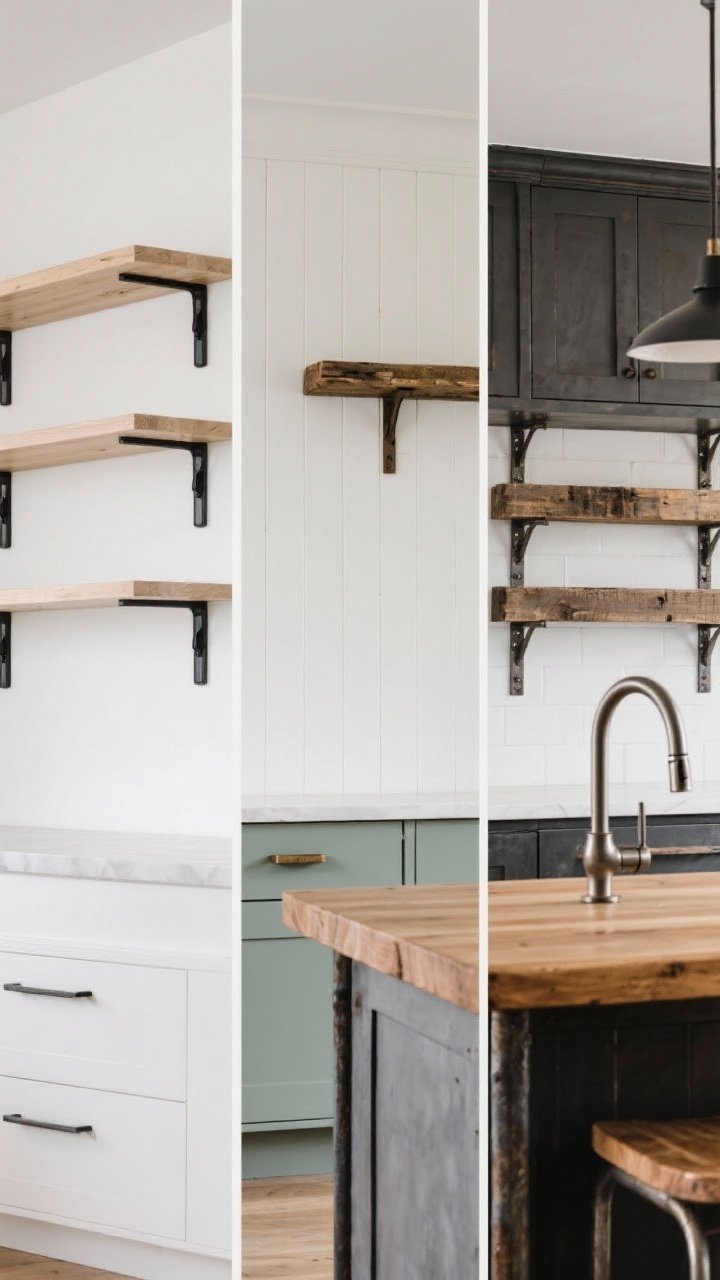
8. Design Personality: Match Your Cabinet Choice to Your Style
Each option tells a story. Pick the one that fits your home’s personality (and yours—IMO this matters most).
Style Pairings
- Modern Scandinavian: White or light wood shelves, slim brackets, matte black hardware
- Farmhouse/English Cottage: Painted uppers with beadboard, plus one rustic shelf for charm
- Industrial: Metal brackets, reclaimed wood shelves, dark uppers elsewhere
- Transitional: Shaker uppers + a single long shelf for balance
Pro Tip: Tie shelves to the room using repeated materials—same wood tone as the island, same metal as the faucet.
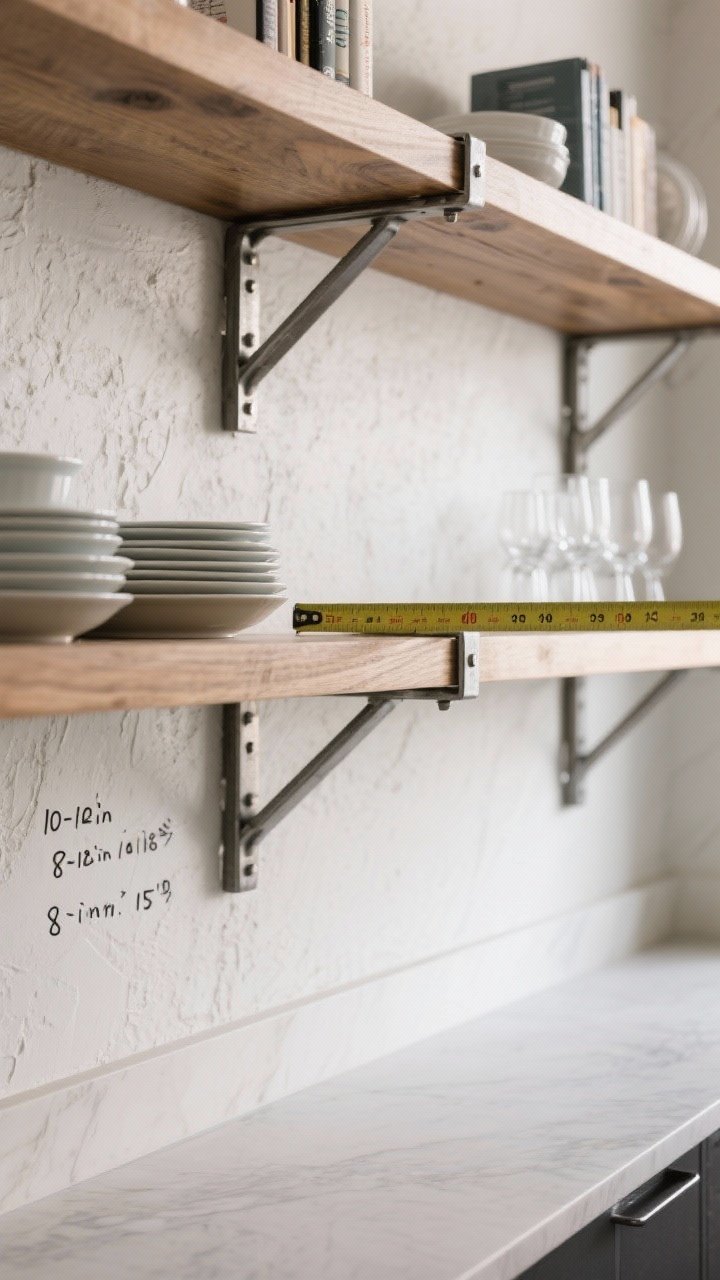
9. Safety, Strength, and Installation 101
Open shelves need proper support. Heavy stacks of plates on a poorly anchored shelf? Not cute. Upper cabinets also need blocking and level installation, or your doors will fight you forever.
What to Know Before You Drill
- Studs or heavy-duty anchors are non-negotiable for open shelving
- Weight limit: Most floating shelves cap around 40–75 lbs depending on length/brackets
- Depth matters: 10–12 inches for dishes; 8–10 inches for glassware/books
- Standard clearances: 18 inches above counters; keep 15 inches between shelves
Pro Tip: If you want the “floating” look but need strength, choose hidden steel brackets mounted to studs.
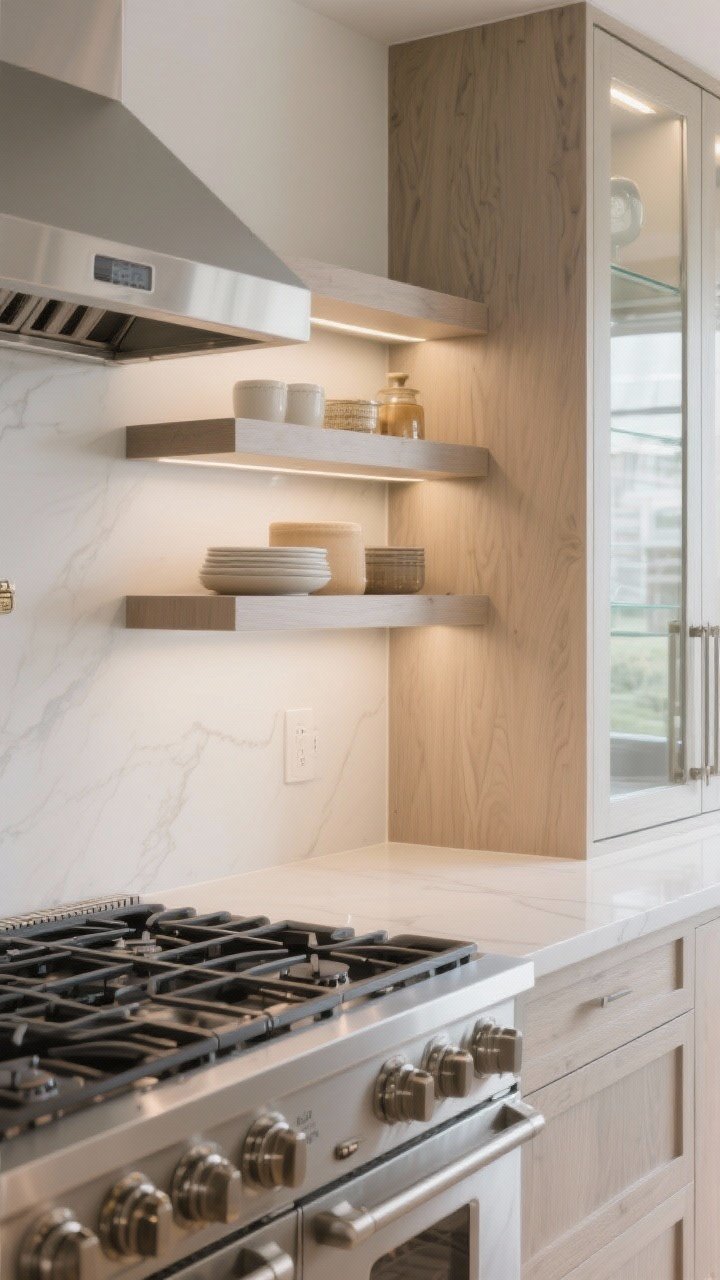
10. The Best of Both: Two-Tone + Light Tricks
You don’t have to choose sides—designers often mix both to get lightness up top and practicality overall. Think open shelves on a backsplash run and upper cabinets on the longest wall for maximum storage.
Make It Look Intentional
- Two-Tone Cabinets: Dark base cabinets, light uppers, and warm wood shelves for balance
- Under-Cabinet Lighting: LED strips under uppers and even under shelves for a glow-up
- End Panels + Trim: Finish open-shelf edges with a small return or side panel to look custom
- Symmetry-ish: Pair shelves on each side of a hood or window to frame the feature
Pro Tip: If your kitchen lacks natural light, keep most uppers and add a single long shelf with integrated lighting to open things up without losing storage.
Quick Decision Guide
- Choose open shelves if: You’re neat, love styling, and want an airy look
- Choose upper cabinets if: You have lots of stuff and want low-maintenance storage
- Choose both if: You want beauty + function (aka the best answer most of the time)
Bottom line? You don’t have to commit fully to Team Shelf or Team Cabinet. Blend them thoughtfully, think through how you cook and live, and your kitchen will look gorgeous and actually work. And yes, your mugs deserve their moment.