10 Kitchen Island Ideas That Make Small Kitchens Feel Bigger (and Way Smarter)
Small kitchen, big dreams? Same. A smart island can totally change how your space looks and works—without making it feel cramped. Think slim silhouettes, sneaky storage, and surfaces that hustle. Let’s build an island that pulls double (or triple) duty and makes your kitchen feel bigger, brighter, and frankly, a little bougie.
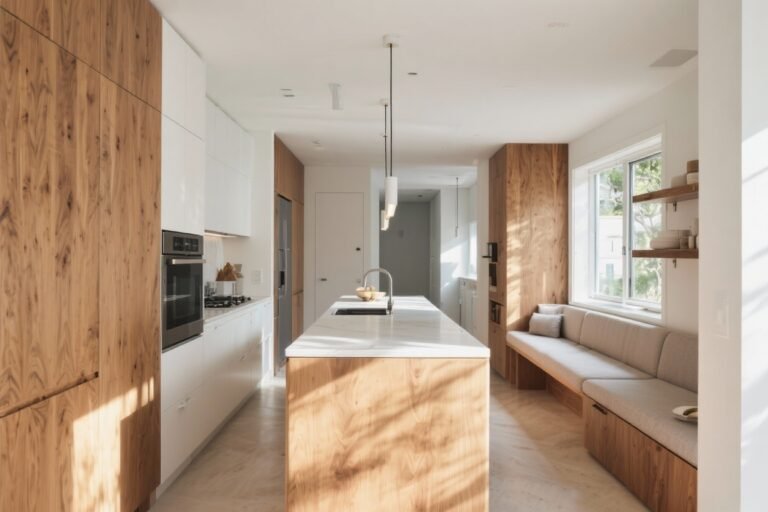
1. Slimline Islands That Don’t Hog the Room
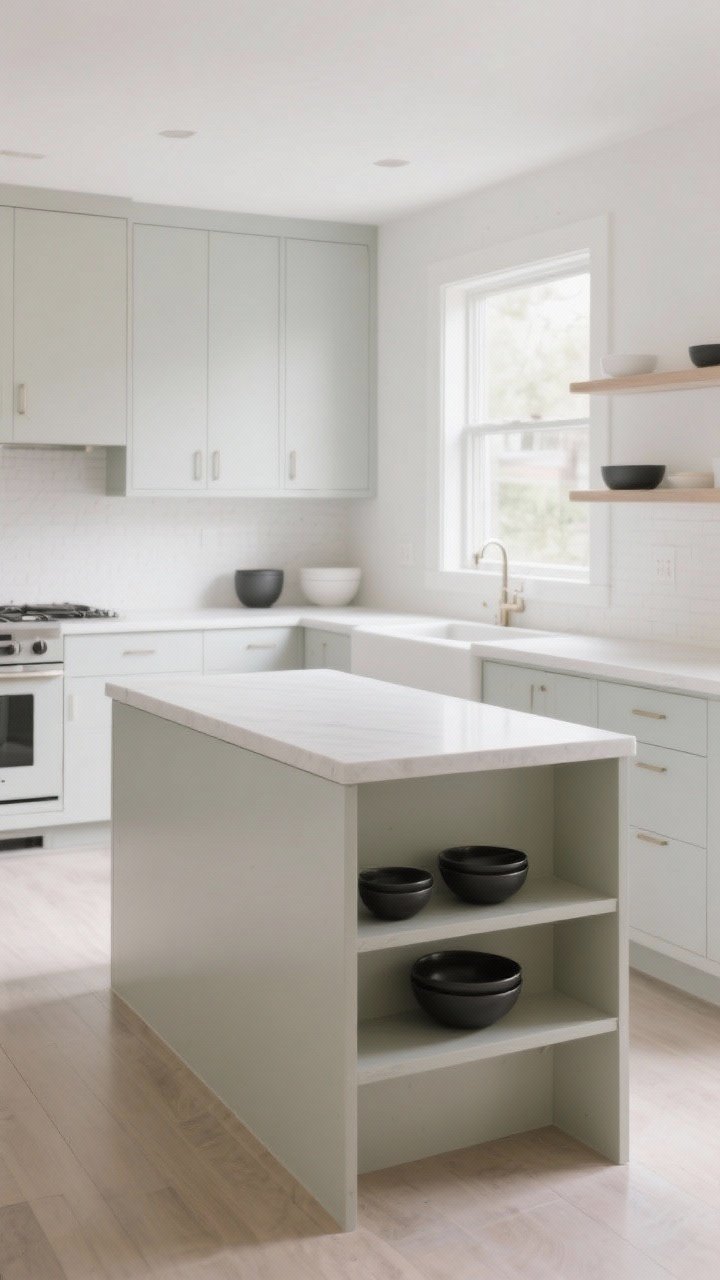
Chunky islands eat visual space. A lean, narrow island gives you prep surface and storage without blocking the flow. Look for depths around 18–24 inches and keep the profile sleek so your eye glides right over it.
Tired of snacking when you’re not even hungry? This reset helps you stop the loop and feel back in control.
A simple reset for moments when cravings take over. Easy to use, easy to repeat, and designed to help you feel satisfied instead of stuck.
Why It Works
- Less visual bulk makes the room feel open.
- More maneuvering space keeps traffic moving—especially in galley layouts.
- Perfect for small appliances and quick prep.
Pro Tips
- Target 36 inches of clearance on all sides (min 32” in very tight spaces, FYI).
- Use a waterfall edge in a light tone to keep lines clean and airy.
- Consider open shelves on one side to reduce heaviness.
2. Mobile Islands You Can Roll Away
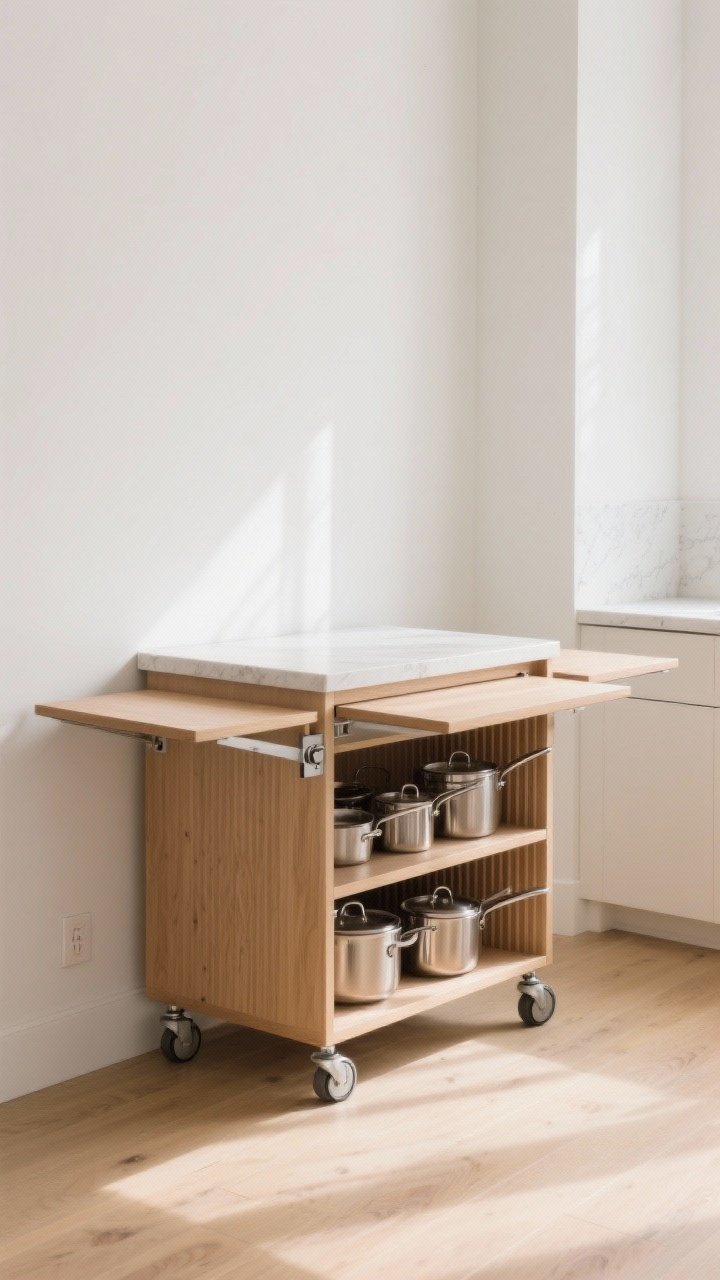
Commitment issues? Try a cart-style island with locking casters. You get counter space when you need it and a clean runway when you don’t. Plus, it’s renter-friendly and budget-smart.
Why It Works
- Flexible footprint adapts for cooking, serving, or cleaning.
- Visual calm when it’s tucked against a wall.
- Instant buffet on hosting nights.
Pro Tips
- Choose a cart with drop leaves for extra surface on demand.
- Match the counter finish to your kitchen for cohesion.
- Opt for open slatted shelves to keep sightlines clear.
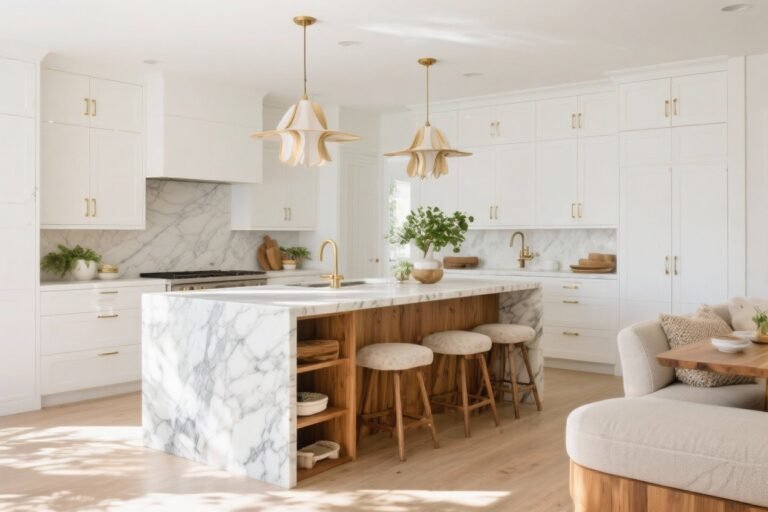
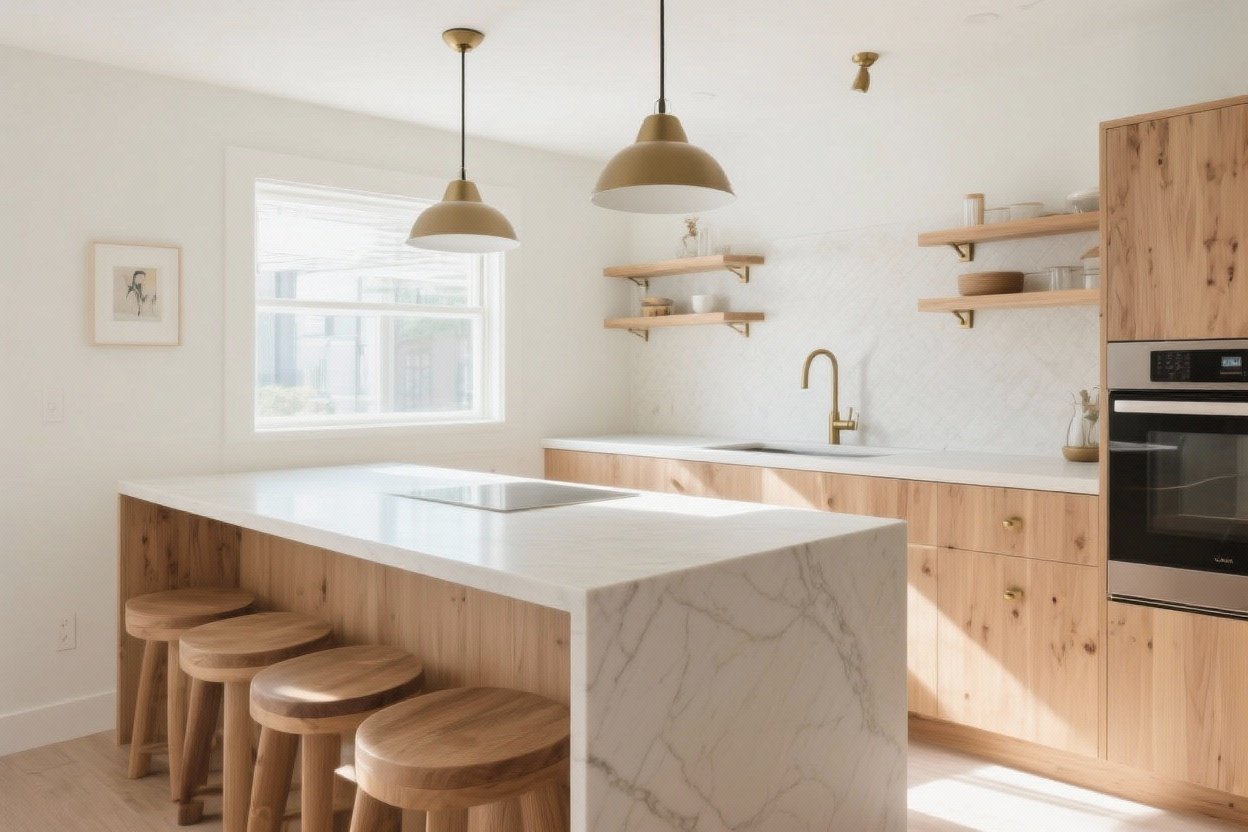
3. Waterfall Countertops That Stretch the Eye
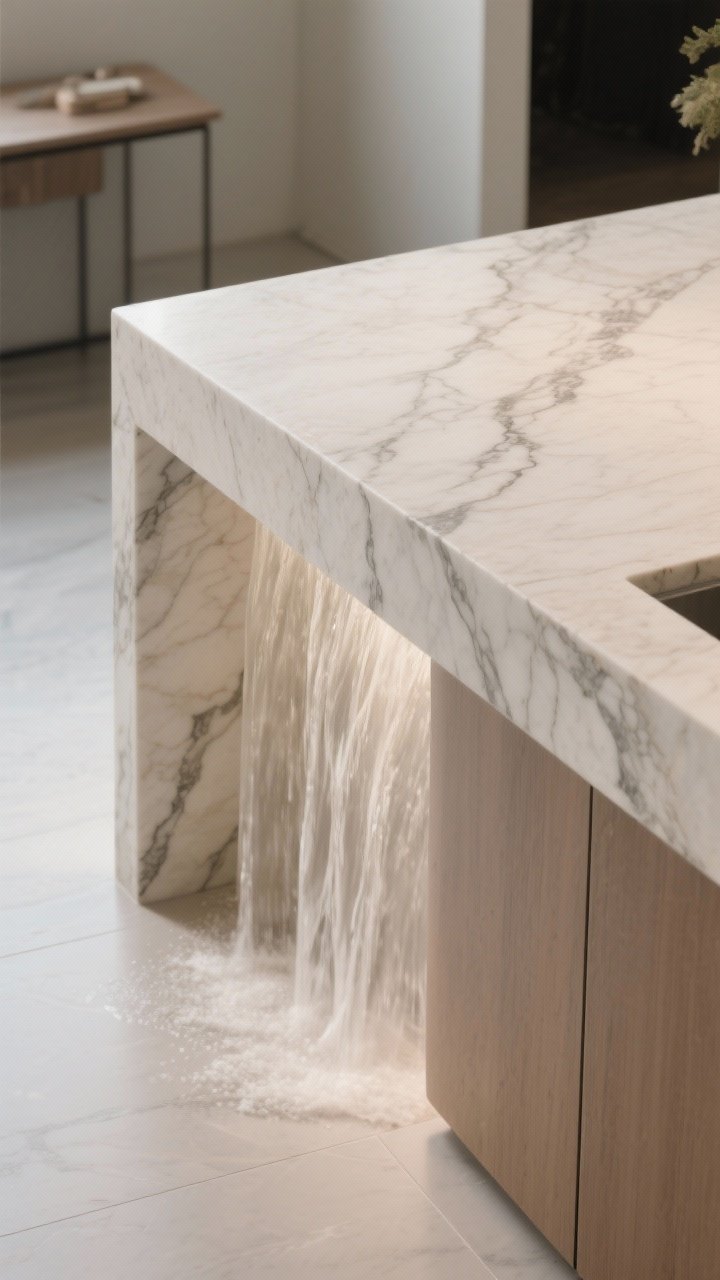
Waterfall edges—where the countertop drops to the floor—create a continuous line that looks luxe and seamless. In small kitchens, that smooth visual flow makes everything feel bigger and calmer.
Why It Works
- Continuous lines reduce visual clutter.
- Light stone reflects more light and brightens the space.
- Protects cabinet sides from scuffs in tight walkways.
Pro Tips
- Go for thin profiles (1.2–2 cm) for a lighter look.
- Choose veining that runs over the edge to elongate the island.
- Pair with flush-panel cabinetry for a minimal vibe.
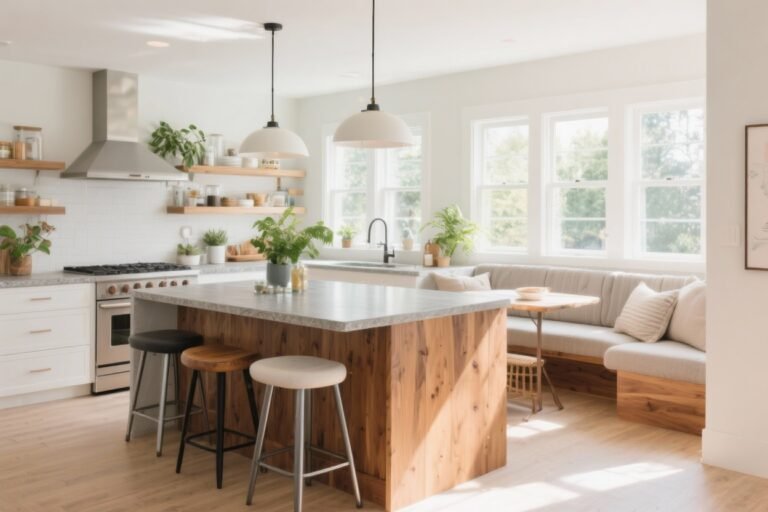
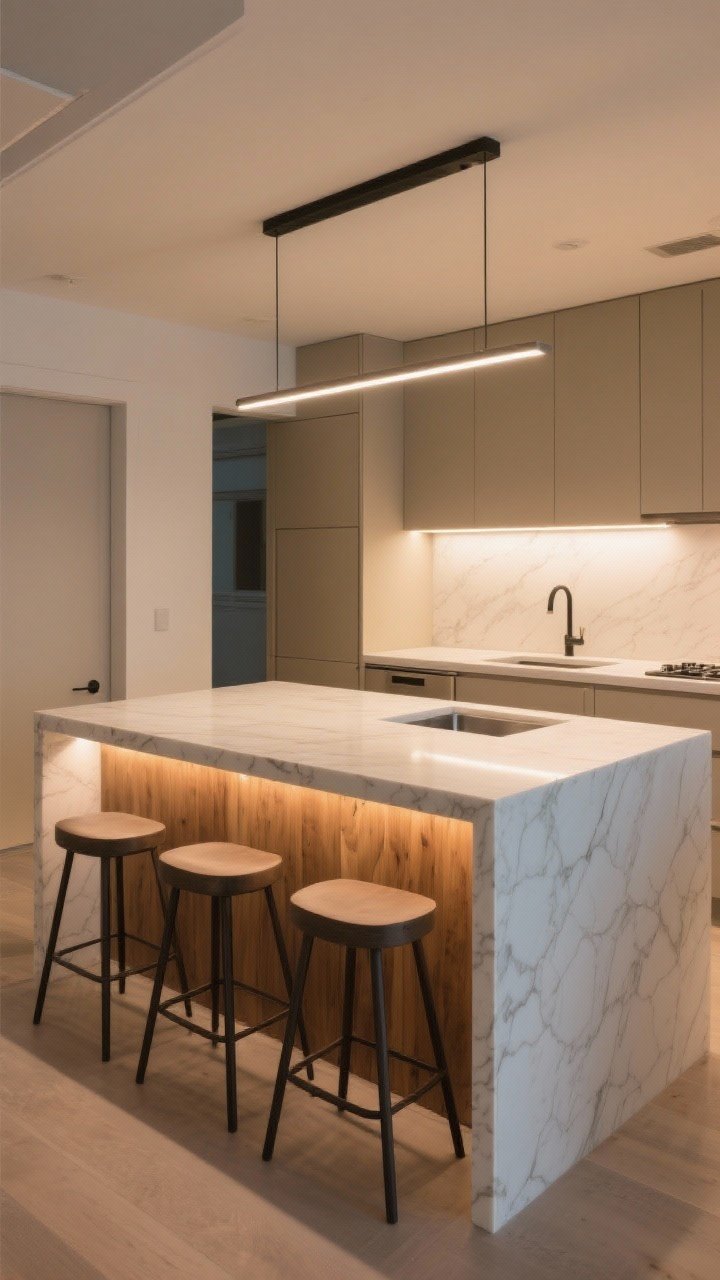
4. Two-Tier Tops for Prep and Perch
Need a spot to chop and a place for coffee? A two-level island gives you a lower prep surface and a raised bar for seating—without sacrificing workflow. It also hides the sink side if you’re a “let the dishes soak” person. No judgment.
Why It Works
- Defined zones for cooking vs. hanging out.
- Visual separation makes the busy side look tidy.
- Bar-height perch fits small stools easily.
Pro Tips
- Keep the overhang at 10–12 inches for knees to be happy.
- Use a durable surface (quartz, butcher block) on the lower tier.
- Run LED strips under the bar lip for a glowy, airy effect.
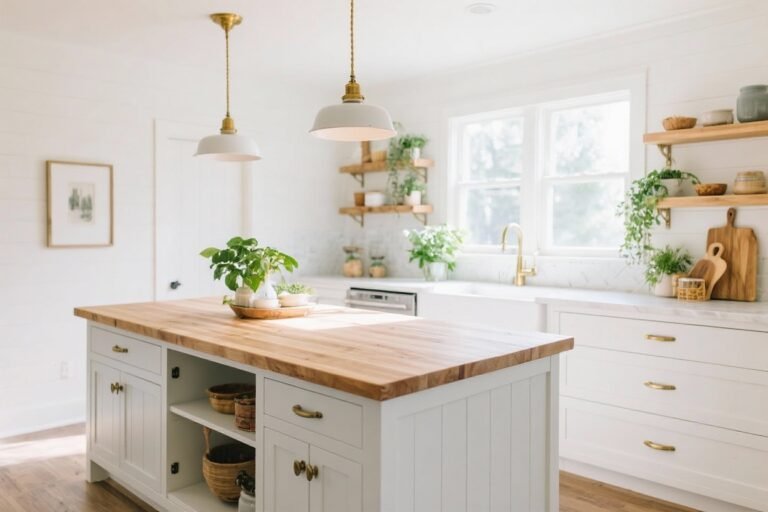
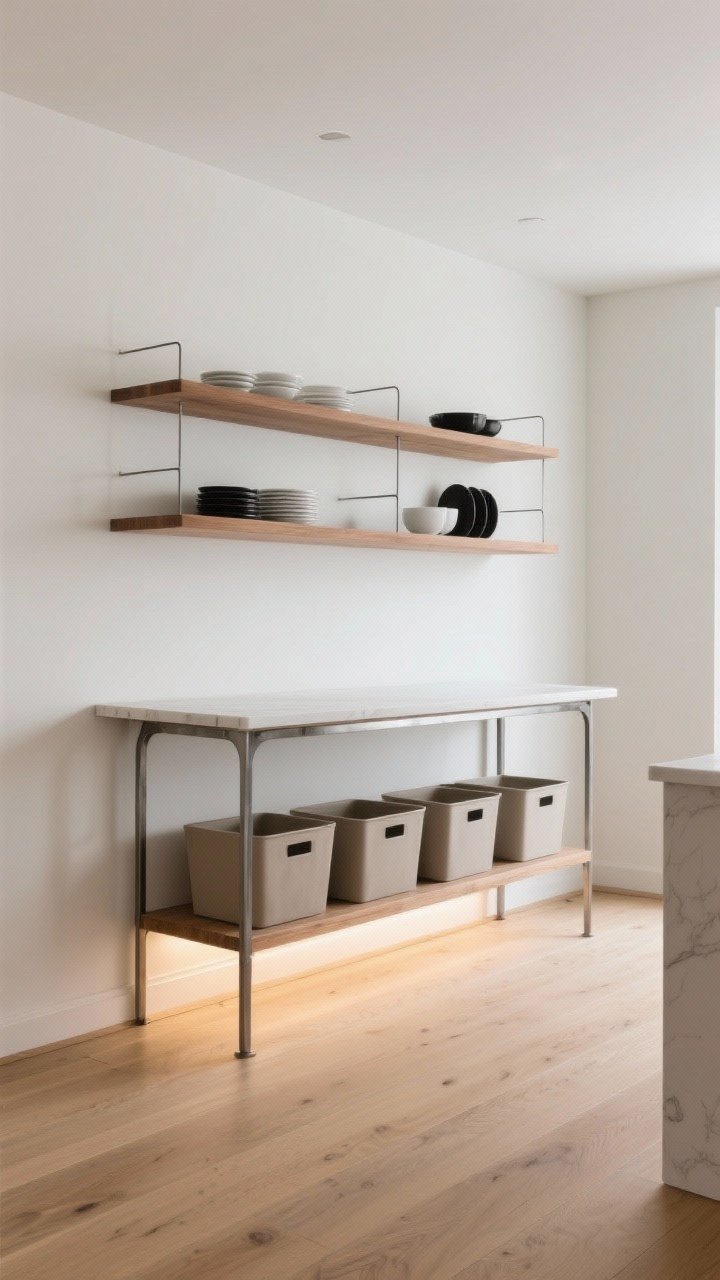
5. Open Base Islands That Breathe
Cabinets are great, but in a small kitchen, an open base can be even better. Think leggy console style with shelves or a metal frame. You still get storage, but the space feels lighter and bigger.
Transform Your Home With 7,250+ Stunning Landscaping Designs—No Expensive Designers Needed!
- 🌿 Access 7,250+ stunning landscaping designs.
- 💰 Save thousands—no pro designer needed.
- 🏡 Plans for gardens, patios, walkways, and more.
- ✨ Simple, beginner-friendly DIY layouts.
- 🛠️ Customize any design to fit your yard.
Why It Works
- Increased floor visibility tricks the eye into seeing more space.
- Airy silhouettes soften compact rooms.
- Easy access to baskets, bowls, and cookbooks.
Pro Tips
- Style with matching bins for a clean, curated look.
- Keep shelf contents monochrome to avoid visual noise.
- Add a toe-kick light to highlight the floating effect.

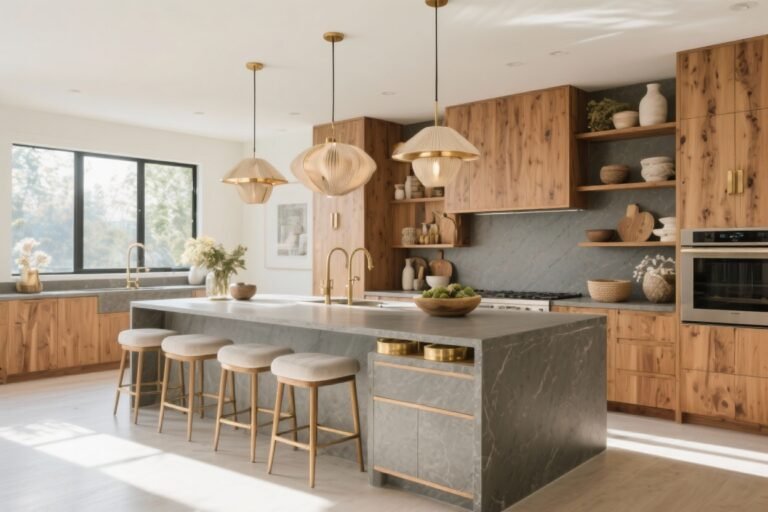
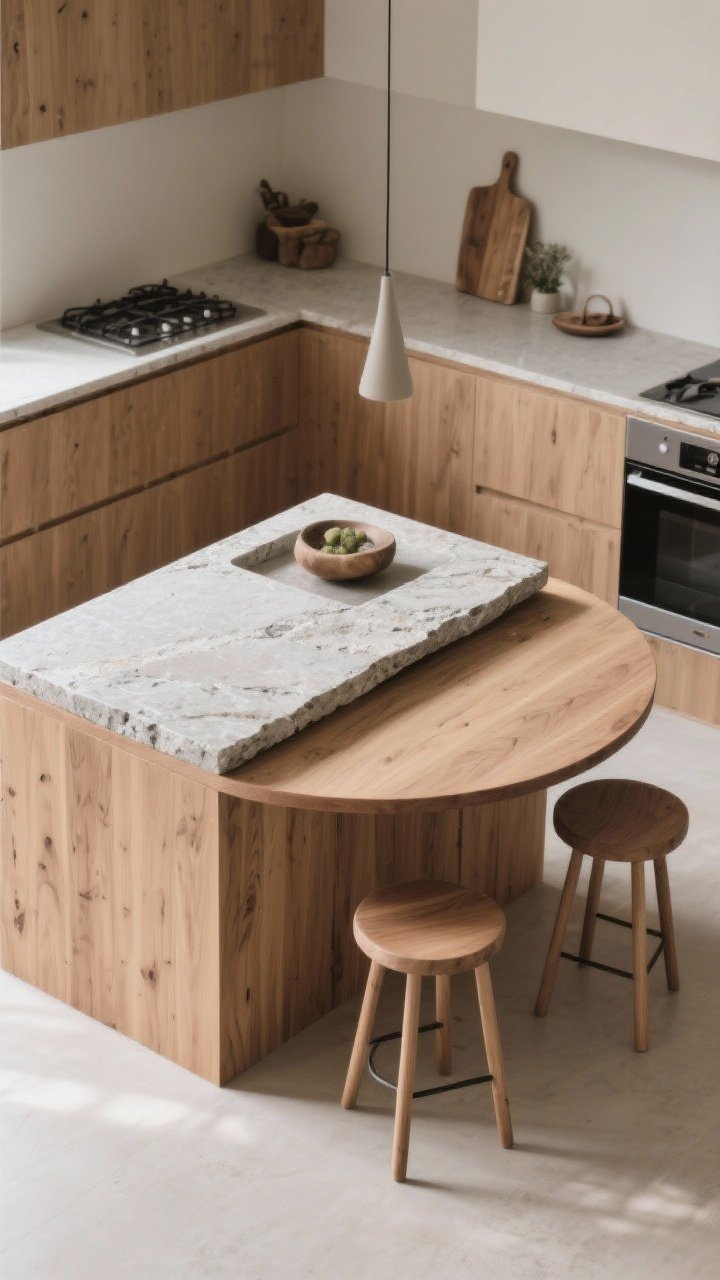
6. Island + Dining Table Hybrids
When space is tight, one surface can do it all. An island-table hybrid gives you prep space most days and a dining setup when friends come over. It’s the multitasker of your dreams.
Why It Works
- One footprint for cooking, working, and eating.
- Softened edges (think rounded or oval) ease movement.
- Legroom feels more generous than a standard bar overhang.
Pro Tips
- Use contrasting materials—stone for prep, wood for dining—to define zones.
- Choose backless stools that tuck in completely.
- Keep chairs/stools to two or three for a small footprint.
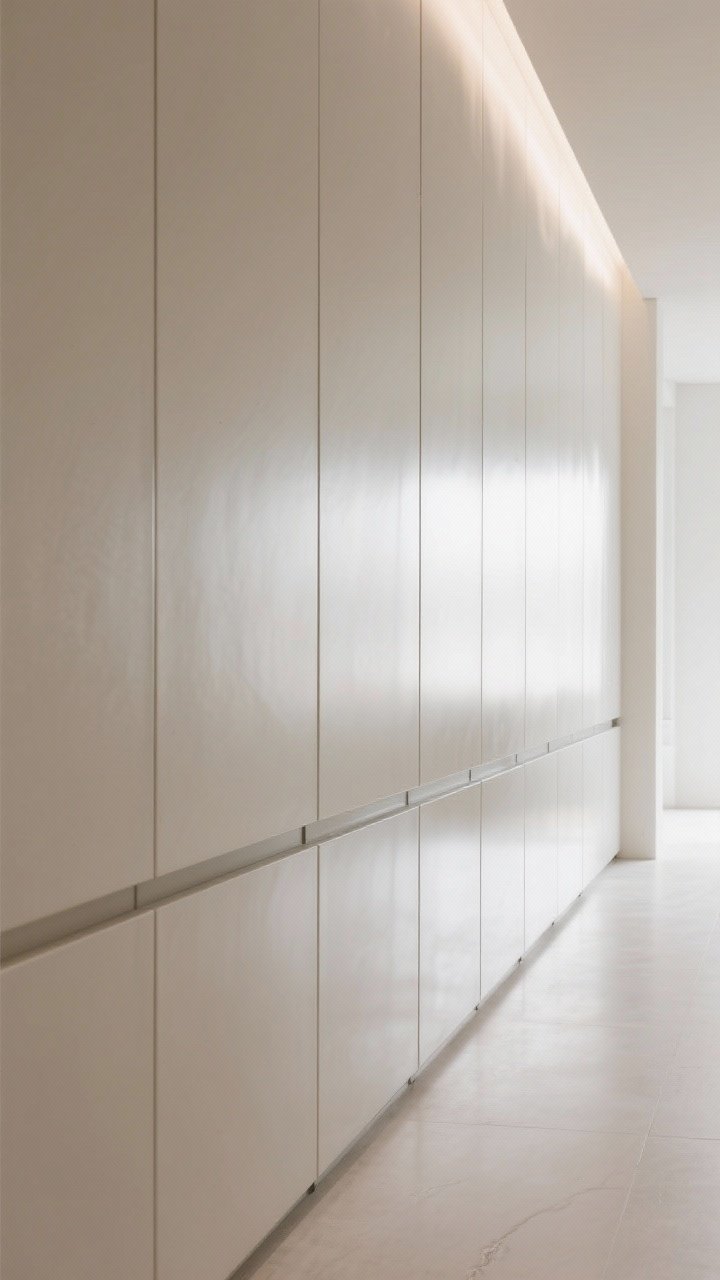
7. Mirror, Glass, and Gloss to Bounce Light
Reflective finishes are your secret weapon. Glass-front cabinets, mirrored toe-kicks, and glossy paint on the island bounce light around and make the whole space feel brighter and larger. It’s basically good lighting’s bestie.
Why It Works
- Light reflection = bigger feel, especially in window-poor kitchens.
- Glossy finishes lift the mood and look modern.
- Mirrored accents disappear visually while doing the most.
Pro Tips
- Try a mirrored toe-kick so the island looks like it’s floating.
- Use semi-gloss or high-gloss paint on the island base.
- Keep fingerprints at bay with matte pulls or integrated handles.
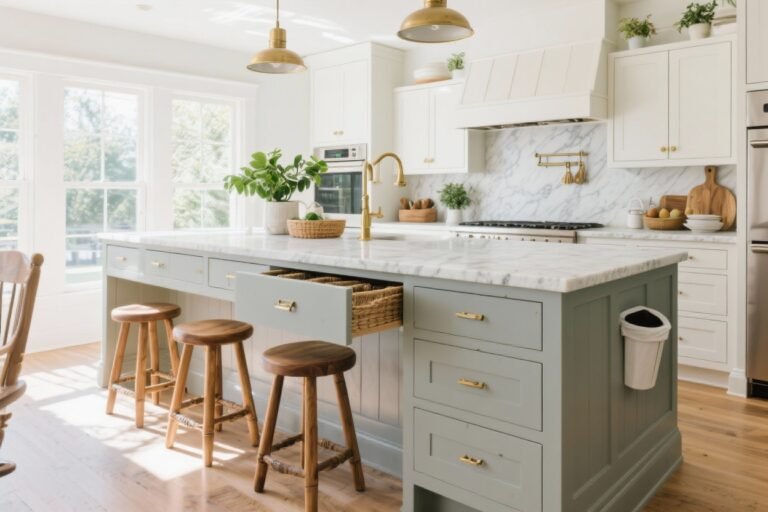
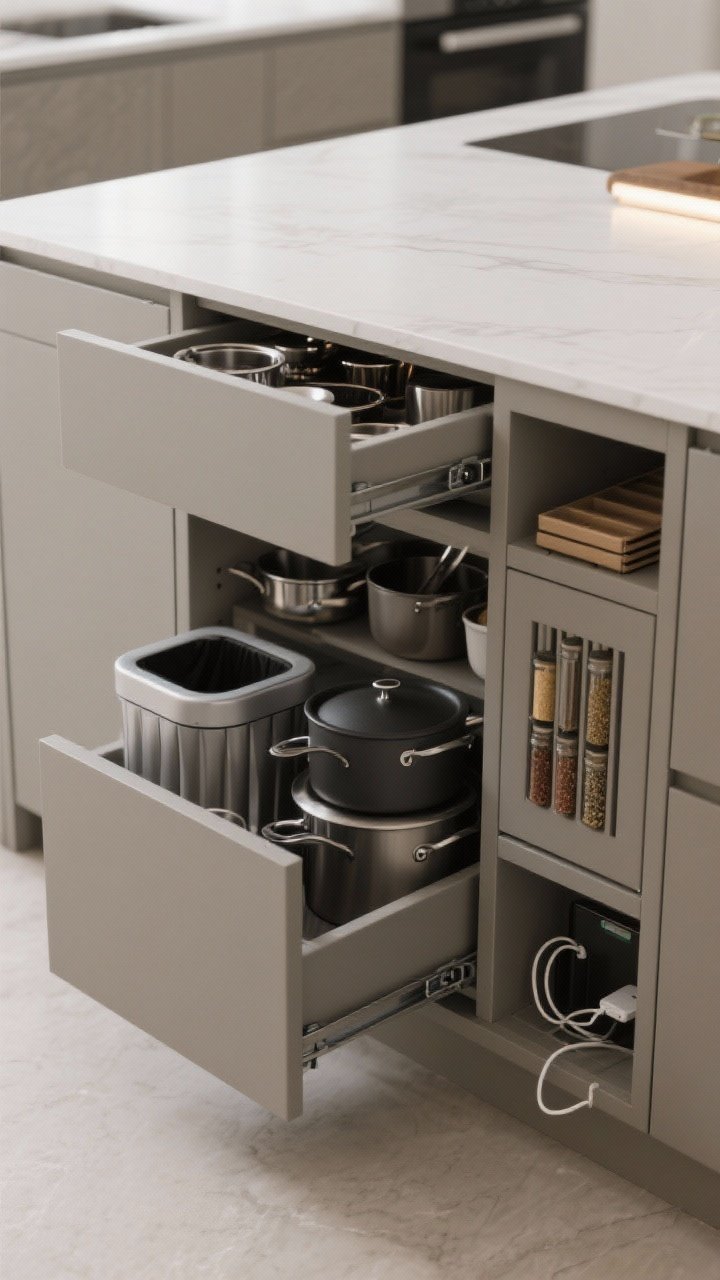
8. Smart Storage That Hides the Chaos

Small kitchens can’t waste a single inch. Build storage into the island that keeps clutter invisible: deep drawers, pull-out trash, slim spice racks, and charging cubbies. Your countertops will finally breathe.
Why It Works
- Less clutter makes rooms feel calmer and bigger.
- Vertical dividers use height for trays and cutting boards.
- Hidden charging keeps cords from stealing the spotlight.
Pro Tips
- Opt for drawer-over-door configurations for easy access.
- Use full-extension slides so nothing gets lost in the back.
- Add soft-close hardware to keep the vibe peaceful.
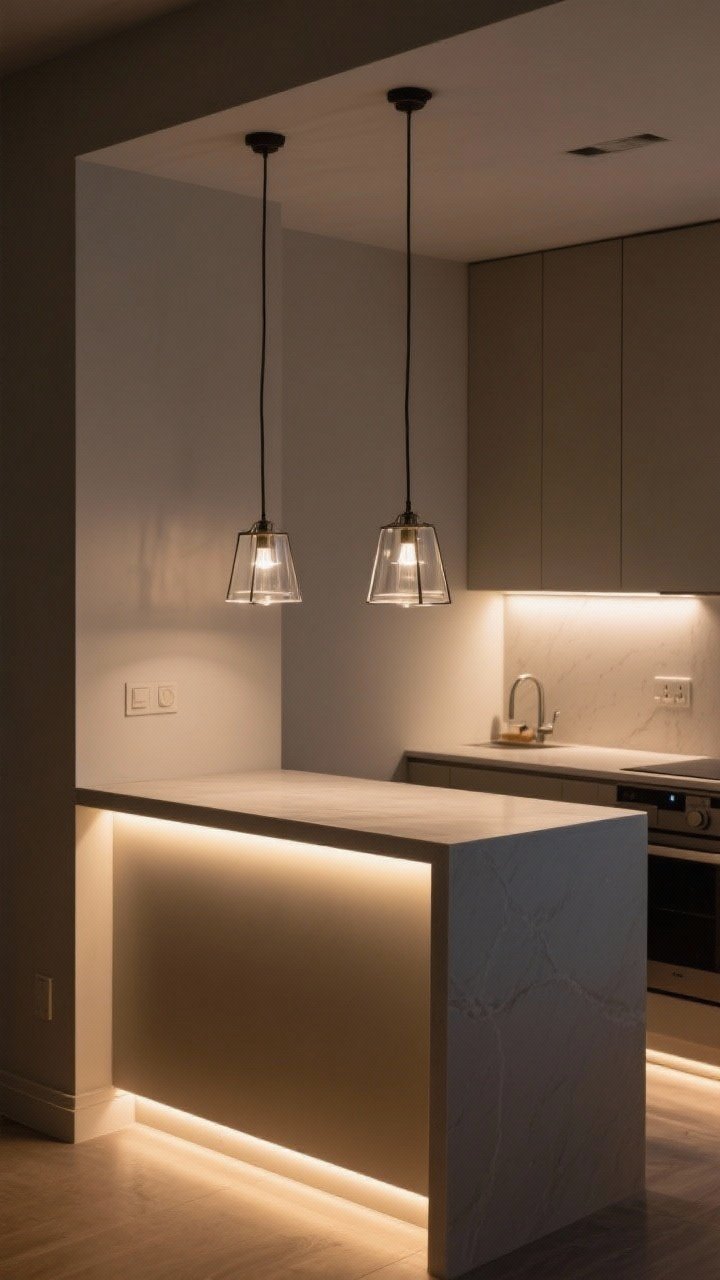
9. Lighting That Flatters and Expands
The right lighting can visually widen your kitchen and make the island the star. Layered lighting—pendants, under-counter LEDs, and a soft glow at the base—spreads light evenly so there are no dark corners shrinking the room.
Why It Works
- Even illumination expands perceived space.
- Scaled pendants add drama without crowding.
- Toe-kick lighting creates a floating illusion.
Pro Tips
- Use two smaller pendants instead of one massive one in tight spaces.
- Choose clear or open-frame pendants to keep sightlines clean.
- Set everything on dimmers for instant mood control, IMO essential.
10. Color Tricks and Camouflage
Color is a magician. A well-chosen palette can make your island recede or shine—whichever makes your kitchen feel bigger. Monochrome magic or soft contrast both keep the look cohesive and airy.
Why It Works
- Tonal matching blends the island into the room so it reads as one unit.
- Light, low-contrast palettes expand visual boundaries.
- Dark base + light top grounds the island without adding weight.
Pro Tips
- Match the island base to the floor color to visually elongate the footprint.
- Use soft neutrals (warm gray, greige, pale sage) for openness.
- If you love color, keep it muted and matte so it doesn’t dominate.
Quick Sizing & Layout Cheatsheet
- Minimum island width: 36–42 inches for prep, 24 inches for a slim console.
- Counter height: 36 inches (standard), 42 inches (bar).
- Seating space: 24 inches per person; 10–12-inch overhang.
- Clearance: Aim for 36 inches around, 40+ near appliances.
Bottom line: a small kitchen doesn’t mean small ideas. Choose an island that’s light on its feet, heavy on function, and styled to blend—not bully. With the right proportions, smart storage, and a few visual tricks, your kitchen will feel bigger, brighter, and way more you. Now, who’s making the coffee?