10 Kitchen Island Ideas With Seating That Actually Work for Real Life
You want a kitchen island that’s gorgeous, functional, and not a total traffic jam. Same. The trick? Balancing proportions, storage, and seating so your island feels like the heart of your home—not a bulky obstacle course. These 10 kitchen island ideas with seating are stylish, realistic, and yes, designed for actual humans who cook, spill, and host friends who never leave.
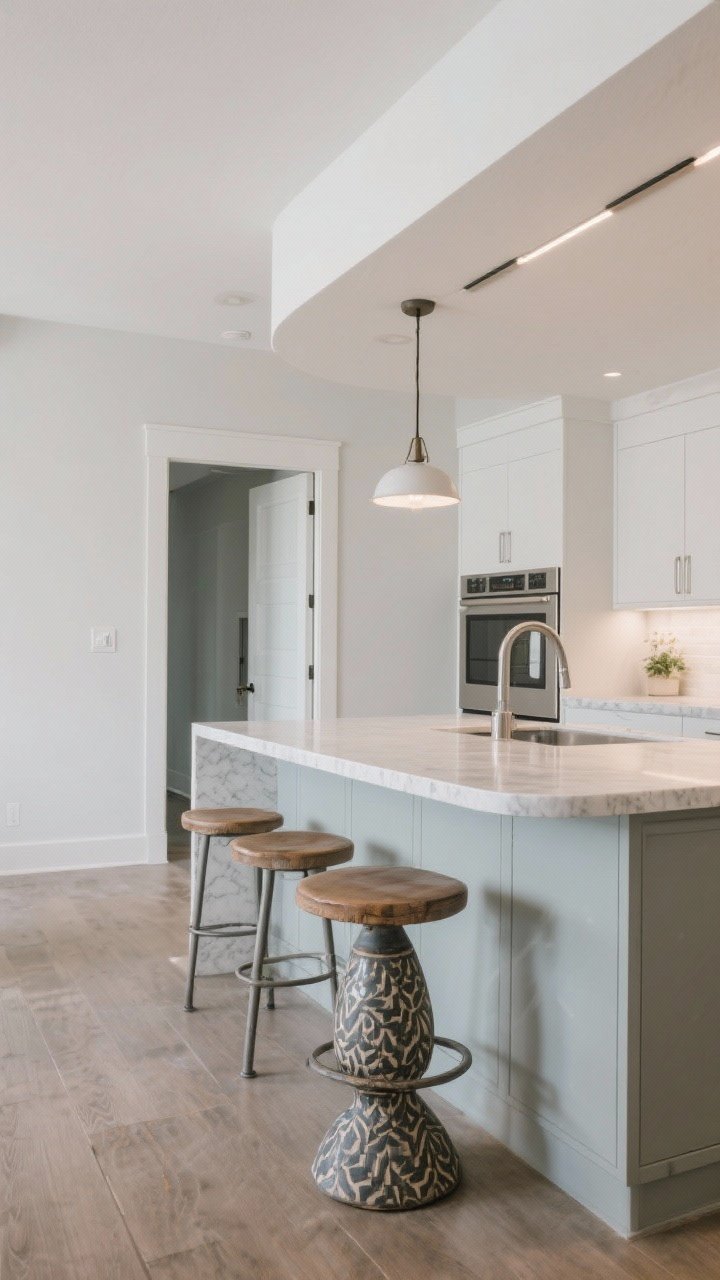
1. The “Tuck-In” Overhang That Saves Space
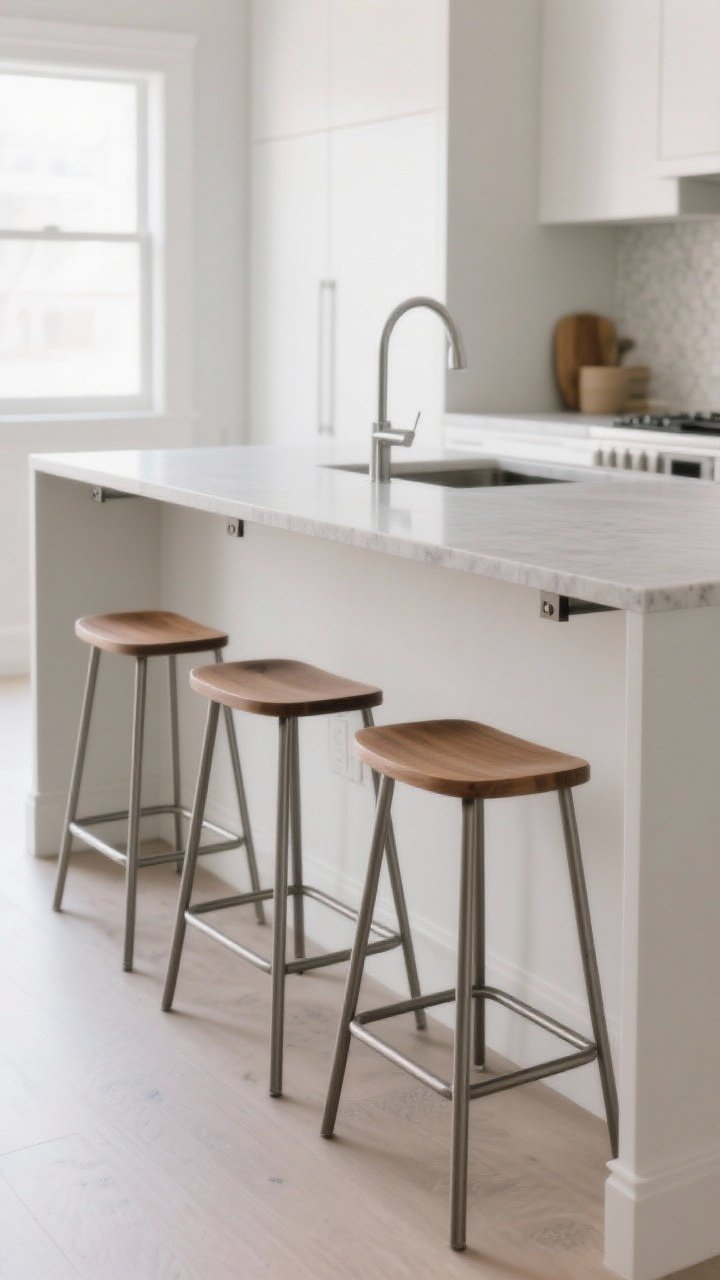
If you don’t have room for a sprawling island, don’t sweat it. A simple countertop overhang of 10–12 inches creates comfy knee space so stools slide right under when not in use. It keeps your walkways clear and your kitchen feeling bigger.
Tired of snacking when you’re not even hungry? This reset helps you stop the loop and feel back in control.
A simple reset for moments when cravings take over. Easy to use, easy to repeat, and designed to help you feel satisfied instead of stuck.
Why It Works
- Cleaner lines: Hidden stools = zero visual clutter.
- Better flow: You’ll maintain the golden 36–42 inches of walkway around the island.
- Budget-friendly: No need for custom legs or complicated builds.
Pro Tips
- Use counter supports like low-profile brackets for stone tops.
- Choose backless stools with narrow footprints (16–18 inches wide).
- Mind the height: 24–26 inches for counter height; 28–30 inches for bar height (FYI: counter height is more flexible for families).
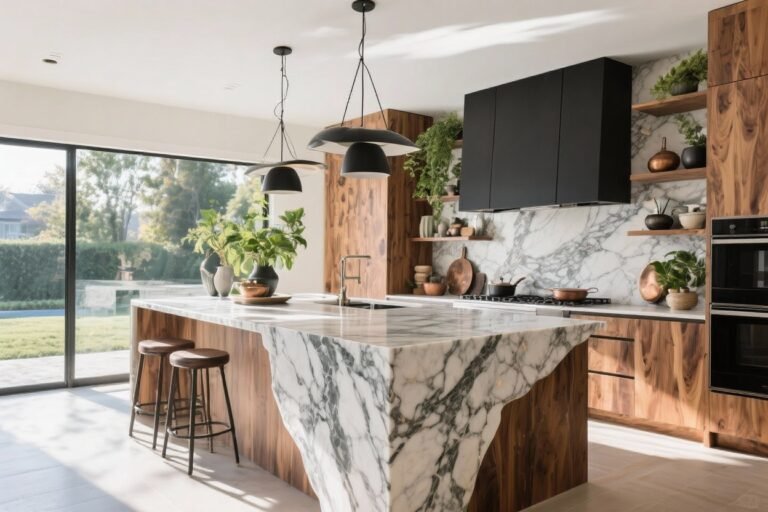
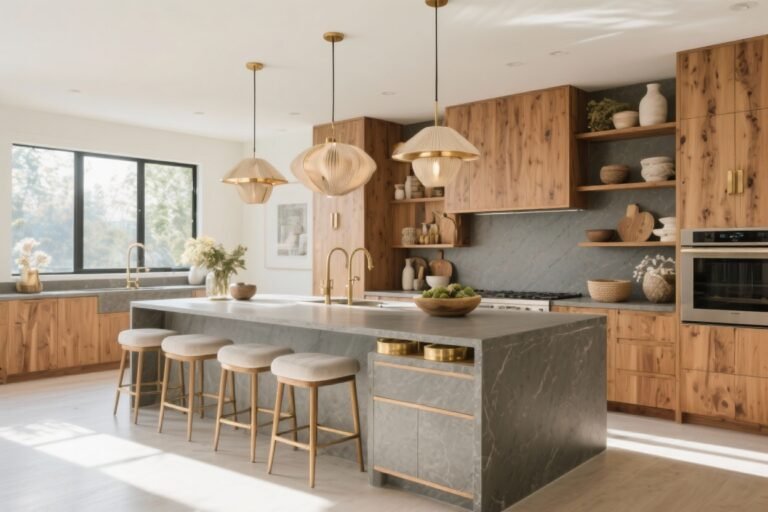
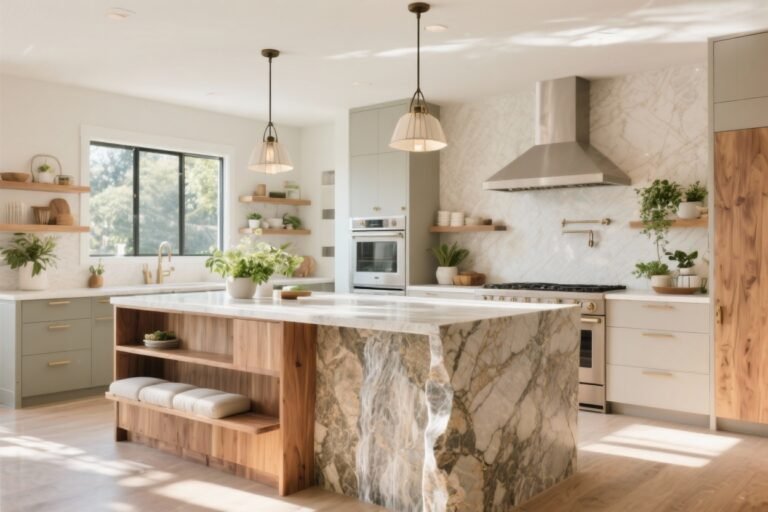
2. The Waterfall Edge With Hidden Seating
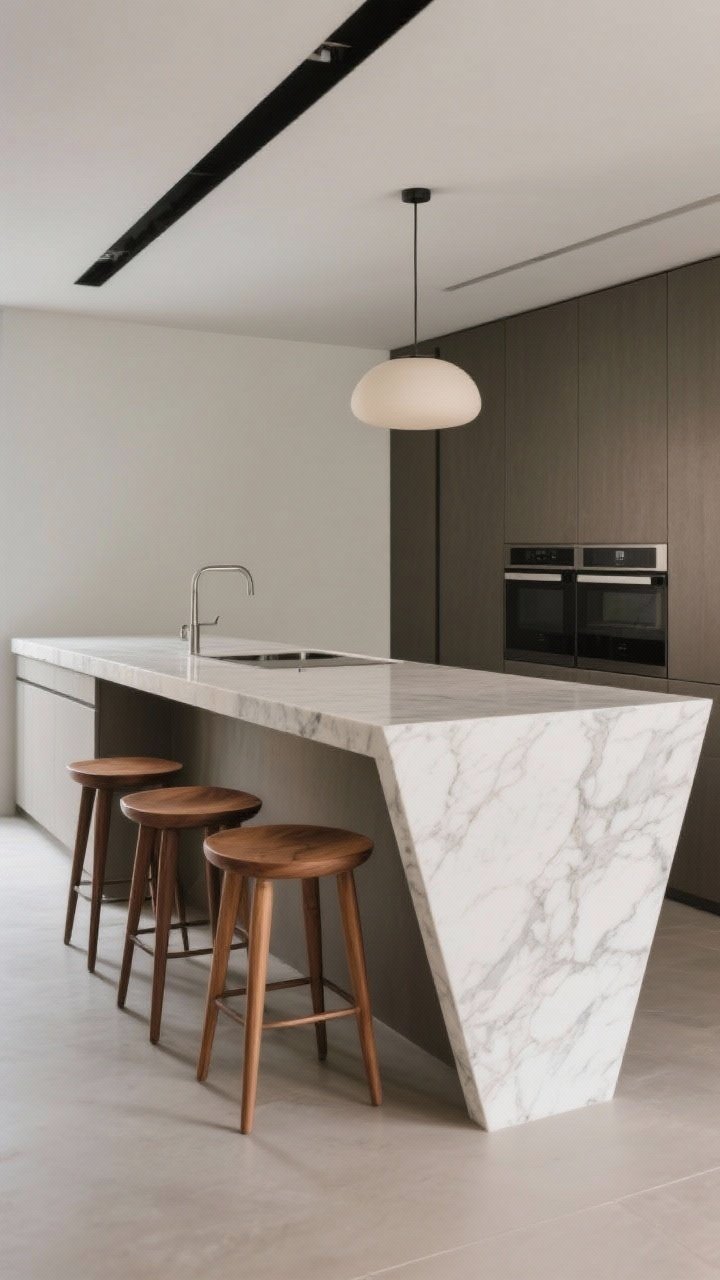
Want designer energy without sacrificing function? A waterfall edge on one side makes your island look sculptural while hiding a sleek row of stools. Form meets function without screaming “breakfast bar.”
Why It Works
- Durable edges resist chipping and keep everything feeling polished.
- Stools tuck under the slab for a clean-lined profile.
- Pairs beautifully with wood, quartz, or marble patterns.
Pro Tips
- Contrast the waterfall with warm wood stools for balance.
- Choose a matte finish to avoid fingerprints (IMO, a lifesaver).
- Stick to 3 stools max for a standard 6–7 foot island.
3. The Two-Tier Island That Actually Hides the Mess
If you live to entertain but never want guests to see your chopping chaos, try a two-tier island. The lower tier is your prep zone; the raised tier is where everyone eats, works, or pretends they’re helping.
Why It Works
- Visual separation makes your kitchen look tidy, even mid-meal.
- Staggered heights are ergonomic: 36 inches for prep, 42 inches for seating.
- Perfect for homes where the island faces living areas.
Pro Tips
- Use the raised tier as a splash shield for sinks or cooktops.
- Stools with backs are more comfortable at bar height.
- Run power on the raised side for laptops and chargers.
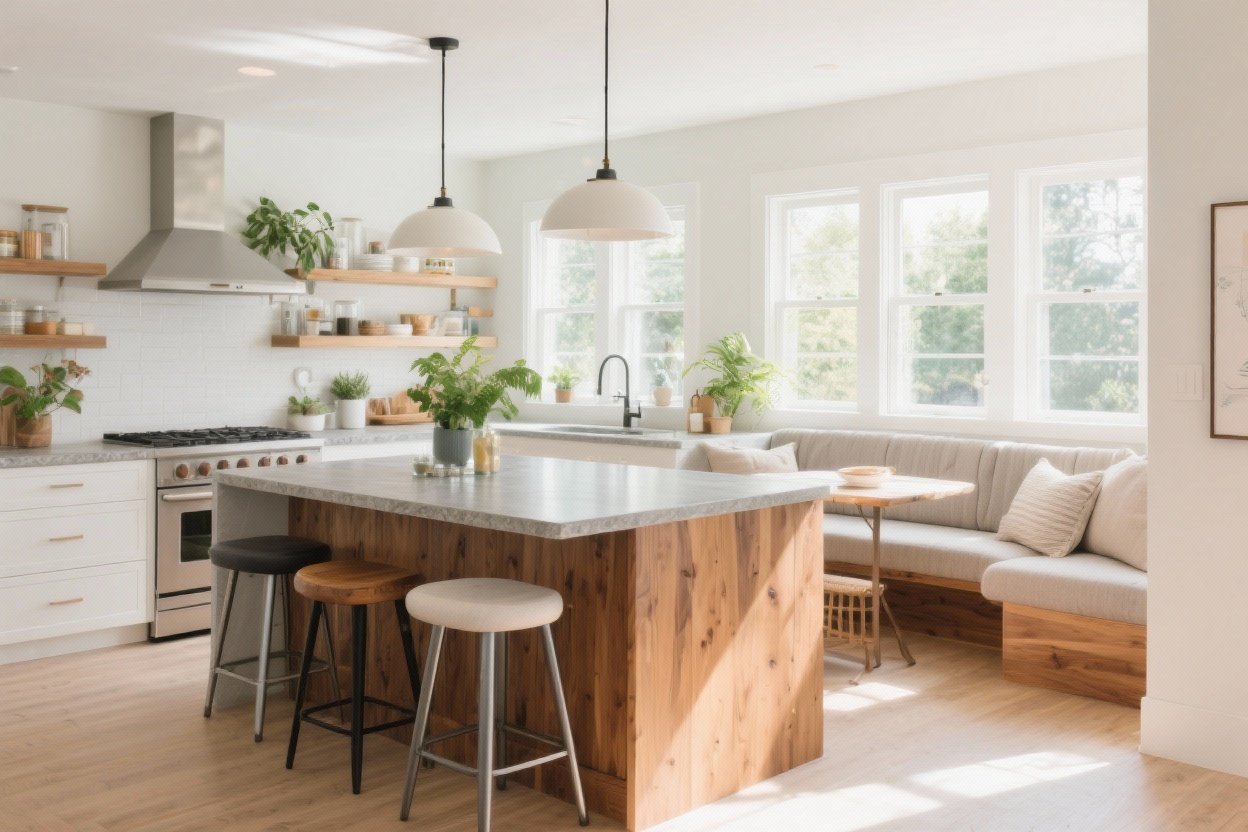
4. The End-Cap Banquette (aka The Comfy Corner)
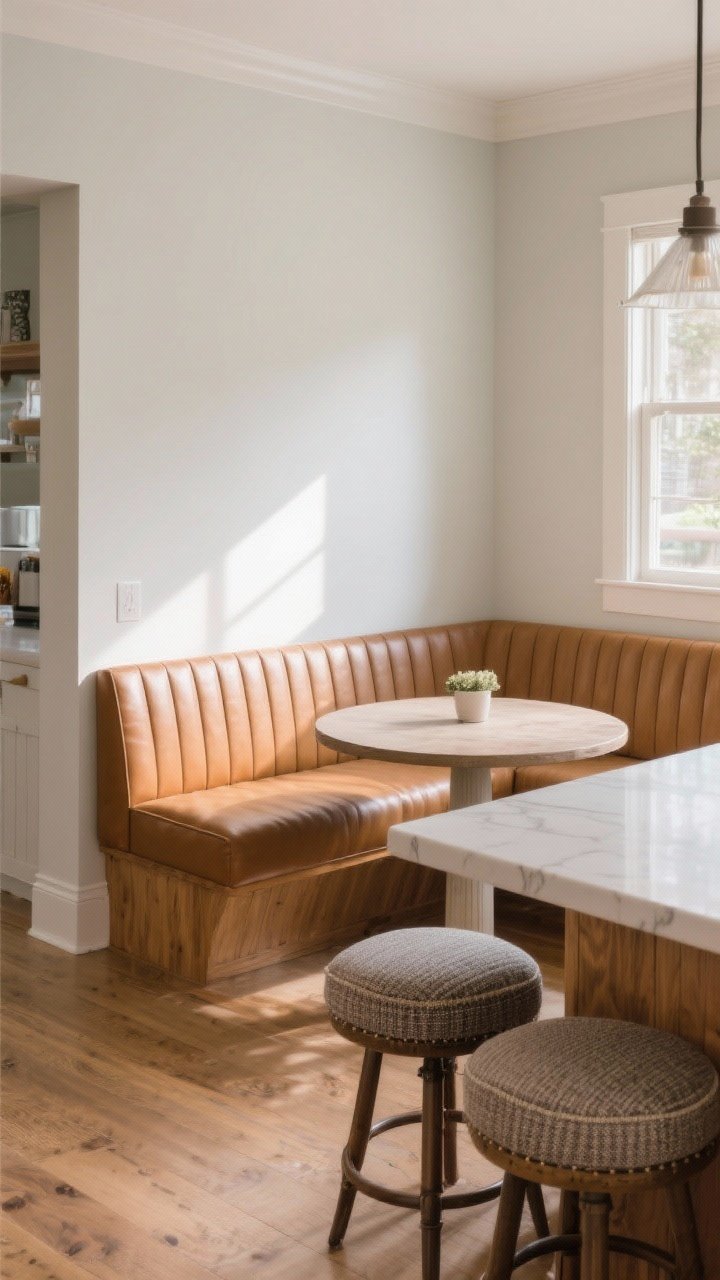
Who says island seating has to be stools? Attach a compact banquette or upholstered bench to one end of your island and add a small round table. Boom—instant breakfast nook without building a whole booth.
Why It Works
- Soft seating makes the kitchen feel cozy and welcoming.
- A round table prevents awkward corner bumps and keeps the flow.
- Great for kids, casual dinners, or laptop time.
Pro Tips
- Choose performance fabric or faux leather for easy cleanup.
- Round tables look best at 36–40 inches in diameter.
- Repeat the bench fabric in bar stool cushions for a pulled-together look.
5. The Overhang-Only Peninsula for Tight Spaces
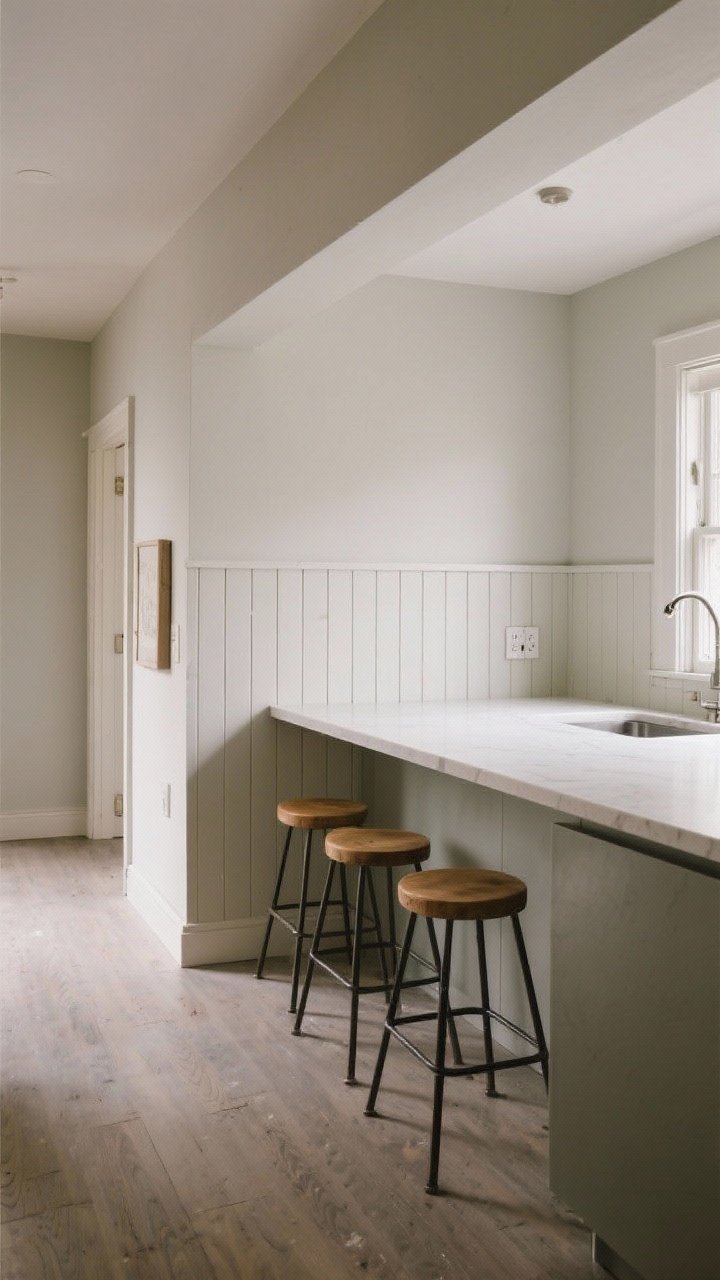
Open concept, small footprint? Meet the peninsula with seating. It’s like an island that hugs a wall, giving you space to move while still offering a social perch.
Transform Your Home With 7,250+ Stunning Landscaping Designs—No Expensive Designers Needed!
- 🌿 Access 7,250+ stunning landscaping designs.
- 💰 Save thousands—no pro designer needed.
- 🏡 Plans for gardens, patios, walkways, and more.
- ✨ Simple, beginner-friendly DIY layouts.
- 🛠️ Customize any design to fit your yard.
Why It Works
- Maxes out corners without blocking pathways.
- Easier to add plumbing or power if it’s near existing runs.
- Feels custom when paired with paneling or beadboard on the back.
Pro Tips
- Keep seating on the open side only to avoid knee collisions.
- Use three small stools instead of two large ones to fit more people.
- Finish the back with a durable surface—feet and bags will scuff it.

6. Seating on the Short Side (L-Shaped Win)
Most people line stools along the long side of the island, but if your kitchen is more galley than great room, try seating on the short end. It creates an L-shaped perch that’s social and smart.
Why It Works
- Perfect for narrow kitchens where side clearance is tight.
- Makes conversations easier—people face each other, not just the cook’s back.
- Leaves the main prep side wide open.
Pro Tips
- Plan at least 24 inches per seat for elbow room.
- Add a subtle radius corner to soften the overhang and spare hips.
- Use one statement stool on the short side if space is super tight.
7. The Workhorse Island With Drawers + Charging
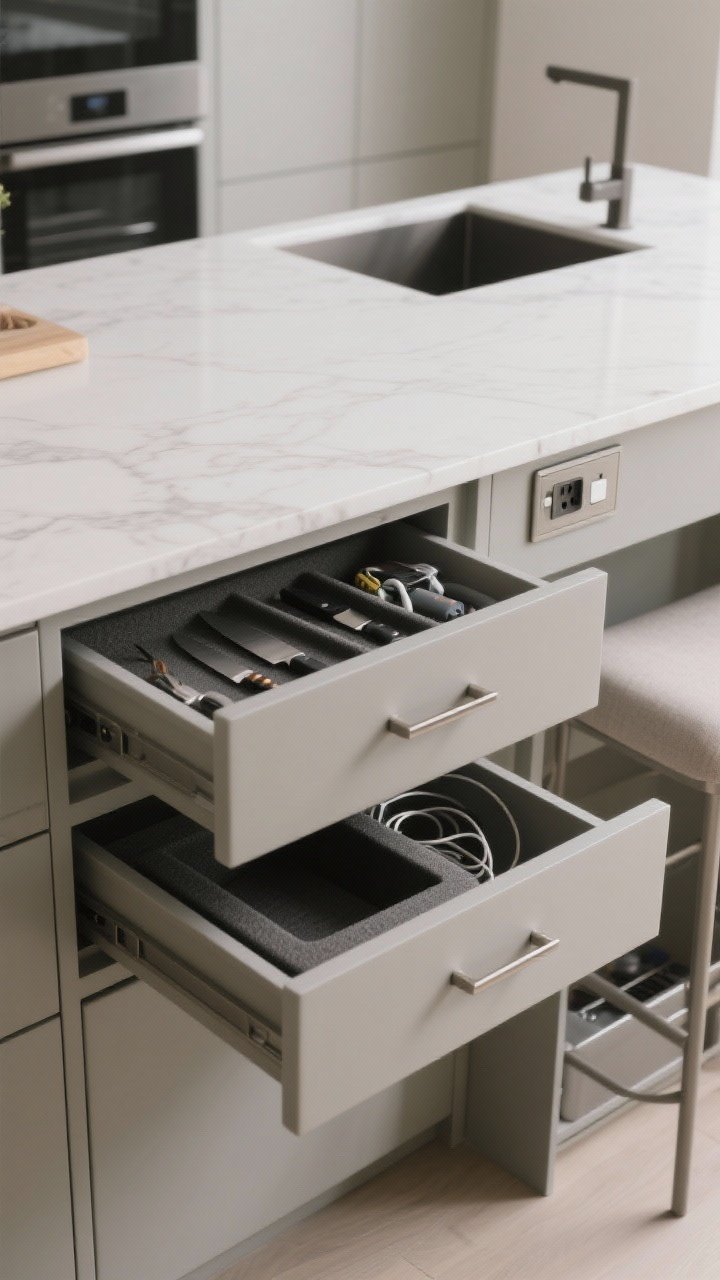
Real-life kitchens need storage—like, a lot of it. Build seating into an island that also has deep drawers, hidden trash, and a charging station. Function is the new fancy.
Why It Works
- Drawers hold pots, lunchboxes, and the mystery Tupperware collection.
- Power outlets on the seating side = no cables across prep zones.
- Trash and recycling close to prep saves steps (and sanity).
Pro Tips
- Use a flip-up outlet on the counter or a pop-out on the end panel.
- Choose soft-close drawers and long pulls for a modern look.
- Line drawers with foam inserts for knives and gadgets.
8. Mix Seating Styles: Stools + A Perch Bench
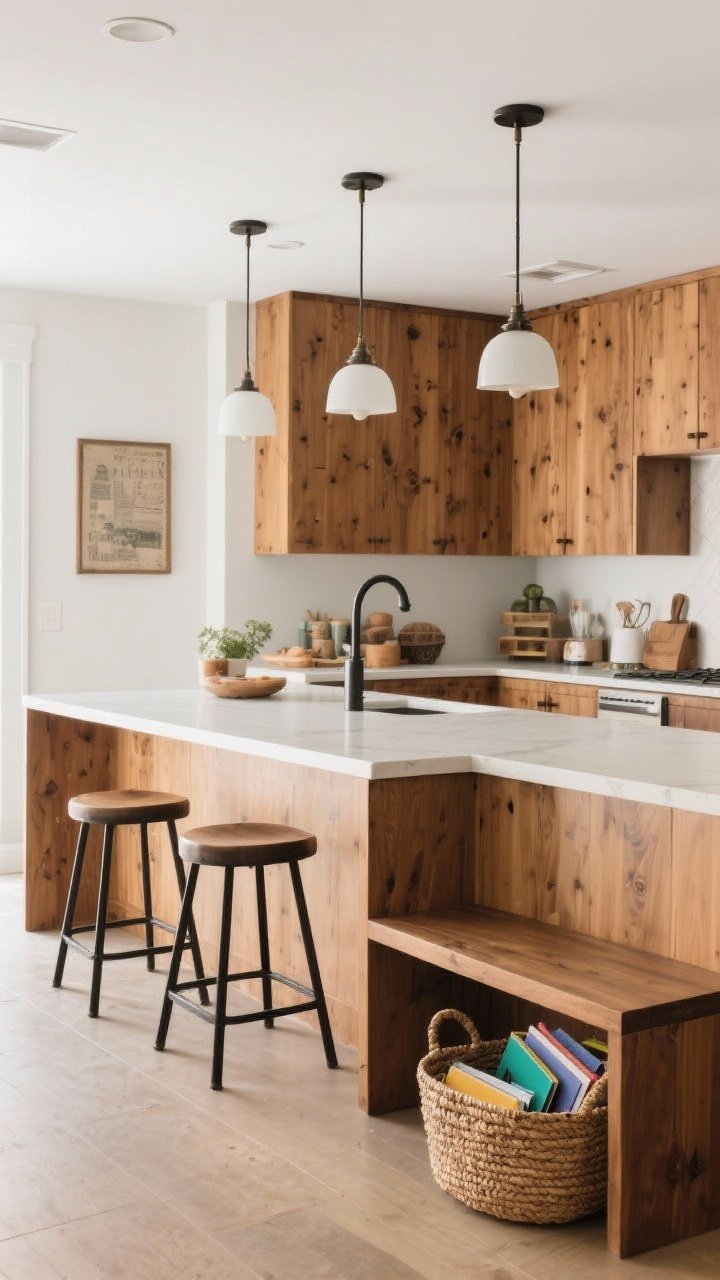
All stools, all the time can feel… expected. Mix things up with a couple of low-back stools on the long side and a small perch bench at the end. It looks collected and fits more people without crowding.
Why It Works
- Varied heights add visual interest and flexibility for different ages.
- A bench fits two littles or one adult + a dog (we don’t judge).
- Great in family homes where the kitchen is the hangout zone.
Pro Tips
- Stick to one unifying material (like black metal) across seating styles.
- Ensure the bench depth is 14–16 inches so knees don’t hit the island.
- Slide a basket under the bench for homework clutter or napkins.
9. The Rounded or Curved End for Squeeze-Friendly Seating
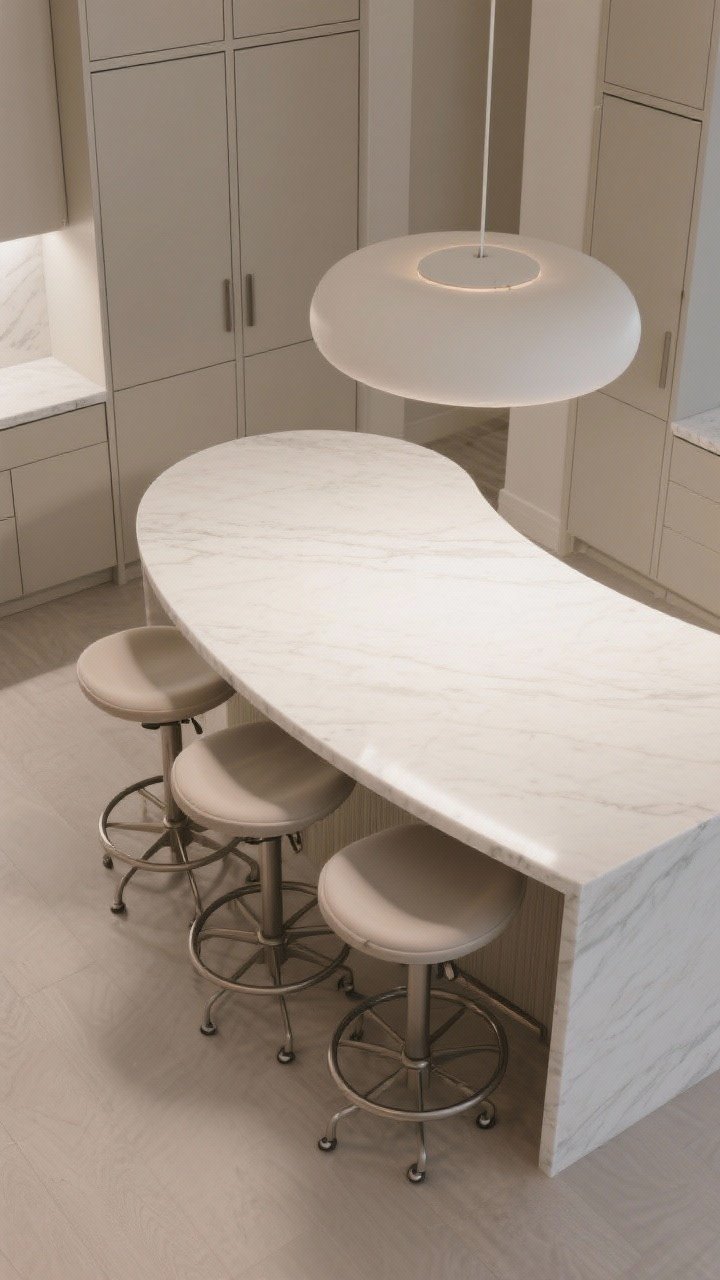
Sharp corners are the enemy of tight kitchens. A rounded or kidney-shaped end lets you sneak in an extra seat and keep traffic flowing. It’s friendly design—literally, no pokey corners.
Why It Works
- Ergonomic shape fits bodies better and invites lingering.
- Safer for kids and clumsy adults (hi, it’s me).
- Visually softens modern or boxy cabinetry.
Pro Tips
- For a 3-stool curve, aim for a 48–54 inch radius on the arc.
- Choose swivel stools to make getting in/out easier.
- Echo the curve with a rounded pendant or arched cabinet detail.
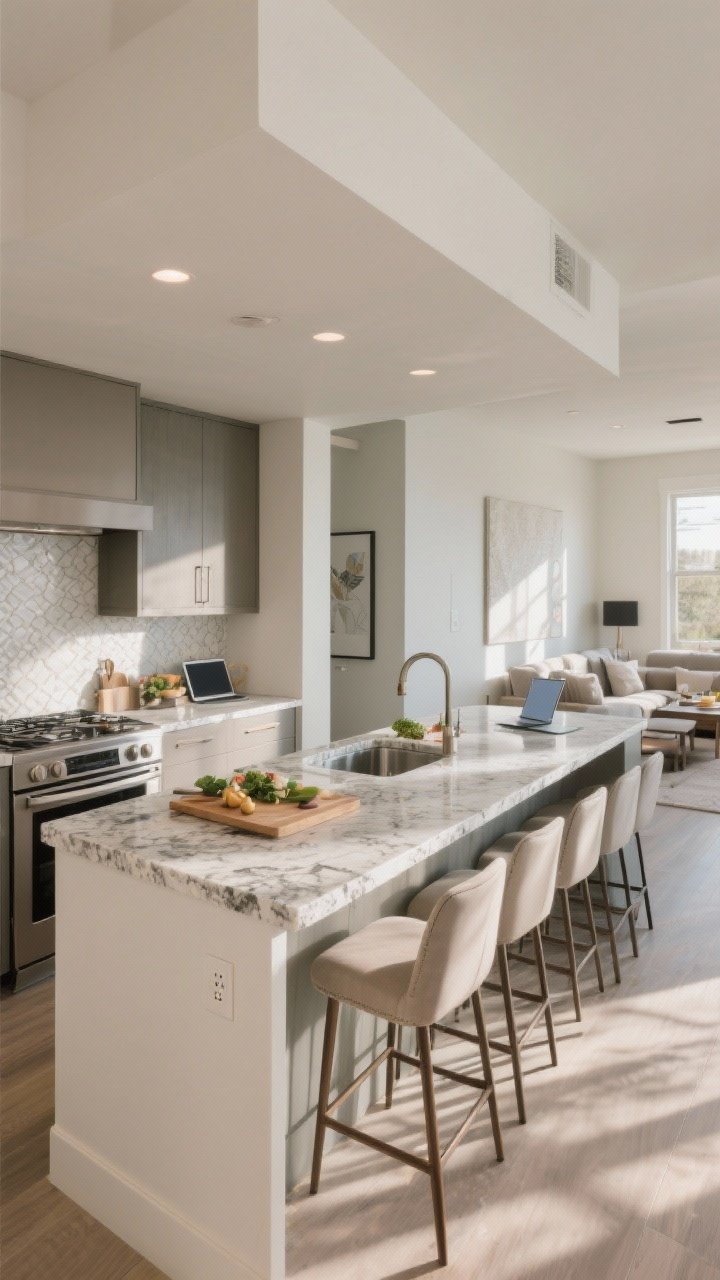
10. The Chef’s Island: Seating Away From The Mess
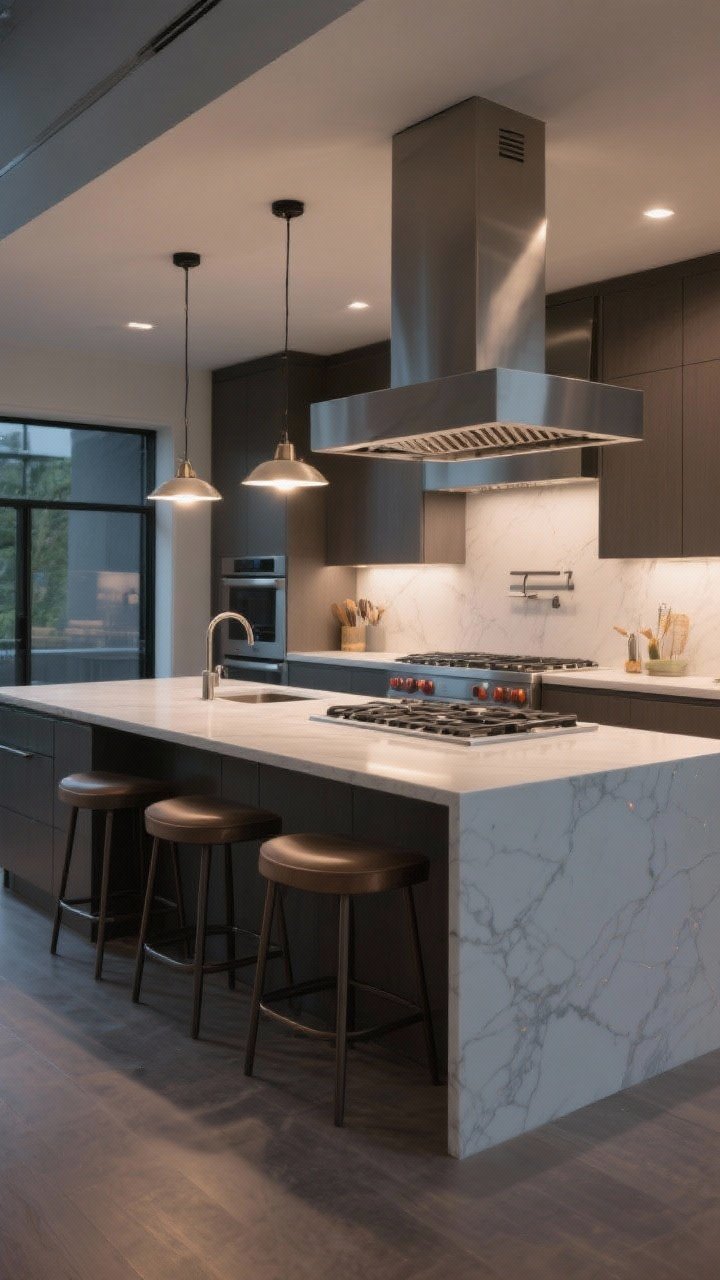
Yes, you can have a sink or cooktop in the island and still do seating—just be strategic. Place seating on the opposite side with a deeper overhang (12–15 inches) and keep at least 9–12 inches of buffer from the wet or hot zone.
Why It Works
- Guests can hang out without getting splashed or smoked out.
- Deep overhang keeps knees comfy and counters useful.
- Feels like a chef’s table—the best seat in the house.
Pro Tips
- Add a downdraft or powerful hood if a cooktop is on the island.
- Use heat- and stain-resistant counters (quartz or porcelain) near the cook zone.
- Slot a prep sink instead of a big basin to save space.
Design Quick-Hits to Nail Your Island Seating
- Spacing per seat: 24 inches wide, 12 inches deep for knees, 15 inches if you can.
- Clearances: 36 inches minimum around the island; 42–48 inches behind the cook zone is bliss.
- Lighting: Pendants 30–36 inches above the counter; scale them to 1/3 the island length for balance.
- Stool count: Island length ÷ 24 inches = number of seats (round down, always).
- Materials: Mix warm wood + matte metal + soft textiles for cozy, wipeable style.
Material and Finish Ideas That Hold Up
- Countertops: Quartz for low maintenance; butcher block at the seating end for warmth.
- Stools: Powder-coated metal frames with performance fabric or faux leather seats.
- Island base: Scuff-resistant paint in satin or matte; add foot rails to protect the finish.
Styling That Makes It Feel Intentional
- Layer two pendants for short islands, three for long—odd numbers almost always win.
- Use under-counter hooks for bags or dish towels on the stool side.
- A slim runner rug in front of the sink plus a small mat near seating zones = comfort and color.
Ready to claim your kitchen island as the MVP of the house? Pick one idea, measure twice, and keep your seating plan realistic for how you actually live. With the right layout and a few smart details, your island can handle weeknight dinners, weekend hangouts, and everything in between—no elbow wars required.