10 Kitchen Island Ideas That Add the Most Value Before You Remodel
You don’t need a full gut job to make your kitchen feel expensive. Your island is the star of the show, and tweaking it can deliver major style points and real resale value. Think of this as your pre-remodel glow-up—fast wins, smart upgrades, and zero “why did I do that?” regrets.
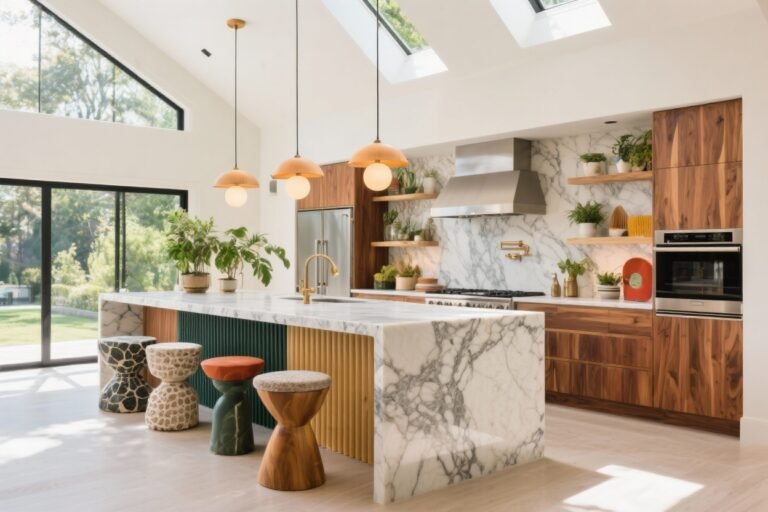
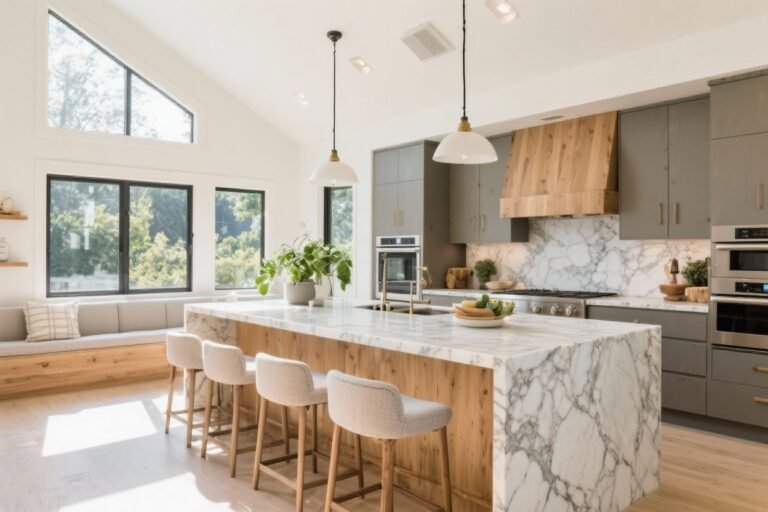
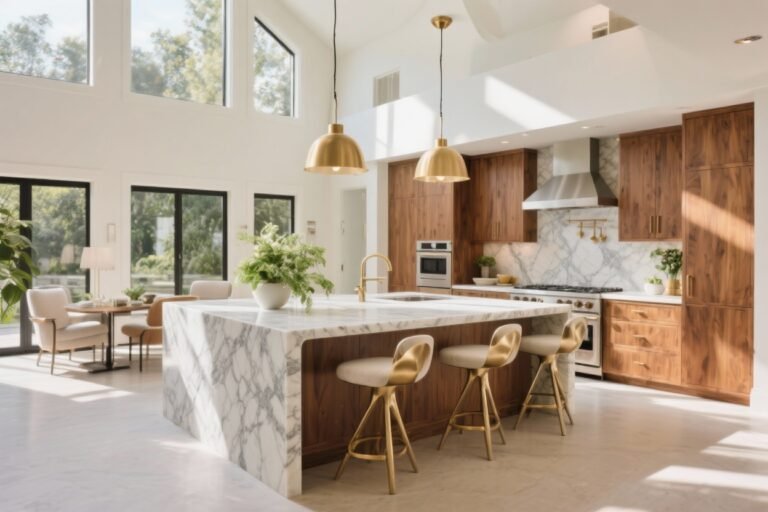
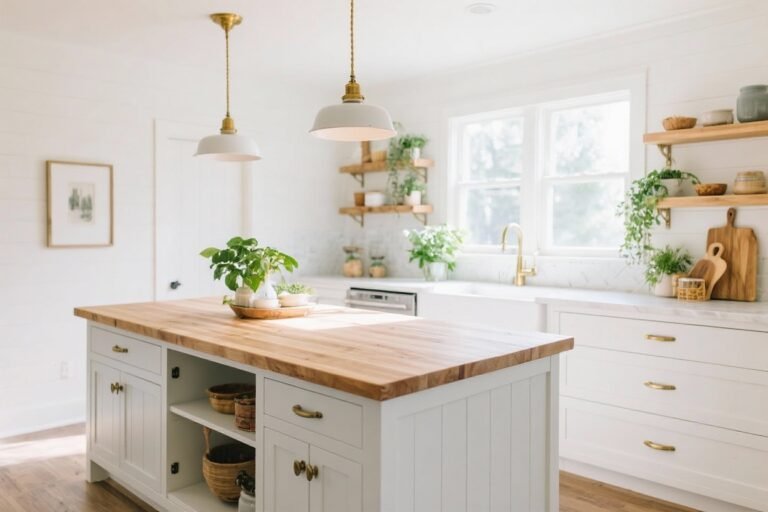
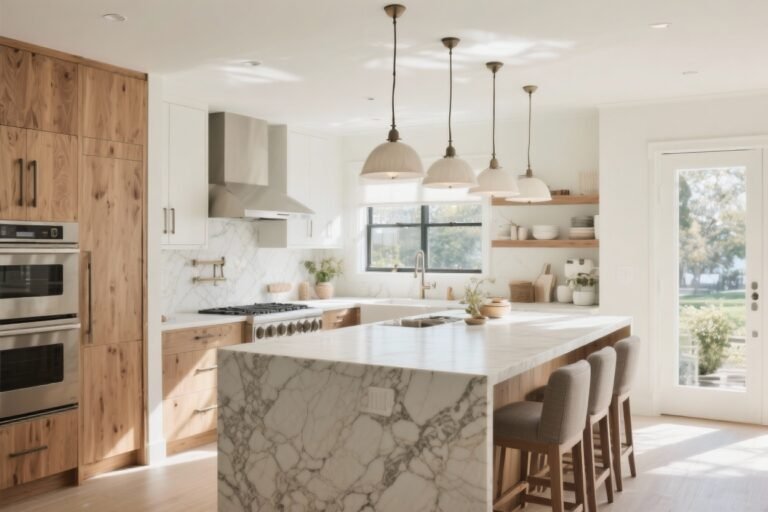
1. Elevate With a Statement Countertop (Without Replacing Everything)
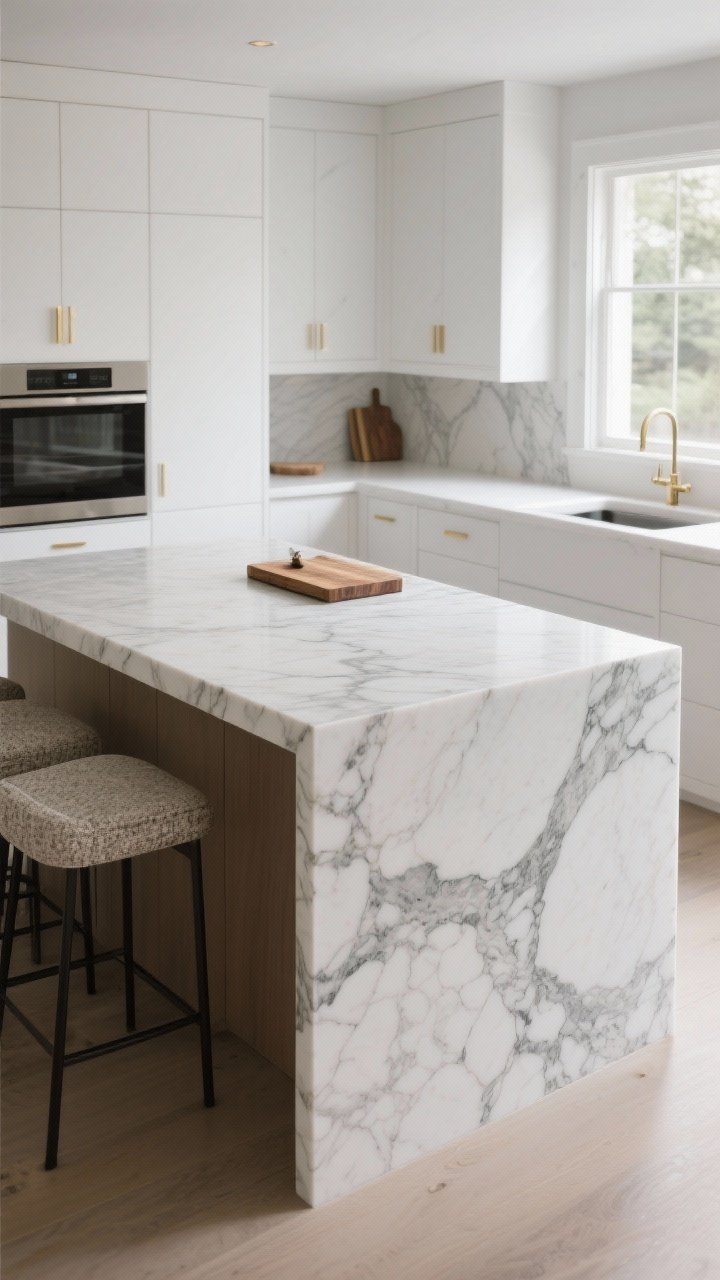
New countertops are dreamy, but you don’t have to redo all of them. Swap just the island’s surface and let it become the focal point. A luxe slab on the island turns basic cabinets into a designer moment.
Tired of snacking when you’re not even hungry? This reset helps you stop the loop and feel back in control.
A simple reset for moments when cravings take over. Easy to use, easy to repeat, and designed to help you feel satisfied instead of stuck.
Smart Material Moves
- Quartz: Durable, low-maintenance, and consistently ranks high for buyers.
- Butcher Block: Adds warmth and contrast—great for farmhouse or Scandinavian styles.
- Marble-Look Porcelain: The drama of marble without the etching anxiety (FYI: it’s budget-friendly).
Pro tip: Add a waterfall edge on one side for a modern touch. If that’s too bold, try an oversized overhang (10–12 inches) for casual seating that looks custom.
2. Upgrade Lighting: Pendants That Do The Heavy Lifting
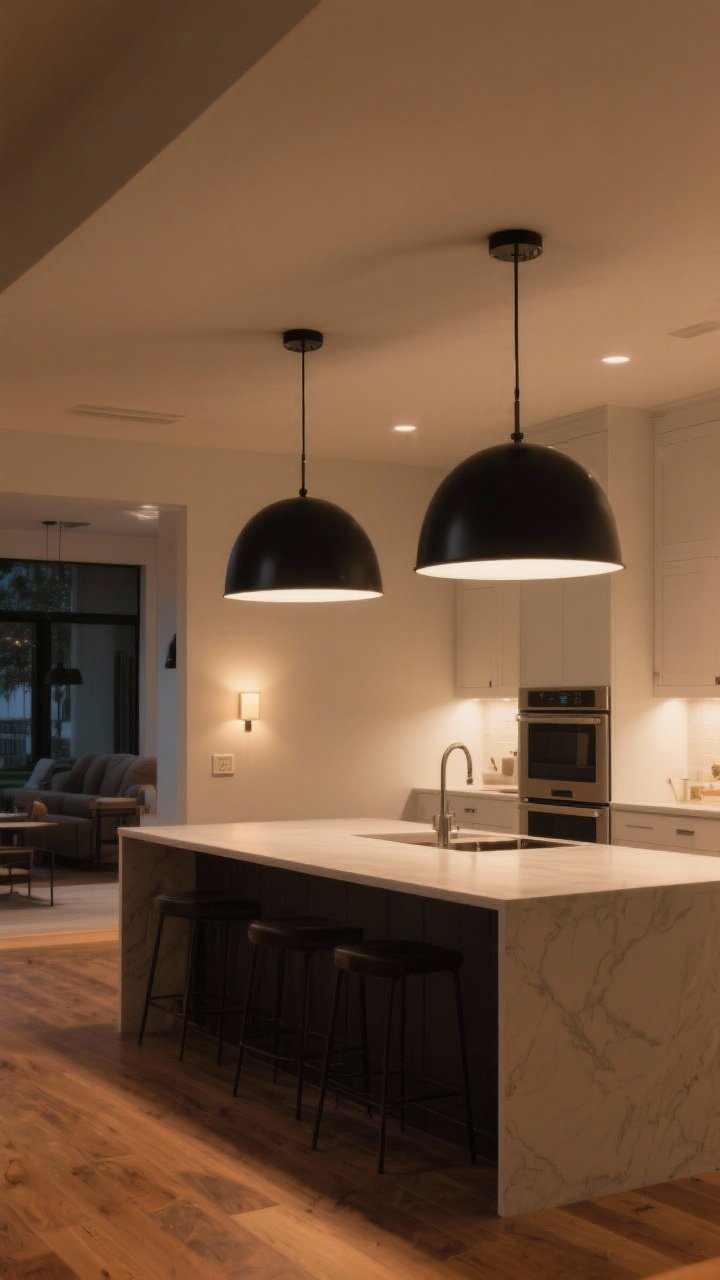
Lighting is the island’s jewelry—swap it, and the whole kitchen glows up. Oversized pendants feel high-end and help define the zone, especially in open layouts.
What Works Best
- Two big pendants over large islands (36–42 inches apart).
- Three smaller pendants for longer runs, equally spaced.
- Linear chandeliers if you hate visual clutter.
Keep the bottom of your fixtures roughly 30–34 inches above the countertop. Bonus points if you add a dim switch so you can go from task to moody dinner vibes instantly.
3. Add Seating That Actually Fits (And Looks Intentional)
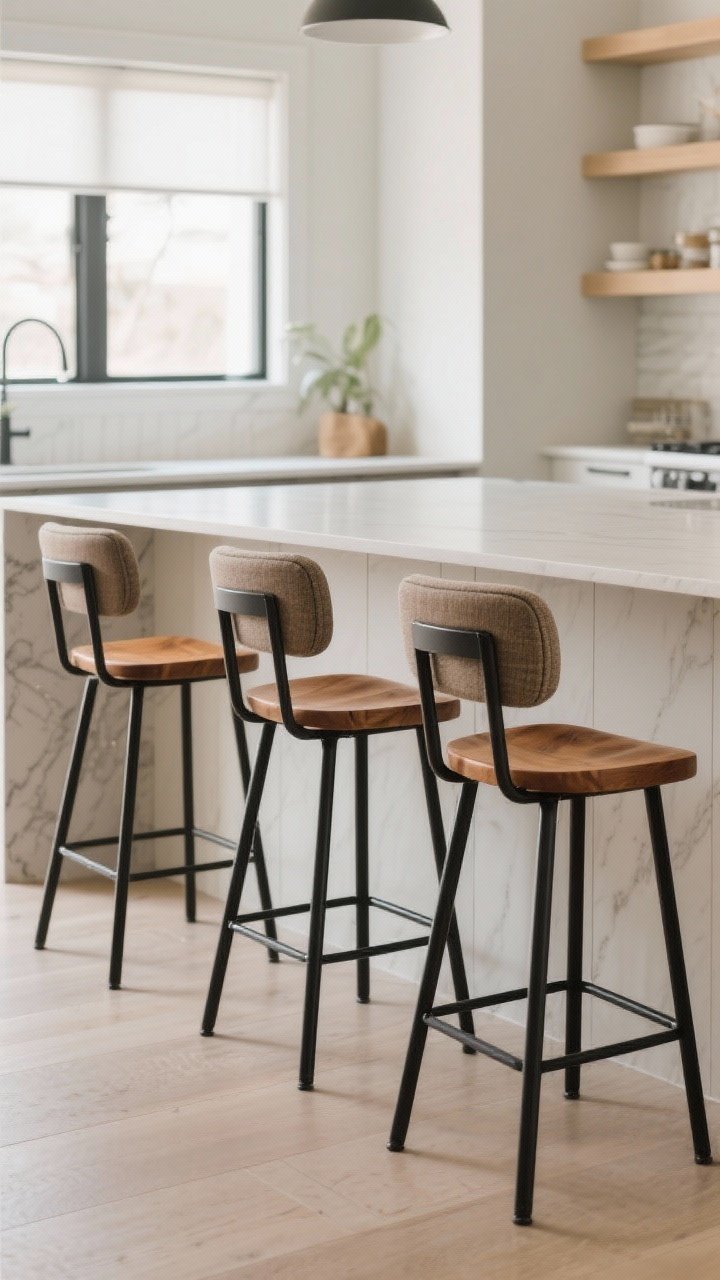
Nothing says “afterthought” like wobbly stools that don’t tuck in. Choose seating that fits your island height and style—because yes, people notice.
Transform Your Home With 7,250+ Stunning Landscaping Designs—No Expensive Designers Needed!
- 🌿 Access 7,250+ stunning landscaping designs.
- 💰 Save thousands—no pro designer needed.
- 🏡 Plans for gardens, patios, walkways, and more.
- ✨ Simple, beginner-friendly DIY layouts.
- 🛠️ Customize any design to fit your yard.
Sizing Cheat Sheet
- Counter-height stools (24–26 inches) for a 36-inch island.
- Bar-height stools (28–30 inches) for a 42-inch raised island.
- Plan on 24 inches of width per person for comfort.
Visually, mix materials: metal frames with wood seats, or upholstered stools with performance fabric. It reads custom and comfy. And please, match the number of stools to the space—three well-spaced beats four crammed every time.
4. Swap or Paint the Island Base for Instant Contrast
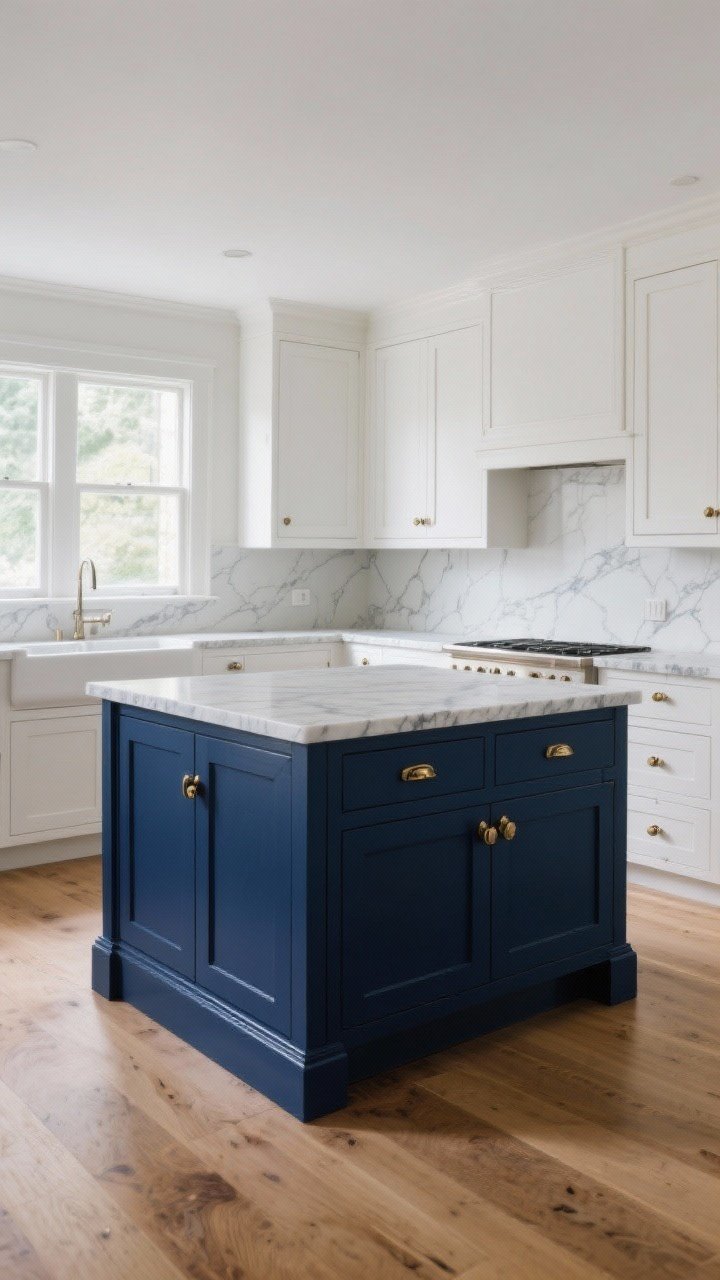
Want a designer move that costs way less than new cabinets? Paint or reface the island base in a contrasting color. It anchors the room and spotlights the island without overpowering everything else.
Color Combos That Just Work
- Navy or charcoal island + white perimeter cabinets
- Greige or mushroom island + warm wood accents
- Deep green island + brass hardware (yes, it’s still a vibe)
Use a durable enamel or lacquer and upgrade the hardware while you’re at it. Fresh pulls and knobs are the tiny detail that makes it look new, not “nicely tried.”
5. Sneak In Storage That Buyers Love (And You’ll Use)
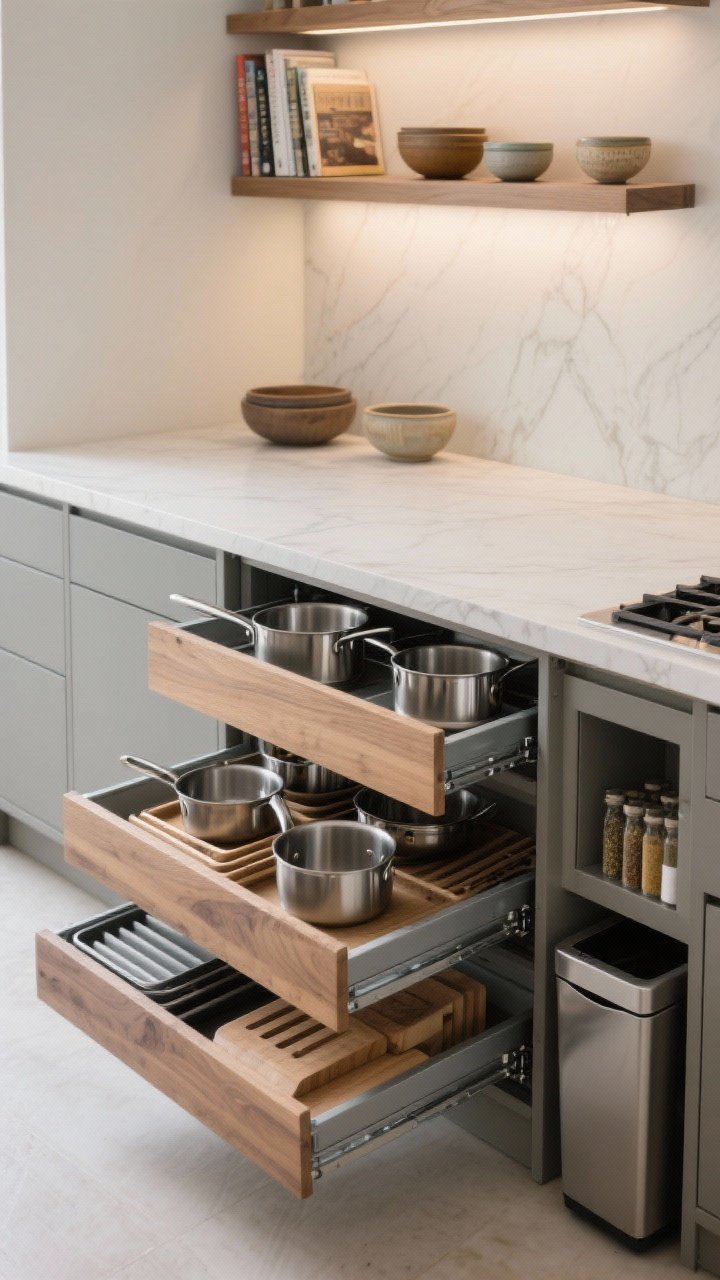
Storage sells. And honestly, it also saves your sanity. Optimize the inside of your island so it’s not just a giant cave of lost Tupperware lids.
High-Value Add-Ons
- Deep drawers for pots and pans—easier than cabinets.
- Pull-out trash/recycling to keep things tidy and hidden.
- Tray dividers for baking sheets and cutting boards.
- Built-in spice pull-outs near the cooktop side of the island.
Don’t forget the back side of the island—add shallow cabinets or display shelves for cookbooks and pretty bowls. That’s functional flair, IMO.

6. Power Up: Outlets, Charging, And Real-Life Functionality
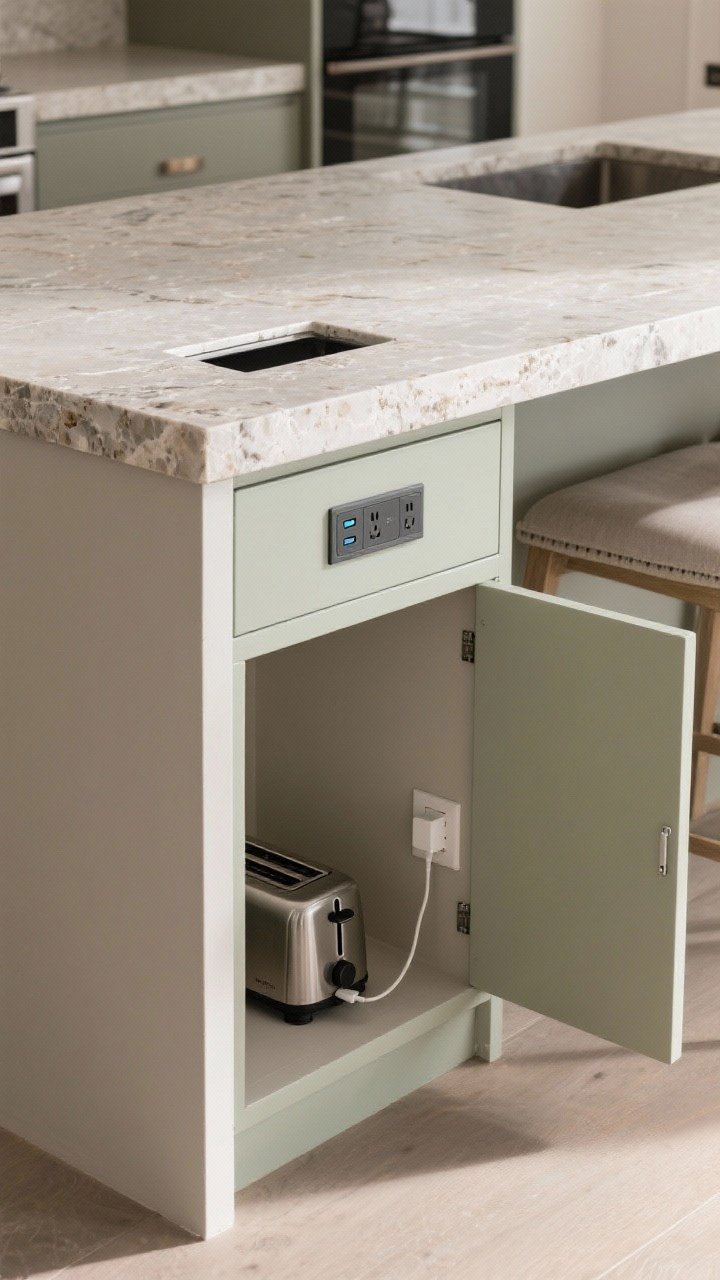
Your island should work as hard as it looks. Add outlets where you actually need them so you’re not charging phones next to the mixer or fighting for plugs during holidays.
Practical Placement
- Pop-up outlets in the countertop for a clean look when not in use.
- USB-C/USB-A combos under the overhang for discreet charging.
- Side-panel outlets color-matched to paint for minimal visual noise.
If you’ve got the depth, consider a shallow appliance garage on one end with a flip-up door for blenders/toasters. It keeps surfaces clean and buyers impressed.
7. Make Room For Real Meals: The “Work + Dine” Hybrid
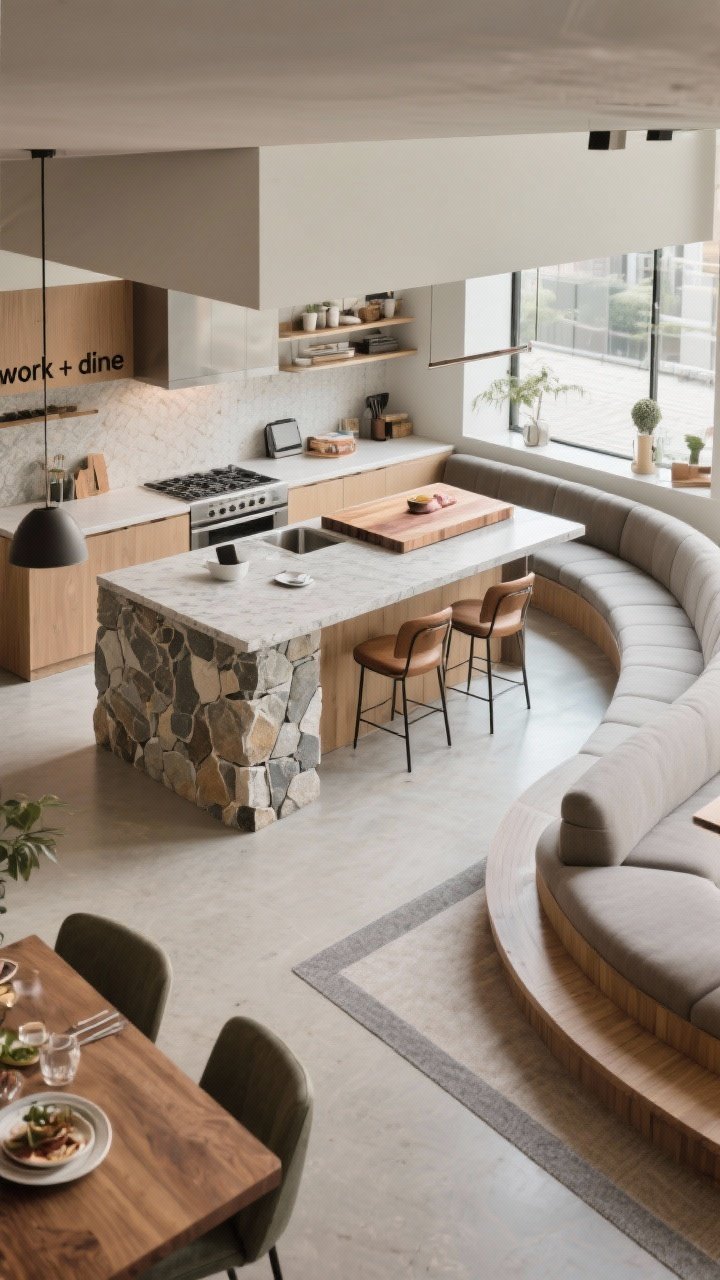
Open-concept kitchens do double duty—homework, snacks, Sunday pancakes. Design the island so it functions as a casual dining zone without feeling like a cafeteria.
Layouts That Feel Custom
- Waterfall wing: Extend one end lower as a table-height surface.
- Bumped-out seating: Curve or angle the seating side for better legroom.
- Mixed surfaces: Butcher block over the seating zone, stone over the prep zone.
Target 10–12 inches of overhang for knees. Add a runner or low-profile rug on the floor by seating to soften acoustics and warm up the space (indoor/outdoor rugs for easy cleaning).
8. Rethink The Island’s Skin: Panels, Slats, And Texture
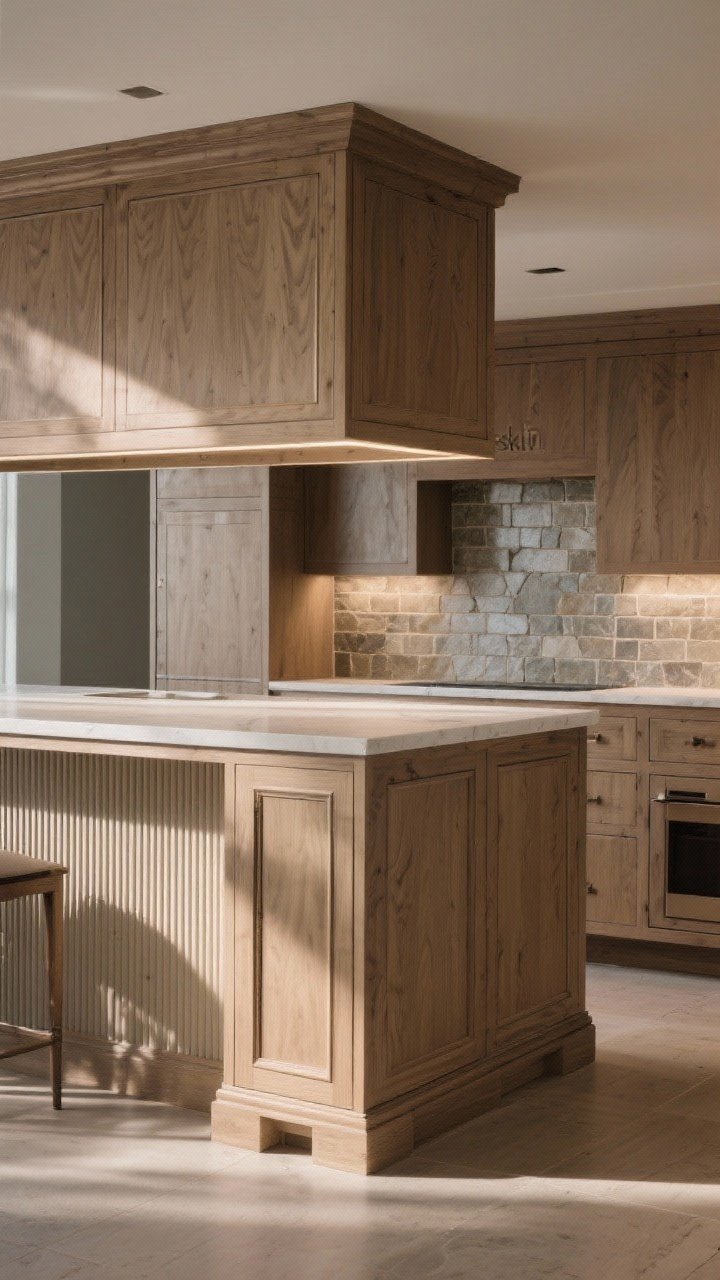
If your island sides are plain or scuffed (no judgment), upgrading the “skin” is a game-changer. Think architectural details that add depth and texture without a full rebuild.
Client-Favorite Finishes
- V-groove or shiplap panels for subtle coastal vibes.
- Vertical slat or fluted millwork for modern warmth.
- Applied molding to fake a custom furniture feel.
- Stone or tile face on the seating side for durability and drama.
Finish strong with furniture-style toe kicks or simple bracket details under the overhang. Those little profile changes make the island look bespoke.
9. Add a Prep Sink or Beverage Zone (If Space Allows)
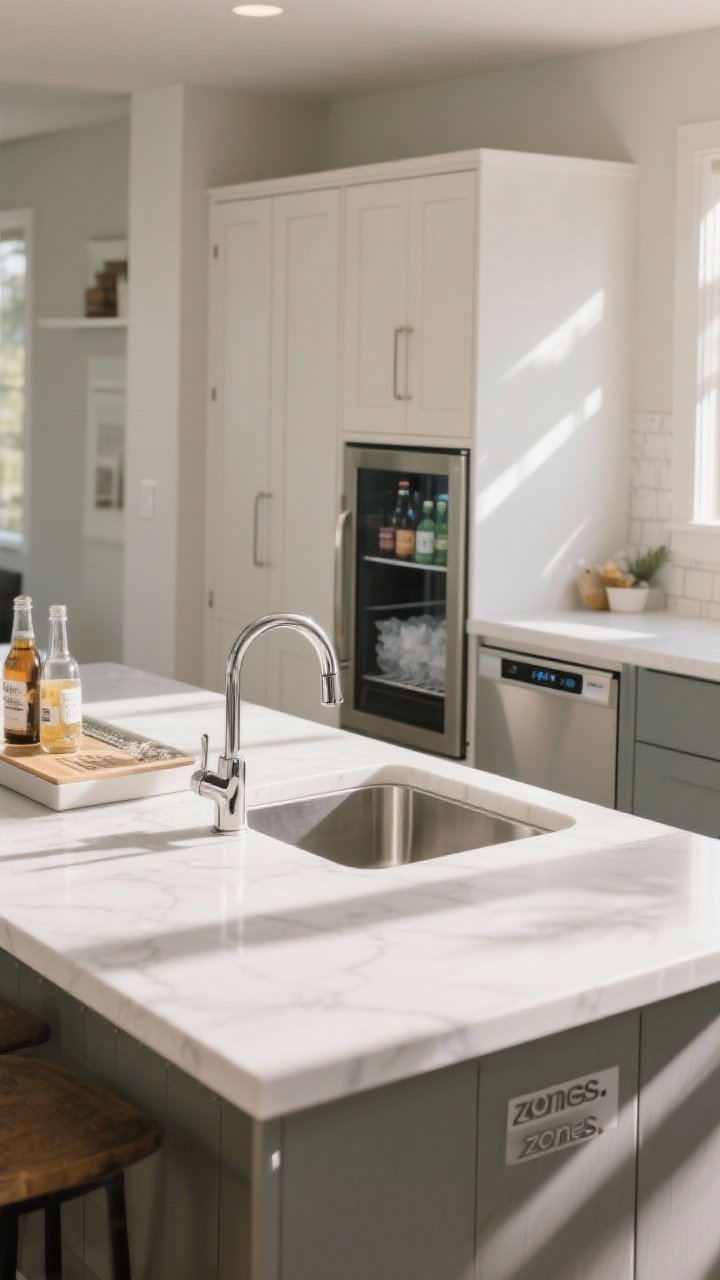
Two sinks = two chefs = fewer arguments. A small prep sink on the island turns your workflow into a dream and creates a “work triangle” that actually works.
Space and Setup
- Look for at least 24 inches of counter on one side of the sink for prep.
- Install a single-handle faucet with pull-down to keep it streamlined.
- If cooking isn’t your thing, turn that corner into a beverage station with an undercounter fridge and an ice maker.
Buyers love zones: coffee in the morning, cocktails at night. It’s a lifestyle feature that photographs beautifully and lives even better.
10. Style It Like A Pro: Layers, Color, And Daily-Cute Essentials
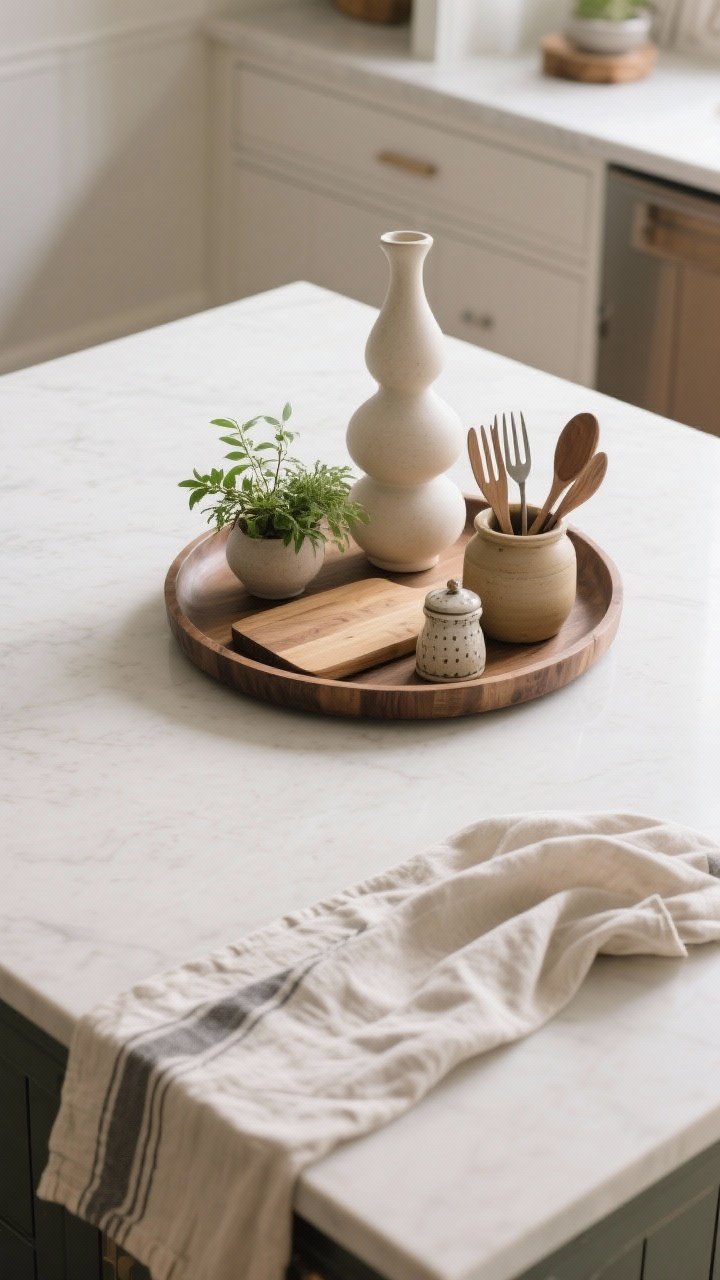
Styling is the fastest, cheapest way to make your island look intentional. And yes, it can still be practical—no one wants to move a sculpture to slice a lemon.
Effortless Styling Formula
- Tray + Greenery + Height: A pretty tray corrals clutter, a vase or plant adds life, and a tall element creates balance.
- Functional Pretty: Wooden boards, a crock of utensils, and a salt cellar that looks like decor.
- Textiles: A seasonal runner or folded linen adds warmth without fuss.
Keep the center mostly clear so it’s photo-worthy and usable. Rotate seasonal touches—citrus in spring, herbs in summer, tiny pumpkins in fall. It’s a quick mood shift that feels curated, not try-hard (FYI: less is more).
Bonus Micro-Tips To Max Out Value
- Consistency: Repeat one finish (like brass or matte black) at least three times for cohesion.
- Sound control: If your island is echo-y, add soft stools or a runner to absorb sound.
- Maintenance: Seal stone, oil butcher block, tighten hardware. The little TLC shows.
Conclusion

Your island can do the heavy lifting—visually and functionally—long before a full remodel. Focus on high-impact upgrades like countertops, lighting, storage, and power, then layer in texture and styling. Small changes, big “whoa, did you redo your kitchen?” energy. Go make that island the main character.