10 Kitchen Island Ideas That Instantly Feel Luxurious (without a Full Reno)
You know that feeling when you walk into a kitchen and the island just steals the show? That’s what we’re going for. Whether your space is compact or chef-level massive, these ideas will make your island look like it got a VIP upgrade—no gut reno required. Ready to make it fancy?
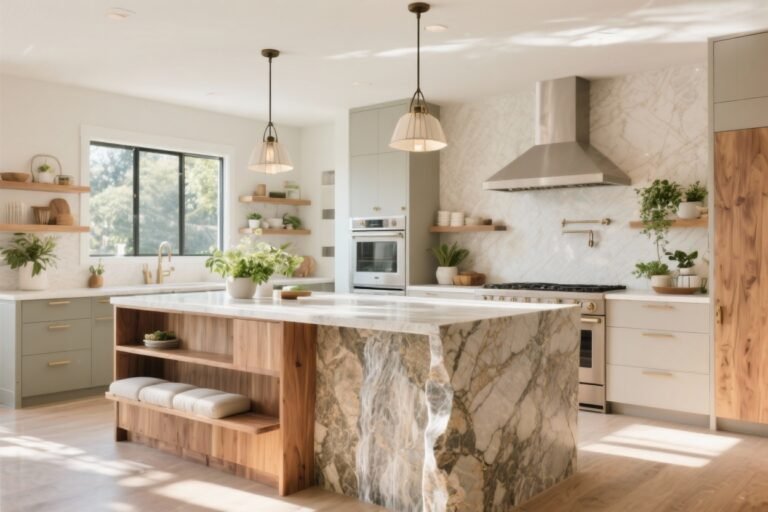
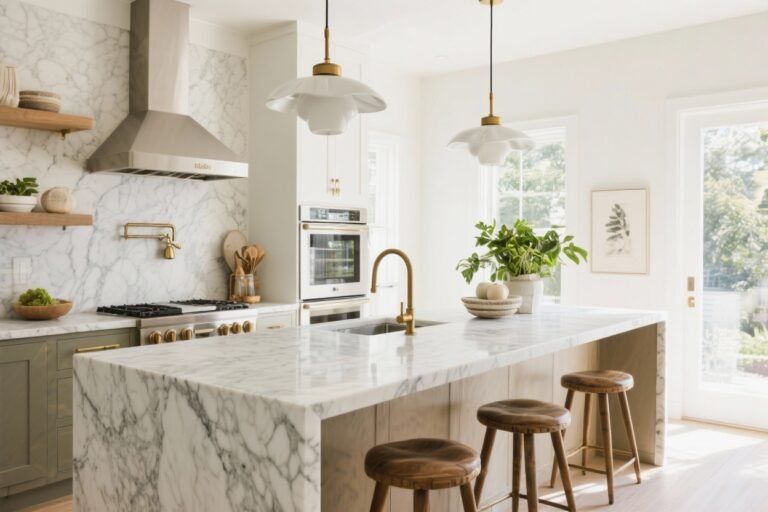
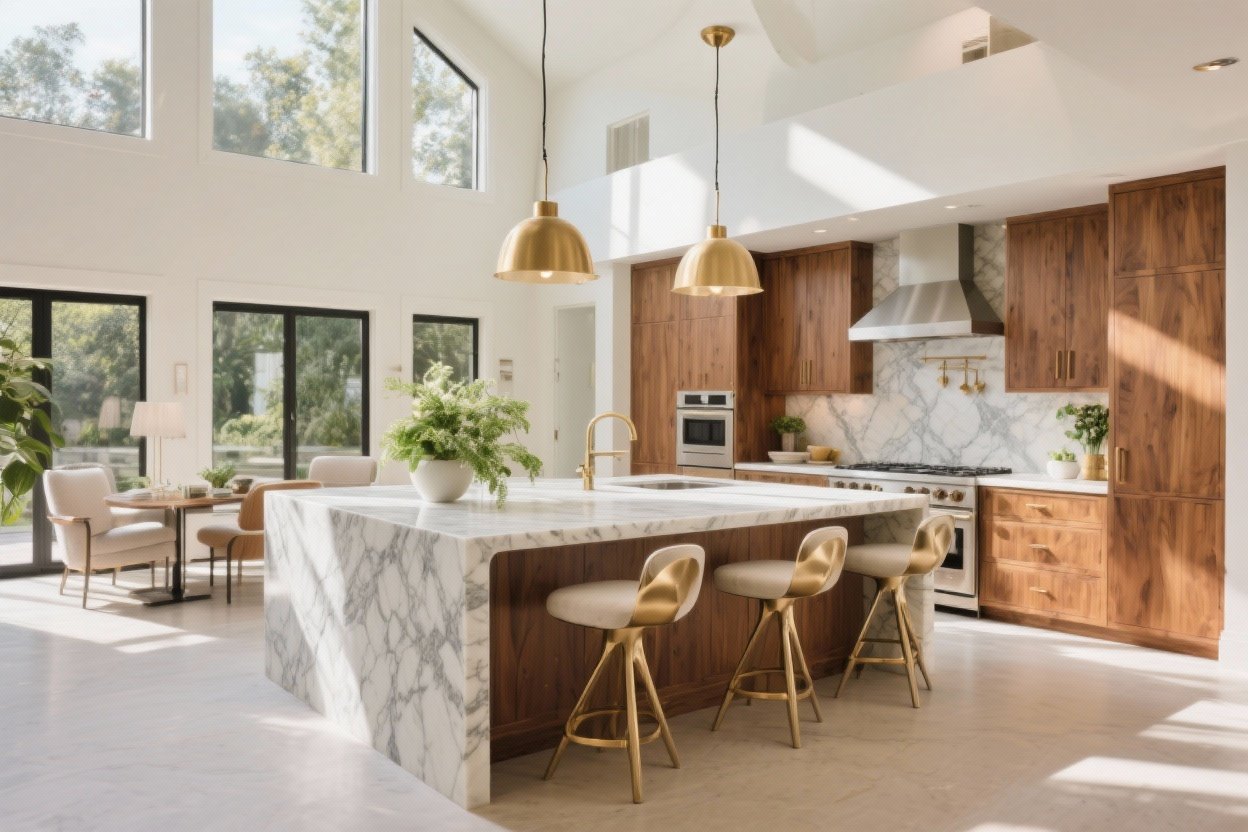
1. Go Bold With Stone (And Let Those Veins Show)

Nothing screams luxury like a slab of stone with dramatic veining. Think Calacatta marble, honed soapstone, or even ultra-realistic quartz that nails the look without the maintenance panic.
Tired of snacking when you’re not even hungry? This reset helps you stop the loop and feel back in control.
A simple reset for moments when cravings take over. Easy to use, easy to repeat, and designed to help you feel satisfied instead of stuck.
Why it works
Strong veining draws the eye and instantly elevates the whole kitchen. It feels custom and curated, even if the rest of your space is simple.
- Waterfall edges = instant drama. Let the stone cascade down both sides.
- Prefer low maintenance? Go for quartz in a marble-look finish—trust me, your future self will thank you.
- Choose a honed finish for a softer, matte vibe or polished for glossy glam.
2. Upgrade Your Hardware Like Jewelry
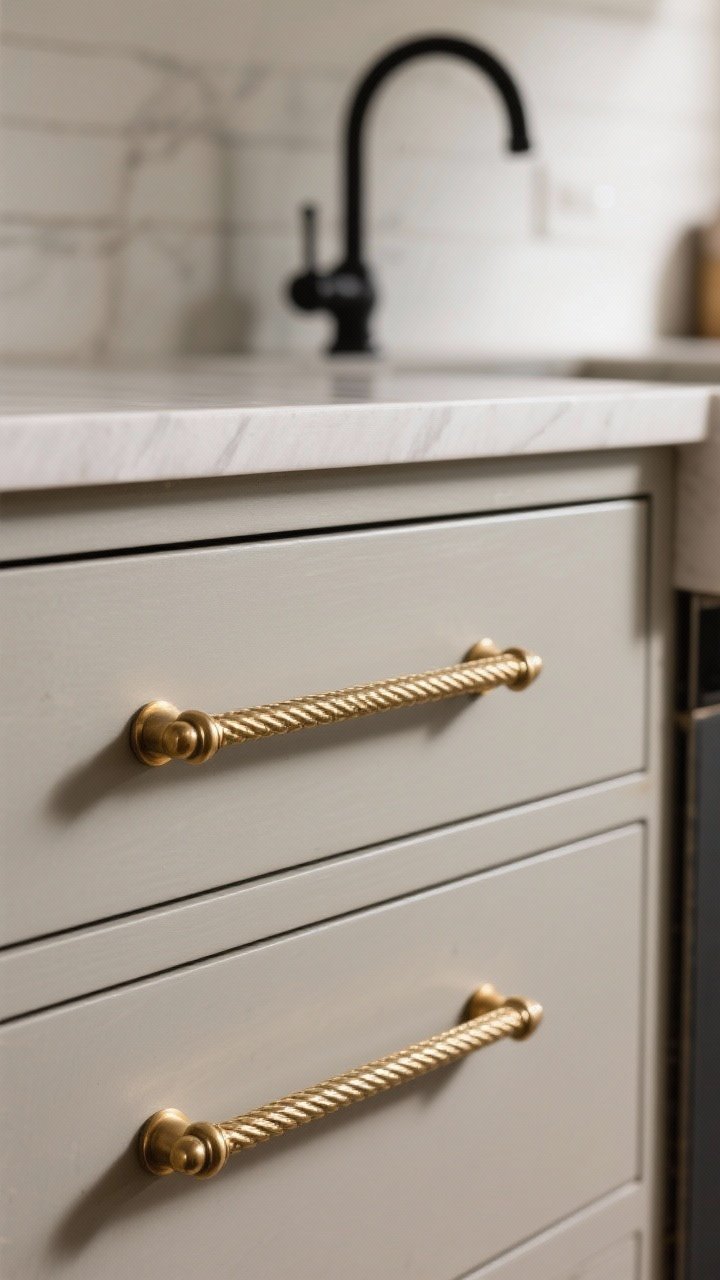
Think of your island as the outfit and the hardware as the earrings—small detail, massive impact. Swap builder-grade pulls for solid brass, brushed nickel, or matte black and watch the “wow” roll in.
Pro tip
Match your faucet finish or intentionally contrast it for that designer touch. Long, linear pulls feel more bespoke than tiny knobs, especially on wide drawers.
- Mixed metals = high-end. Just repeat each finish at least twice for cohesion.
- Look for knurled or ribbed textures for a subtle “custom” flex.
- Consider oversized pulls (8–12 inches) for a chic, modern look.
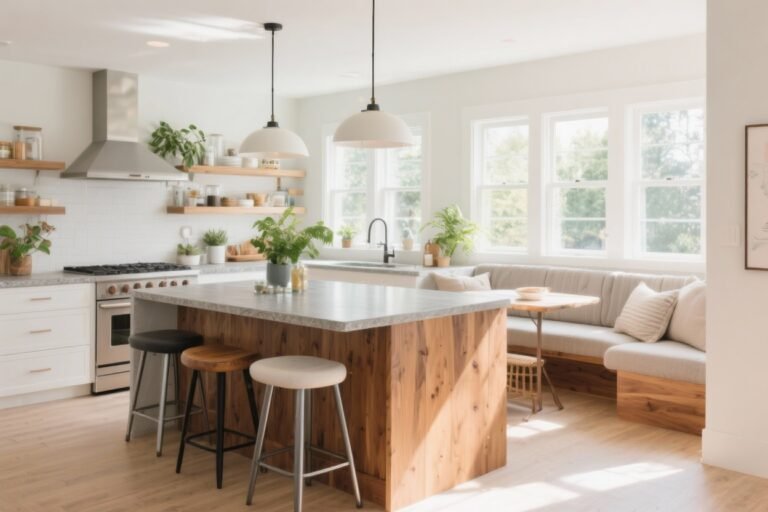
3. Add Seating That Looks Like It Belongs in a Boutique Hotel
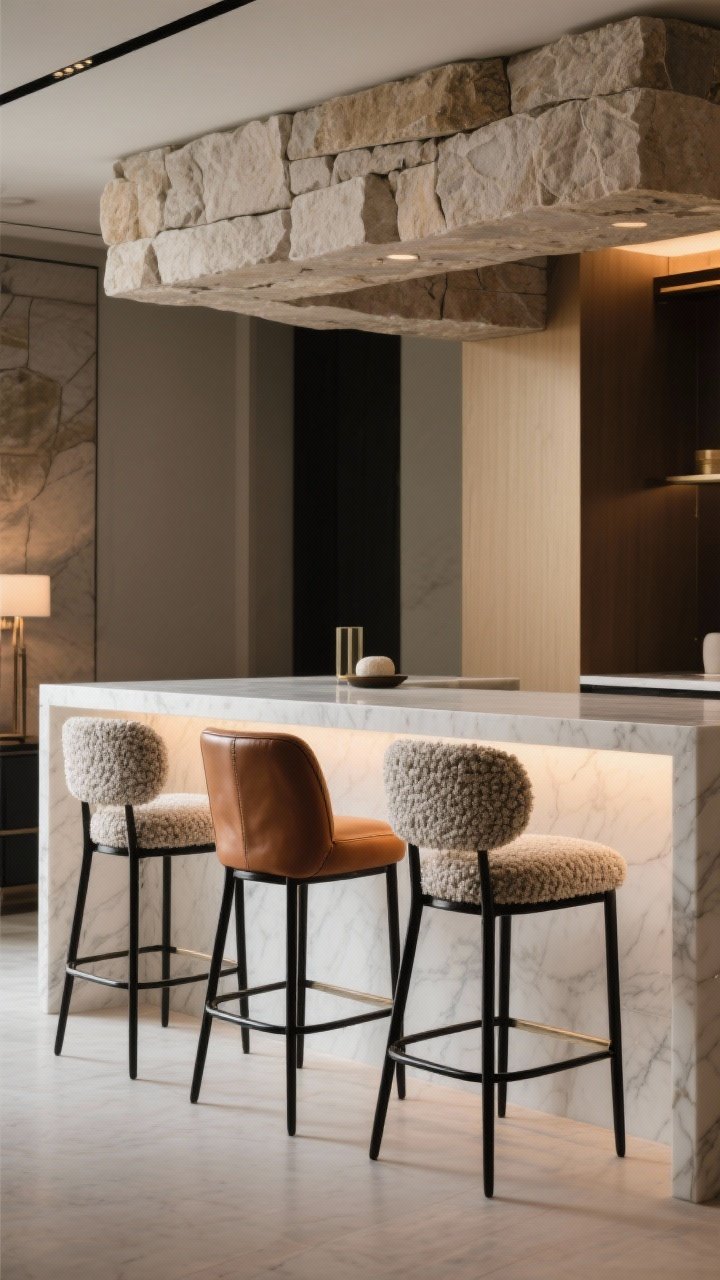
Swap the clunky stools for something sculptural. Upholstered bar stools with bouclé, leather, or velvet add texture and softness—which is exactly what hard-surface kitchens crave.
Transform Your Home With 7,250+ Stunning Landscaping Designs—No Expensive Designers Needed!
- 🌿 Access 7,250+ stunning landscaping designs.
- 💰 Save thousands—no pro designer needed.
- 🏡 Plans for gardens, patios, walkways, and more.
- ✨ Simple, beginner-friendly DIY layouts.
- 🛠️ Customize any design to fit your yard.
Best stool styles
- Backed stools = comfort and polish (especially if you host).
- Slim metal frames keep it modern and airy.
- Wood + fabric blends warmth and luxury without trying too hard.
FYI, swivel stools are both fun and shockingly practical when you’ve got kids or frequent guests.
4. Light It Like a Gallery
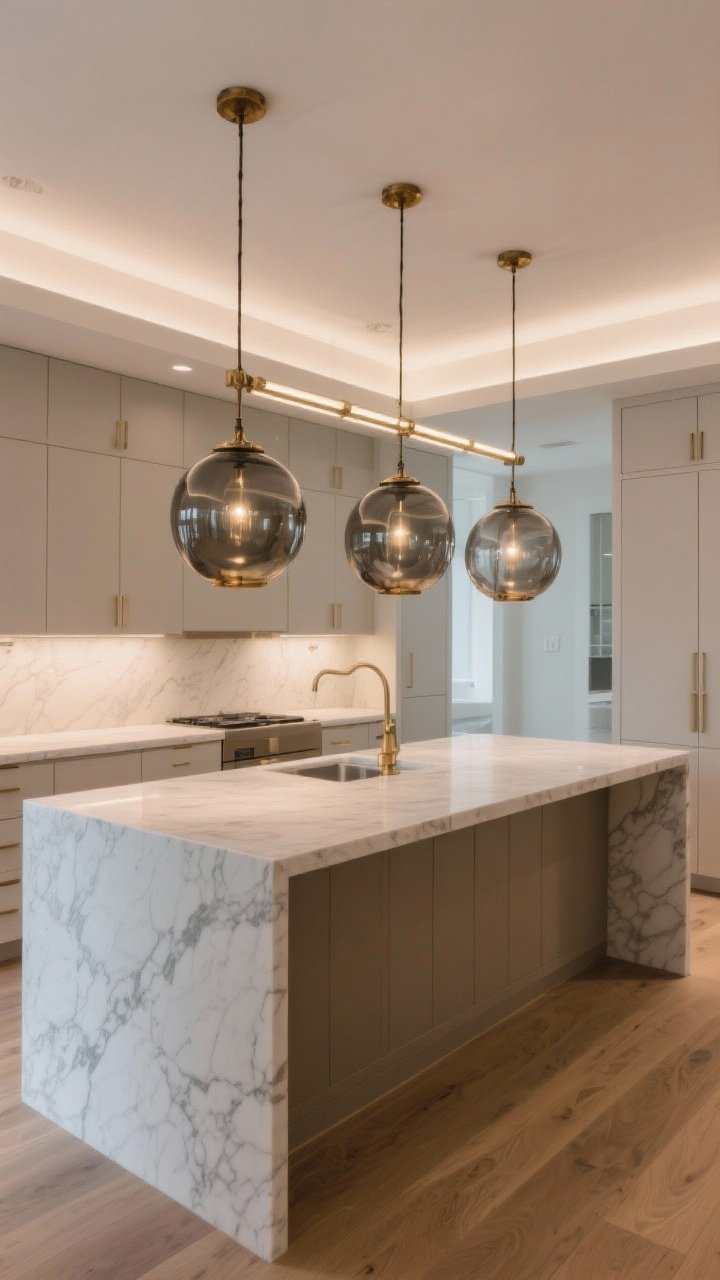
Your lighting situation can make or break the island’s vibe. The fix? A pair (or trio) of statement pendants that feel sculptural—think smoked glass, aged brass, or linen drum shades.
Quick lighting rules
- Hang pendants about 30–36 inches above the countertop.
- Space multiples roughly 24–30 inches apart.
- Choose a pendant diameter around 12–18 inches for most islands.
- Dimmer switch = instant ambiance (and less interrogation-room energy at night).
Bonus points for a linear chandelier over longer islands—it looks luxe and intentional.
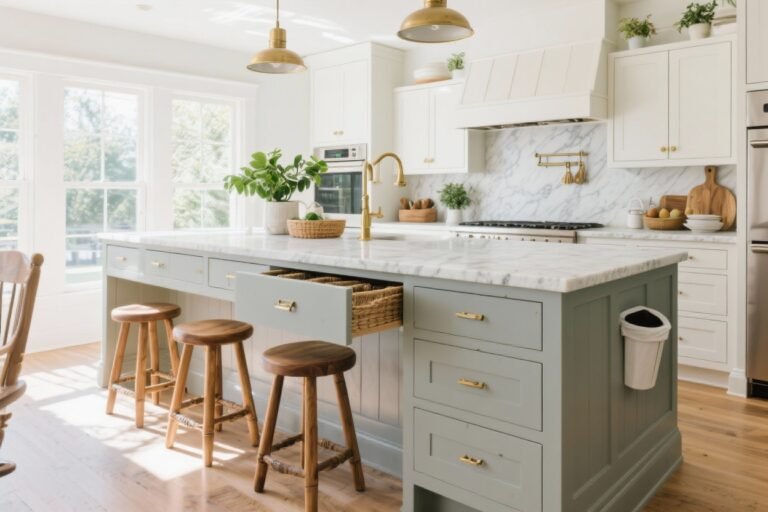
5. Layer In Paneling and Trim for Custom Character
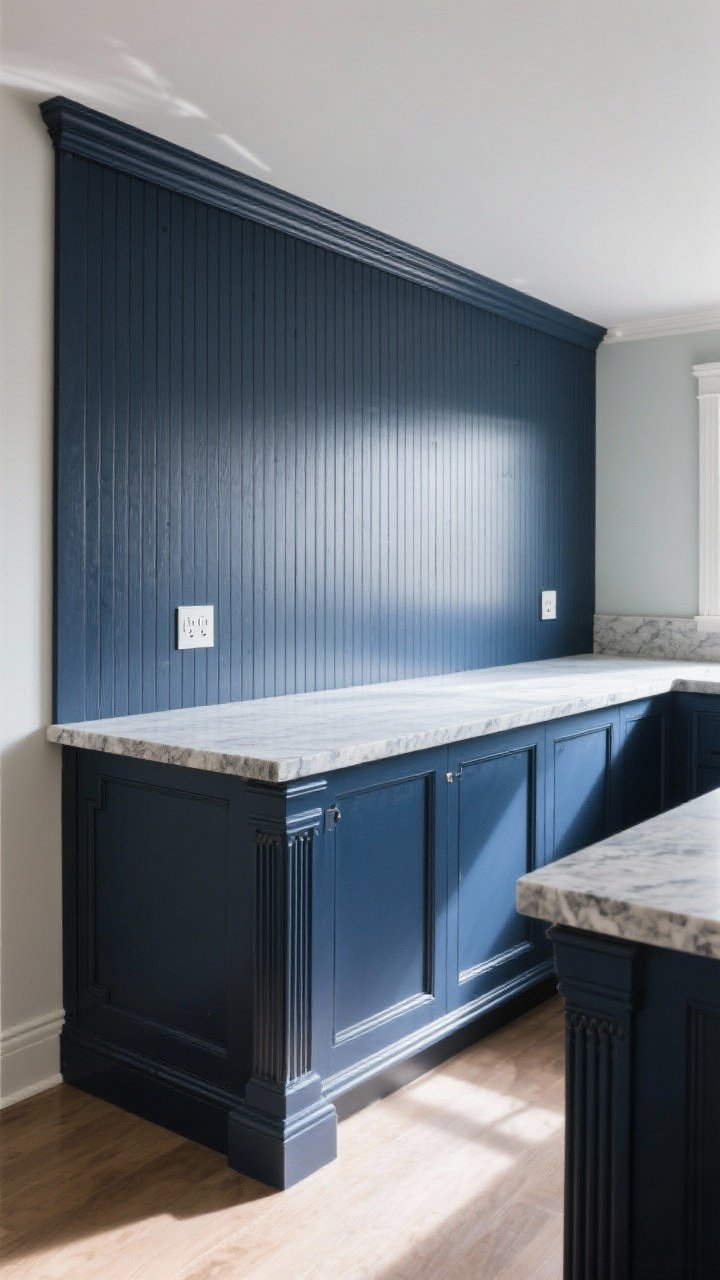
Flat-front island? Let’s give it a face. Add shaker panels, beadboard, or fluted wood to the back and sides for architectural interest. It’s like giving your island a tailored suit.
Easy upgrades
- Fluted or reeded panels feel very “designer.” Paint them or keep them natural.
- Add furniture-style baseboards or footed details to make it look built-in.
- Consider a contrast color on the island—navy, forest green, charcoal, or muted clay.
Pro move: Use color-matched outlet covers so they disappear into the paneling.

6. Hide Clutter With Sleek Storage (While Flexing Your Organization Skills)
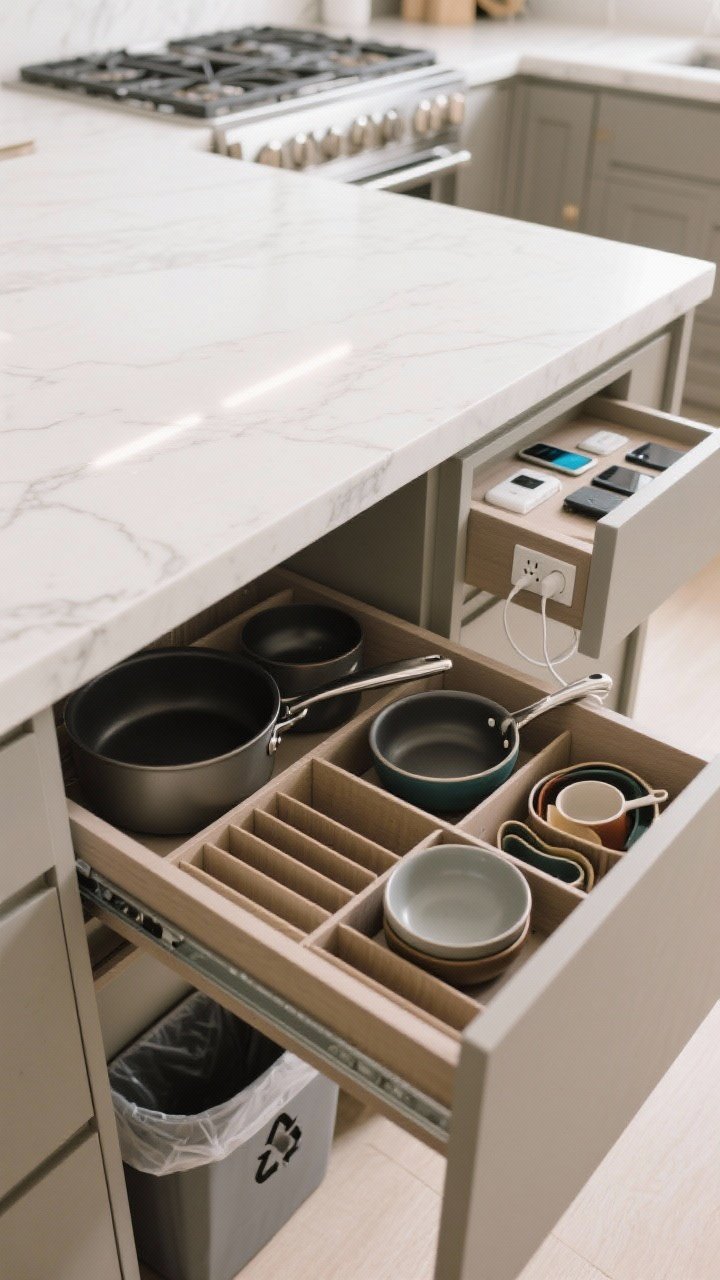
Luxury isn’t just about looks—it’s about how the island works for you. Add storage that keeps the surface clean and your life easier.
Smart storage ideas
- Deep drawers for pots, pans, and mixing bowls—way easier than bottom cabinets.
- Charging drawer with built-in outlets for phones and tablets.
- Pull-out trash/recycling so the bin isn’t photobombing your kitchen.
- Hidden microwave in the island to free up backsplash space (and visual calm).
Minimal clutter on the countertop equals instant luxe. It’s science. (Okay, not really, but it works.)
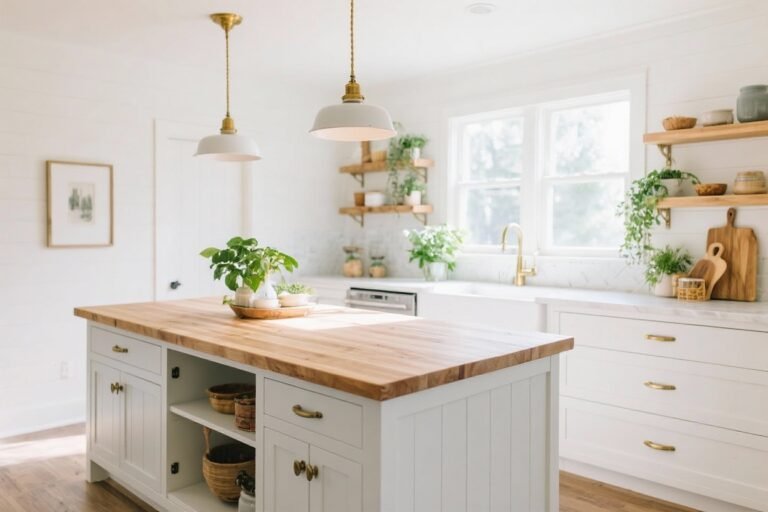
7. Warm It Up With Wood (But Make It Intentional)
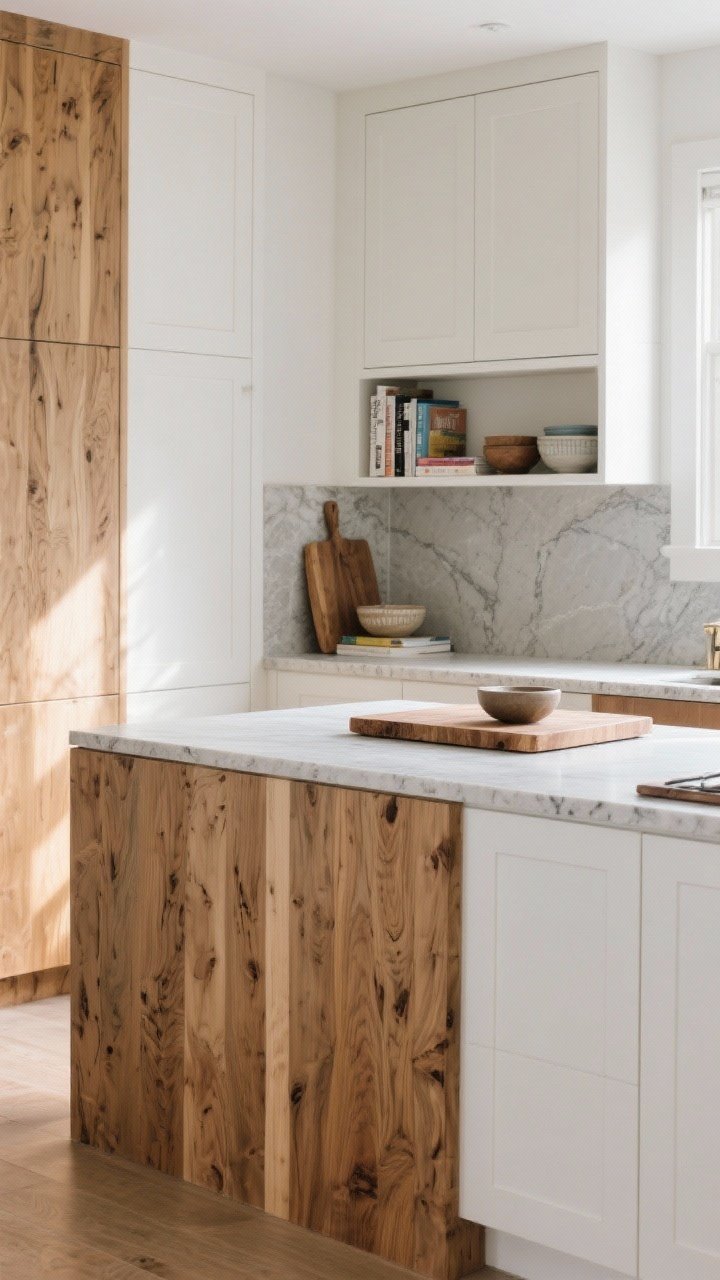
Stone is glamorous, but wood adds the soul. Mix in white oak, walnut, or even a butcher block accent to bring warmth and depth to the island.
Where to use wood
- Butcher block end-cap for a dedicated chopping zone.
- Open shelf at the end of the island for cookbooks or pretty bowls.
- Wood-clad panels to break up a sea of white cabinetry.
Seal butcher block properly and you’ll get function and beauty. IMO, a wood-and-stone combo is peak balance.
8. Add a Statement Sink or Faucet (The Little Luxuries)
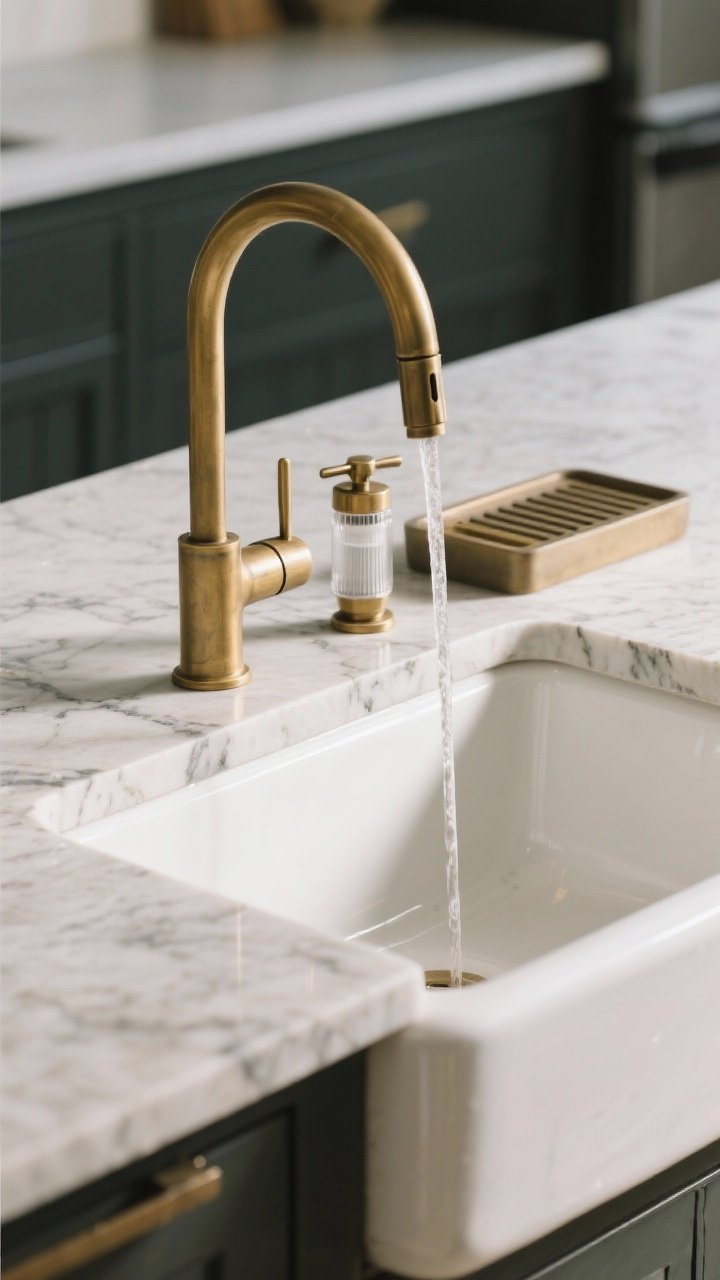
A standard undermount sink is fine, but a prep sink, apron-front sink, or brushed brass faucet on the island? That’s designer energy. Plus, it makes the island actually useful for cooking, not just looking pretty.
Faucet upgrades that matter
- Bridge faucets for classic charm.
- High-arc pull-down for serious function and clean lines.
- Filtered water tap or hot water dispenser if you want daily luxury.
Choose a sink material that matches your lifestyle. Stainless is tough, fireclay looks chic, and composite sinks are quiet and stain-resistant. FYI, a drainboard or integrated ledge system is chef-level convenience.
9. Style It Like a Coffee Table (But For Cooking)
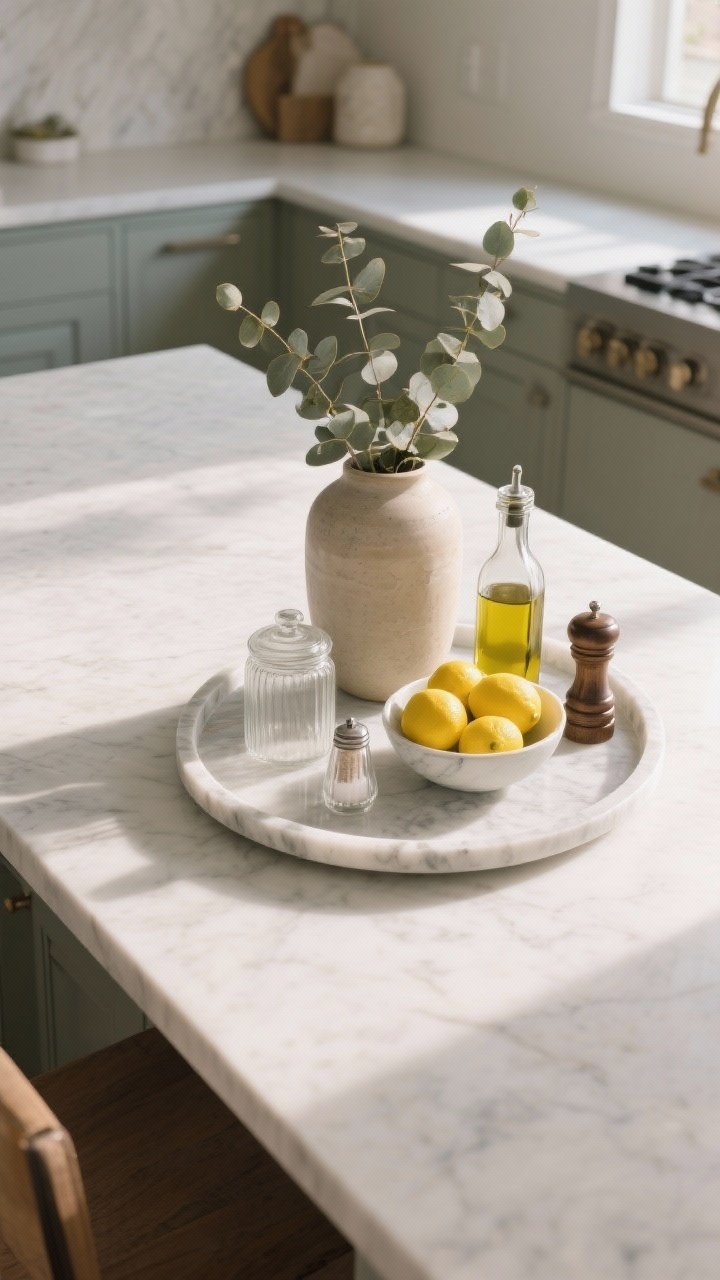
Let’s talk styling. A few curated pieces will make your island look magazine-ready without feeling precious. The trick is to keep it low-profile and purposeful.
Foolproof styling formula
- One large tray to corral everything—wood, marble, or rattan.
- Something living like a small potted herb or fresh eucalyptus.
- Height variation: a tall vase, medium canister, low bowl of citrus.
- Practical pretties—salt cellar, olive oil decanter, pepper mill.
Keep at least half the island clear for chopping and, you know, life. Edit more than you add. Luxurious spaces breathe.
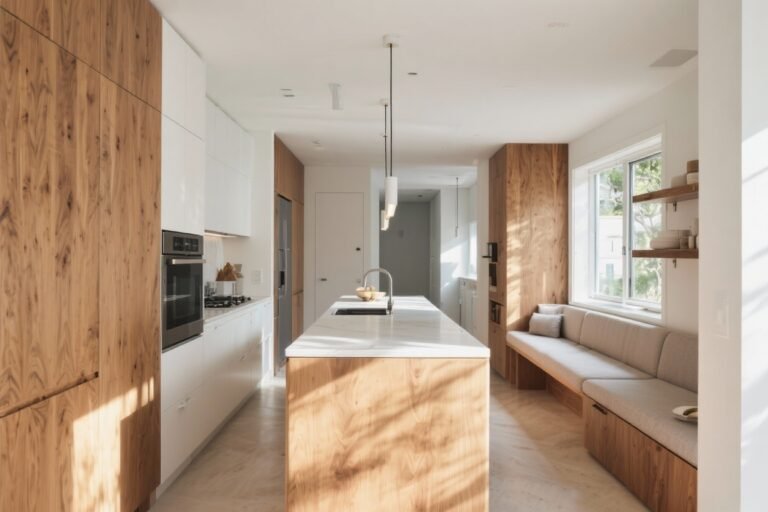
10. Extend the Counter for a “Built-In Entertainer” Vibe
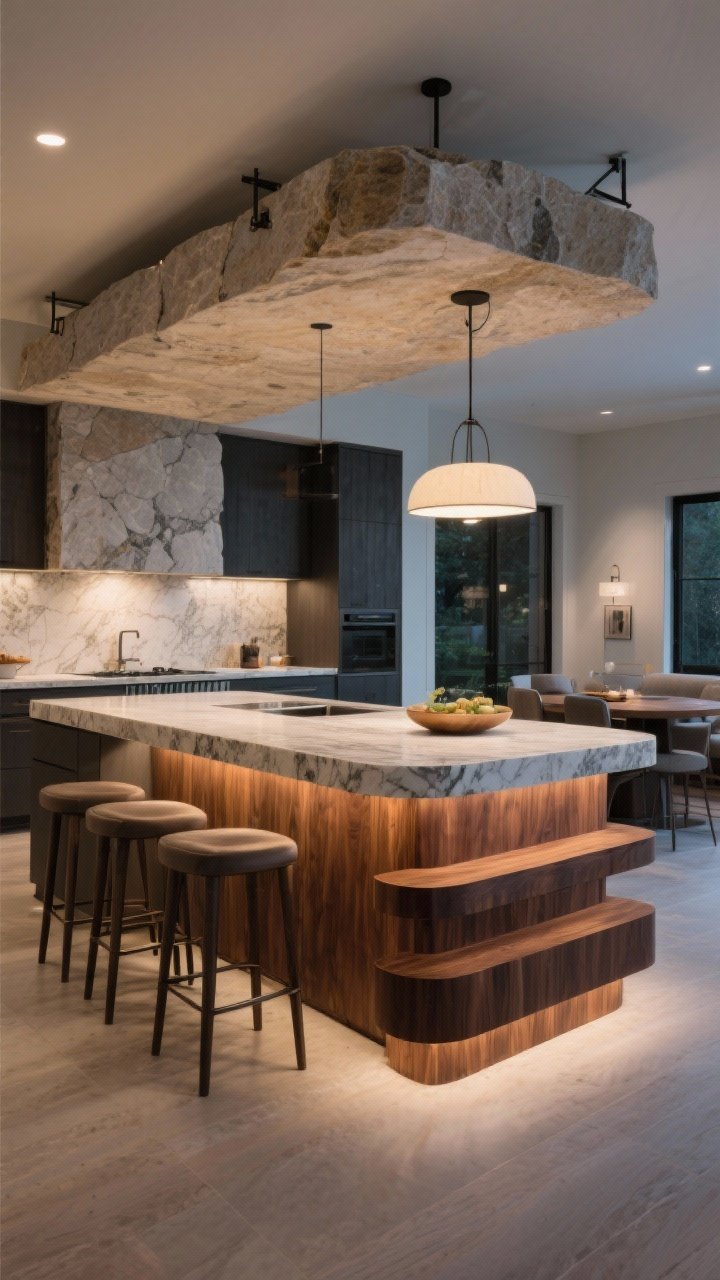
If you’ve got a bit of space, a cantilevered overhang or a two-tier counter instantly says custom. It creates an area for guests to hang while you cook—without sitting in your prep zone.
Design moves that elevate
- 12–15 inch overhang for comfortable knee space at bar seating.
- Rounded corners for a softer, furniture-like look (and fewer bruises).
- Mixed surfaces: stone for prep, wood for serving or dining.
- Add hidden corbels or steel supports to keep it clean and modern.
Hosting becomes effortless when the layout invites people to gather. Your island becomes the unofficial party HQ—by design.
Bonus Micro-Touches That Make a Major Difference
- Toe-kick lighting for a soft nighttime glow.
- Integrated outlets in matching finishes—no plastic eyesores.
- Rug runner in front of the island to soften the space and add pattern.
- Paint the stools or island base to refresh the palette seasonally.
Color Pairings That Always Feel Luxe
- Deep Navy + Brass + Marble = timeless and rich.
- Greige + Walnut + Matte Black = warm modern.
- Forest Green + Aged Brass + Soapstone = moody chic.
- Charcoal + Chrome + White Oak = clean and contemporary.
Quick Measurement Cheats (So It Looks Pro)
- Allow 24 inches width per stool for comfy seating.
- Leave 36–42 inches clearance around the island for traffic flow.
- Standard island height is 36 inches; bar height is 42 inches.
- For pendants, aim for the bottom of the fixture to sit 30–36 inches above the counter.
You don’t need a total overhaul to make your kitchen island feel luxurious—just smart upgrades that pack a punch. Pick one or two ideas and start there. Before you know it, your island will be doing the absolute most (in the best way). Now go claim your countertop crown.