10 Kitchen Island Ideas That Balance Style, Seating & Storage You’ll Love
Let’s be honest: the kitchen island is the Beyoncé of the house. It’s the hangout spot, the prep station, the snack bar, and occasionally a homework desk. If yours is doing the bare minimum, we’re fixing that. Here are 10 smart, stylish kitchen island ideas that nail the trifecta: style, seating, and storage.
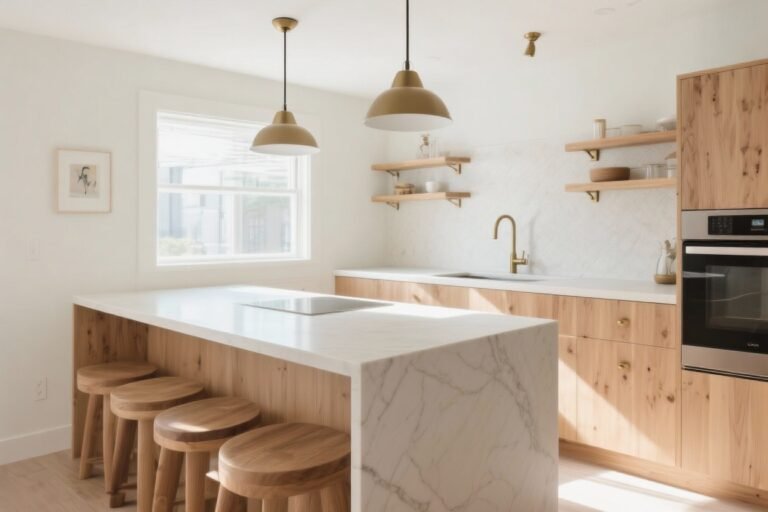
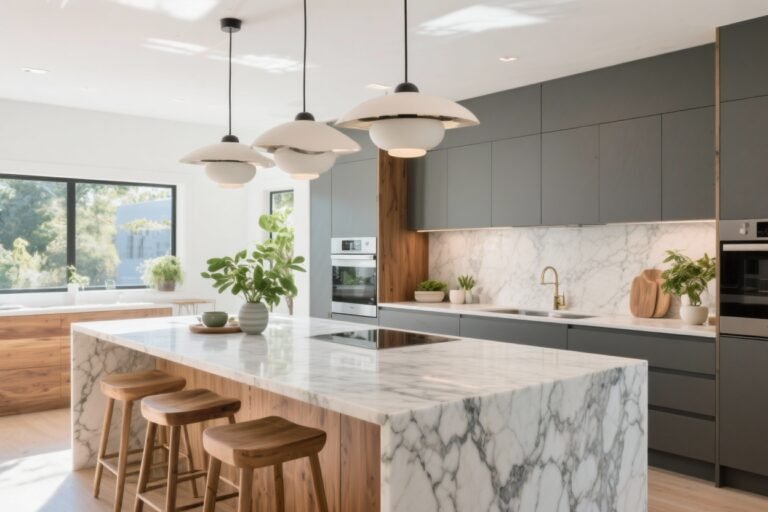
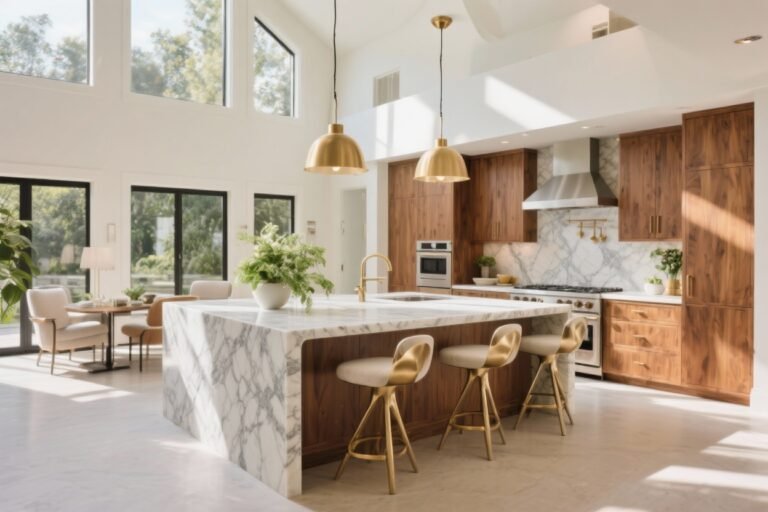
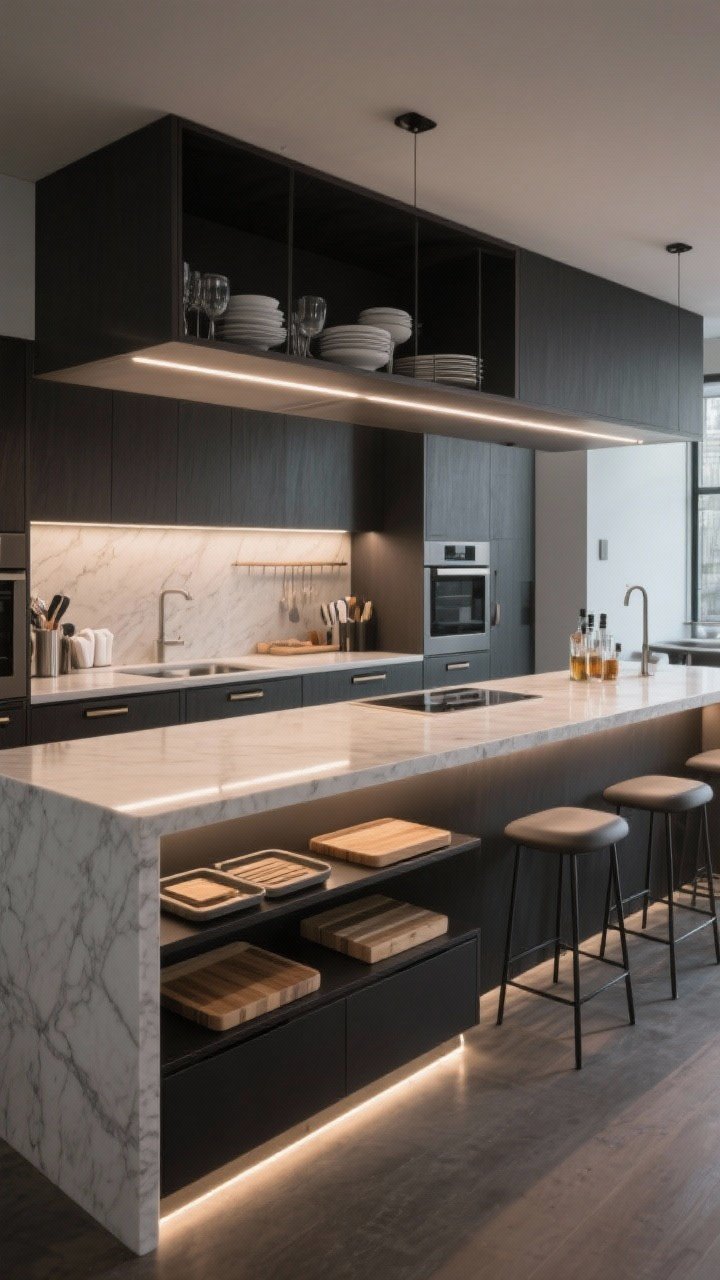
1. The Waterfall Wow: Seamless Stone That Does It All
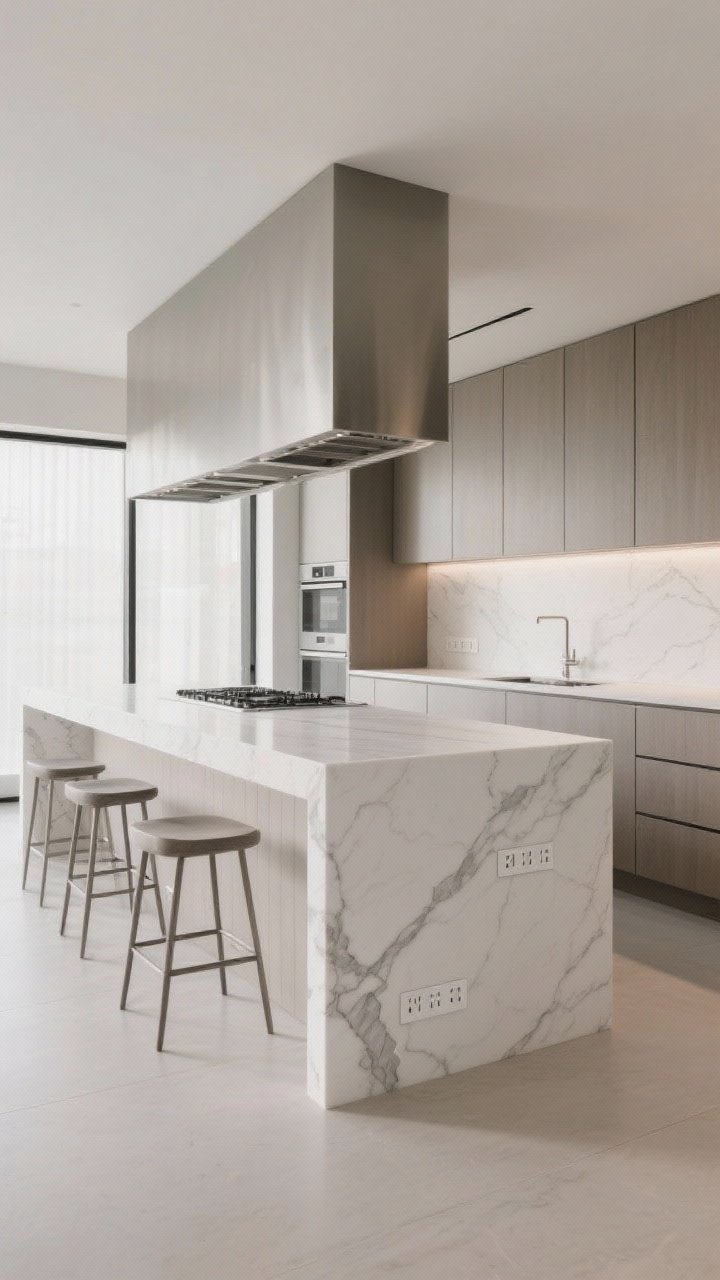
Want instant “designer kitchen” energy? A waterfall countertop—where the stone drops down the sides—turns your island into sculpture. It looks luxe, hides scuffs, and visually anchors the room.
Tired of snacking when you’re not even hungry? This reset helps you stop the loop and feel back in control.
A simple reset for moments when cravings take over. Easy to use, easy to repeat, and designed to help you feel satisfied instead of stuck.
Why It Works
- Style: Clean lines = modern sophistication.
- Seating: Overhang one side for comfy stool space.
- Storage: Tuck cabinets and deep drawers behind the sleek facade.
Pro Tips
- Choose quartz for durability; marble is stunning but high maintenance (read: stains, tears).
- Extend the overhang to 12–15 inches for knee room, and add a steel support if it’s heavy.
- Use integrated outlets on the inside leg for mixers and laptops.
2. Dual-Level Magic: One Island, Two Purposes
Can’t decide between a dining zone and a prep surface? Do both. A two-tier island creates a working height for cooking and a slightly lower or higher tier for casual eating or serving.
Why It Works
- Style: Breaks up a big block of counter with architectural interest.
- Seating: The raised bar side conceals dishes and gives comfy legroom.
- Storage: Lower tier can hold tray dividers and cutting boards; upper tier gets shallow drawers for napkins and bar tools.
Pro Tips
- Keep 36 inches on the prep side, 42 inches on the dining side for elbow comfort.
- Use a darker material for the dining tier to hide wear (hello, kid-proof).
- Add LED strip lighting under the raised tier for moody glow.
3. The Hidden Workhorse: Drawers, Pull-Outs, and Secret Compartments
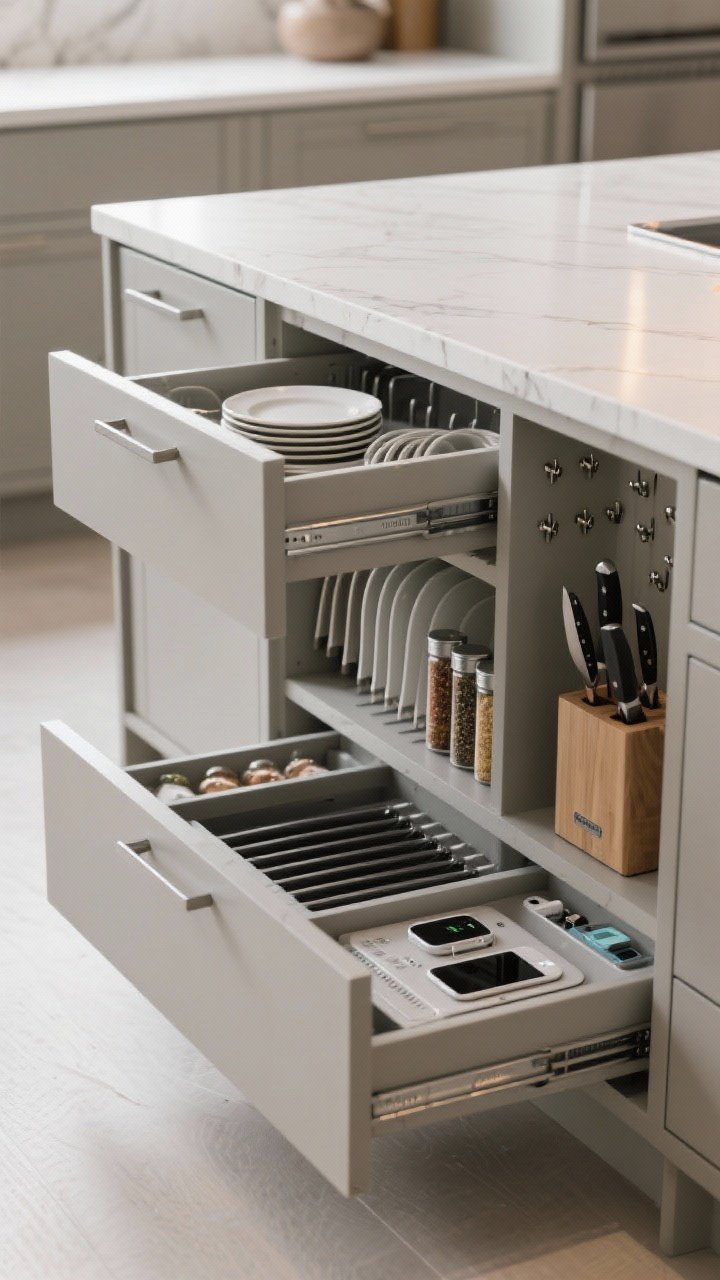
If your island is just a couple of cabinets, it’s time to upgrade. Maximize every inch with deep drawers, pull-out spice racks, and a sneaky charging drawer for devices.
Why It Works
- Style: Minimal fronts with integrated pulls keep it chic.
- Seating: Keep storage-heavy sides opposite the stools so no one’s banging knees.
- Storage: Vertical dividers for baking sheets, a knife block insert, and a slide-out trash that actually fits your life.
Pro Tips
- Use full-extension glides so you can actually see the back of the drawer (revolutionary).
- Dedicate a deep drawer for pots near the cooktop side if your island hosts a range.
- Add drawer peg systems to keep plates from shifting.
4. The Social Butterfly: U-Shape or L-Shape for Big Families
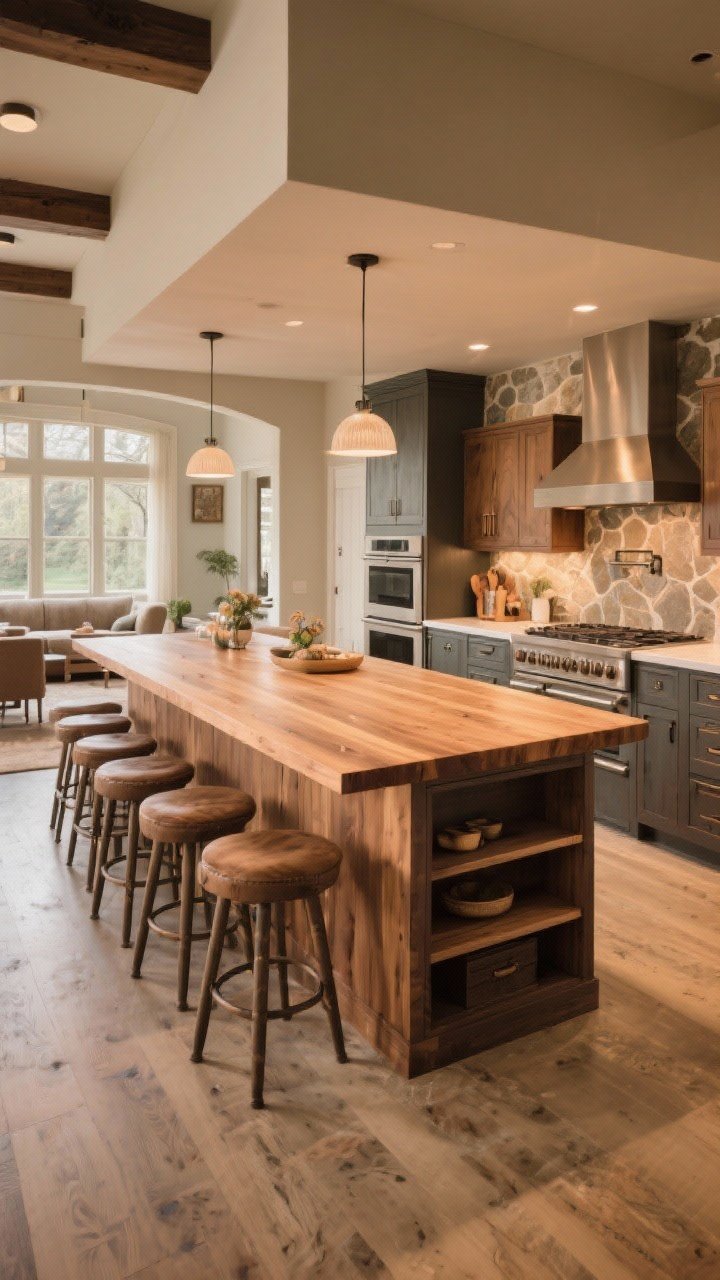
Love hosting? An L-shaped or U-shaped island creates a built-in hangout zone without sacrificing workflow. It’s perfect for open floor plans where the kitchen is the party.
Why It Works
- Style: Architectural form that feels custom and thoughtful.
- Seating: Wraparound stools mean everyone gets a spot.
- Storage: Corner cabinets with lazy Susans or angled drawers make use of awkward spaces.
Pro Tips
- Leave at least 42–48 inches of aisle space around the island for traffic flow.
- Vary depths: 24 inches on storage legs, 12–15 inches at seating edges.
- Use a different countertop on the seating section—wood warms things up and feels like furniture.
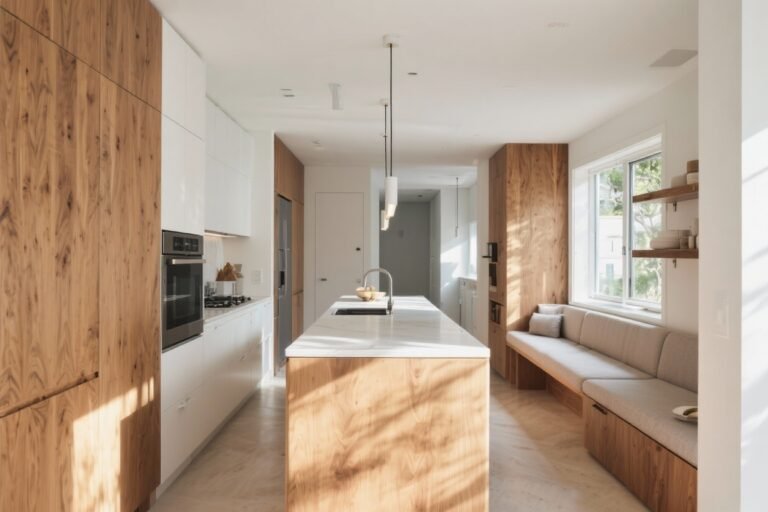
5. Mix-and-Match Materials: Wood Meets Stone (And Everyone Wins)
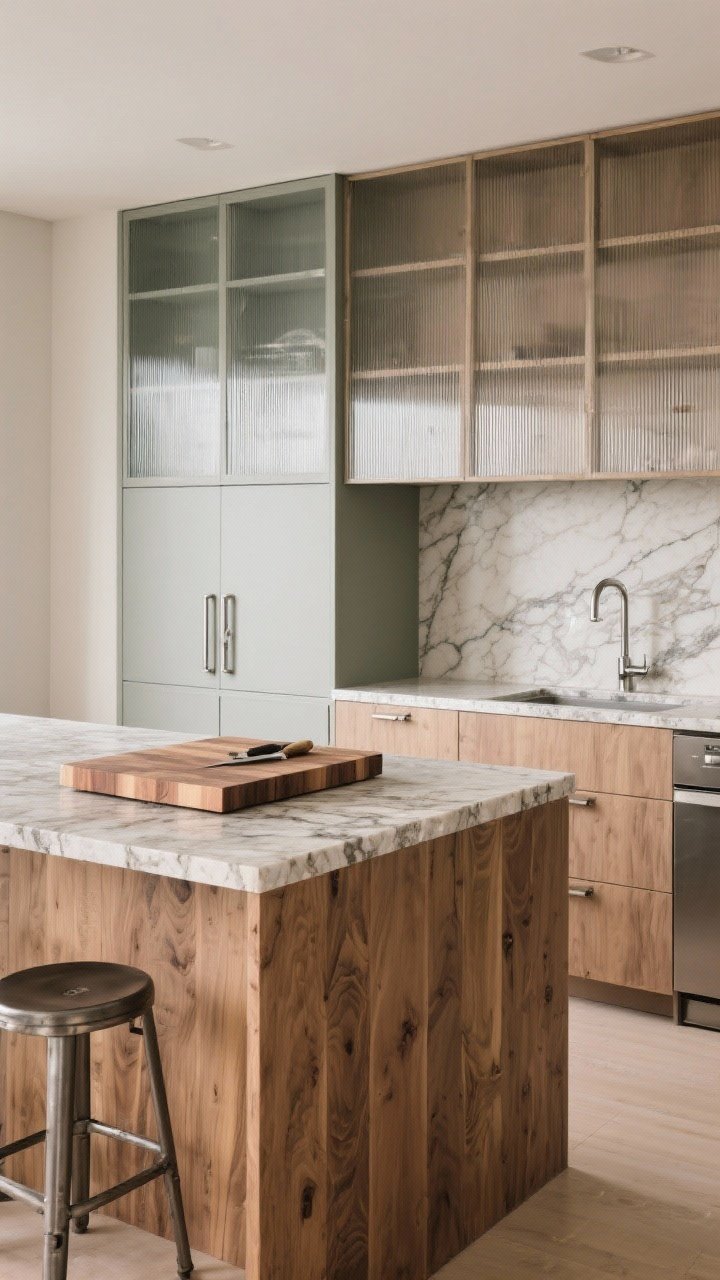
Can’t pick just one finish? Don’t. A wood base with a stone top is a classic. Or flip it: stone base details with a butcher-block insert for chopping.
Transform Your Home With 7,250+ Stunning Landscaping Designs—No Expensive Designers Needed!
- 🌿 Access 7,250+ stunning landscaping designs.
- 💰 Save thousands—no pro designer needed.
- 🏡 Plans for gardens, patios, walkways, and more.
- ✨ Simple, beginner-friendly DIY layouts.
- 🛠️ Customize any design to fit your yard.
Why It Works
- Style: Texture layering looks expensive and curated.
- Seating: Wood warms up the seating area so it feels inviting.
- Storage: Use glass fronts or reeded panels for a designer moment that still hides the mess.
Pro Tips
- Keep your palette to 2–3 materials to avoid chaos.
- Use waterproof finishes on wood near sinks; an oiled finish is easier to refinish than you think.
- Match your stool metal finishes to hardware for cohesion (nickel with nickel—easy win).

6. The Appliance Ninja: Integrate a Beverage Station or Microwave Drawer

Small appliances are huge clutter creators. Tuck them into the island and you’ll gain space (and sanity). Think microwave drawer, beverage fridge, or a built-in espresso zone.
Why It Works
- Style: Clean counters, fewer cords, zen vibes.
- Seating: Place appliances away from the stool side to avoid foot traffic collisions.
- Storage: Add a lift-up appliance garage on the back for toasters and blenders.
Pro Tips
- Put the beverage fridge at the stool side—kids can grab drinks without entering the chef zone.
- Microwave drawers need 24–30 inches width; plan power and venting early (FYI).
- Include a toe-kick vacuum if you’ve got central vac—it’s addictive.
7. Petite But Mighty: Narrow Islands With Slide-Out Seating
Small kitchen? No problem. A slim island (24–30 inches deep) with pull-out seating or tuck-under stools adds function without cramping the aisle.
Why It Works
- Style: Mini scale can still be major moment with a bold color or fluted detail.
- Seating: Use backless stools that disappear under an overhang.
- Storage: Shallow drawers for linens, spices, and gadgets you actually use.
Pro Tips
- Target 36 inches of circulation minimum; 42 is ideal if two people cook.
- Add a drop-leaf extension for occasional dining or extra prep space.
- Go vertical: end panels with peg rails or magnetic knife strips free up drawers.
8. Statement Lighting + Smart Power: Form Meets Function
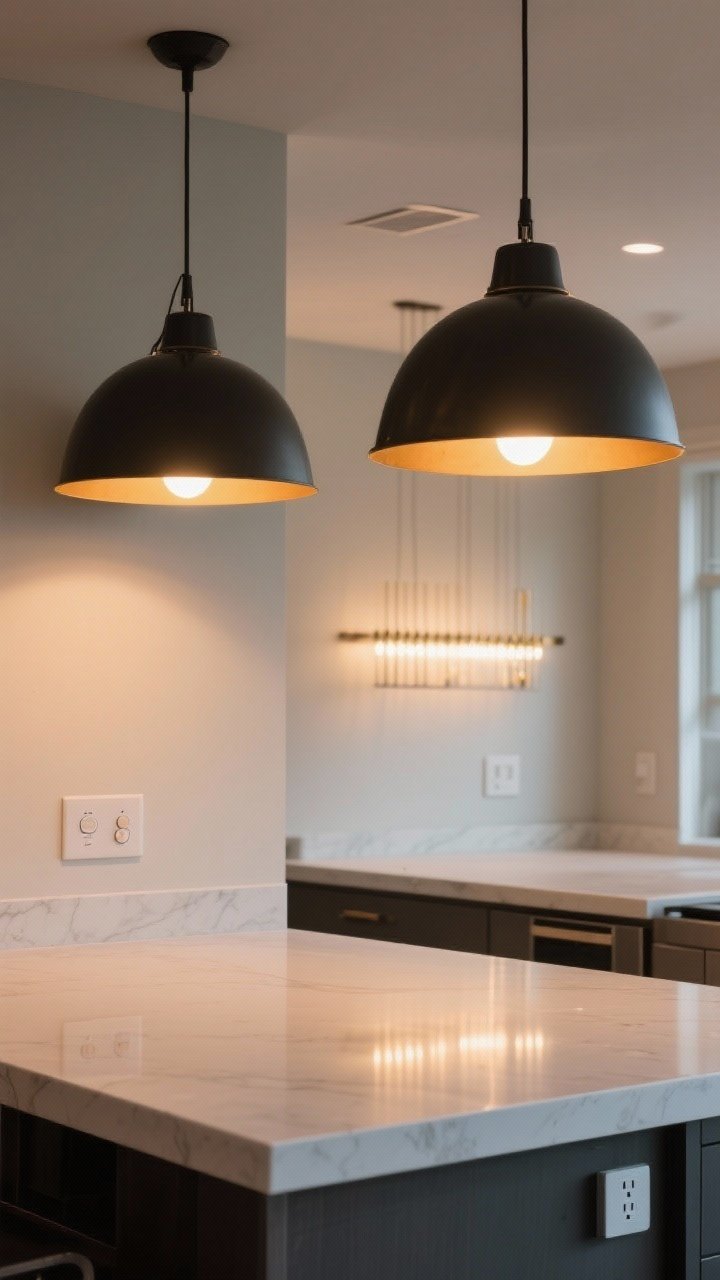
Your island deserves lighting that flatters the room and the chef. Pair pendants with discreet power solutions and you’ll never fight a dark corner or dead battery again.
Why It Works
- Style: Oversized pendants or a linear chandelier = instant focal point.
- Seating: Dimmer controls let you switch from task mode to dinner-party glow.
- Storage: Under-counter pop-up outlets keep surfaces clean.
Pro Tips
- Hang pendants 30–34 inches above the counter; space them evenly (rule of thirds works well).
- Choose bulbs at 2700–3000K for warm, flattering light.
- Add USB-C outlets inside a drawer for device charging—no cable clutter, IMO.
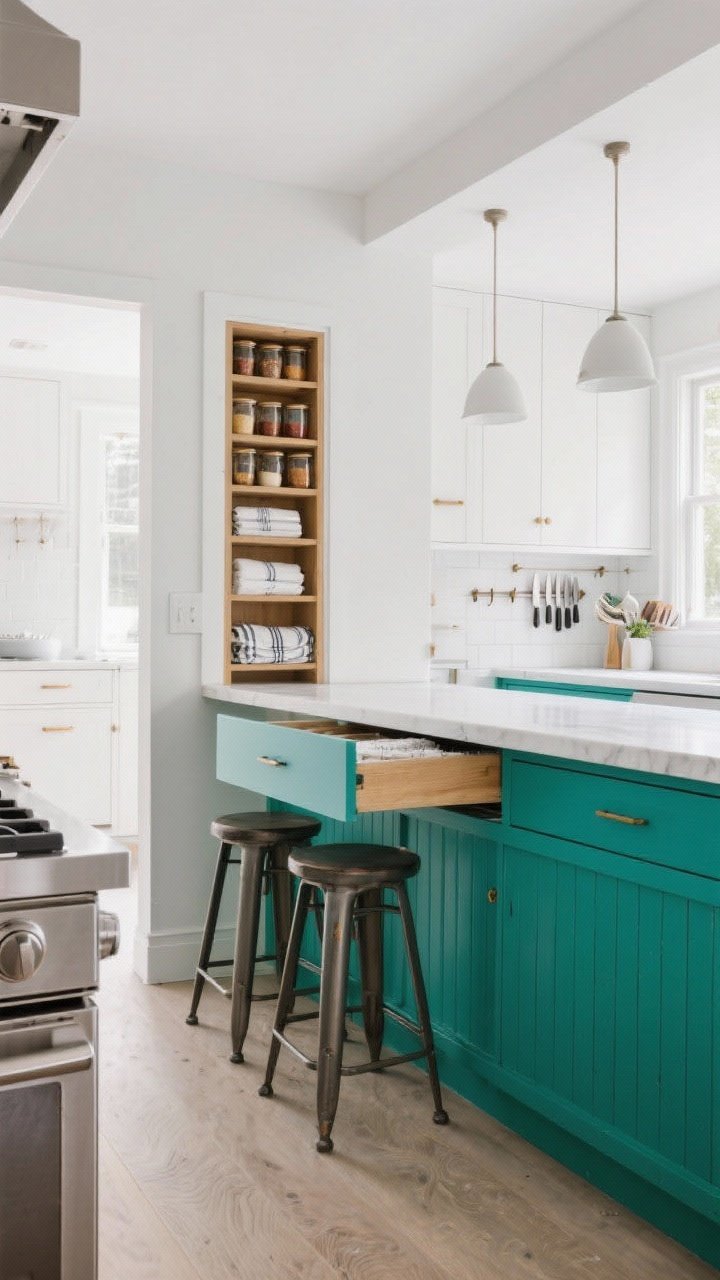
9. Color Crush: Go Bold With Paint, Keep Function Classic

If your kitchen is neutral, the island is the perfect spot for color. Think deep navy, sage green, or a moody charcoal—it’s a change that transforms the whole room.
Why It Works
- Style: Contrast adds depth and makes the island a feature.
- Seating: Coordinate stool upholstery with the island shade for a layered look.
- Storage: Painted finishes hide wear better than high-gloss in high-traffic zones.
Pro Tips
- Use a durable enamel or cabinet-grade paint that resists chips.
- Try a color-dipped toe-kick or contrasting end panels for personality without commitment.
- Balance bold color with subtle counters—white, light quartz, or soapstone look-alikes.
10. The Furniture-Style Island: Legs, Open Shelves, and Book Nooks
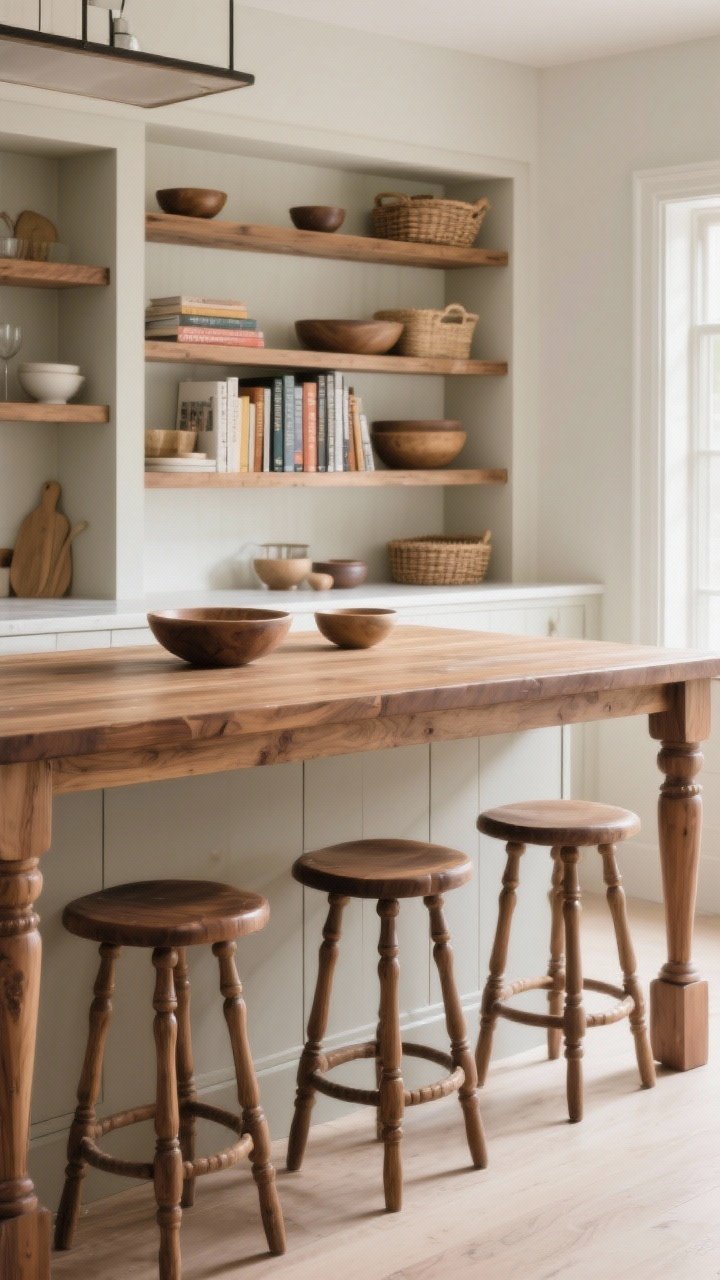
You don’t need a boxy block to be functional. A furniture-inspired island with turned legs, open shelves, or a book nook feels airy and custom—especially in smaller spaces.
Why It Works
- Style: Adds character and breaks up a wall of cabinets.
- Seating: Leg details naturally carve out stool spots.
- Storage: Open shelves for display-worthy bowls and cookbooks; drawers for the rest.
Pro Tips
- Use baskets on open shelves to corral less-pretty items.
- Specify a water-resistant top if you’re using wood—European oak or walnut with a hardwax oil is clutch.
- Protect the book nook with a slight overhang lip to shield from splashes.
Stool Sizing Cheat Sheet (Because Comfort Matters)
- Counter-height island: 36-inch counter, use 24–26-inch stools.
- Bar-height island: 42-inch counter, use 28–30-inch stools.
- Allow 24 inches width per stool and 10–12 inches of leg clearance.
Storage Add-Ons You’ll Be Obsessed With
- Toe-kick drawers for sheet pans and platters.
- Pull-out cutting board over the trash for peel-and-dump efficiency.
- Corner drawers (diagonal) that actually use that weird space.
- Divided utensil drawers with cork or silicone liners to keep things quiet.
Planning Basics (So It Flows, Not Fights)
- Keep 42 inches minimum between island and perimeter; 48 inches if multiple cooks.
- Map the work triangle (sink, fridge, range) so the island supports, not blocks.
- Place the dishwasher on the island only if you have 36 inches of landing space next to the sink.
Whether you’re going bold with color, sneaking in a beverage fridge, or creating a dual-level masterpiece, your island can be so much more than a countertop with stools. Pick the ideas that match your lifestyle, layer in smart storage, and don’t be shy about a little drama. You’ll end up with a kitchen that looks incredible and works even better—aka the dream combo. Now, who’s coming over for snacks?