10 Budget-friendly Kitchen Organization Ideas That Look High-end—no Reno Required
Your kitchen can look designer-level without the designer-level invoice. We’re talking clever swaps, small upgrades, and a few sneaky tricks that make everything feel luxe. Ready to make your cabinets behave and your counters breathe? Let’s get into the good stuff.
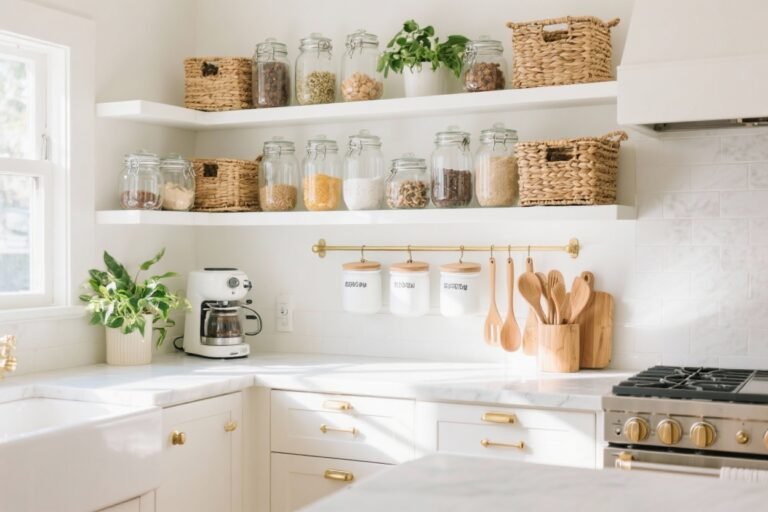
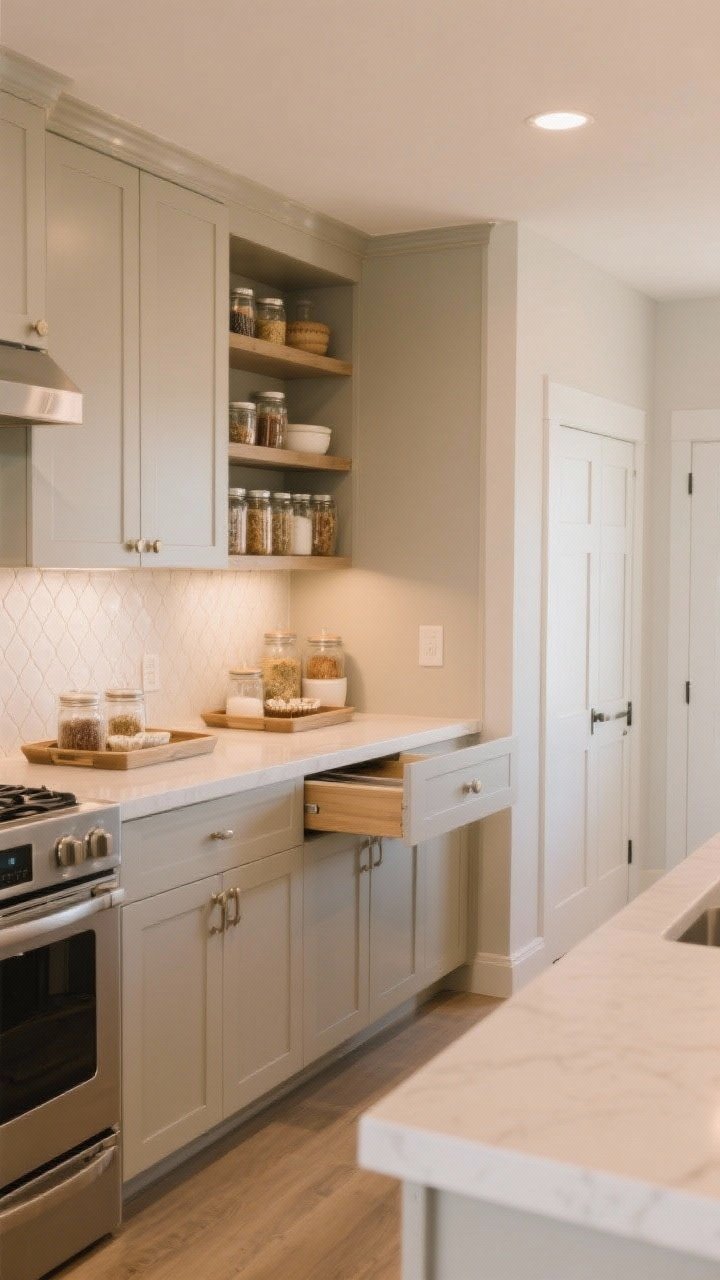
1. Decant Like a Minimalist, Save Like a Maximalist
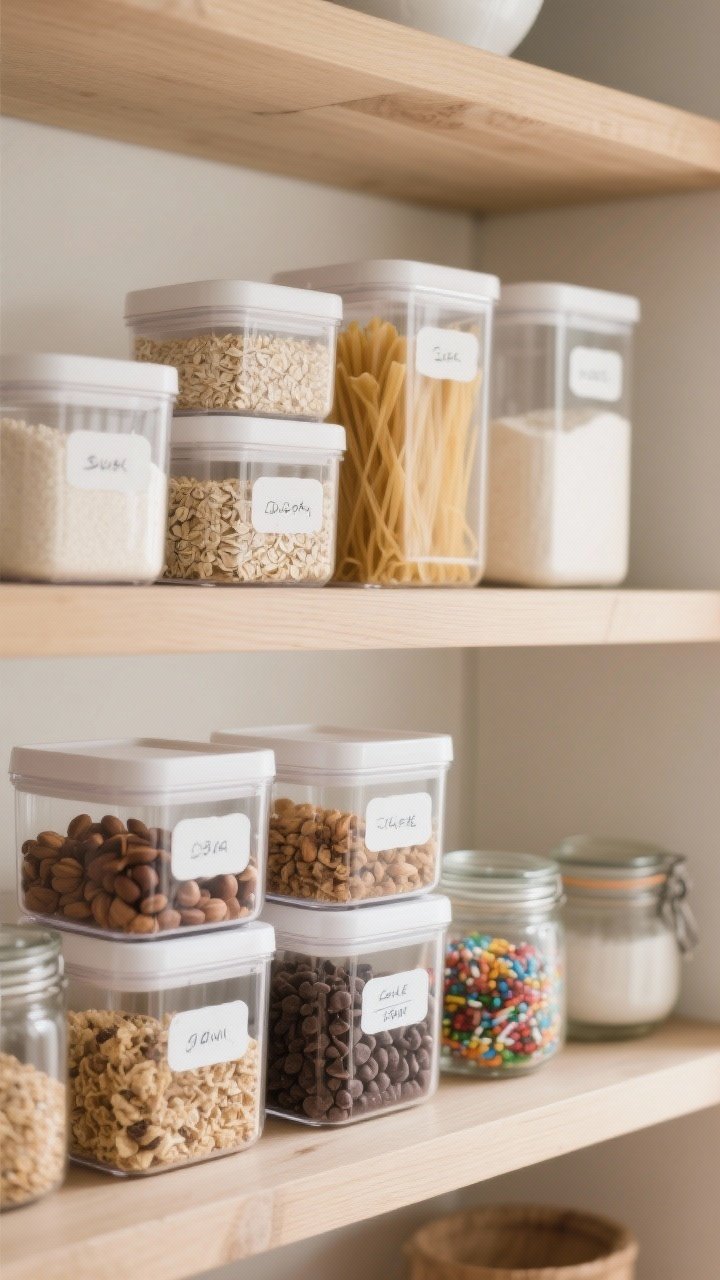
Want instant “I have my life together” energy? Decant your pantry staples into clear containers. It’s the oldest high-end trick in the book because it works—uniform shapes look clean, labels help you find things, and you can actually see when you’re out of rice.
Tired of snacking when you’re not even hungry? This reset helps you stop the loop and feel back in control.
A simple reset for moments when cravings take over. Easy to use, easy to repeat, and designed to help you feel satisfied instead of stuck.
What to Decant
- Dry goods: Flour, sugar, pasta, rice, oats, beans.
- Snacks: Crackers, nuts, granola, cookies.
- Baking bits: Chocolate chips, sprinkles, cocoa.
Money-Saving Tips
- Buy a set of stackable containers (square or rectangle saves space).
- Use glass jars or cleaned pasta sauce jars for a free upgrade.
- Label with a paint pen or cheap vinyl labels—instant polish.
Bonus: decanting makes even budget groceries feel fancy. Your oats just got promoted.
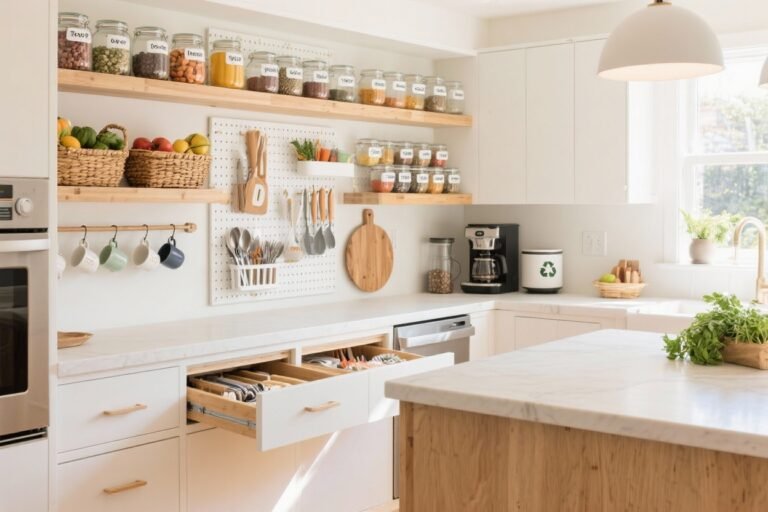
2. Zone Your Drawers Like a Boutique
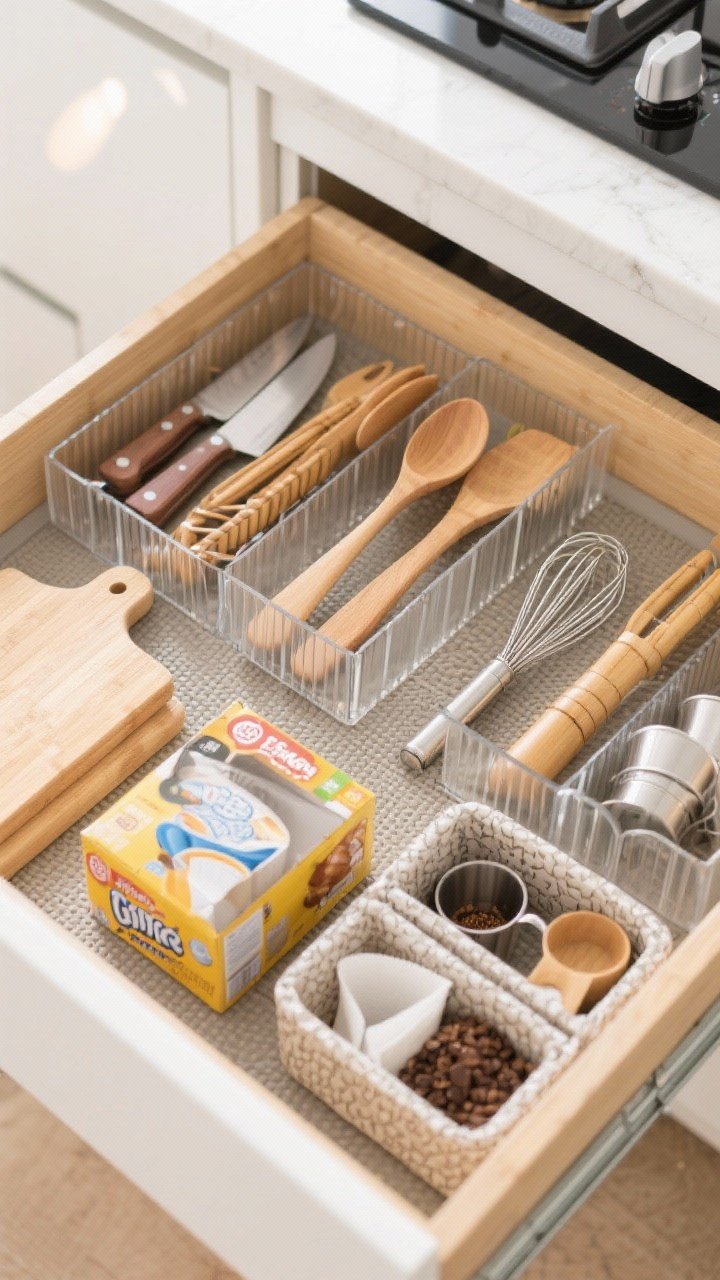
High-end kitchens aren’t just pretty—they’re zoned. Create stations for prep, coffee, baking, and snacks so you’re not running laps around your kitchen mid-meal.
How to Zone
- Prep zone: Cutting boards, knives, mixing bowls near the sink.
- Stove zone: Spatulas, wooden spoons, tongs by the range.
- Coffee zone: Mugs, filters, beans, syrups in one spot.
- Baking zone: Measuring cups, whisks, baking sheets together.
Budget Drawer Tricks
- Use bamboo or acrylic dividers to organize utensils by type.
- Turn small cereal boxes into DIY drawer organizers and wrap them in contact paper.
- Add non-slip mats so nothing slides around (tiny cost, big difference).
Zones = less mess, less stress, and zero “Where’s the whisk?!” moments.
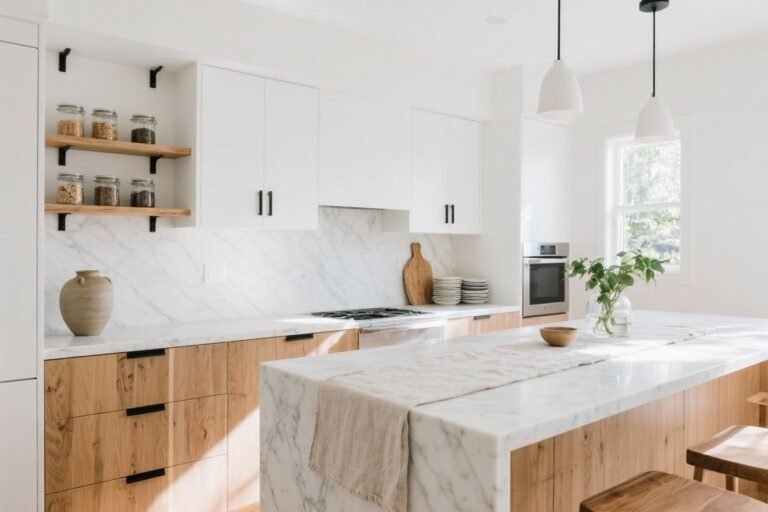
3. Elevate with Matching Hardware (Yes, Really)
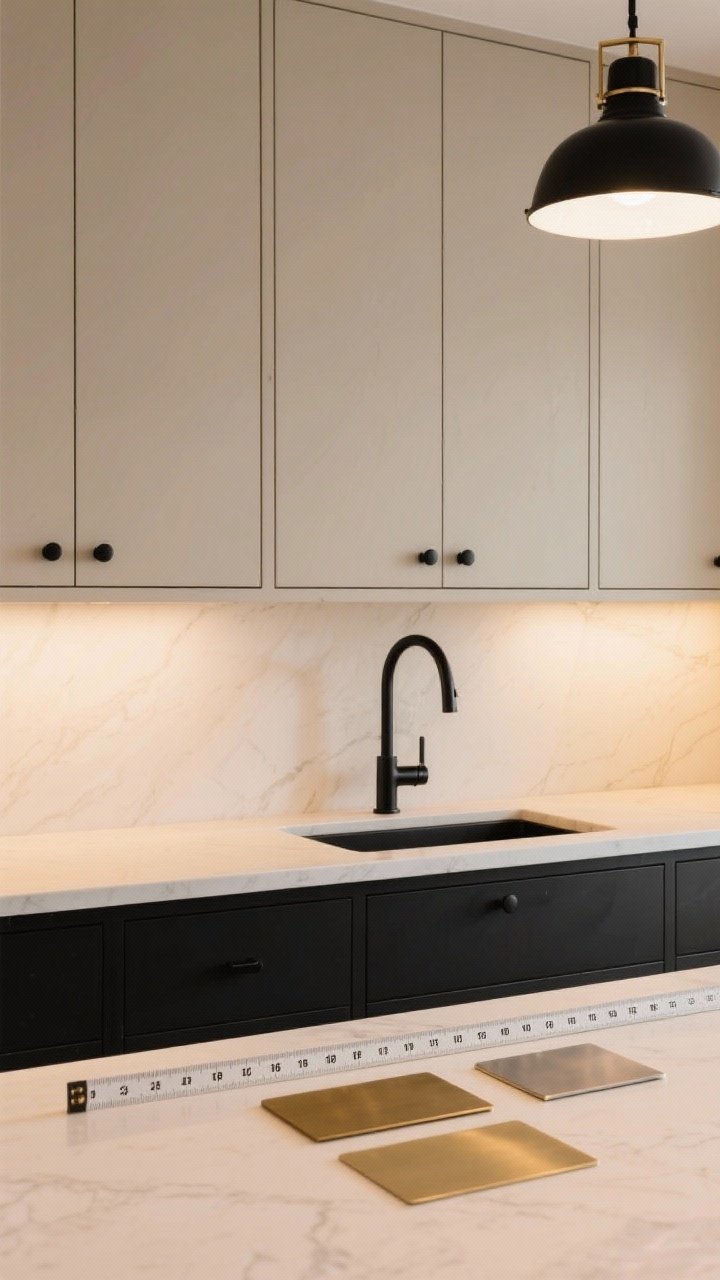
Swapping cabinet hardware is the fastest way to fake a custom kitchen. Mismatched knobs scream “rental,” while cohesive handles whisper “high-end.” It’s the jewelry of your cabinets—so accessorize.
Transform Your Home With 7,250+ Stunning Landscaping Designs—No Expensive Designers Needed!
- 🌿 Access 7,250+ stunning landscaping designs.
- 💰 Save thousands—no pro designer needed.
- 🏡 Plans for gardens, patios, walkways, and more.
- ✨ Simple, beginner-friendly DIY layouts.
- 🛠️ Customize any design to fit your yard.
Affordable Finish Ideas
- Brushed brass for warmth and a boutique look.
- Matte black for drama and contrast on light cabinets.
- Brushed nickel for something timeless and low-maintenance.
Pro Tips
- Measure center-to-center holes before ordering pulls—trust me on this.
- Match finishes with faucet and lighting when possible for that cohesive glow-up.
- Hit the sale section or clearance bins—hardware often gets discounted in sets.
FYI: Even swapping just the visible knobs and leaving the inner cabinet ones alone cuts costs.
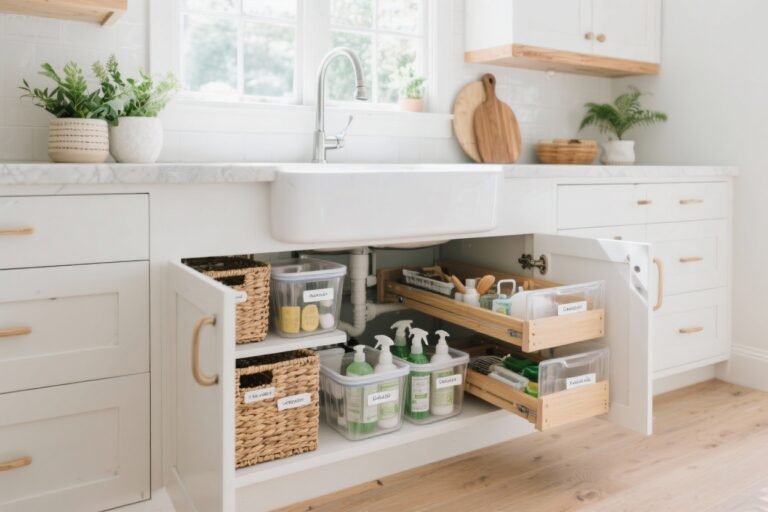
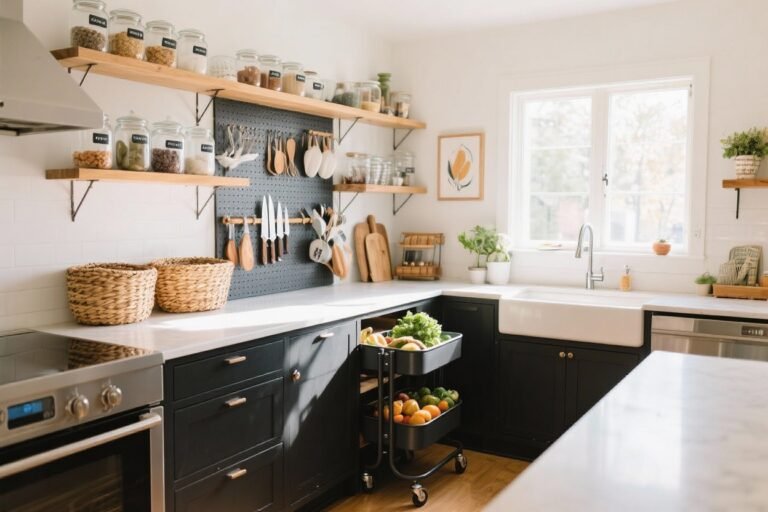
4. Use Bins and Baskets Like a Designer
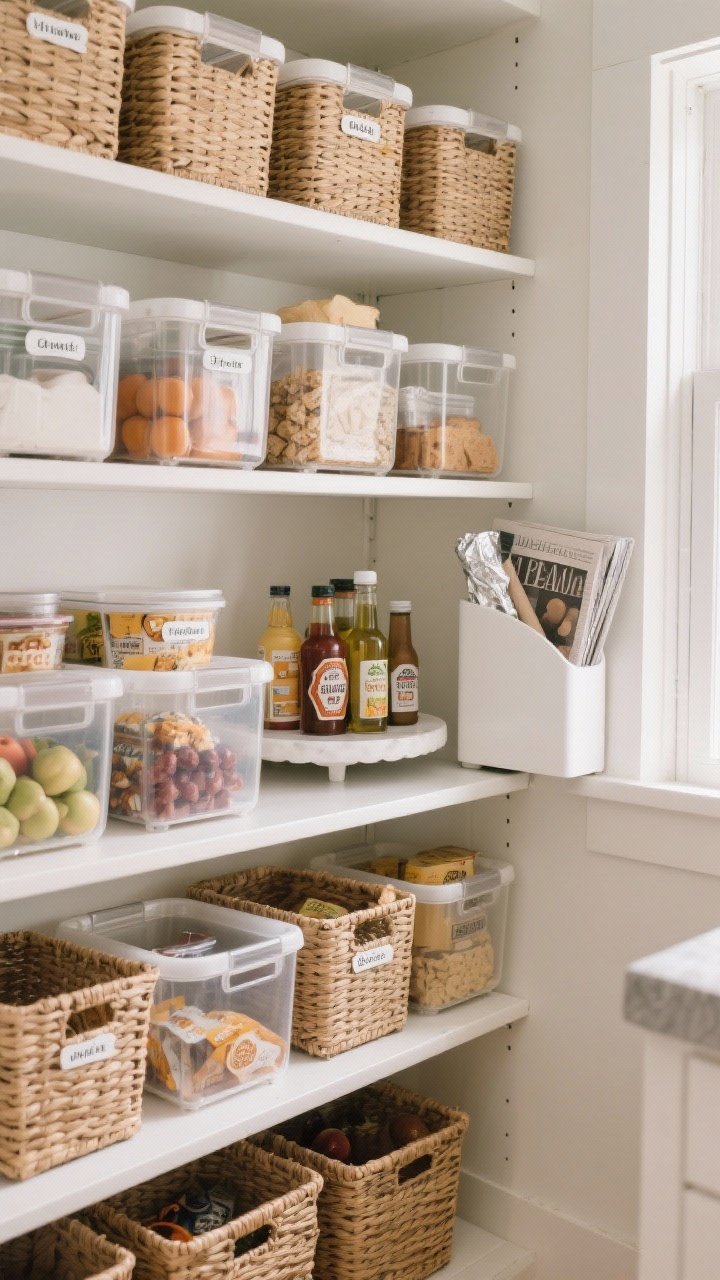
Designers love a good container. Why? Because uniform bins disguise chaos. Put small items in matching baskets and suddenly your pantry looks like it has a team of assistants.
Where to Use
- Pantry: Group snacks, baking supplies, breakfast items.
- Fridge: Clear bins for produce, deli items, leftovers.
- Under sink: One bin for cleaners, another for sponges and bags.
Budget-Friendly Picks
- Plastic or woven bins from discount stores—buy multiple in the same style.
- Lazy Susans for oils and sauces (no more sticky corners).
- Magazine holders for foil, parchment, and cutting boards.
Label everything. It looks chic and stops the gremlins (aka your family) from putting things anywhere.
5. Add a Peel-and-Stick Backsplash or Shelf Liner
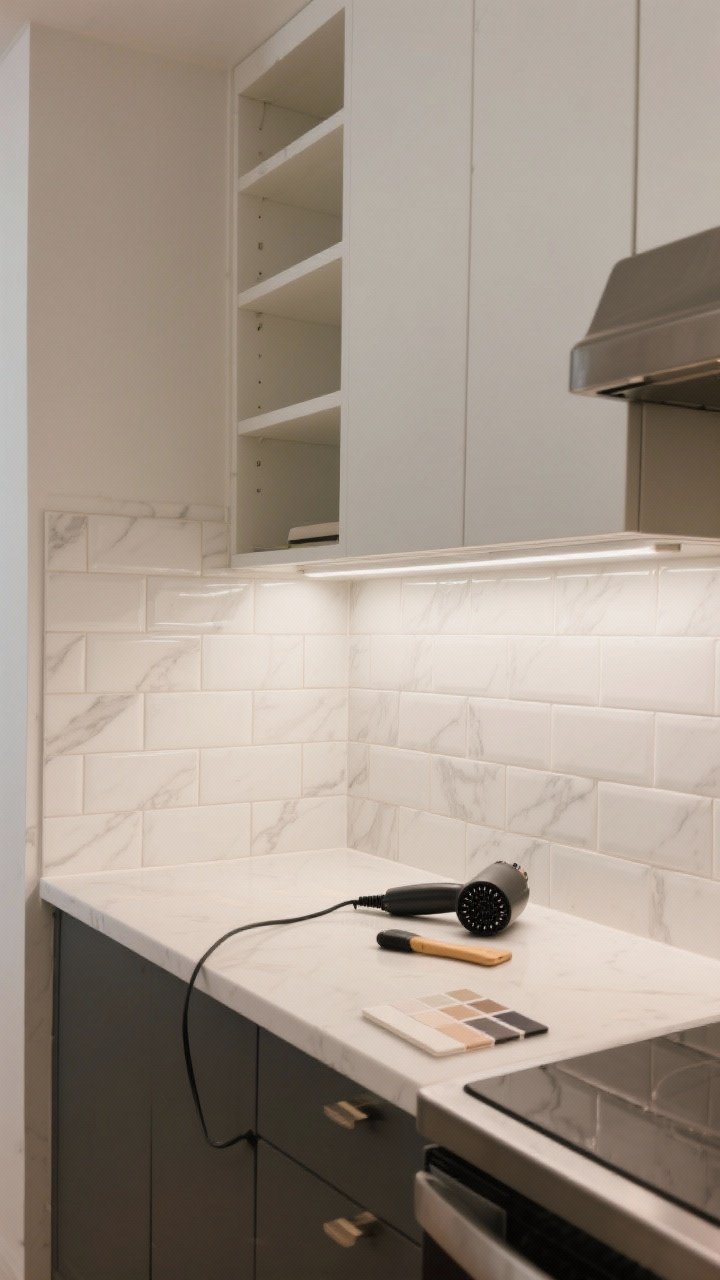
Want that custom, “I thought you renovated?” vibe on a budget? Use peel-and-stick materials strategically. A little texture and pattern goes a long way.
Where to Apply
- Backsplash area: Subway tile or marble peel-and-stick for a clean look.
- Open shelves: Liner on the back panel to add depth and pattern.
- Cabinet interiors: Liner to protect shelves and add a subtle surprise.
Pro Tips
- Choose neutral, classic patterns for a high-end feel.
- Buy samples first to test color and texture in your lighting.
- Use a smoothing tool and a hairdryer for edges—clean and bubble-free.
It’s renter-friendly, removable, and surprisingly durable—designer look, DIY price.

6. Bring In Open Shelves (Without the Dust Drama)

Open shelving looks expensive… unless it’s messy. Keep it curated and functional with a few smart choices.
What to Display
- Everyday dishes: White plates and bowls look uniform and chic.
- Glassware: Matching glasses or a neat color story.
- Decanted pantry goods: Pretty jars of pasta, grains, and spices.
How to Style
- Stick to a neutral palette with 1-2 accent colors.
- Stack items in odd numbers for balance (threes are your friend).
- Add one plant or a small wood cutting board for warmth.
Worried about dust? Use shelves for items you grab daily—the movement keeps dust down, IMO.
7. Master the Art of Hidden Storage
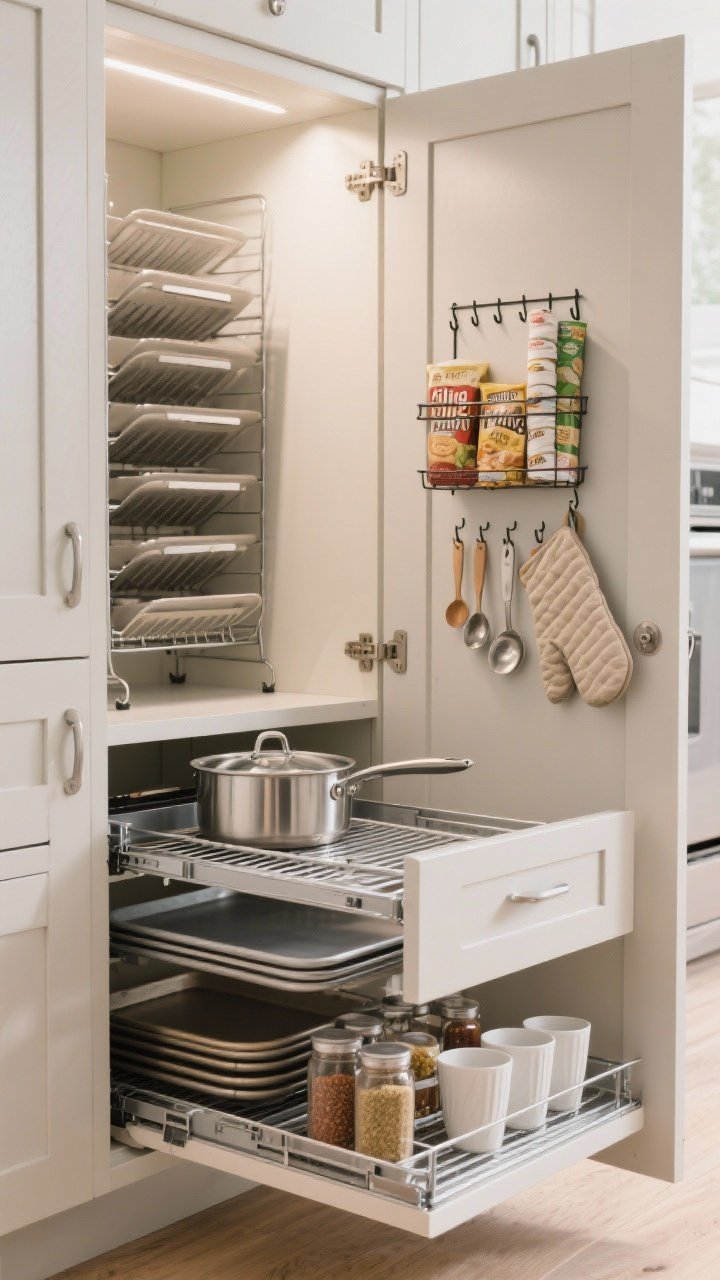
High-end kitchens are basically magicians. They hide everything. You can too with a few under-the-radar solutions that maximize space without visual clutter.
Smart Storage Add-Ons
- Over-the-door racks: Great for pantry doors—hold wraps, snacks, spices.
- Pull-out cabinet organizers: Metal or bamboo trays for pots and lids.
- Toe-kick drawers: DIY if you’re handy, or use low bins for baking sheets.
Small Changes, Big Payoff
- File your baking sheets vertically with a rack—no more clanging stacks.
- Hook the inside of cabinet doors for measuring spoons and oven mitts.
- Use risers in cabinets to create a second shelf for cups or spices.
Hidden storage doesn’t just look luxe—it makes cooking actually enjoyable. Shocking, I know.
8. Upgrade Your Counter Game With Trays and Curated Clusters
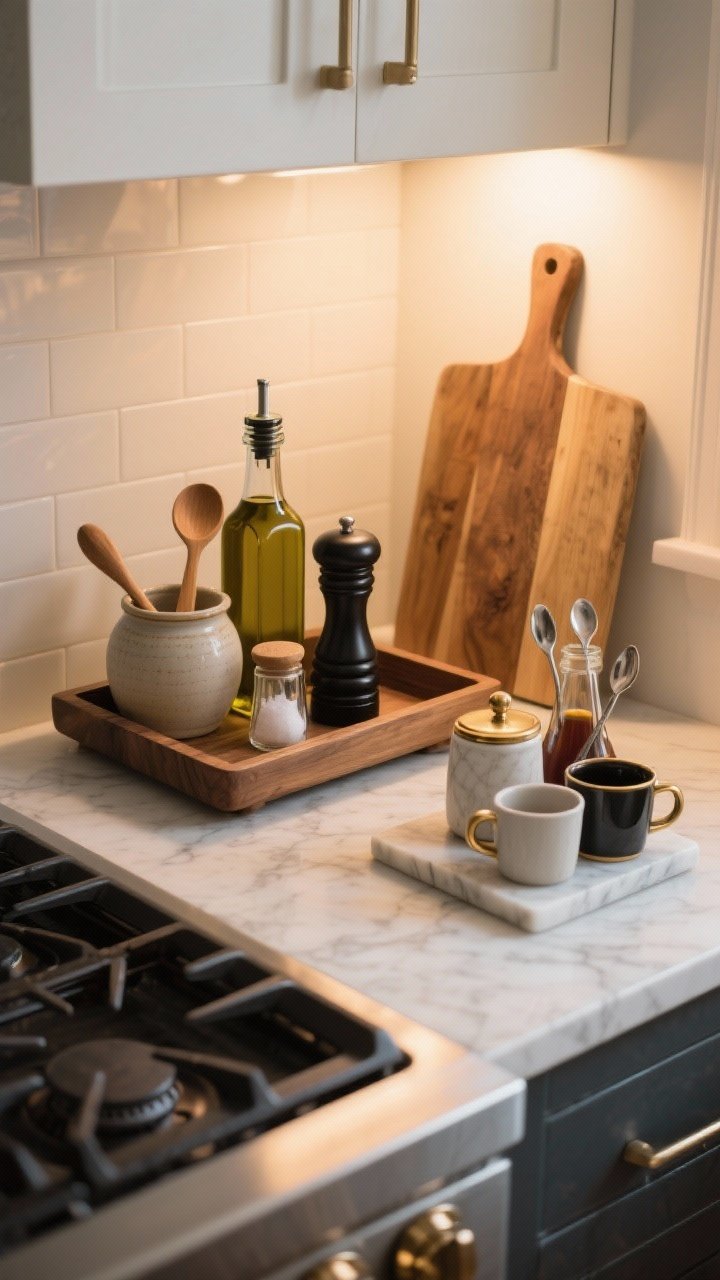
Clutter looks messy. But curated clutter on a tray? That looks intentional and expensive. Group daily-use items to create a mini vignette that doubles as storage.
What to Corral
- By the stove: Olive oil, salt cellar, pepper mill, wooden spoon in a crock.
- Coffee station: Sugar, syrups, spoons, mugs on a pretty board or tray.
- Prep zone: Cutting board stack with a small bowl for garlic/shallots.
Designer Details
- Use a wood cutting board or marble slab as the base.
- Mix one natural texture (wood, stone) with one metallic (brass, black).
- Limit each tray to 3–5 items so it feels curated, not crowded.
Instant upgrade, zero reno. Your counters will finally get their main-character moment.
9. Go Pro With a Streamlined Sink Setup

The sink area can quietly tank your aesthetic. Tighten it up with a few budget swaps that look straight out of a showroom.
Make It Look High-End
- Swap mismatched soap bottles for matching dispensers (glass or matte).
- Use a sleek dish brush and tuck sponges into a low-profile caddy.
- Add a roll-up drying rack over the sink—functional and space-saving.
Under-Sink Order
- Use stacking bins for cleaners and towels.
- Install a tension rod to hang spray bottles and free up shelf space.
- Include a small lidded bin for dishwasher tabs or trash bags.
Keep just the essentials out. Everything else? It gets stored. Minimalism at its most practical, FYI.
10. Light It Like a Restaurant Without the Bill
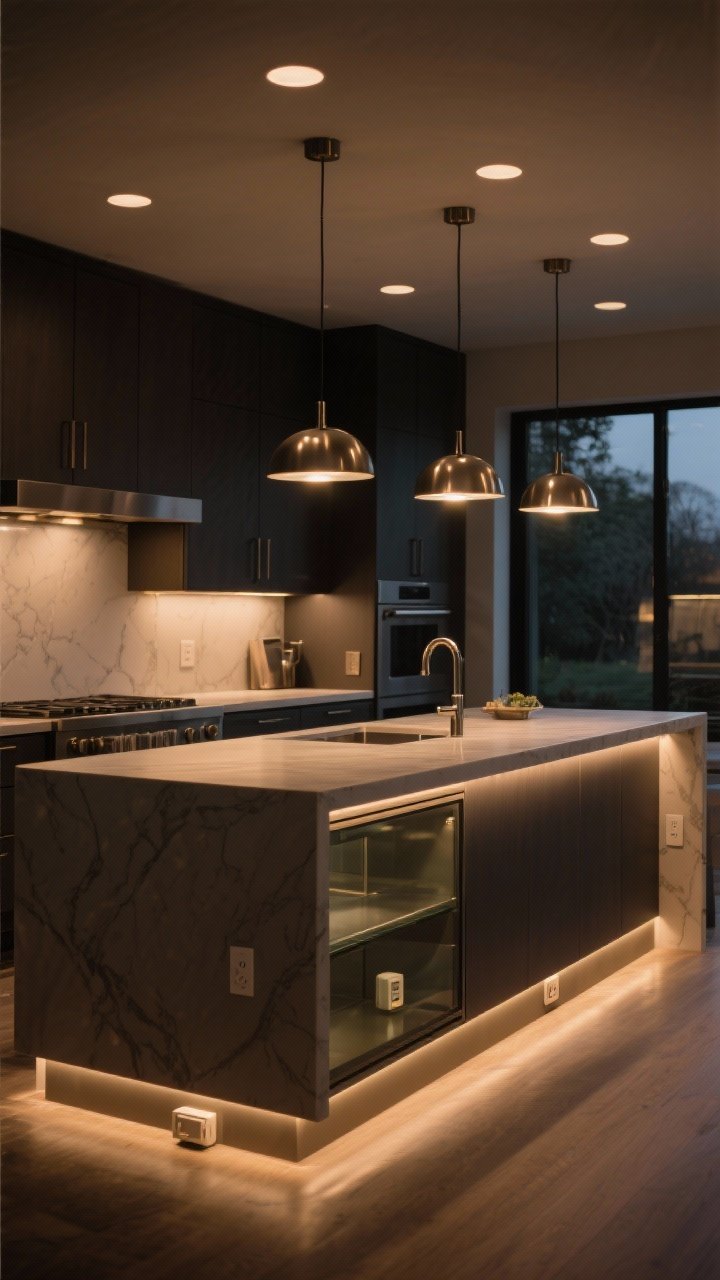
Lighting is the secret sauce. Swap harsh overheads for layered, warm lighting and your kitchen instantly feels custom—even if you’re reheating last night’s pasta.
Budget Lighting Ideas
- Stick-on puck lights under cabinets for ambient task lighting.
- Plug-in pendants instead of hardwired fixtures—stylish and renter-friendly.
- LED strip lights inside glass cabinets or along toe-kicks for a soft glow.
Pro Tips
- Choose warm white (2700–3000K) bulbs for a cozy, upscale vibe.
- Use smart plugs or dimmers to control brightness and set routines.
- Repeat the same metal finish across hardware and lighting for cohesion.
When your lighting is good, everything else reads more expensive. Including your very normal countertops.
Conclusion
High-end style isn’t about spending big—it’s about editing, matching, and hiding the chaos. Decant the basics, zone your drawers, corral the counters, and let good lighting do the heavy lifting. Start with one idea, then build. Your kitchen’s about to look designer-curated—without the designer price tag.