10 Kitchen Backsplash Ideas That Look Custom (without the Custom Price)
Let’s be honest: a gorgeous backsplash can make your kitchen look designer-level in seconds. But custom tile? That price tag can sting. The good news: you can absolutely fake a high-end look with smart materials, layout tricks, and a few DIY-friendly upgrades.
Grab your coffee and your measuring tape—here are ten creative, budget-savvy backsplash ideas that look ultra custom without draining your reno fund.
Tired of snacking when you’re not even hungry? This reset helps you stop the loop and feel back in control.
A simple reset for moments when cravings take over. Easy to use, easy to repeat, and designed to help you feel satisfied instead of stuck.
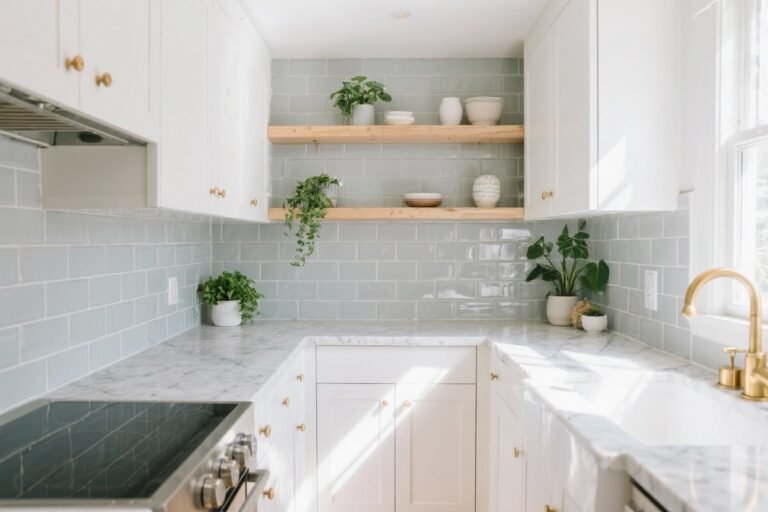
1. Stacked Subway, But Make It Fresh
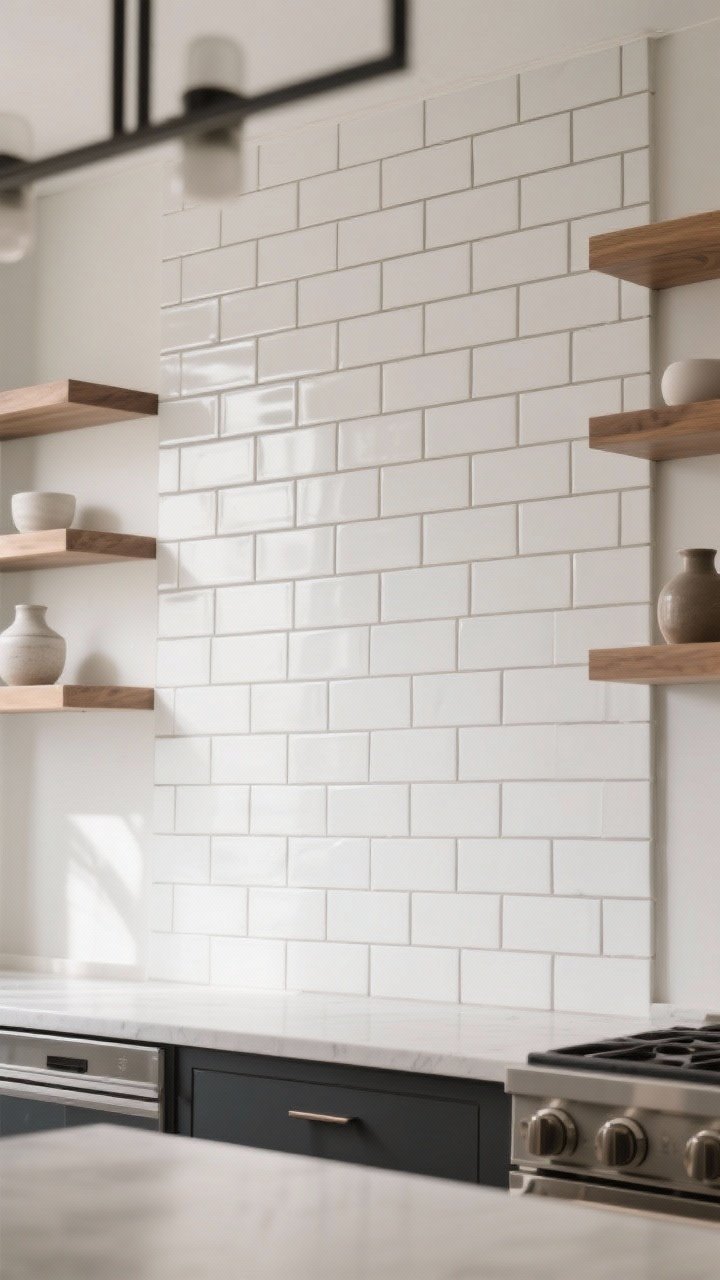
Subway tile is timeless, but the standard running bond can feel expected. Switch up the layout to look custom without upgrading the tile itself. Try vertical stacking for a sleek modern vibe or a soldier stack (perfectly aligned rows) for that luxe, tailored feel.
Why It Works
- Same tile, different layout = designer-level impact at basic-tile prices.
- Vertical orientation makes ceilings feel taller—trick of the eye, big payoff.
- Fewer cuts and cleaner lines keep install time (and costs) down.
Pro Tips
- Use a contrasting grout to highlight the pattern—think white tile with warm gray grout.
- Run tile to the ceiling behind open shelves for a custom, built-in look.
- Choose a matte finish for modern kitchens; go glossy for classic or small spaces that need light bounce.
2. Peel-and-Stick (That Doesn’t Look Peel-and-Stick)
Hear me out: the newer peel-and-stick tiles are legit. Look for thicker, gel-faced or stone-composite versions that mimic real tile. They go up fast, resist splashes, and are a renter’s best friend.
Why It Works
- They deliver the pattern and texture of real tile without the mess.
- Removable options let you switch styles with zero demo.
- Great for testing a bold look before committing to permanent tile.
Pro Tips
- Prep is everything—clean with degreaser and dry thoroughly before sticking.
- Use a metal edge trim at the ends to make it look “finished.”
- Cut around outlets with a sharp utility knife for crisp edges.
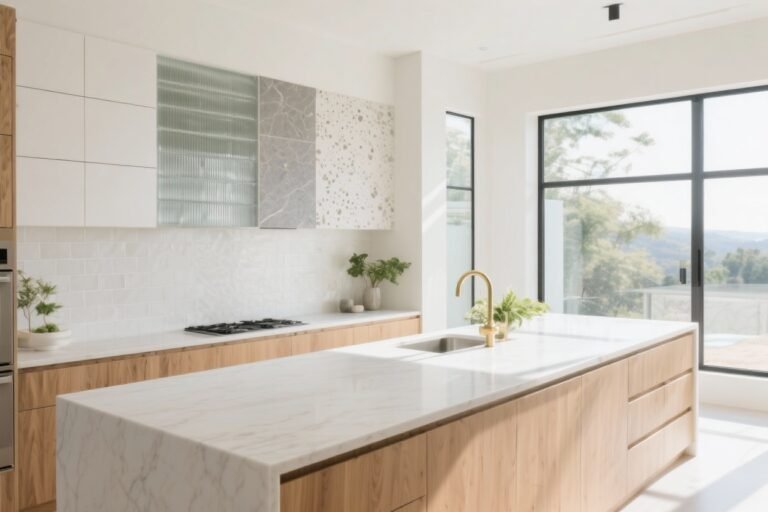
3. Slab-Look Panels Without the Slab Price
Get that seamless, high-end slab style using laminate sheets, large-format porcelain, or acrylic panels. Fewer seams = instant luxury. Plus, panels are super easy to wipe down, and you avoid grout maintenance altogether.
Why It Works
- Smooth surface reads as custom millwork and looks incredibly sleek.
- Big sheets can mimic marble veining or stone texture convincingly.
- It’s often DIY-friendly with basic tools.
Pro Tips
- Pick a panel with a subtle veining pattern for a realistic stone look.
- Use color-matched silicone at the counter seam so it disappears.
- Run the panel up to the range hood for a custom, continuous feel.
4. High-Contrast Grout for Major Graphic Drama
Want your backsplash to stop traffic? Keep your tile simple and let grout do the heavy lifting. A basic square tile with bold grout looks editorial and expensive—without being either.
Transform Your Home With 7,250+ Stunning Landscaping Designs—No Expensive Designers Needed!
- 🌿 Access 7,250+ stunning landscaping designs.
- 💰 Save thousands—no pro designer needed.
- 🏡 Plans for gardens, patios, walkways, and more.
- ✨ Simple, beginner-friendly DIY layouts.
- 🛠️ Customize any design to fit your yard.
Why It Works
- Grout color transforms the entire pattern for pennies.
- Turns budget-friendly tile into a statement feature.
- Perfect if you love a graphic, modern vibe.
Pro Tips
- Use epoxy or stain-resistant grout to keep dark colors crisp.
- Balance bold grout with understated hardware for an elevated look.
- FYI: Test a small area first—grout haze on matte tile can be tricky.
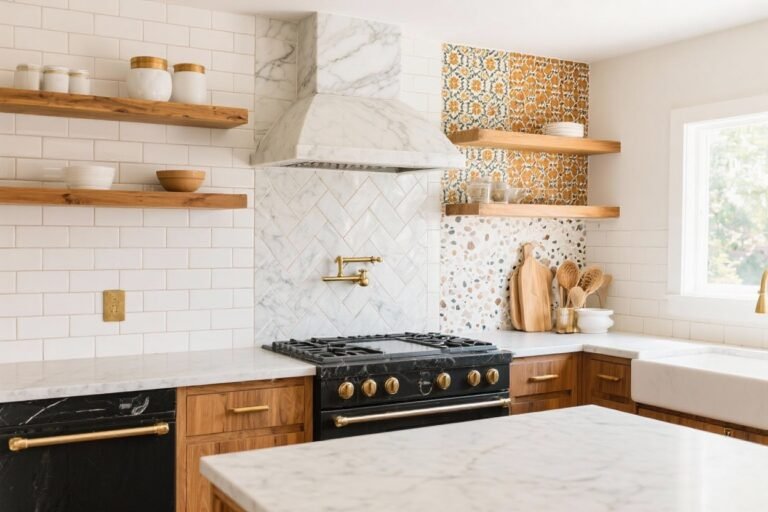
5. Picture-Frame a Feature Behind the Range
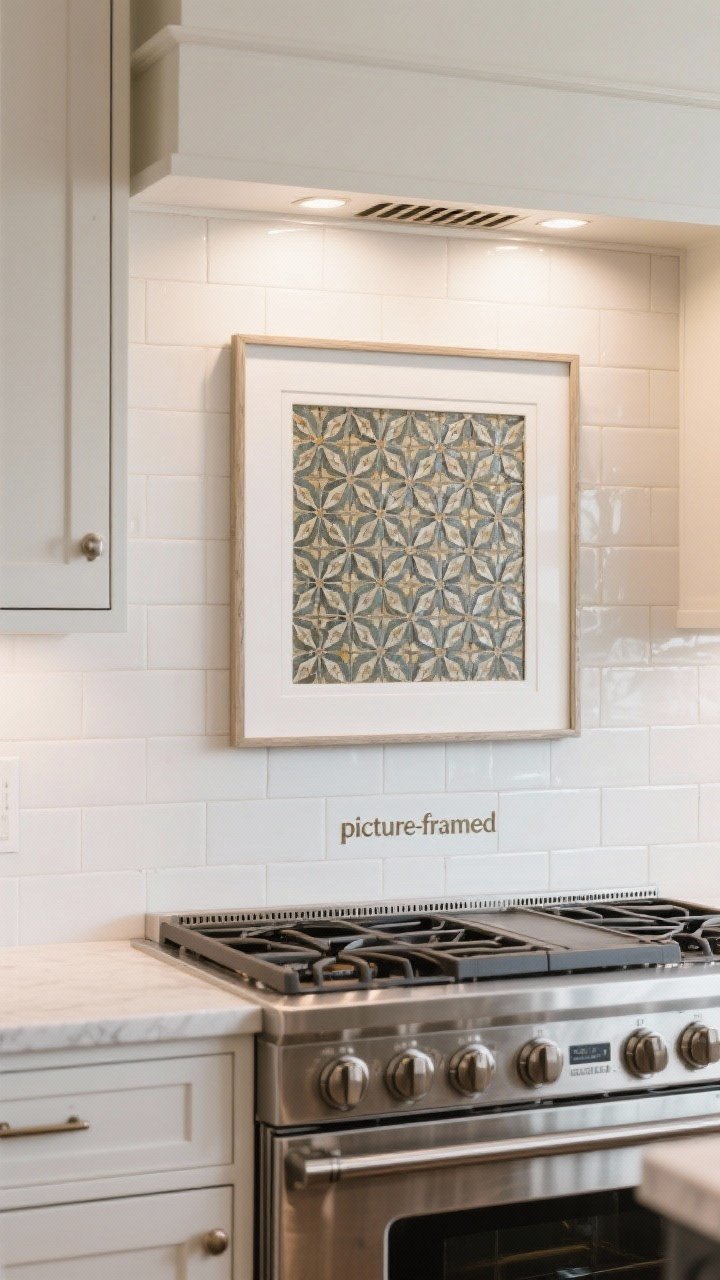
Here’s a high-end designer move: create a “feature panel” behind your stove with a different tile or pattern, and frame it with trim pieces. The rest of the backsplash stays simple, which keeps costs down and lets the feature sing.
Why It Works
- Concentrates your splurge tile where it counts.
- Looks like a custom inset—because it basically is.
- Adds a focal point without overwhelming the space.
Pro Tips
- Use pencil trim or Schluter edging to frame the panel cleanly.
- Choose a bolder pattern or a mosaic for contrast.
- Keep the rest of the backsplash neutral so the feature stands out.

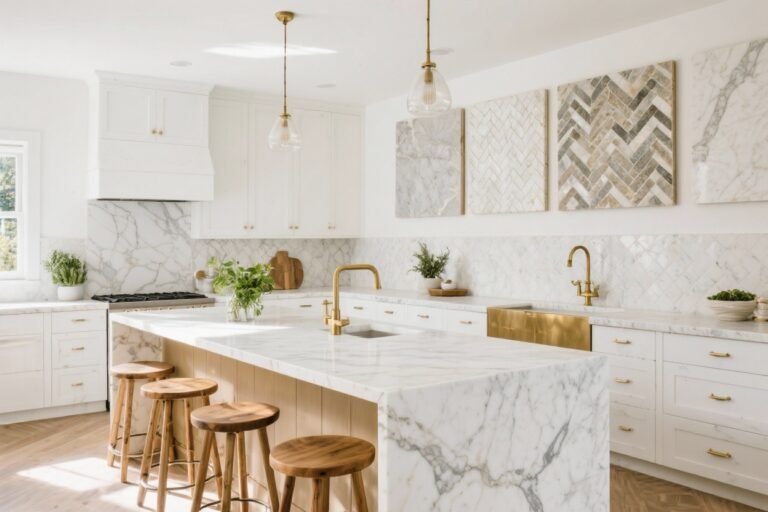
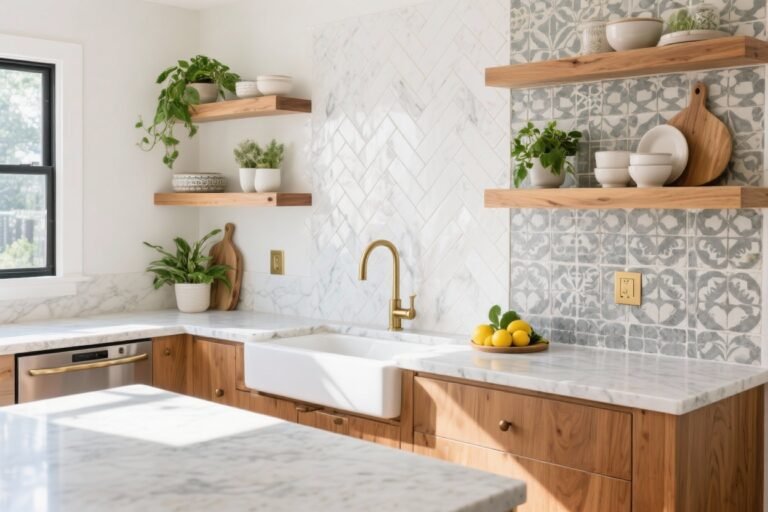
6. Natural Stone Mosaics (Strategically)
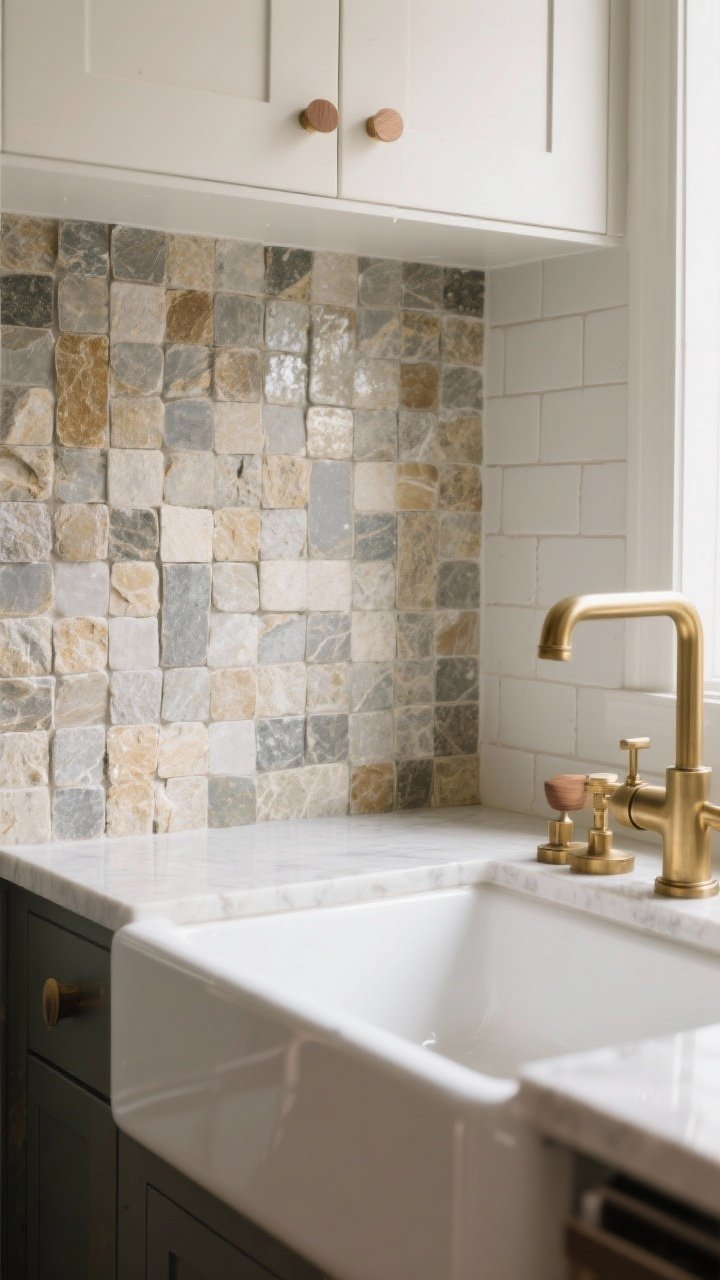
Stone mosaics scream custom, but you don’t need to tile the entire wall. Use mosaic sheets sparingly—think above the sink or as a border—and pair with budget-friendly field tile everywhere else.
Why It Works
- You get texture and variation that feels artisanal.
- Smaller areas keep both material and labor costs low.
- Stone pairs beautifully with wood, brass, and matte black hardware.
Pro Tips
- Seal natural stone before and after grouting to prevent staining.
- Choose a tumbled or honed finish for a soft, bespoke look.
- Echo the stone’s tones in your counter accessories for cohesion.
7. Beadboard or Shiplap, Sealed and Chic
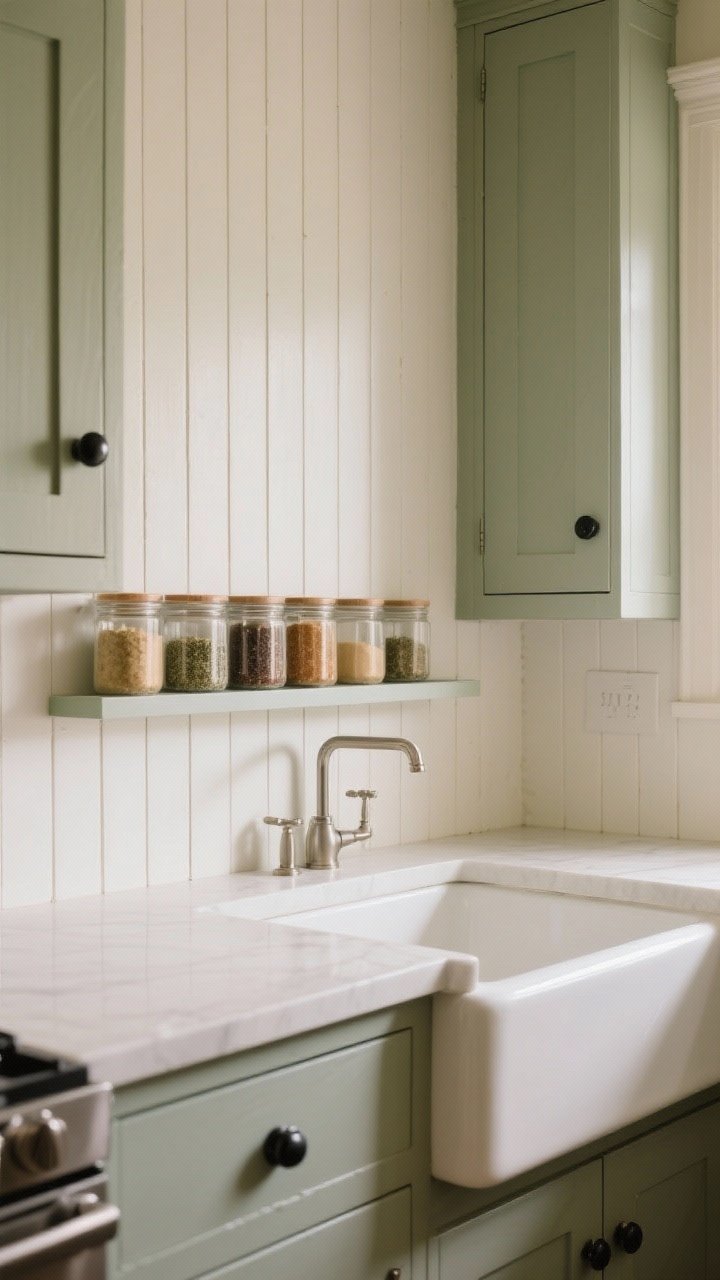
For a cottage-y, cozy vibe that still feels intentional, try painted beadboard or shiplap as a backsplash. When sealed properly, it’s shockingly durable and gives you that patina-filled charm on a budget.
Why It Works
- The vertical lines add height and texture.
- Paint lets you perfectly color match cabinetry or go high-contrast.
- Easy to DIY and even easier to touch up.
Pro Tips
- Use moisture-resistant MDF or PVC near the sink and range.
- Prime with stain-blocking primer and finish with scrubbable enamel.
- Add a thin ledge or rail for spices—looks custom, costs little.
8. Mirrored or Metallic Magic
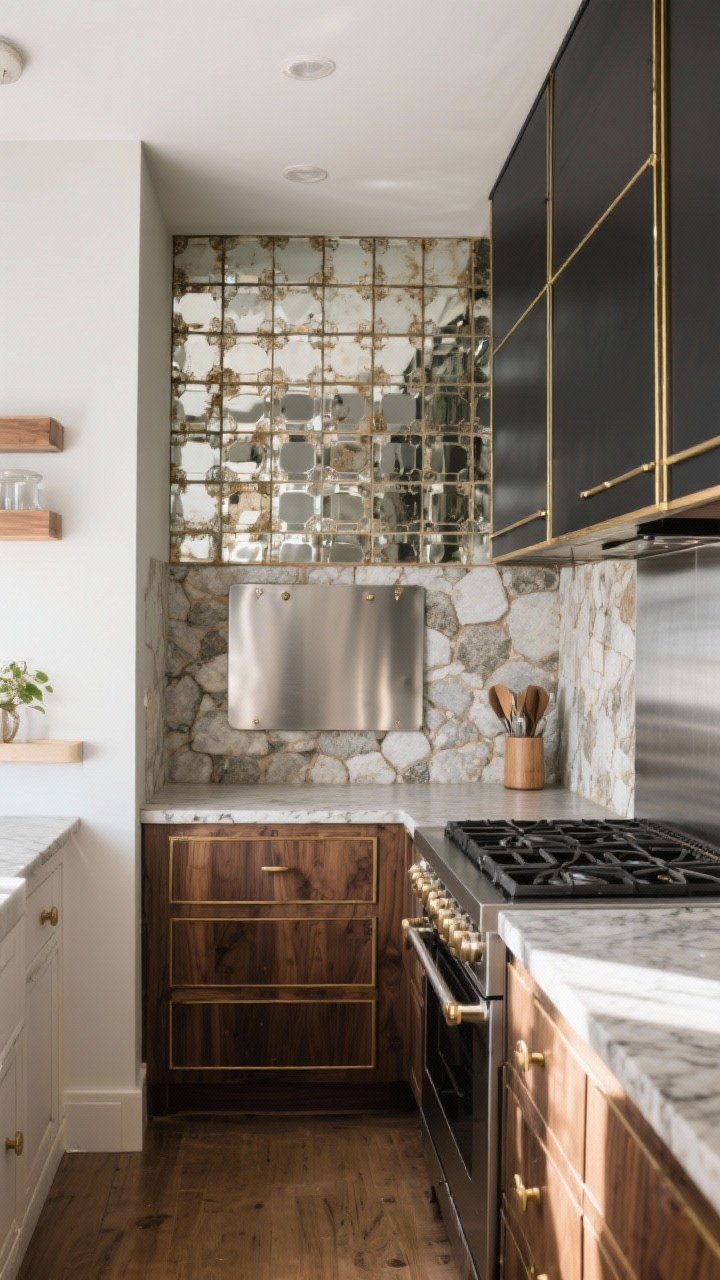
If your kitchen is short on natural light, go reflective. Antiqued mirror tiles, brushed brass metal sheets, or stainless panels make a small kitchen feel glamorous and bigger. It’s bold—but so is your taste.
Why It Works
- Reflective surfaces bounce light and visually expand space.
- Antiqued finishes hide splashes better than clear mirror.
- Pairs beautifully with stone counters and wood accents for contrast.
Pro Tips
- Use antique mirror to avoid obvious fingerprints and reflections.
- Consider a magnetic stainless sheet near the range for utility and style.
- Edge with slim black or brass trim for a polished finish.
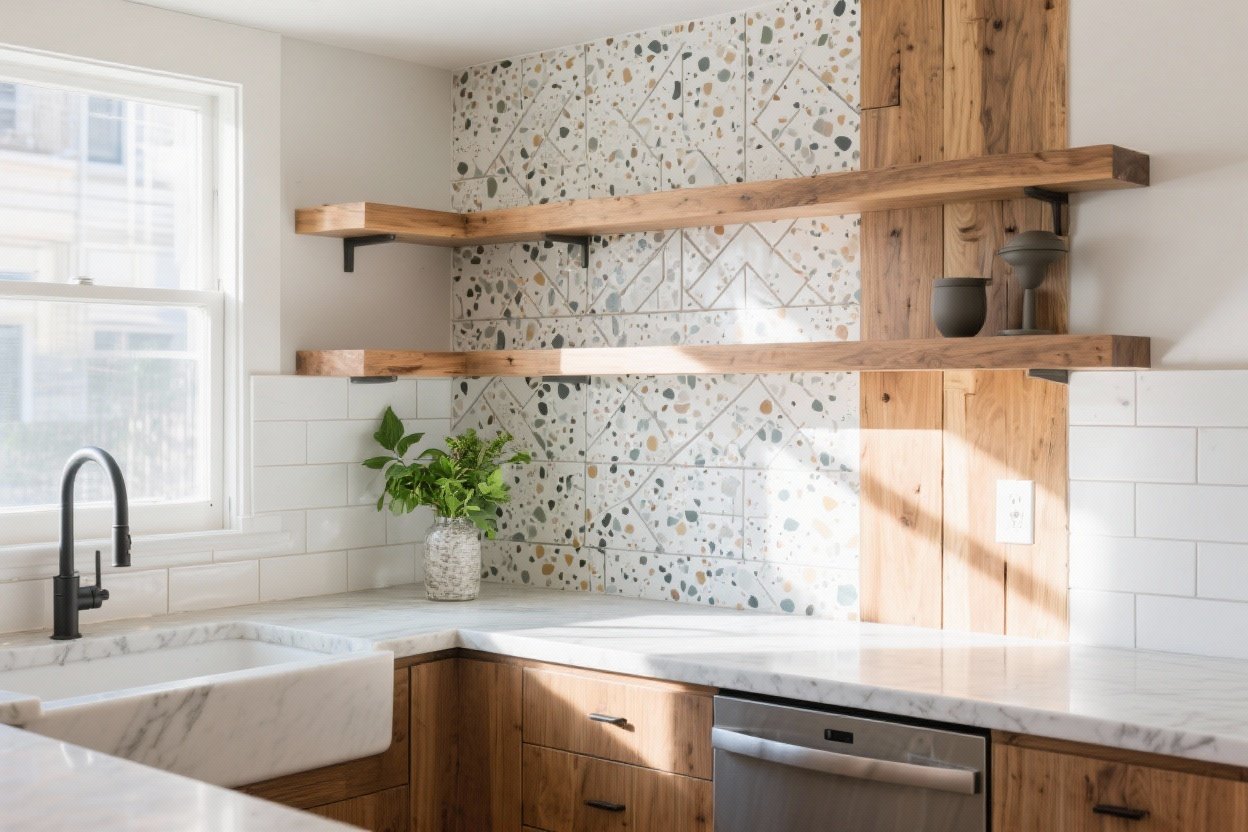
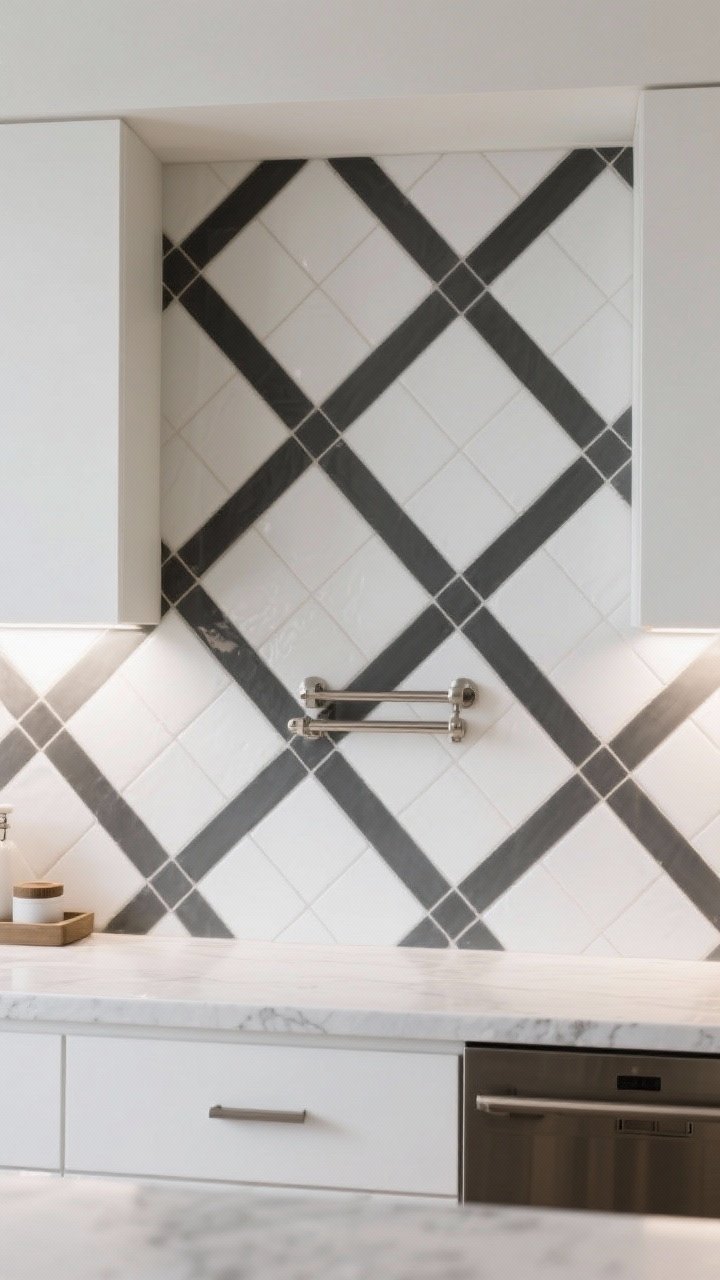
9. Patterned Cement-Look (Without the Cement)
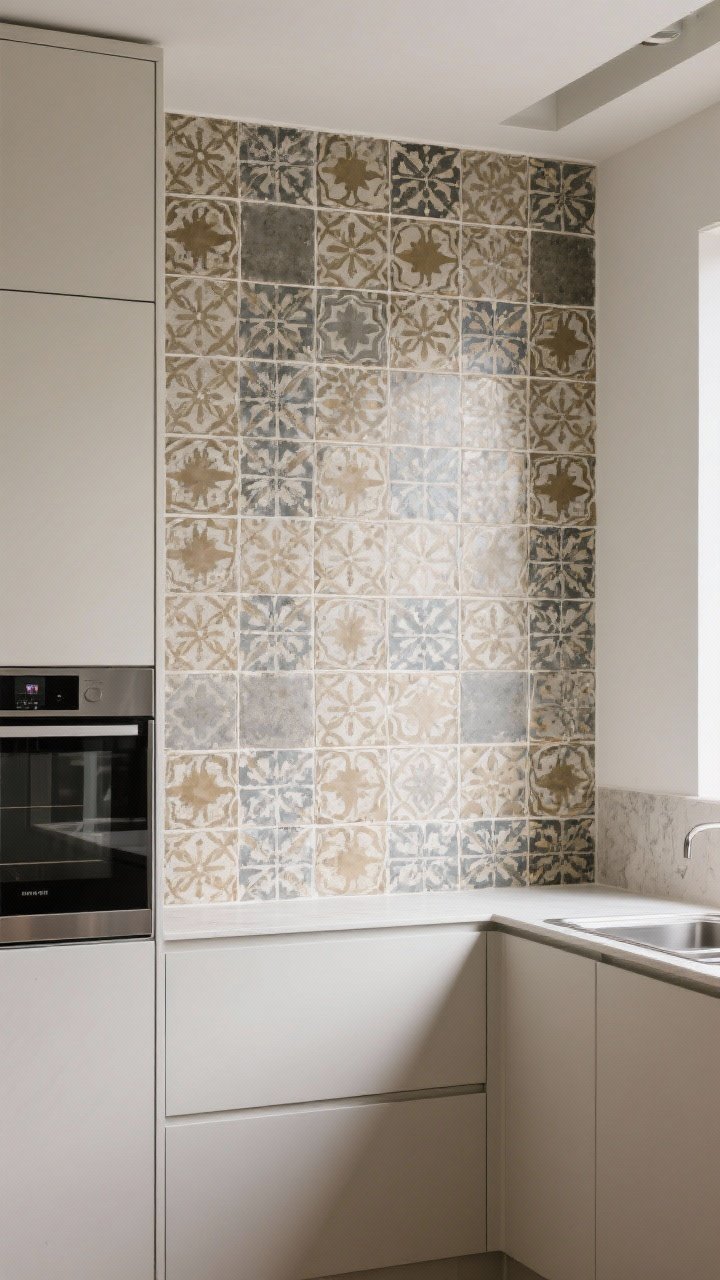
Love the bold, European tile look? Go for ceramic or porcelain versions of cement patterns. They’re lighter, cheaper, and way easier to maintain—no sealing, no color bleed, just instant personality.
Why It Works
- High design impact with minimal square footage.
- Mixes well with minimalist cabinets and modern ranges.
- Gives that “collected” feel that reads handcrafted.
Pro Tips
- Keep patterns to a single wall or band to avoid visual overload.
- Choose a warm white grout for a softer, vintage feel.
- Sample at home—lighting can shift how bold the pattern reads.
10. Wrap the Window, Not Just the Wall
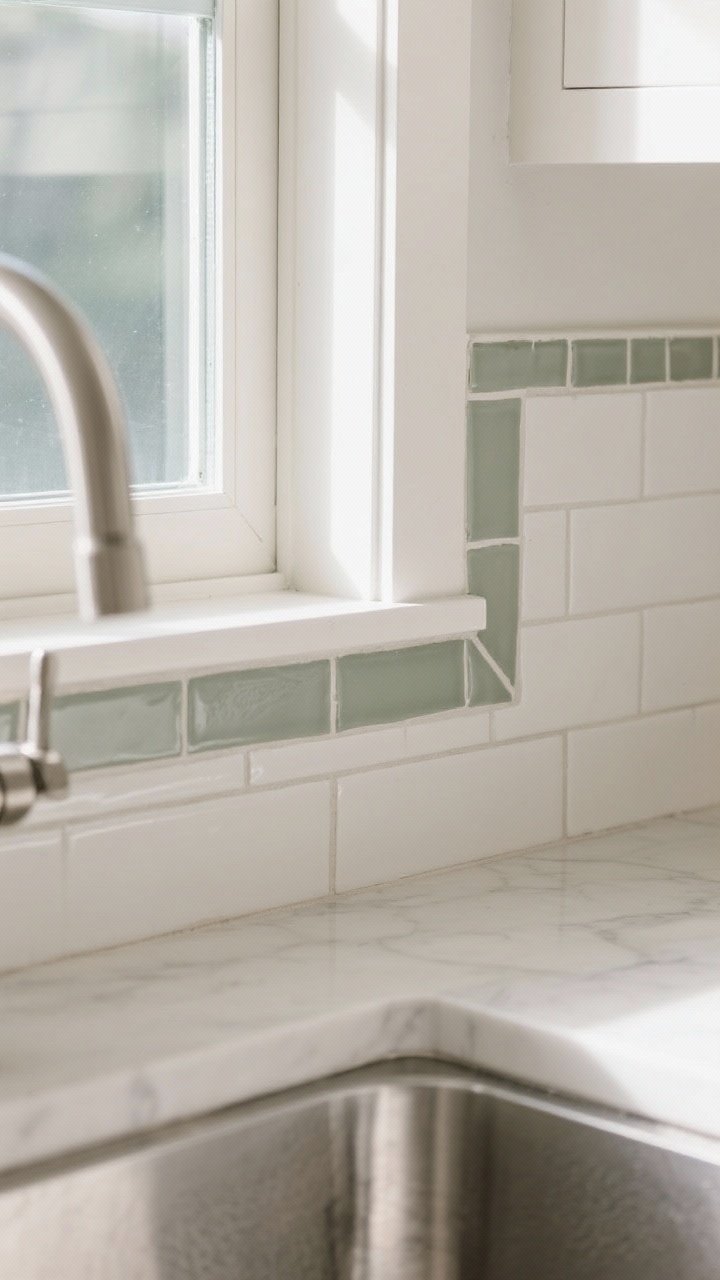
Want your kitchen to look professionally designed? Tile around and into the window return (the inside edges) for a seamless, built-in effect. It’s a subtle detail that screams custom without a custom bill.
Why It Works
- Eliminates awkward paint edges and water-prone drywall near the sink.
- Makes the whole wall feel cohesive and intentional.
- Shows off your tile choice from multiple angles—bonus style points.
Pro Tips
- Use bullnose or trim pieces to finish the return cleanly.
- Measure twice—window interiors are rarely perfectly square (shocking, I know).
- Match your caulk to grout for an uninterrupted look.
Budget-Savvy Extras That Elevate Any Backsplash
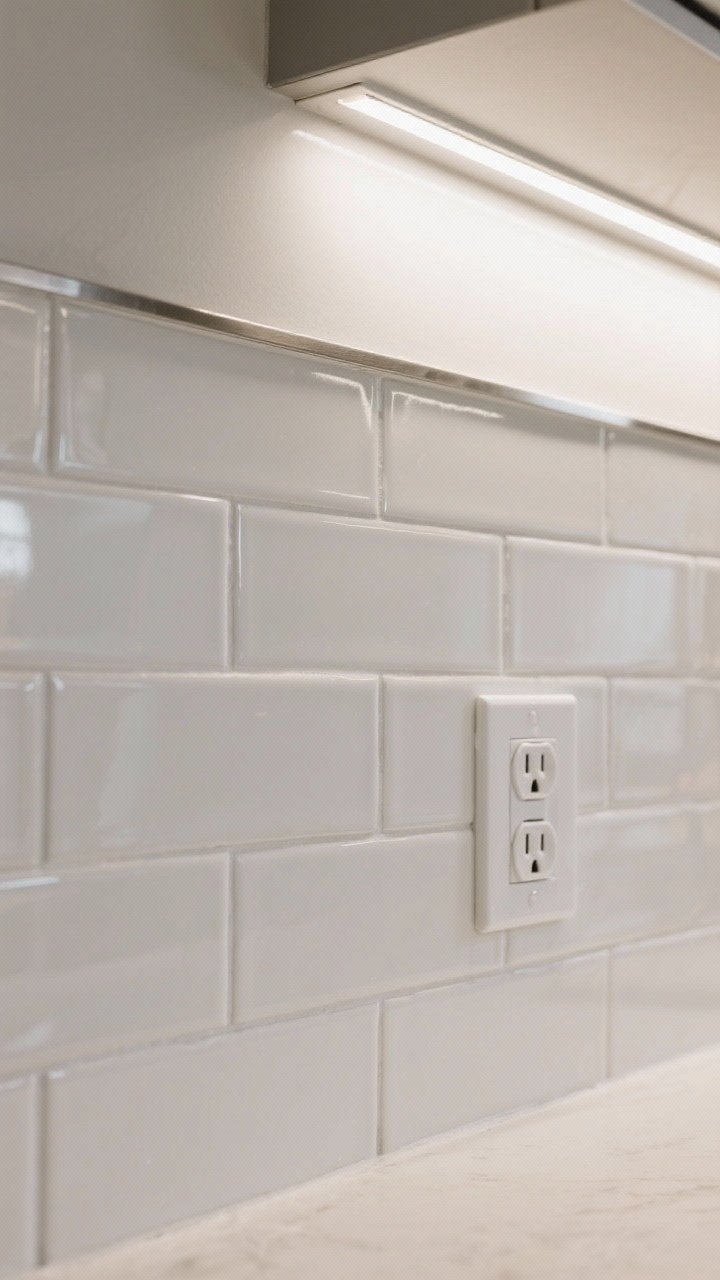
- Schluter/metal trim: Clean edges = custom finish. Don’t skip it.
- Under-cabinet lighting: Even budget puck lights make tile pop at night.
- Color story: Repeat one tone from your counters or hardware in the backsplash for a designer thread.
- Outlet covers: Paintable or color-matched covers keep the look uninterrupted (IMO, a must).
How to Choose the Right Idea for Your Kitchen
- Small kitchens: Go vertical stack or mirrored panels to add height and light.
- Modern spaces: Slab-look panels or high-contrast grout for graphic punch.
- Classic/cottage: Beadboard, honed stone mosaics, or soft patterned porcelain.
- Renter-friendly: Peel-and-stick or metal sheets you can remove later (FYI: keep the original paint intact).
Installation Cliff Notes
- Prep: Degrease walls, patch holes, and prime if needed. Your finish is only as good as your prep.
- Layout: Dry-fit your pattern, mark level lines, and start at the focal point (usually the range).
- Details: Miter outside corners or use trim; align grout lines with cabinet edges for that pro look.
- Maintenance: Seal stone, choose stain-resistant grout, and keep a touch-up kit handy.
Design doesn’t have to be expensive to look expensive. With a little planning and a few clever materials, your kitchen backsplash can look custom for a fraction of the cost. Pick one idea, commit to the details, and watch your kitchen glow up. You’ve got this—your dream backsplash is totally within reach.