10 Diy Landscape Ideas Anyone Can Do That Look Surprisingly High-end
Want a yard that turns neighbors’ heads without hiring a full crew? Same. These 10 DIY landscape ideas anyone can do will give your outdoor space instant curb appeal, a dash of personality, and a few “wait, you did that?” compliments. Grab some gloves, a weekend, and let’s make the outside look as good as the inside.
1. Create a No-Dig Garden Bed (Zero Drama, All Impact)
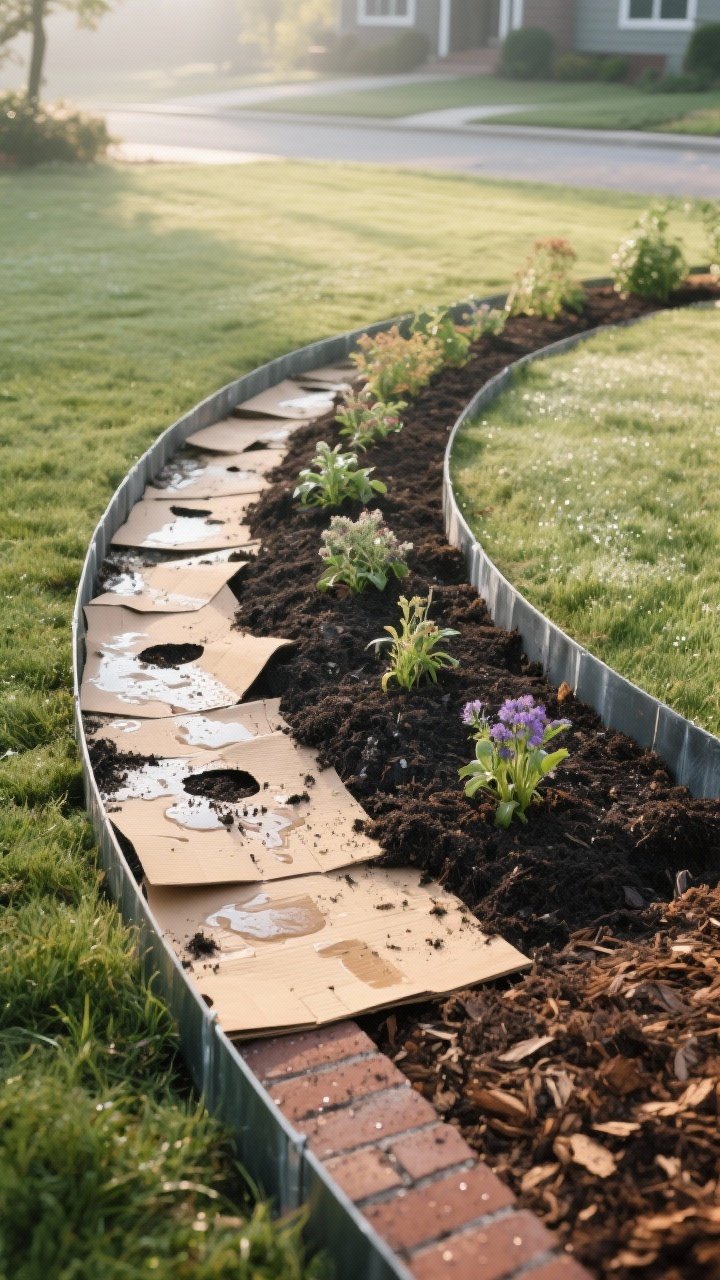
If the idea of ripping up a lawn makes you break out in hives, try a no-dig garden bed. It’s quick, forgiving, and super satisfying. You’ll smother grass and weeds under layers, then plant right into fresh soil—no jackhammer vibes required.
Tired of snacking when you’re not even hungry? This reset helps you stop the loop and feel back in control.
A simple reset for moments when cravings take over. Easy to use, easy to repeat, and designed to help you feel satisfied instead of stuck.
How-To Highlights
- Outline the bed: Use a hose or rope to shape your edge. Curves feel lush, straights feel modern—pick your vibe.
- Smother layer: Lay down overlapping cardboard or 6–8 pages of newspaper. Wet it so it stays put.
- Build it up: Add 2–3 inches of compost, then 2–3 inches of topsoil. Top with 2 inches of mulch.
- Plant smart: Slice holes in the cardboard for plants. Water deeply the first week.
Pro tip: Edge with bricks or steel edging for a crisp, finished look. It’s like eyeliner for your lawn.
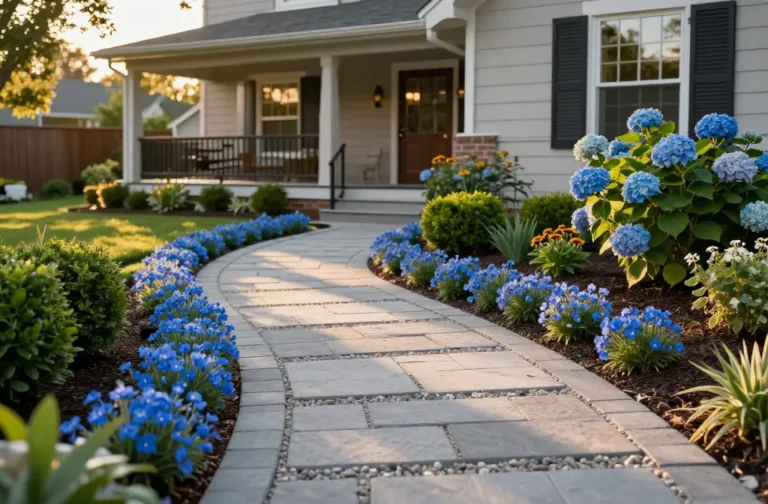
2. Lay a Stone Path That Looks Custom (Because It Is)
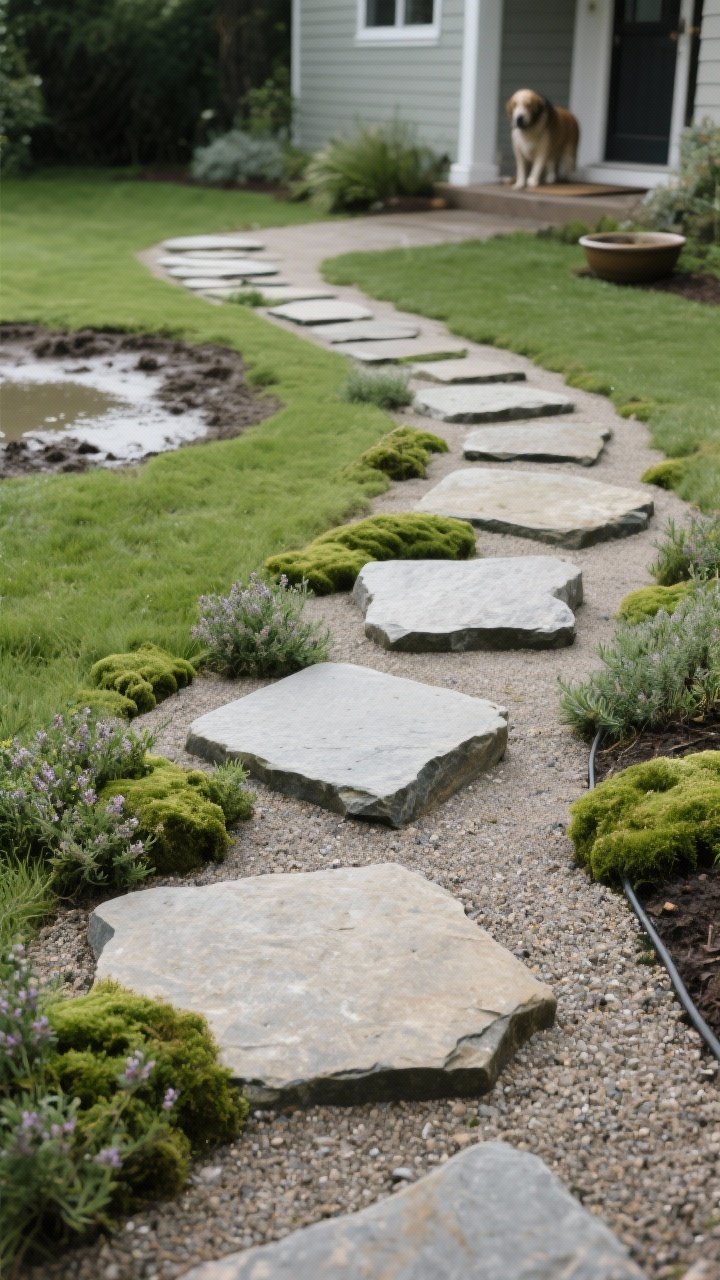
A path instantly makes your garden feel intentional. A few stepping stones can guide guests (or your dog) and keep shoes out of mud. Casual, cottage, or minimal—you choose the stone and spacing.
DIY Steps
- Plan your route: Walk it first. Place stones roughly where your feet land, 18–24 inches apart.
- Set each stone: Trace around it, dig 2 inches down, add decomposed granite or sand, and tamp.
- Level and secure: Wiggle each stone into place. Fill gaps with sand, pea gravel, or creeping thyme.
Planting between stones? Try low-growers: creeping thyme, Irish moss, or blue star creeper.
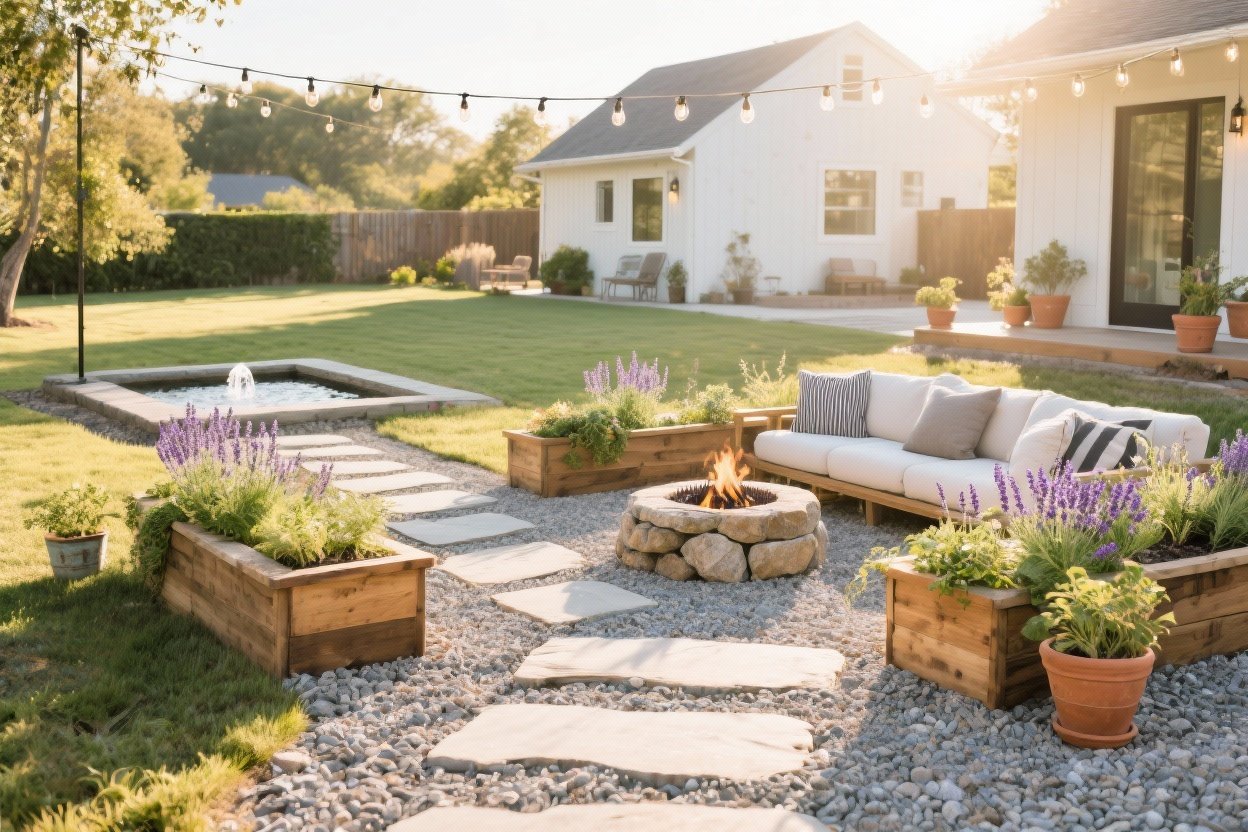
3. Build a Raised Bed That Won’t Warp in a Year
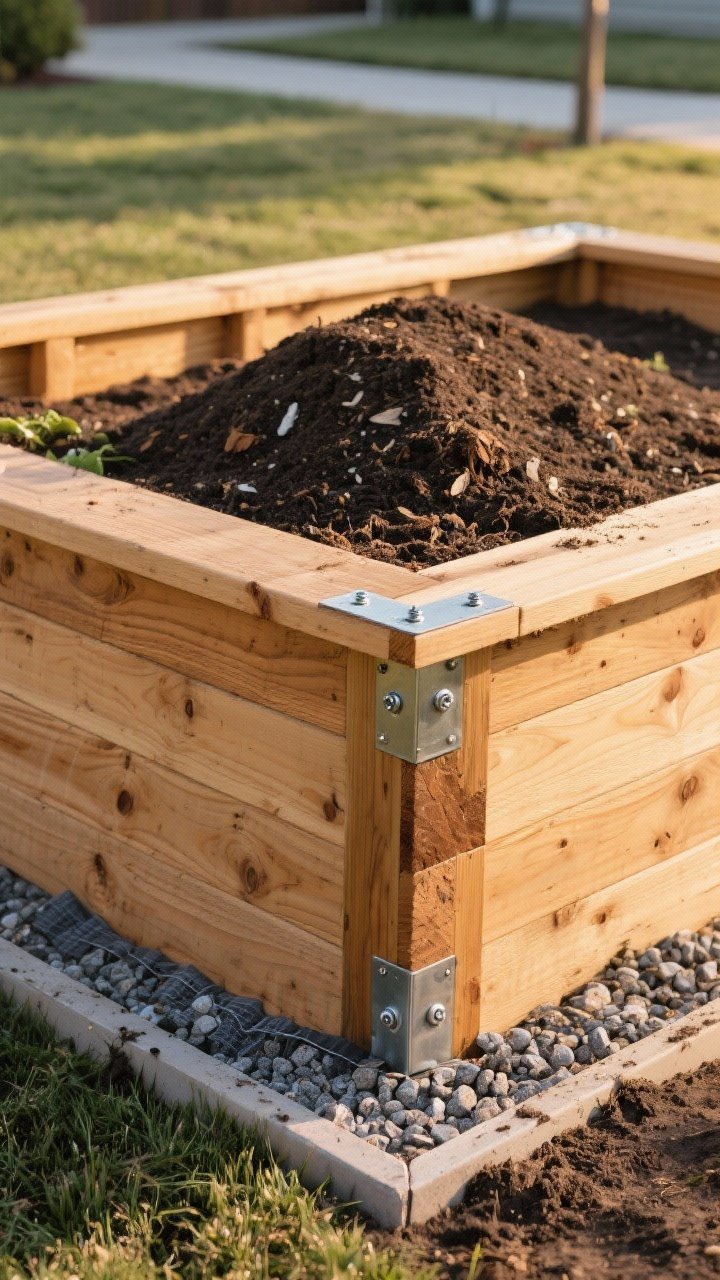
Raised beds are the little black dress of landscaping—always flattering. They add structure, grow almost anything, and keep things tidy. Bonus: less bending, more harvesting.
Transform Your Home With 7,250+ Stunning Landscaping Designs—No Expensive Designers Needed!
- 🌿 Access 7,250+ stunning landscaping designs.
- 💰 Save thousands—no pro designer needed.
- 🏡 Plans for gardens, patios, walkways, and more.
- ✨ Simple, beginner-friendly DIY layouts.
- 🛠️ Customize any design to fit your yard.
Materials That Last
- Cedar or redwood: Naturally rot-resistant and pretty. 2x8s or 2x10s work great.
- Corner braces: Use deck screws and metal braces for sturdy corners.
- Weed barrier: Lay a breathable landscape fabric at the base to slow down weeds.
Pro Build Tips
- Size sweet spot: 4′ wide x 8′ long x 12–16″ high for easy reach.
- Soil recipe: 40% topsoil, 40% compost, 20% coarse material (perlite or pine fines).
- Edge it: Gravel border around the bed = clean lines and fewer mud splashes.
4. Make a Mulch-and-Perennial Island (Low Maintenance, Big Style)
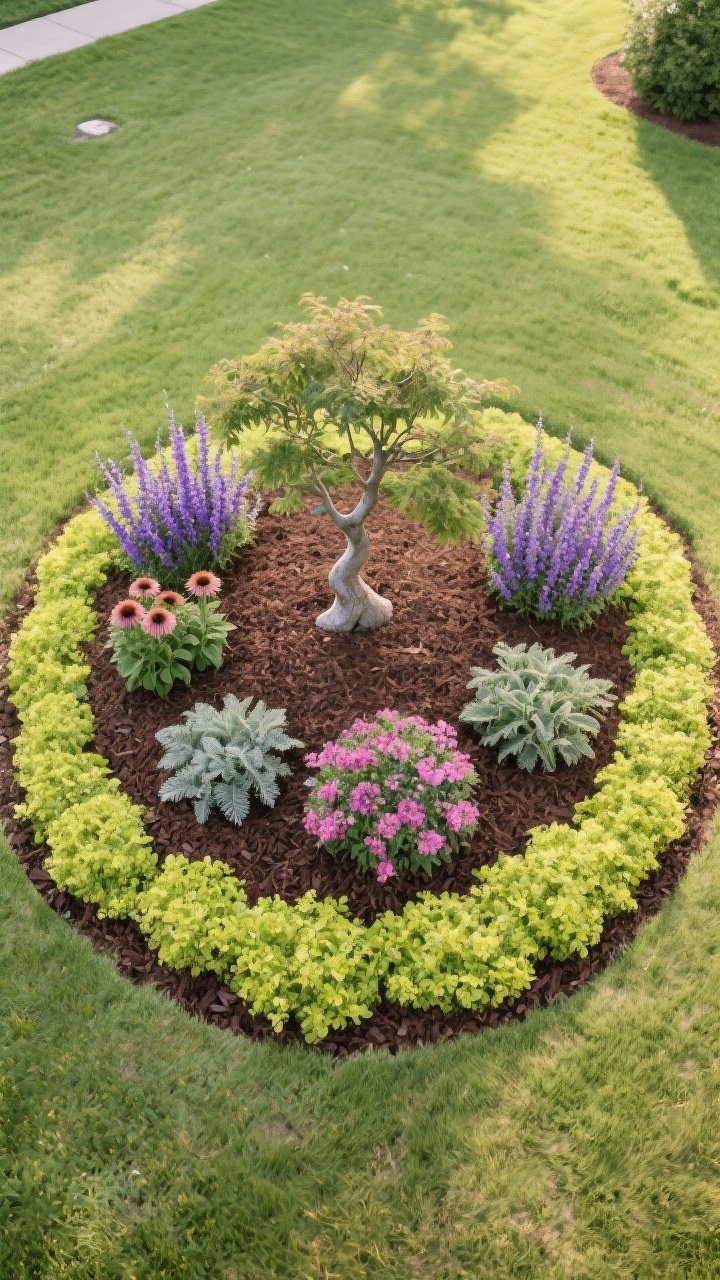
If your yard is one big blank canvas, add a freestanding island bed. It’s like a coffee table in the middle of your green living room—anchors the space and looks designed.
Plant Formula That Works
- One anchor: Small ornamental tree or shrub (Japanese maple, dwarf spruce, hydrangea).
- Three medium perennials: Think salvia, echinacea, daylilies, or lavender.
- Five fillers: Heuchera, hosta (shade), or catmint (sun).
- Groundcover edge: Creeping jenny, sedum, or mondo grass.
Layer heights from back to front if viewed from one side; radiate around the anchor if it’s seen from all angles.
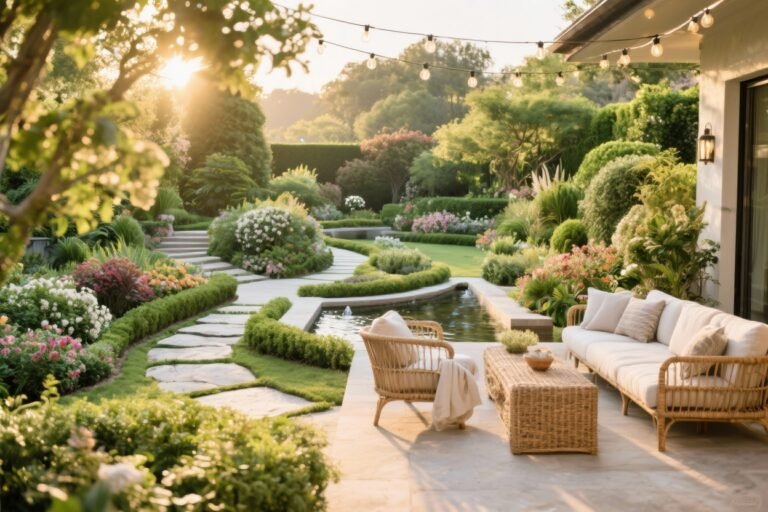
5. Add a DIY Water Feature (No Pond, No Problem)
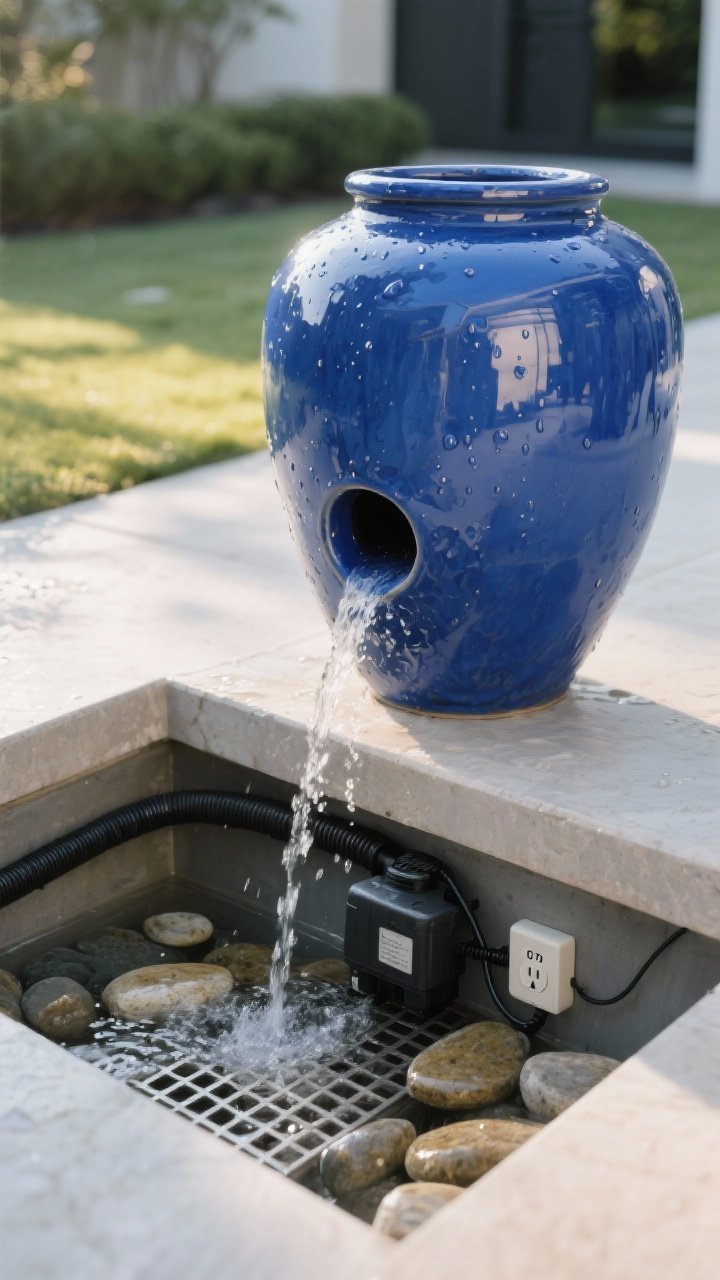
Running water = instant zen. You don’t need a full pond to get the sound. A disappearing fountain hides the reservoir underground and looks chic.
Quick Build
- Pick a feature piece: Glazed urn, basalt column, or a bowl with a center hole.
- Buy a small pump: 200–400 GPH is plenty for a modest feature.
- Create the base: Sink a plastic basin or stock tank, cover with a metal grate, then hide with stones.
- Plumb it: Thread tubing from pump up through the piece, fill basin, plug into a GFCI outlet.
FYI: Add a simple smart plug so you can turn it on/off from your phone. Lazy luxury.

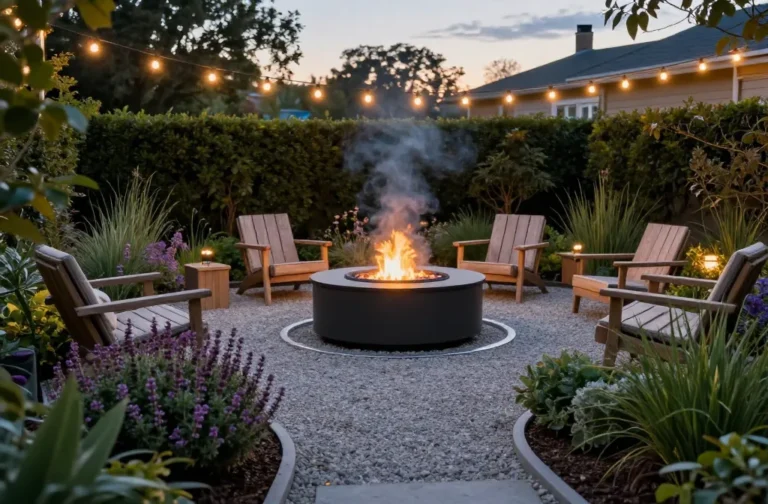
6. Light It Like a Boutique Hotel (On a Budget)
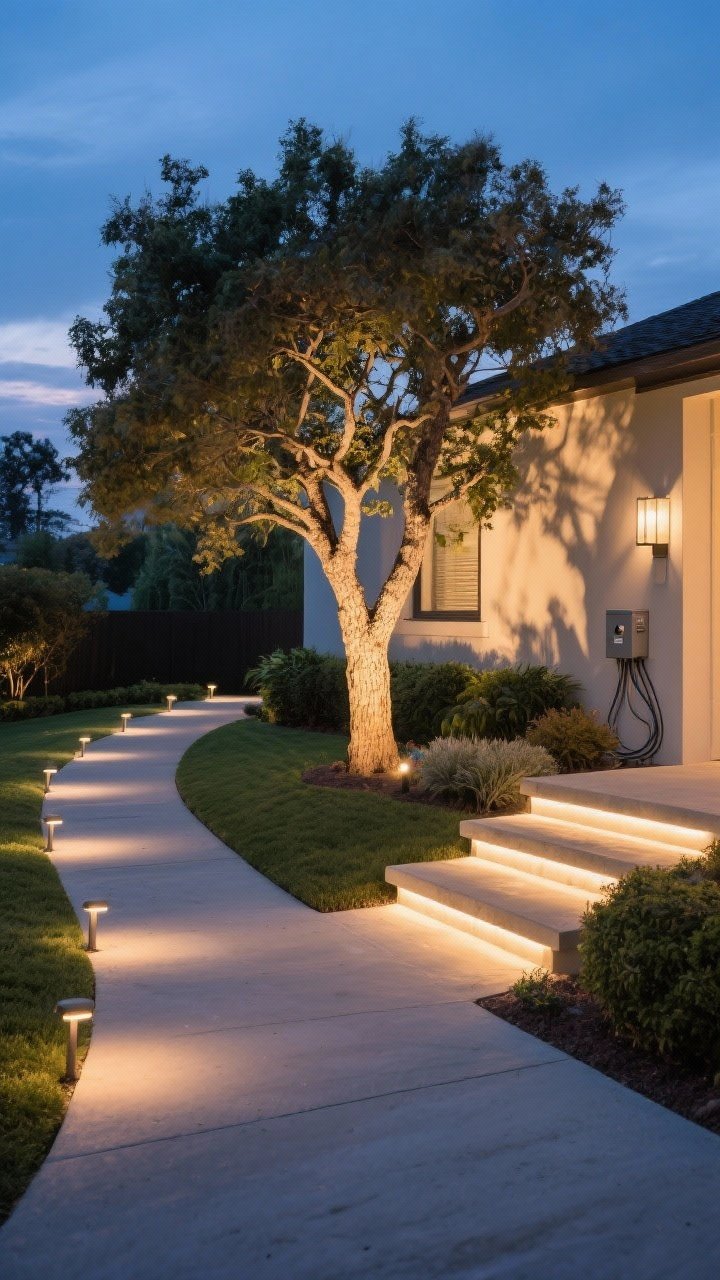
Good lighting makes everything look expensive at night. A few well-placed low-voltage LED lights can transform your yard from “fine” to “wow.”
Where to Place Lights
- Path lights: Stagger them instead of lining both sides. Less runway, more ambiance.
- Uplights: Aim at one statement tree or wall for dramatic shadows.
- Step lights: Safety and style—win-win.
Setup Tips
- Use a 12V transformer with a timer and photocell.
- Keep wire connections above soil with gel-filled connectors to prevent corrosion.
- Warm white (2700–3000K) looks cozy; avoid blue tones unless you like “parking lot chic.”
7. Edge Your Beds Like a Pro (The Secret to “Finished”)
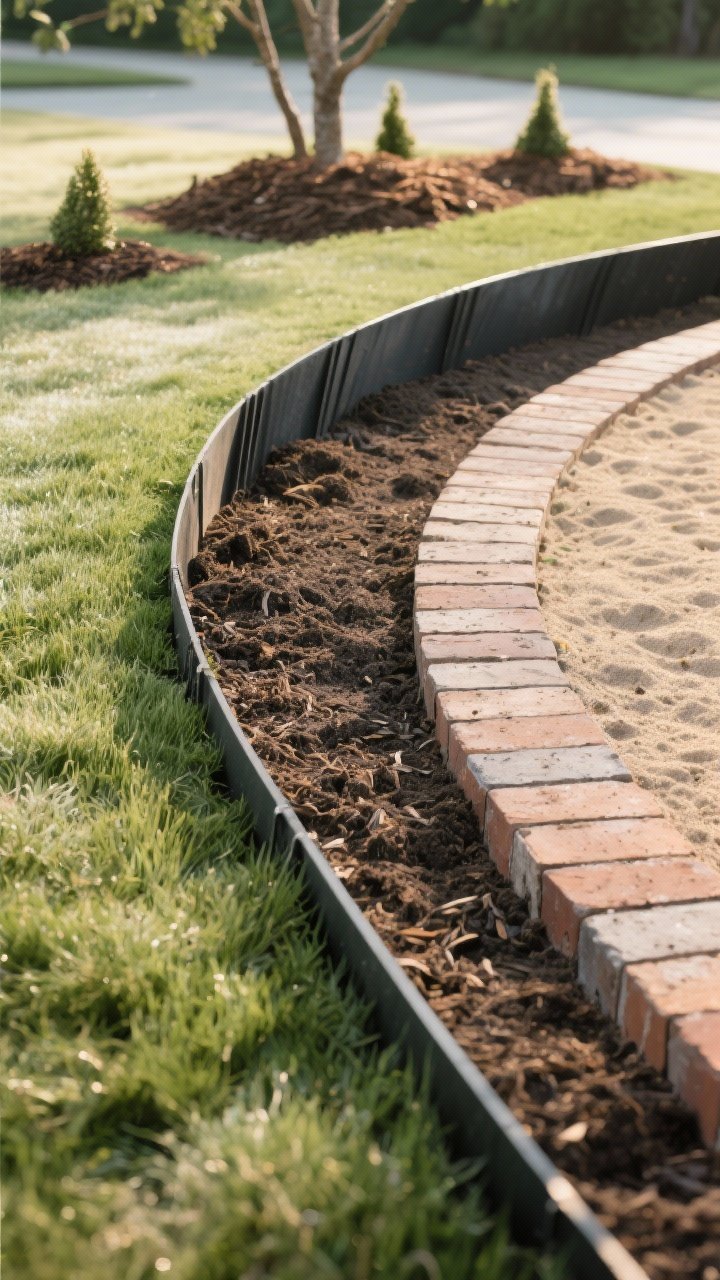
A sharp edge is the unsung hero of landscaping. It corrals mulch, defines space, and makes your plants pop. You can DIY it in an afternoon.
Three Solid Options
- Natural trench edge: Cut a 4–6″ deep V-shaped edge with an edging shovel. Recut each season.
- Steel edging: Modern, thin, and clean. Great for straight lines and curves.
- Brick or paver edge: Classic look. Set on a thin bed of sand and tap level.
Pro tip: Always pull mulch back from stems and trunks. Mulch volcanoes are a no.
8. Build a Simple Gravel Patio (Weekend-Friendly)
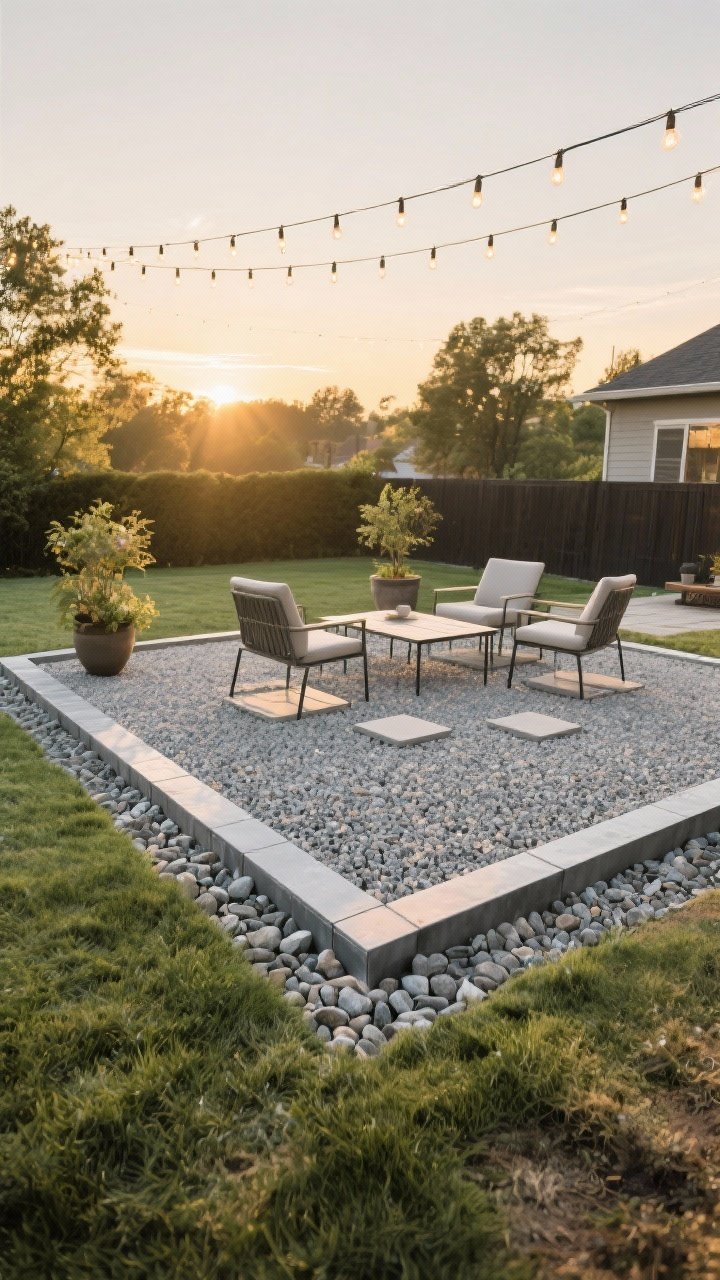
No need to pour concrete. A gravel patio is quick, permeable, and easy to style with furniture and plants. It’s the chill cousin of a paver patio.
How to Do It
- Frame it: Mark your space and add edging (steel or composite).
- Prep the base: Remove grass, compact soil, then add 2–3″ of crushed stone (like 3/4″ minus). Tamp again.
- Top layer: Add 1–2″ of decomposed granite or pea gravel. Rake smooth.
- Furnish: Use furniture with wider legs or add paver pads under chair feet to prevent sinking.
Add string lights overhead, and BOOM—instant outdoor living room.
9. Go Vertical With a Trellis or Privacy Screen
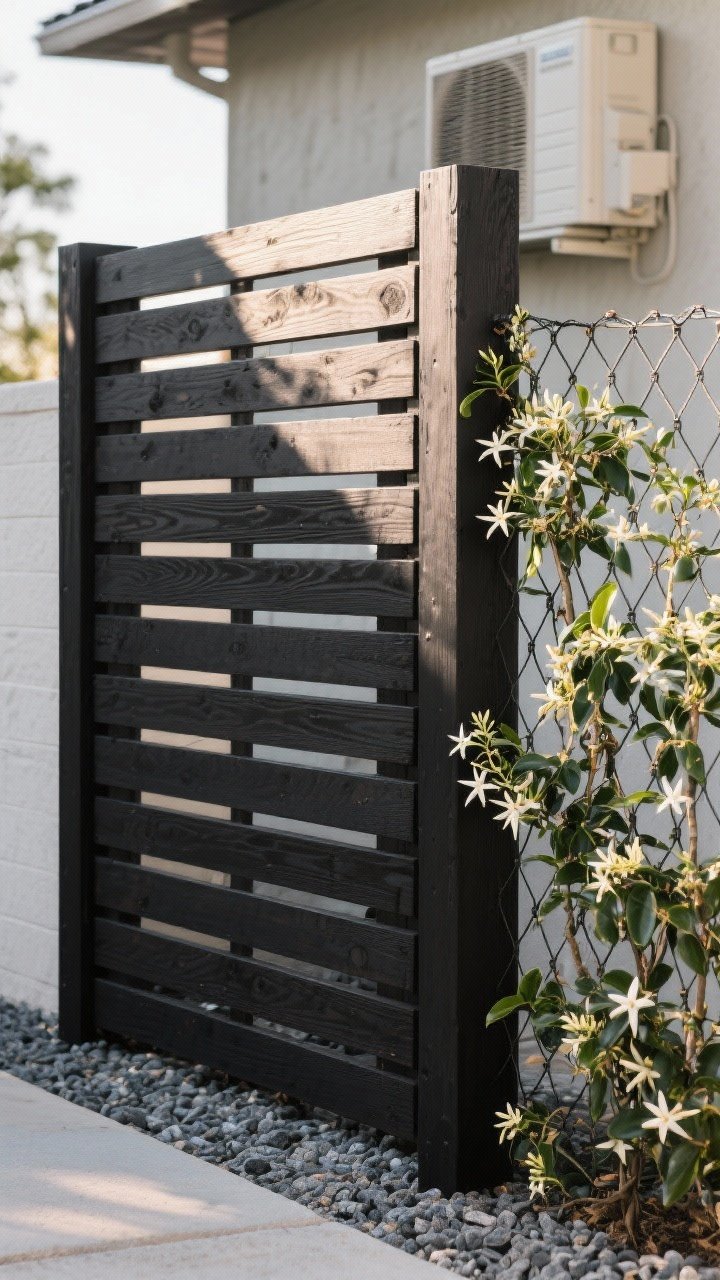
Short on space? Grow up. A trellis or slatted screen adds privacy, texture, and an elegant backdrop for plants. Also, it hides that not-cute AC unit nicely.
Easy Build Ideas
- Wood slat wall: Use 1×2 or 1×3 cedar boards spaced 1″ apart on vertical posts.
- Wire panel trellis: Cattle panel attached to posts = sturdy and modern.
- Modular kits: Pre-made trellises are fine—just anchor them well.
Climbers That Behave
- Sun: Star jasmine, clematis, black-eyed Susan vine.
- Shade: Climbing hydrangea, evergreen clematis.
IMO: Paint the frame black or dark bronze for instant “designer” points.
10. Plant a Pollinator Strip That’s Pretty And Useful
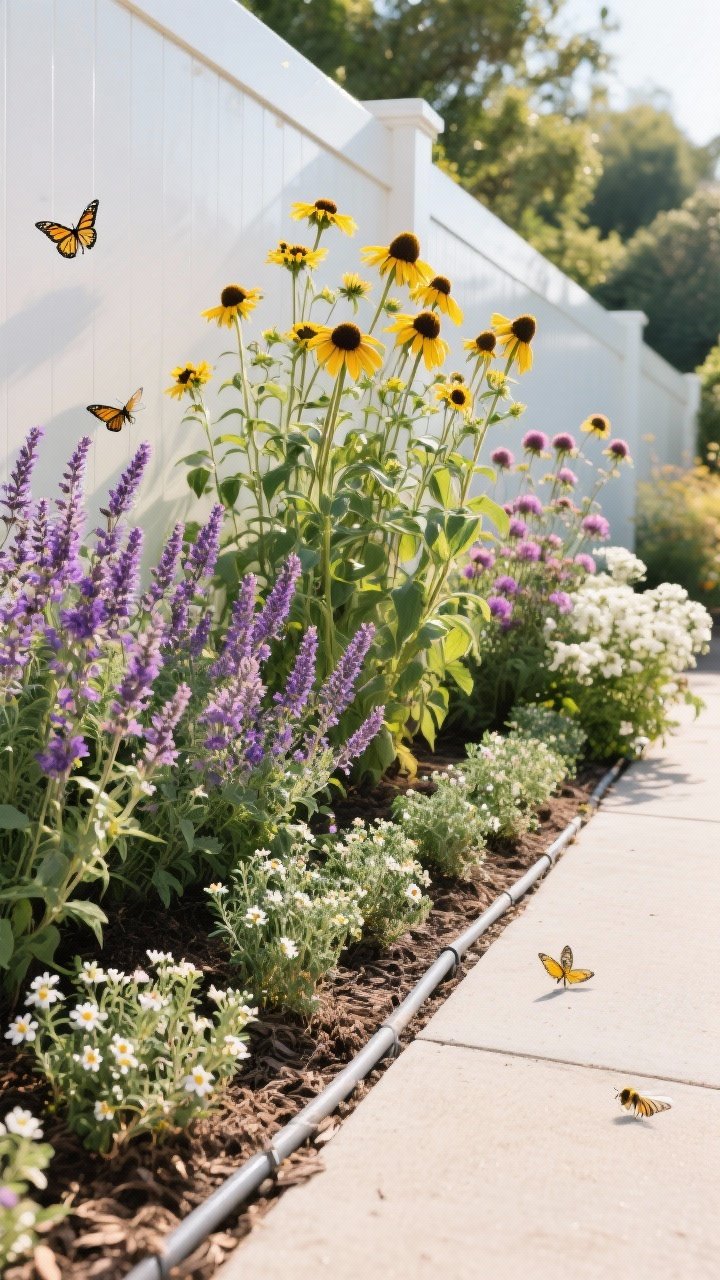
Bees, butterflies, and birds will thank you—and your garden will look alive. A narrow pollinator strip along a fence or driveway is low effort, high reward.
Design Formula
- Mix heights: Tall in back (coneflower, rudbeckia), medium mid-layer (salvia, yarrow), low front (thyme, alyssum).
- Repeat colors: Choose 3–4 colors and repeat for cohesion.
- Bloom succession: Spring: columbine, allium. Summer: bee balm, lavender. Fall: asters, sedum.
Water-wise tip: Group plants by sun and water needs. Your hose (and water bill) will appreciate it.
Quick Tools That Make Everything Easier
- Hand edger and transplant shovel: For clean lines and precise planting.
- Tamper: Essential for paths and patios.
- Kneeling pad and garden gloves: Your knees and manicure will survive.
- Drip kit: Set-and-forget watering for beds and borders.
Money-Saving Hacks
- Split perennials: Many can be divided in spring or fall. One plant becomes three—magic.
- Buy small: Quart-size plants catch up fast and cost less.
- Use free mulch: Check city arborist programs for chipped wood (great for paths, not right against trunks).
Maintenance That Keeps It Looking Fresh
- Mulch top-ups: 1 inch yearly keeps weeds down and soil happy.
- Edge refresh: Recut trench edges each spring for that crisp look.
- Prune lightly: Deadhead spent blooms to stretch the season and keep it tidy.
You don’t need a massive budget or a crew to make your yard look amazing—just a plan and a couple weekends. Start with one project, then build from there. Before you know it, you’ll have a space that feels intentional, stylish, and totally you. FYI: your front porch selfie game is about to level up.