10 Dreamy Kitchen Remodel Ideas That’ll Make You Love Cooking Again
You know that moment when you walk into someone’s kitchen and instantly want to bake a pie, host a dinner party, and reorganize your life? That’s the power of a dreamy kitchen. If your current space feels more “meh” than “chef’s kiss,” let’s fix that. Here are ten remodel ideas that blend style, function, and a little drama—in the best way.
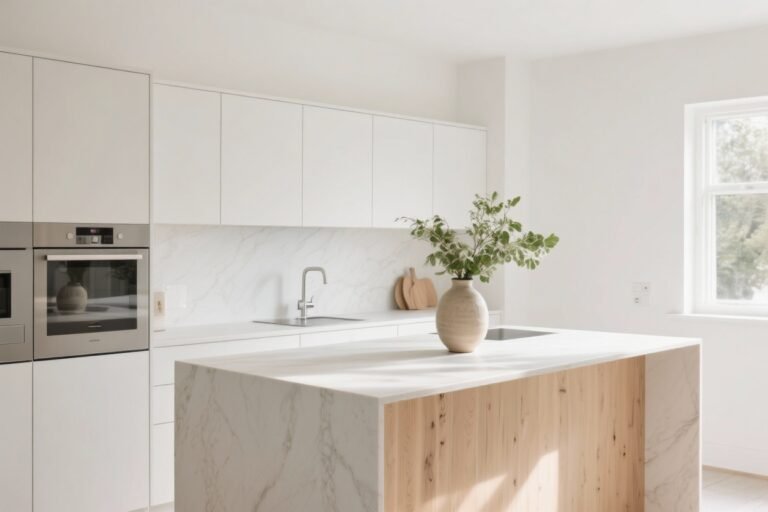
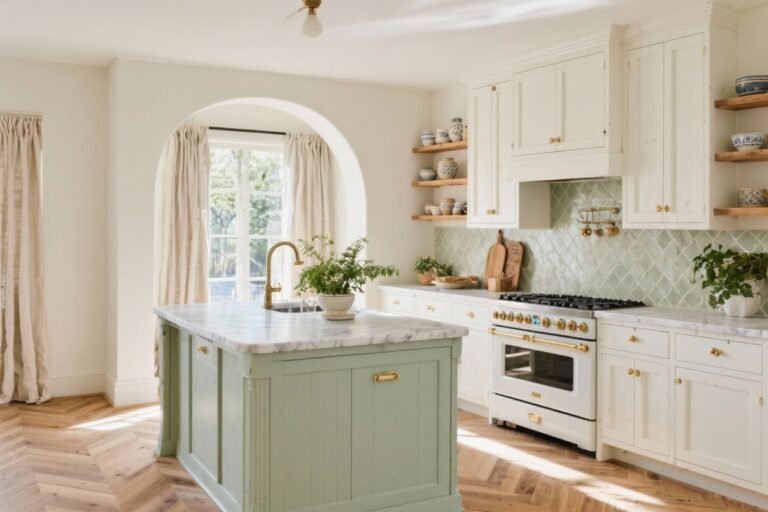
1. Go Big With a Statement Island

Your island is the kitchen’s stage. Make it grand, make it useful, and yes, make it a little extra. A generous island gives you landing space, seating, and a place to chat while the pasta water boils.
Tired of snacking when you’re not even hungry? This reset helps you stop the loop and feel back in control.
A simple reset for moments when cravings take over. Easy to use, easy to repeat, and designed to help you feel satisfied instead of stuck.
Why It Works
- Multi-tasking hero: Prep, serve, eat, repeat.
- Visual anchor: Grounds the room and sets the style tone.
- Hidden storage: Stash mixers, trays, and those 47 reusable bottles.
Pro Tips
- Go for a waterfall edge in quartz or marble for instant luxury.
- Add an overhang of 12–15 inches for comfy counter seating.
- Consider a two-tier island if you want a subtle division between prep and hangout zones.
2. Mix Your Metals Like a Designer
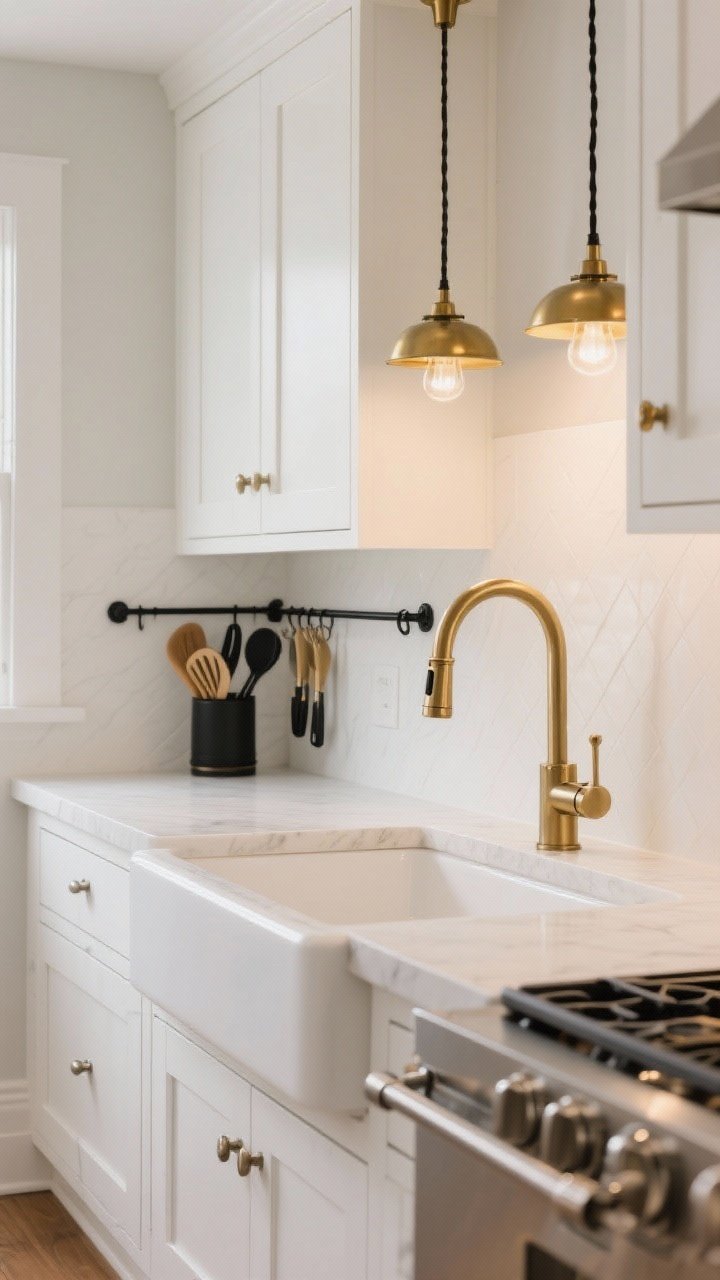
Matching every metal is like wearing a full denim suit—bold, but not always cute. Mixing metals adds depth and looks intentional when done right.
How to Nail It
- Pick one dominant finish (like brushed nickel) and one accent finish (like brass).
- Use the dominant finish on hardware and the accent on lighting or faucets.
- Want it modern? Pair matte black + brass. Want it coastal? Try polished nickel + pewter.
FYI: Keep finishes consistent within each “zone” for a cohesive look.
3. Two-Tone Cabinets For Instant Depth

Single-color cabinets are fine. Two-tone cabinets are fabulous. They make your kitchen feel custom and layered without blowing the budget.
Color Pairings That Never Fail
- White uppers + navy lowers: Bright and moody in the right amounts.
- Greige + natural wood: Earthy, modern, and warm.
- Sage green + cream: Calm farmhouse vibes, minus the clichés.
Smart Moves
- Keep darker colors below eye level to ground the space.
- Use glass fronts or open shelves on top to lighten things up.
- Upgrade hardware—sleek pulls can make even budget cabinets feel luxe.
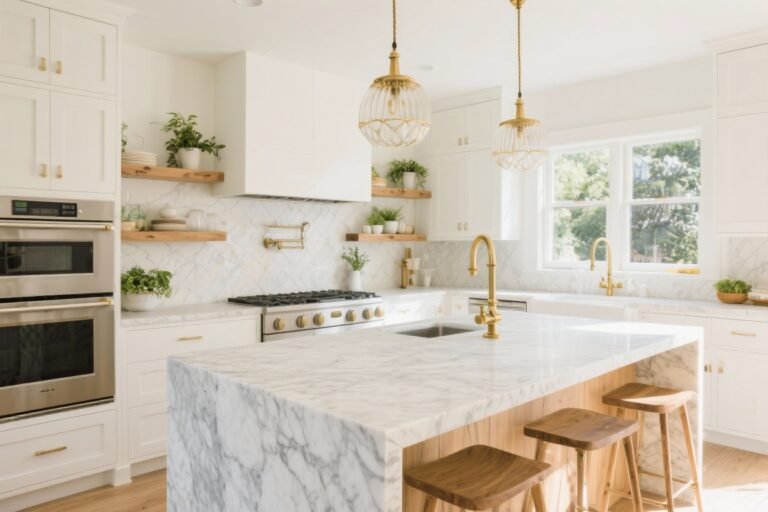
4. Light It Like a Magazine Cover
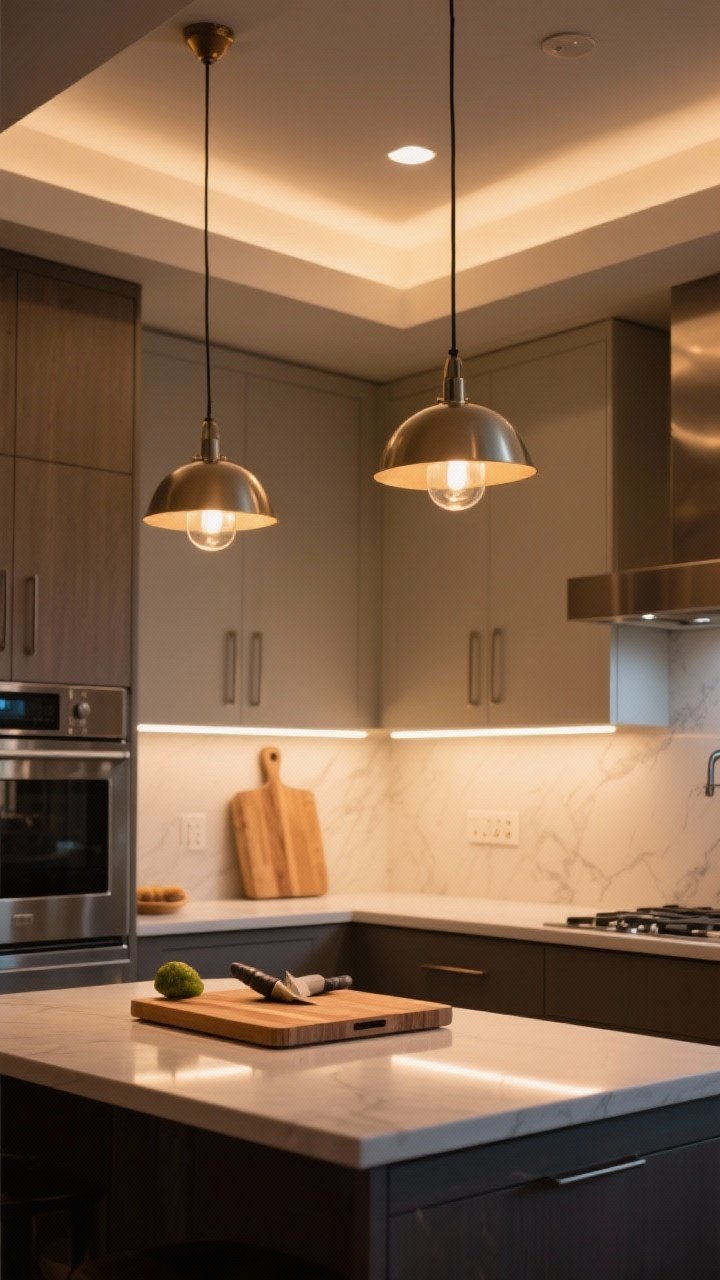
If you’re still rocking one lonely flush mount, we need to talk. Great lighting is the difference between “cozy glow” and “mysterious shadows.”
Transform Your Home With 7,250+ Stunning Landscaping Designs—No Expensive Designers Needed!
- 🌿 Access 7,250+ stunning landscaping designs.
- 💰 Save thousands—no pro designer needed.
- 🏡 Plans for gardens, patios, walkways, and more.
- ✨ Simple, beginner-friendly DIY layouts.
- 🛠️ Customize any design to fit your yard.
The Three Layers
- Ambient: Recessed lights or a central fixture for overall brightness.
- Task: Under-cabinet LEDs so you can actually see your chopping board.
- Accent: Pendants or sconces to bring the drama.
Design Tips
- Hang pendants 30–36 inches above the island.
- Choose fixtures that complement your metal mix and cabinet style.
- Install dimmers everywhere. Dinner parties will thank you.
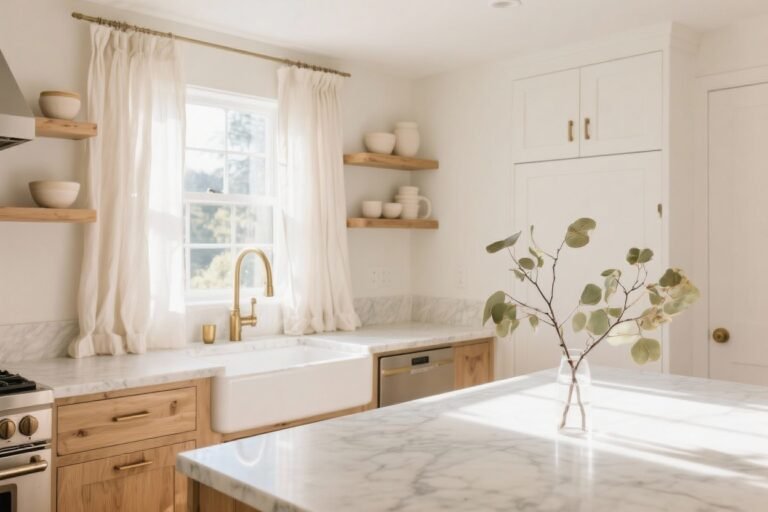
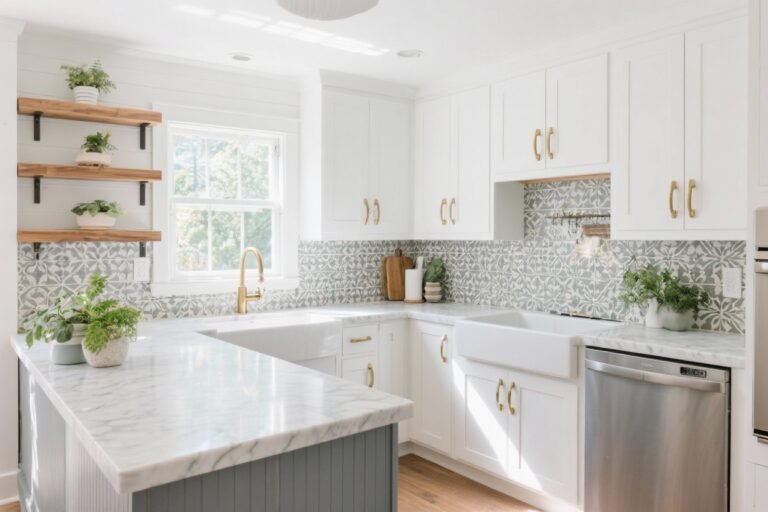
5. Elevate With a Show-Stopping Backsplash

Your backsplash is the kitchen’s jewelry. Make it sparkle, make it interesting, and make it easy to clean because spaghetti sauce happens.
Ideas That Turn Heads
- Zellige or handmade tile: Soft shine, subtle variation, chef’s kiss texture.
- Slab backsplash: Continue your countertop up the wall—so sleek, so modern.
- Pattern play: Herringbone or stacked vertical subway tiles feel fresh.
Practical Notes
- Choose a non-porous grout or seal it to reduce staining.
- Full-height behind the range = instant wow.
- Run outlets horizontally and low or use pop-up outlets to keep the look clean.

6. Pantries That Actually Work For Real Life
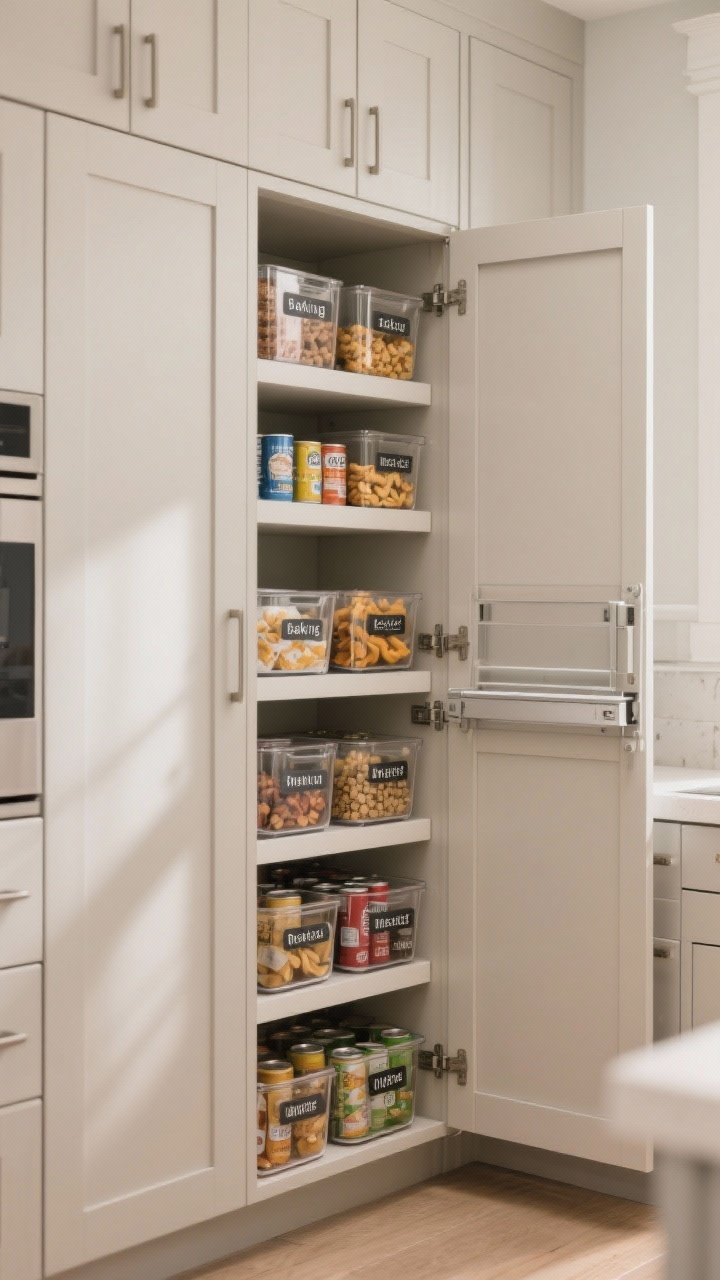
A dreamy kitchen is an organized kitchen. Whether you have a spare closet or a single cabinet, a smart pantry setup will change your daily rhythm.
Options To Consider
- Walk-in pantry: Go big with floor-to-ceiling shelves, can risers, and appliance storage.
- Butler’s pantry: Add a prep sink, coffee station, or wine fridge. It’s mini-luxury.
- Pocket pantry: Pull-out tall cabinets with adjustable shelves—small footprint, huge payoff.
Organization Tips
- Use clear bins and labels so everyone stops asking “Where’s the granola?”
- Install shallow shelves for cans so nothing gets lost in the abyss.
- Group by task: baking, snacks, breakfast, weeknight meals. It’s a game-changer, IMO.
7. Countertops That Look Chic And Live Easy

You want counters that survive your life and still look amazing. Luckily, you don’t have to choose between beauty and durability anymore.
Top Material Picks
- Quartz: Low maintenance, high style, tons of patterns. Great for busy households.
- Quartzite: Natural stone beauty, more durable than marble. Seal it; love it.
- Marble: A classic, but it etches and stains. If you love patina, it’s perfect.
- Butcher block: Warm and approachable—especially on an island or baking zone.
Design Smart
- Opt for a thicker mitered edge for that custom look without full-thickness slabs.
- Consider mixing materials: quartz on the perimeter, butcher block on the island.
- Choose a matte or honed finish to hide fingerprints and glare.
8. Appliances That Feel Built-In (Without a Custom Price Tag)
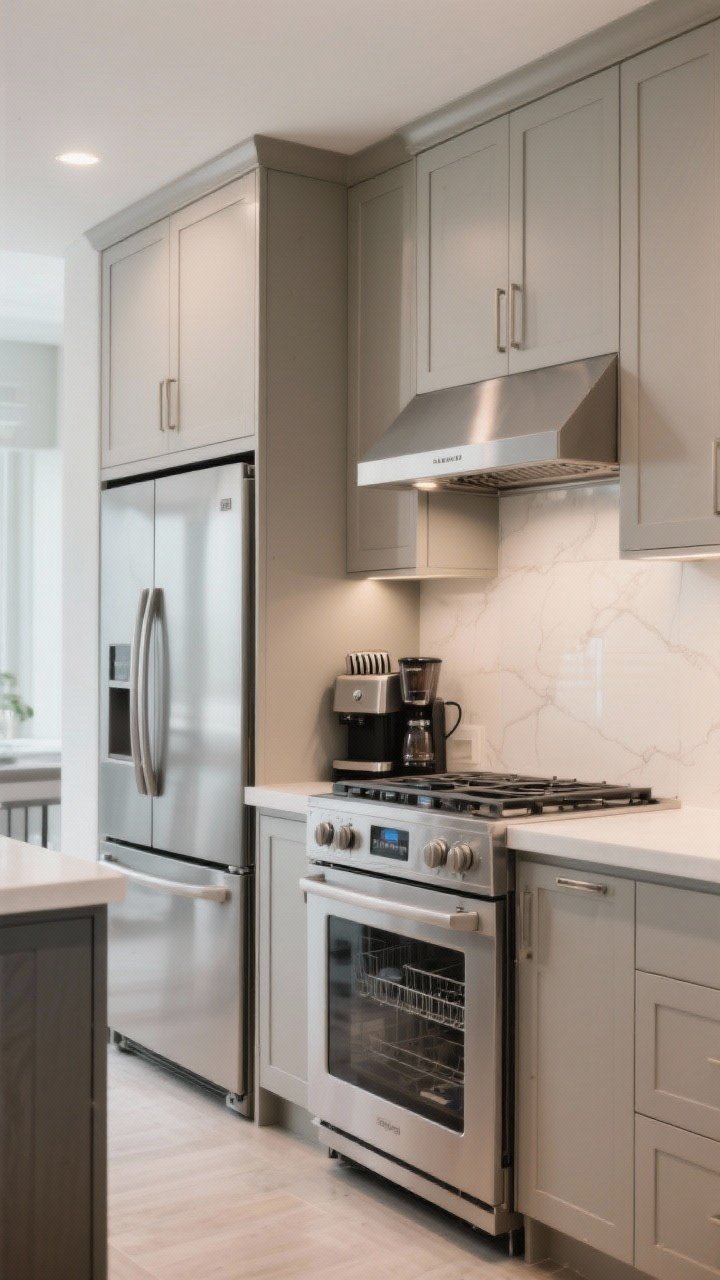
High-end look, lower stress. You can make standard appliances look custom with a little design trickery.
Design Moves
- Panel-ready fronts on dishwashers and fridges blend seamlessly with cabinetry.
- Build a counter-depth fridge surround with upper cabinets to mimic a built-in.
- Create an appliance garage with lift-up doors to hide toasters and espresso machines.
Bonus Upgrades
- Go induction for fast, safe, and sleek cooking. It’s the future.
- Add a speed oven or steam oven if you cook a lot; they’re tiny miracle workers.
- Don’t forget ventilation—choose a quiet, powerful range hood that actually vents outside.
9. Flooring That Sets the Mood (And Survives Spills)
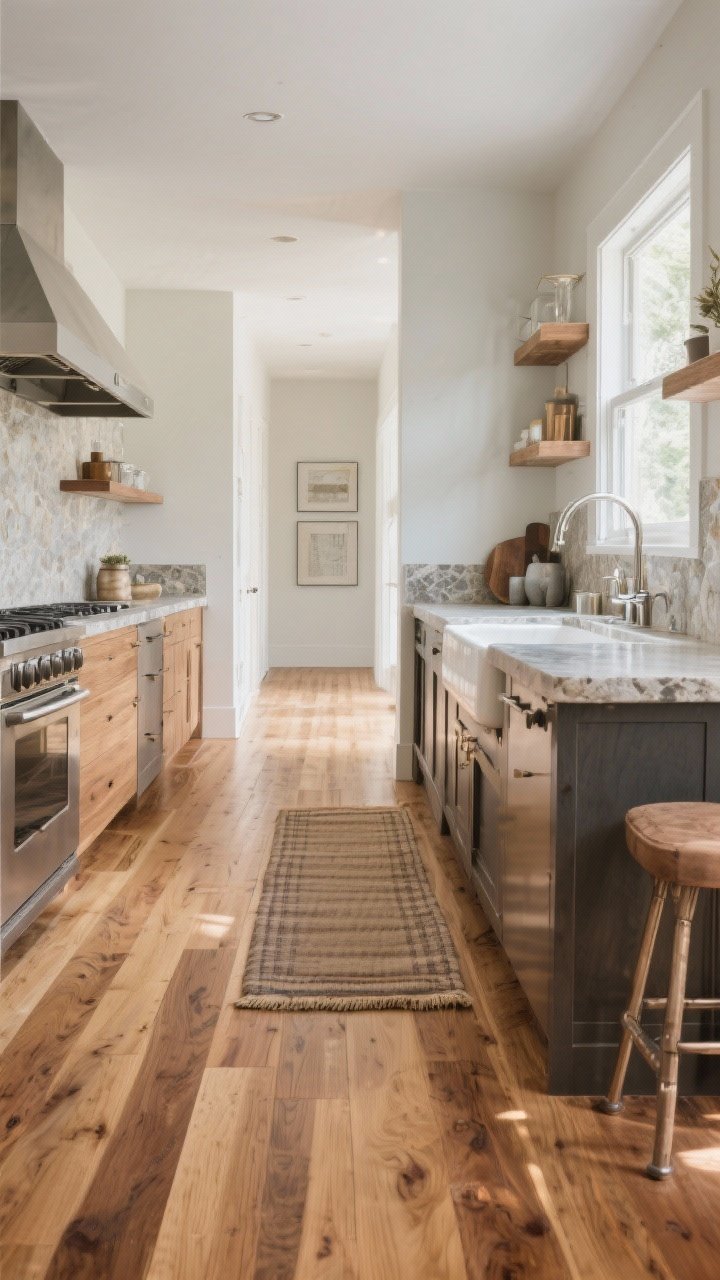
Floors do a lot of heavy lifting. They should feel great underfoot and look great on your feed. Also, they’re going to meet olive oil at some point—plan accordingly.
Favorite Choices
- Engineered hardwood: Warm, classic, stable over changing temps.
- Large-format porcelain: Concrete or stone look with zero sealing required.
- LVP (Luxury Vinyl Plank): Budget-friendly, water-resistant, surprisingly chic.
- Patterned cement tile: Bold moment for a pantry or breakfast nook.
Design Details
- Run planks parallel to the longest wall to visually stretch the space.
- Use warm wood tones to balance cool stone counters and metal accents.
- Add a cushioned runner in front of the sink—your back will be obsessed.
10. Add Soul With Open Shelving and Styled Moments

Even sleek kitchens need personality. Open shelves and mini display moments keep things from feeling sterile—plus, you get to show off that cute ceramic mug you definitely didn’t buy just for Instagram.
Where to Use Them
- A single shelf over the backsplash for art and frequently used pieces.
- Flanking the range hood for symmetry and easy access to spices and oils.
- Inside a niche or above a coffee station for curated charm.
Styling Cheat Sheet
- Stick to a tight color palette: wood, white, and one accent color.
- Mix heights and textures: stacks of bowls, a plant, a cutting board, a small framed print.
- Rotate seasonally so it stays fresh. Spring lemons; fall copper—easy win.
Bonus: Layout Wisdom You’ll Thank Yourself For
Okay, not a full section, but a quick sanity check before you demo anything.
- Respect the work triangle: sink, stove, fridge should be efficient, not a marathon.
- Keep at least 42 inches between counters for comfortable flow (48 if you’ve got multiple cooks).
- Plan landing zones: 12–18 inches of counter space next to major appliances.
- Don’t skimp on electrical: more outlets, under-cabinet strips, USBs where you charge.
Material Mix That Always Feels Custom
Here’s a foolproof combo that looks boutique-level without complexity:
- Cabinets: Soft white uppers, rift-cut white oak lowers.
- Counters: Warm white quartz with subtle veining.
- Backsplash: Zellige in a creamy tone, stacked vertical.
- Metals: Brushed nickel base with brass accents on lighting.
- Floor: Medium-tone engineered oak.
- Lighting: Two oversized pendants with dimmers, plus under-cabinet LEDs.
Budget-Savvy Upgrades That Look High-End
- Paint + hardware refresh: New color and long bar pulls will fool everyone.
- Swap your faucet: A sculptural pull-down model feels fancy instantly.
- Toe-kick lighting: LED strips for a soft glow at night—hotel vibes at home.
- Reface, don’t replace: New doors and drawer fronts keep costs lower but look brand new.
Color Palettes That Set a Mood
- Sunny Minimal: Warm white, pale oak, brushed nickel, eucalyptus green accents.
- Moody Modern: Charcoal lowers, ivory uppers, matte black hardware, walnut shelves.
- Soft Coastal: Cream, fog gray, polished nickel, sea-glass backsplash.
Remodeling can feel like a lot, but the payoff is huge. Choose a few ideas that match your lifestyle, layer in smart storage and lighting, and don’t forget those little styling moments that make it feel personal. You’ll be sipping coffee in your beautiful, functional, magazine-worthy kitchen before you know it. And yes, your friends will absolutely notice—consider this your official permission to brag a little.