10 Kitchen Organization Ideas for Pots, Pans, and Lids That End Chaos
Your pots and pans aren’t the problem—your storage is. If every pasta night starts with a cabinet avalanche, we’re fixing that today. These smart, stylish solutions will clear the clutter, protect your cookware, and make cooking feel easy (and low-key luxurious). Ready to end the chaos?
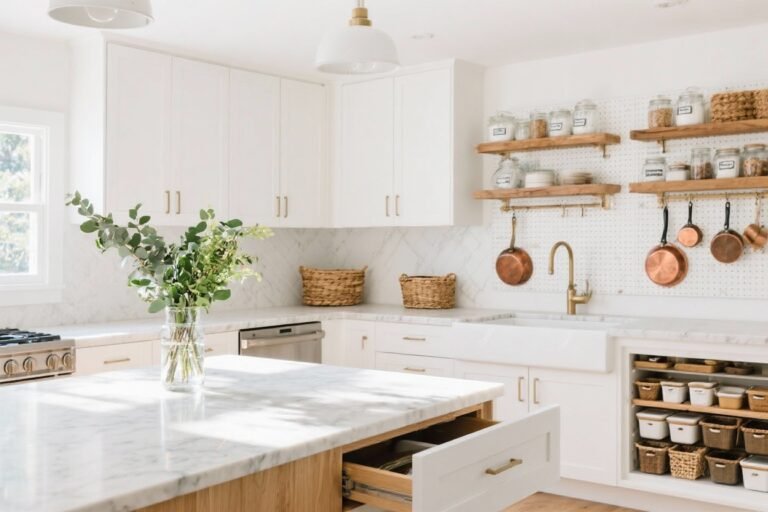
1. Hang It High: The Chic Pot Rack Move
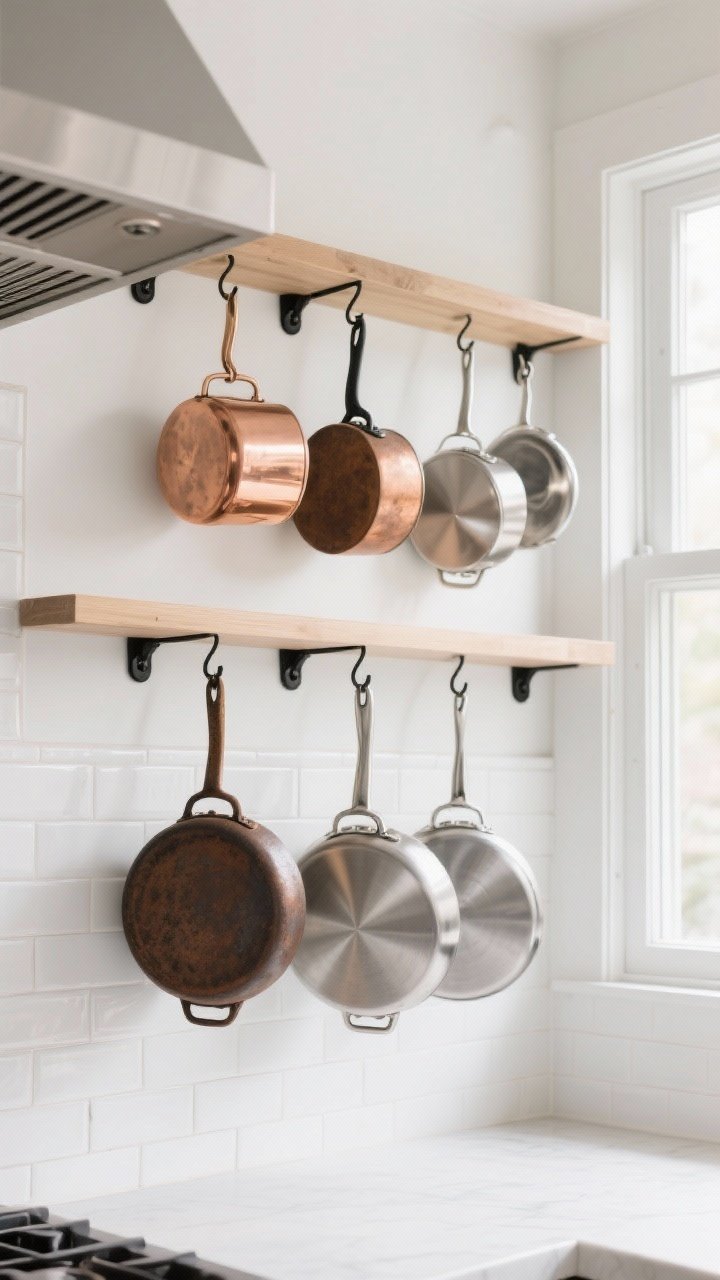
Free your cabinets and put your cookware to work as decor. A ceiling or wall-mounted pot rack keeps everything visible, airy, and right where you need it.
Tired of snacking when you’re not even hungry? This reset helps you stop the loop and feel back in control.
A simple reset for moments when cravings take over. Easy to use, easy to repeat, and designed to help you feel satisfied instead of stuck.
Why It Works
- Visibility: You see your best pieces—no more rummaging.
- Ventilation: Keeps pans dry and scratch-free.
- Style Points: Copper, cast iron, or stainless? Instant kitchen jewelry.
Quick Tips
- Use sturdy anchors and find studs (safety first).
- Hang most-used pans at eye level; heavier pots lower.
- Add S-hooks so you can rearrange on the fly.
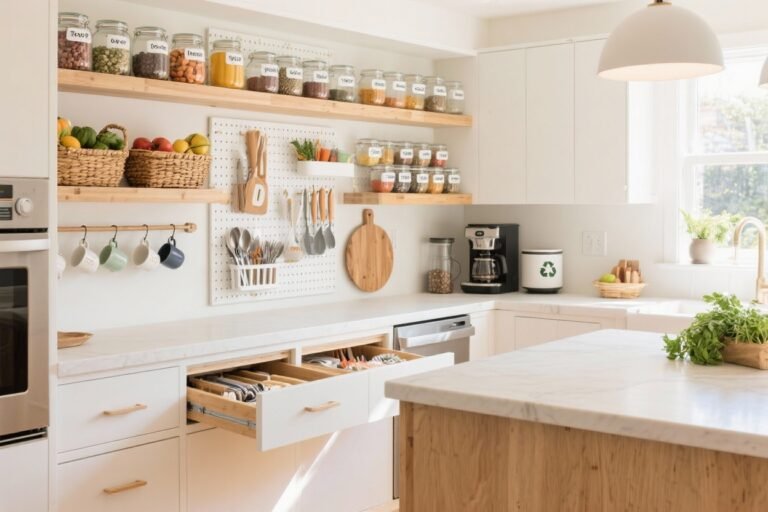
2. Drawer Divas: Deep Drawers With Smart Dividers
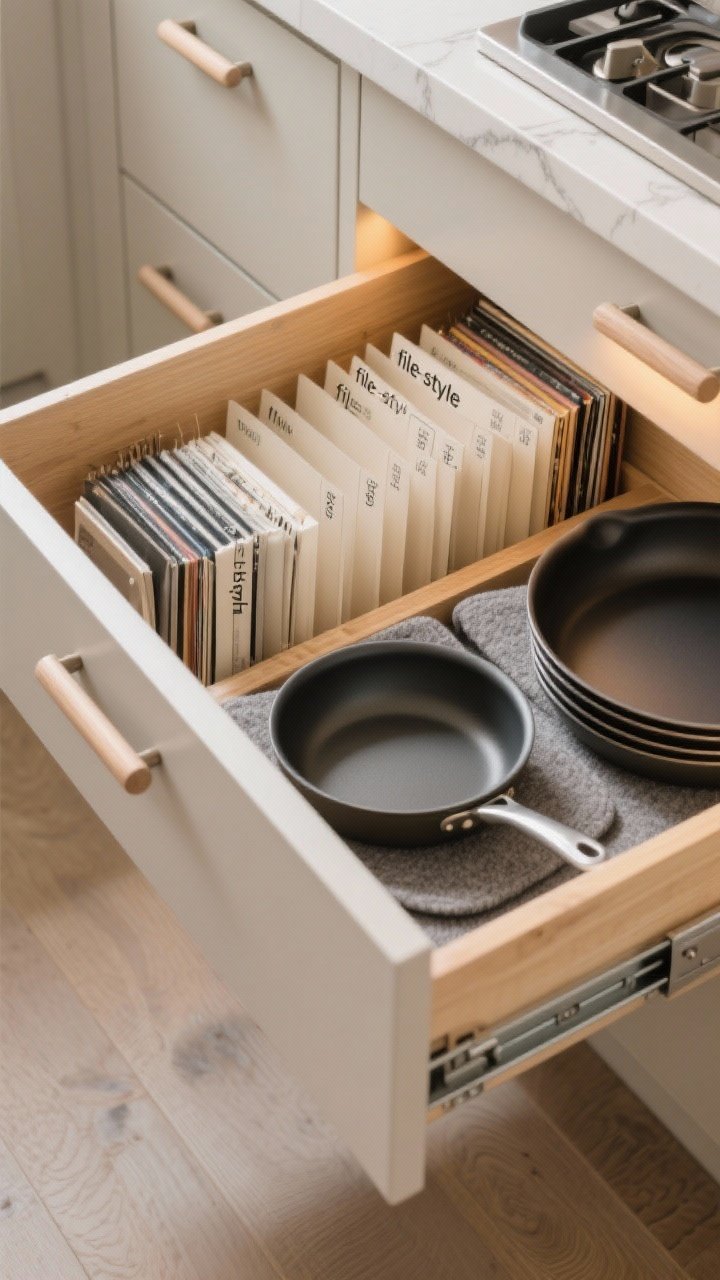
If you’ve got deep drawers, they’re prime real estate for pots and lids. The trick is vertical dividers so everything stands up and doesn’t shift when you open the drawer.
Setup Ideas
- File Style: Store lids upright like records. Satisfying and efficient.
- Skillet Stack: Nest pans with felt protectors to avoid scratches.
- Handles Out: Position handles toward the front for an easy grab.
Pro Tip
- Install soft-close slides to protect cookware and your sanity.
- Measure interior height—leave room for lids or tall pots (FYI, 10–12 inches is ideal).
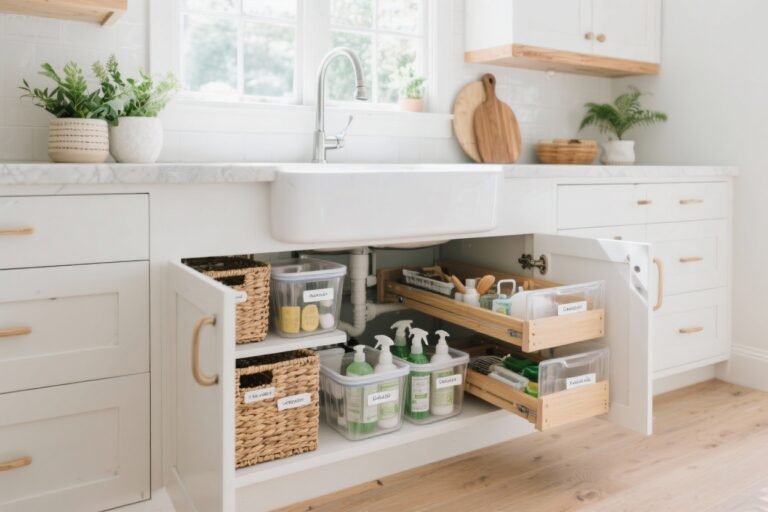
3. Pull-Out Perfection: Glide-Out Shelves You’ll Actually Use
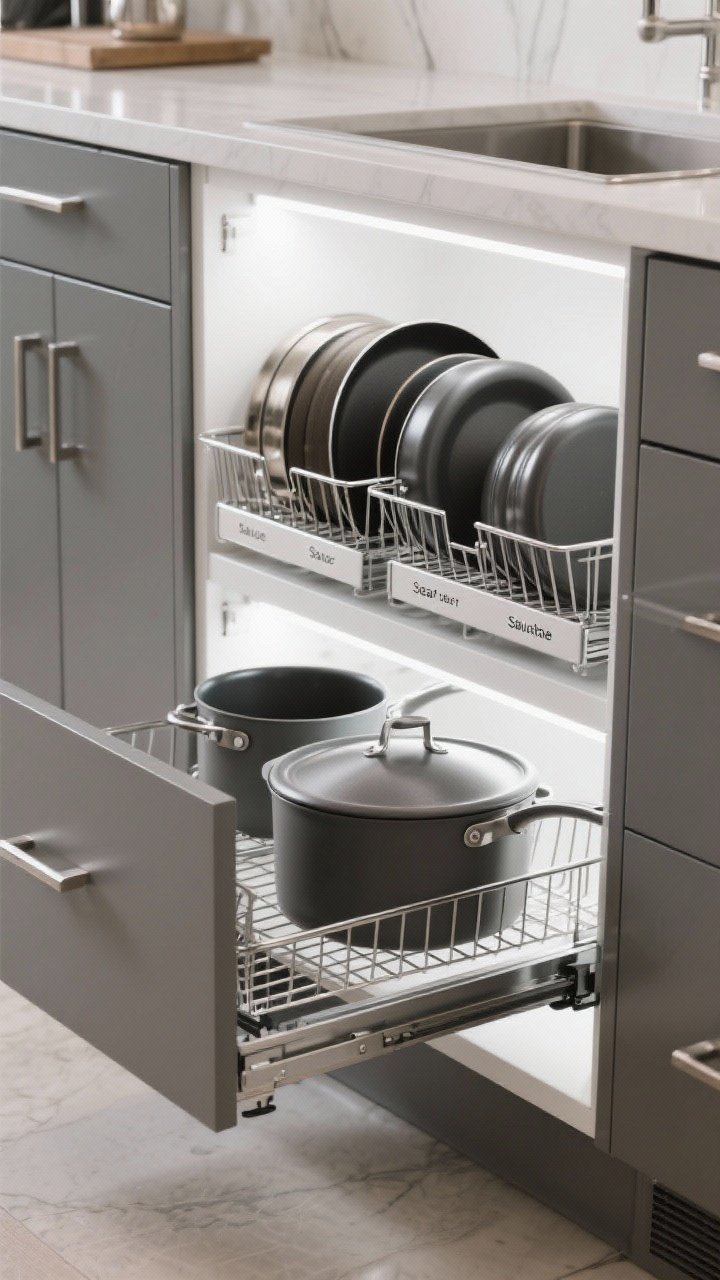
Base cabinets are black holes unless you install pull-out shelves or roll-out trays. Suddenly, everything in the back is easy to reach—no yoga pose required.
What To Choose
- Full-Extension Glides: So the entire shelf slides out.
- Metal Over Wood: Metal baskets handle weight and heat better.
- Tall Sides: Keep lids and smaller pans from tipping.
Layout Trick
- Put pots on the bottom pull-out; lids and fry pans up top.
- Group by function—sauce, sear, sauté—so cooking is intuitive.
4. Lid Logic: Tame The Chaos With Upright Racks
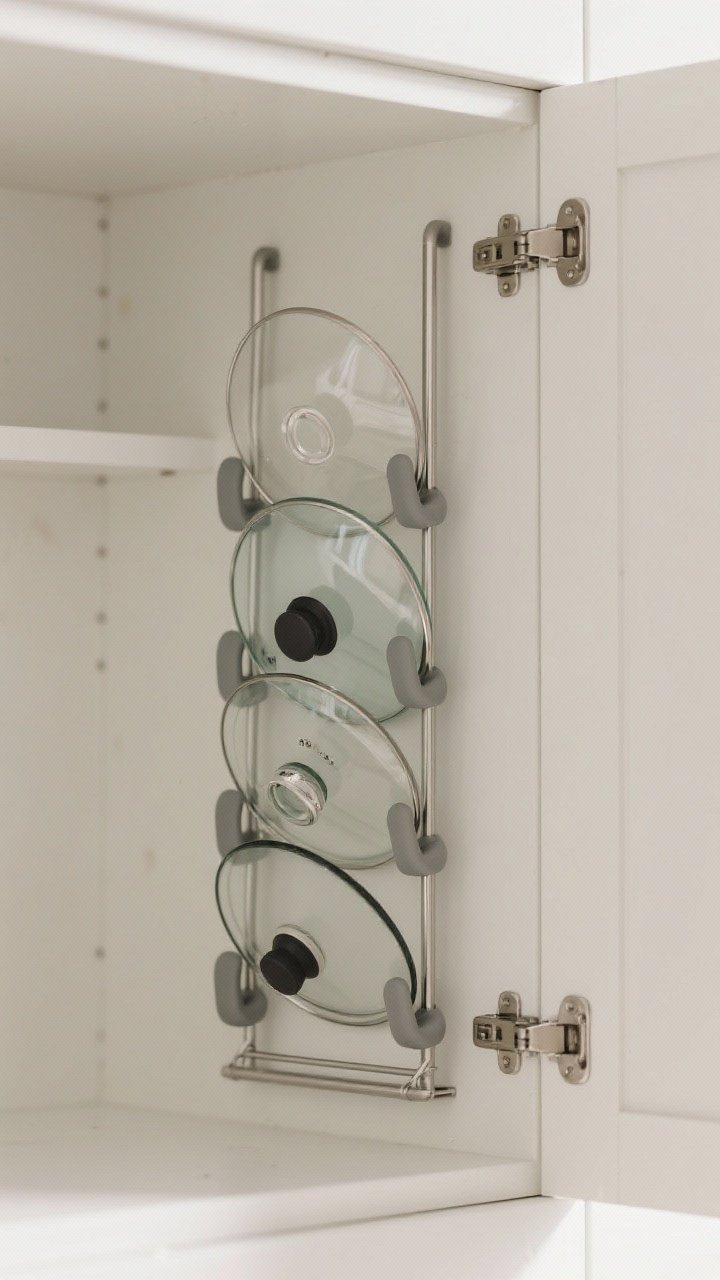
Lids are the drama queens of your cabinets—loud and everywhere. Solve it with a lid organizer that stores them upright and separated.
Options That Work
- Expandable Rack: Grows with your collection (and your obsession).
- File Holder Hack: A metal magazine rack works surprisingly well.
- Cabinet Door Rack: Mount inside doors to save shelf space.
Fit & Function
- Sort by size or by pot—label if you’re extra.
- Store glass lids upright to avoid scratches; use silicone bumpers if needed.
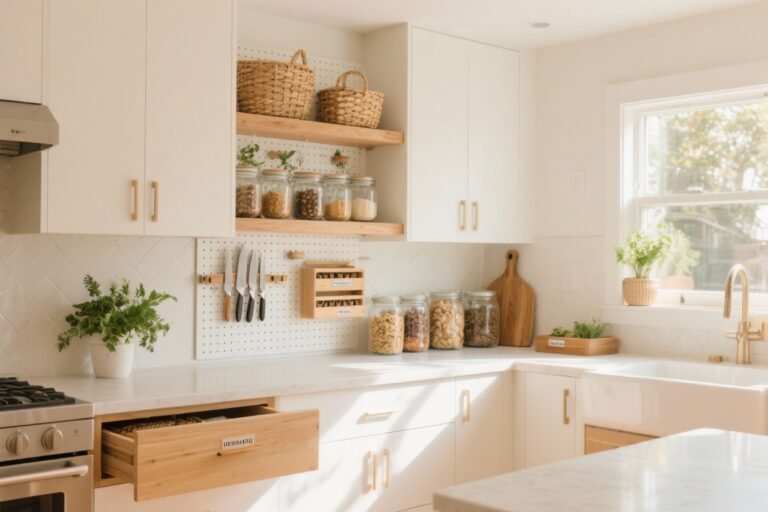
5. Pegboard Wall: The Customizable Workhorse
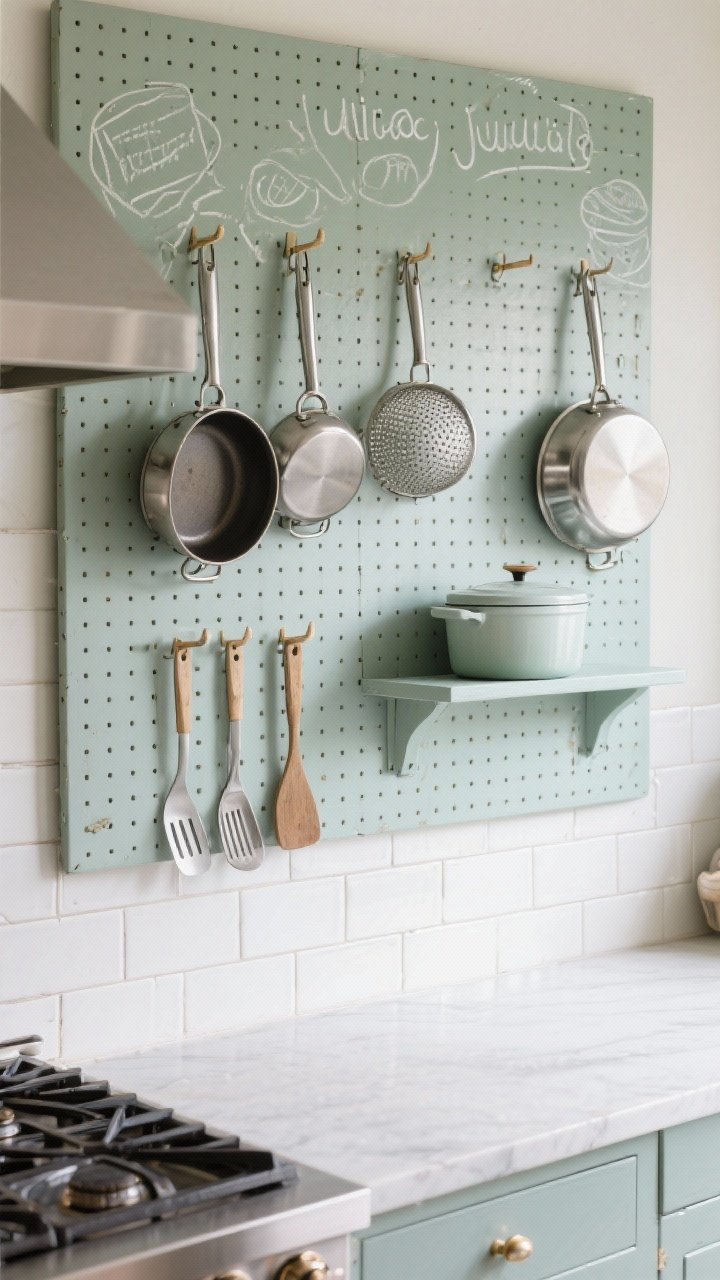
Channel your inner Julia Child with a pegboard wall. It’s modular, cool-looking, and ridiculously practical for pans, spatulas, and strainers.
Transform Your Home With 7,250+ Stunning Landscaping Designs—No Expensive Designers Needed!
- 🌿 Access 7,250+ stunning landscaping designs.
- 💰 Save thousands—no pro designer needed.
- 🏡 Plans for gardens, patios, walkways, and more.
- ✨ Simple, beginner-friendly DIY layouts.
- 🛠️ Customize any design to fit your yard.
Why You’ll Love It
- Flexible Layout: Move pegs as your collection changes.
- Vertical Storage: Saves cabinet space for pantry staples.
- Instant Access: Grab-and-go beats dig-and-sigh.
Styling Tips
- Outline tools with chalk if you love a tidy board (and a little whimsy).
- Mix hooks and small shelves for lids and Dutch oven tops.
- Paint it to match your backsplash for a custom vibe.

6. Under-Shelf Magic: Double Your Space With Risers
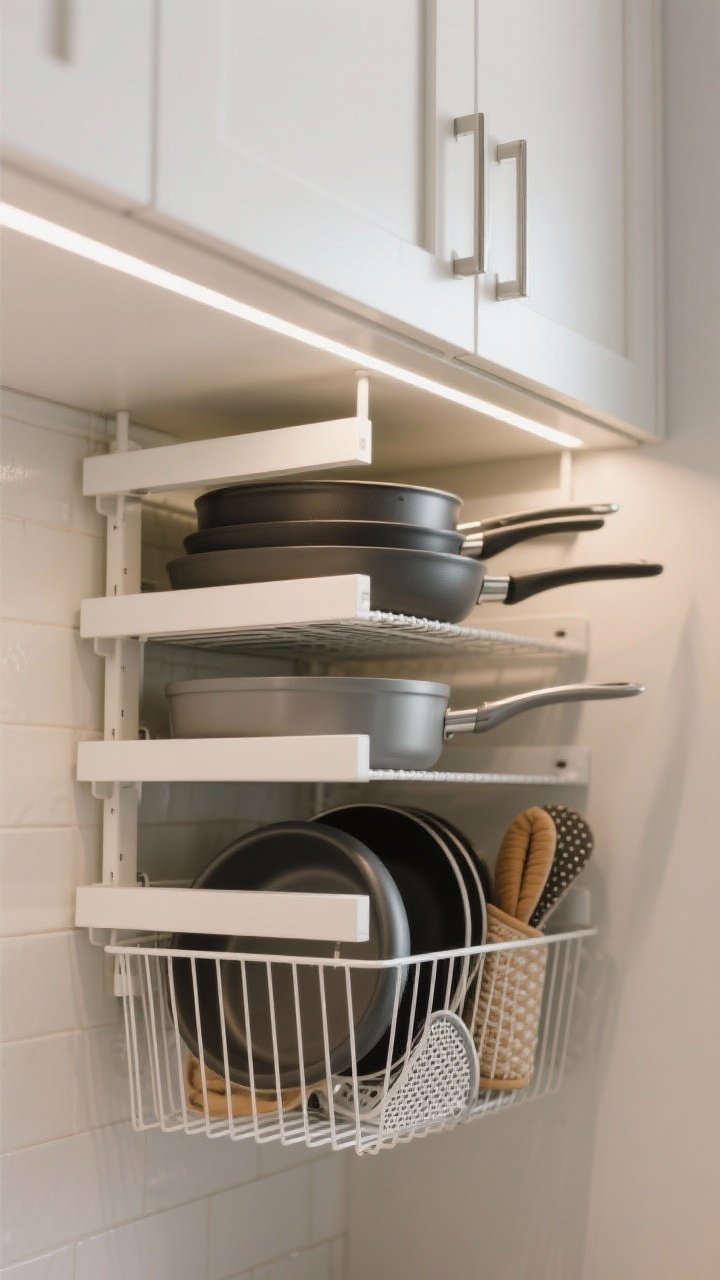
Have tall shelves with wasted headroom? Add under-shelf baskets and stacking risers to instantly create more surfaces without a full renovation.
Best Uses
- Risers: Perfect for nesting skillets while keeping them separate.
- Under-Shelf Baskets: Slide in for lids, pot holders, or splatter screens.
- Stack Savvy: Heavy items on the bottom, lighter on top—basic physics, big payoff.
Buy Smart
- Look for coated metal to avoid scuffs.
- Measure the lip of your shelf; not all baskets fit all shelves (IMO, adjustable is best).
7. Corner Cabinet Hero: Lazy Susans And Blind-Corner Pull-Outs

Corner cabinets can be a nightmare—unless you outfit them with lazy Susans or blind-corner pull-outs. Suddenly, the most annoying space becomes your most efficient.
What Works Where
- Full-Round Lazy Susan: Great for lighter pots and lids.
- Kidney-Shaped Susan: Fits standard corner bases and spins easily.
- Blind-Corner Systems: Shelves that pull out and slide over—so satisfying.
Setup Tips
- Heaviest cookware on the lower tier for stability.
- Use rubber mats to prevent sliding and scratching.
8. Rail Systems: Handles Out, Counter Clear
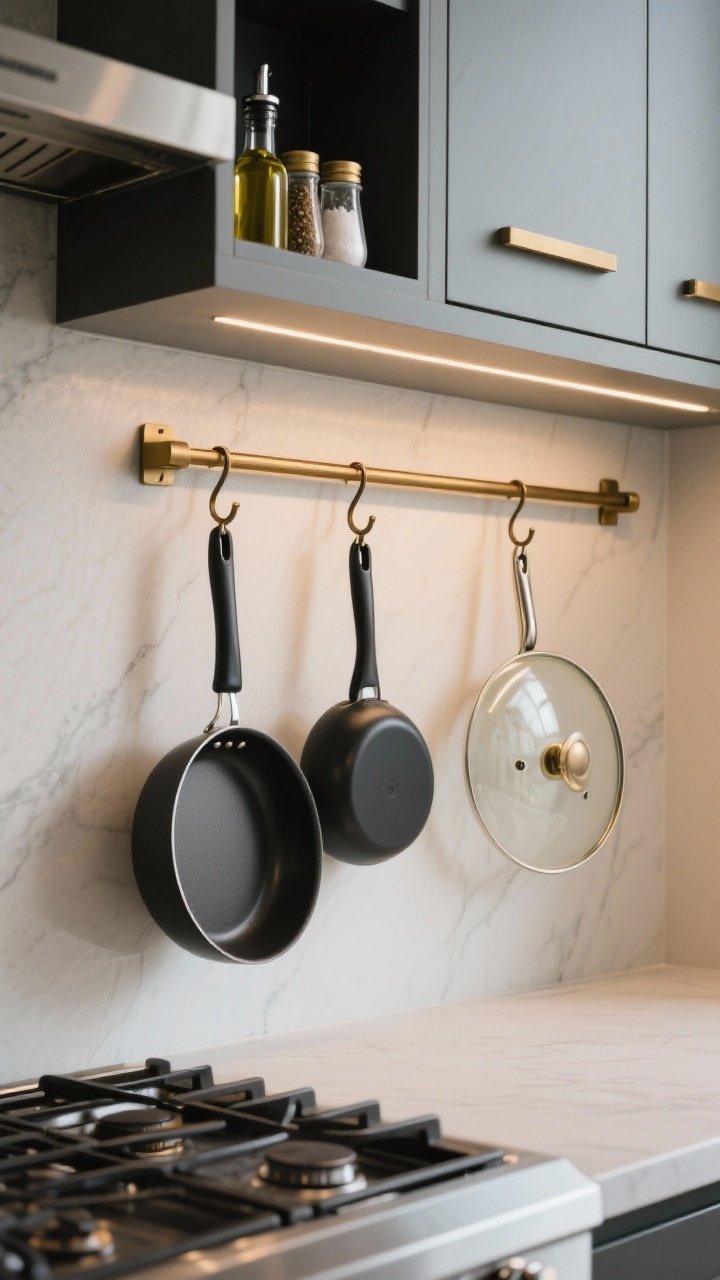
Love the pro-kitchen look? Install a wall rail with hooks near your stove. It keeps your most-used pans and lids within arm’s reach and frees up drawers.
How To Max It Out
- Mix S-hooks and specialized lid hooks for flexible storage.
- Mount into studs or use high-strength anchors—pans aren’t light.
- Keep it curated: display your everyday three—one skillet, one saucepan, one lid.
Bonus Style
- Match rail finish to your hardware for a seamless look.
- Add a mini shelf above for oils, salt, and pepper—chef’s kiss.
9. Appliance Garage For Cookware: Tall Cabinet With Roll-Out Bins
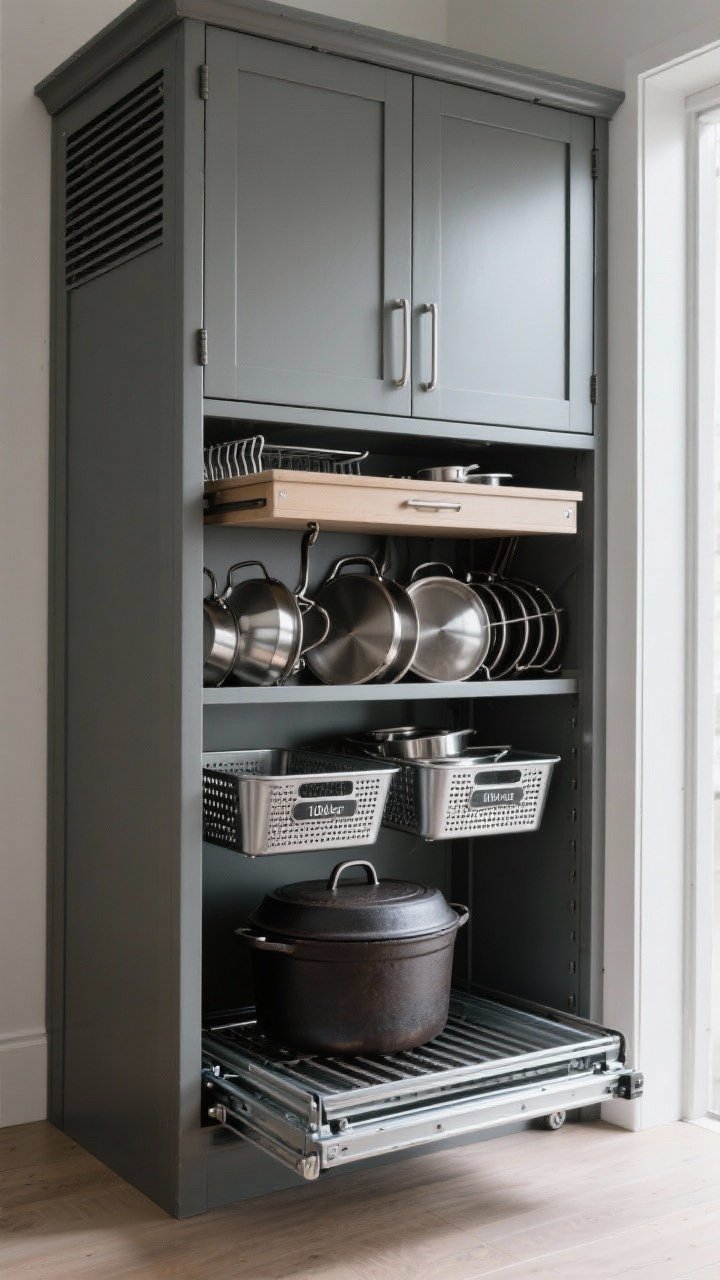
Who says an appliance garage is only for toasters? Repurpose a tall cabinet with roll-out bins or baskets for oversized pots, stockpots, and Dutch ovens.
Configuration Ideas
- Tiered Bins: Bottom bin for heavy cast iron, mid-level for saucepans.
- Lid Drawer: A shallow top drawer with a lid rack—game changer.
- Label The Fronts: Especially if multiple cooks share the kitchen.
Material Matters
- Choose heavy-duty glides (100 lb+) for cast iron.
- Ventilated metal bins keep moisture from building up.
10. Minimalist Capsule Cookware: Curate, Then Store Like A Pro
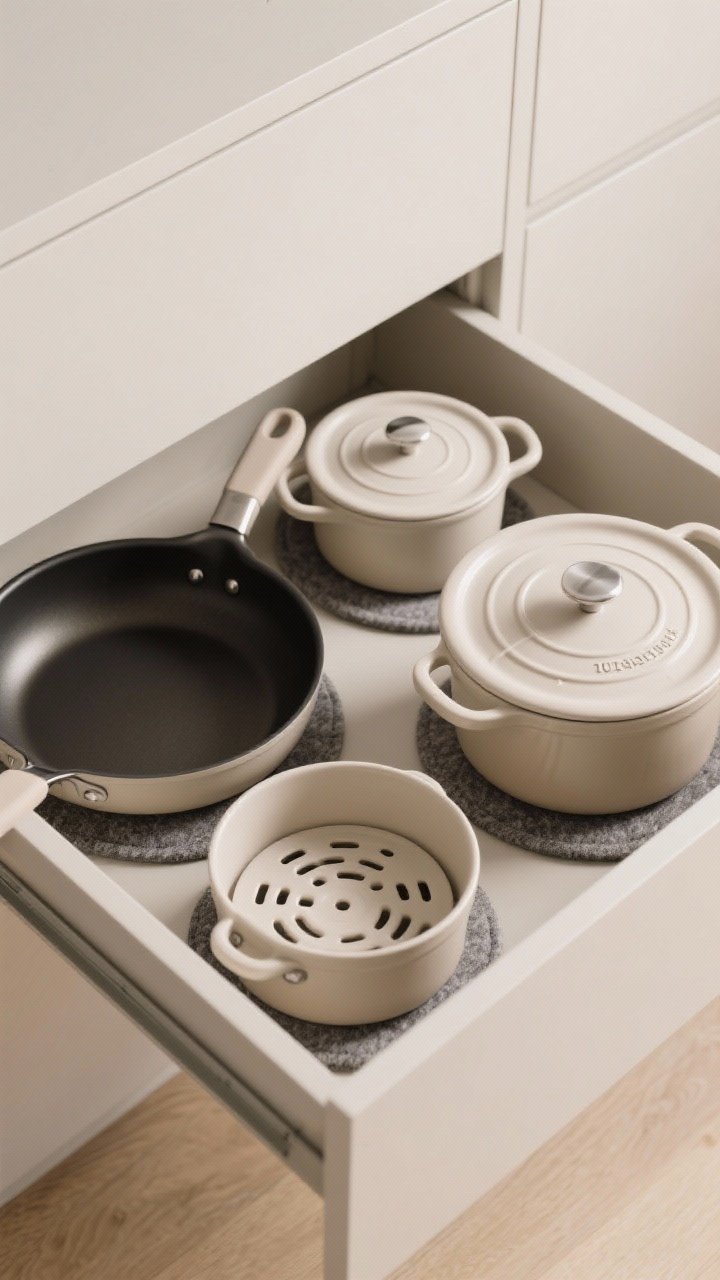
Sometimes the best organization is owning less. A tight capsule cookware collection saves space, money, and your sanity.
The Core Set
- 10–12″ skillet (nonstick or stainless)
- 3–4 qt saucepan with lid
- 5–7 qt Dutch oven or stockpot
- Steamer insert or universal lid
Smart Storage After The Edit
- Use universal lids to replace multiples.
- Choose stackable sets with removable handles—tiny footprint, big function.
- Donate duplicates and retire scratched nonstick—your cabinets (and food) will thank you.
Bonus Tips To Keep It Organized
- Zone Your Kitchen: Store cookware near the stove, baking near the oven, prep by the sink.
- Protect Surfaces: Felt pan protectors or paper towels between nested pans prevent damage.
- Routine Reset: Do a 5-minute tidy every Sunday. Little effort, big payoff.
Ready to cook without the clatter? Pick two or three ideas that fit your space and go for it. Your future self—calm, collected, and not buried under a tower of lids—will be very pleased, FYI.