10 Rustic Outdoor Kitchens That Feel Warm and Inviting You’ll Want to Copy
Ready to turn your backyard into the coziest, most drool-worthy hangout on the block? Rustic outdoor kitchens hit that sweet spot between laid-back and luxe. Think weathered wood, stone, flickering firelight, and food sizzling on cast iron. Yes, please.
Below are 10 fresh, practical ideas to help you create a rustic outdoor kitchen that feels warm, inviting, and seriously hard to leave. We’re talking texture, lighting, storage, and those little styling touches that make it look like you hired a fancy designer—without losing that “come as you are” vibe.
Tired of snacking when you’re not even hungry? This reset helps you stop the loop and feel back in control.
A simple reset for moments when cravings take over. Easy to use, easy to repeat, and designed to help you feel satisfied instead of stuck.
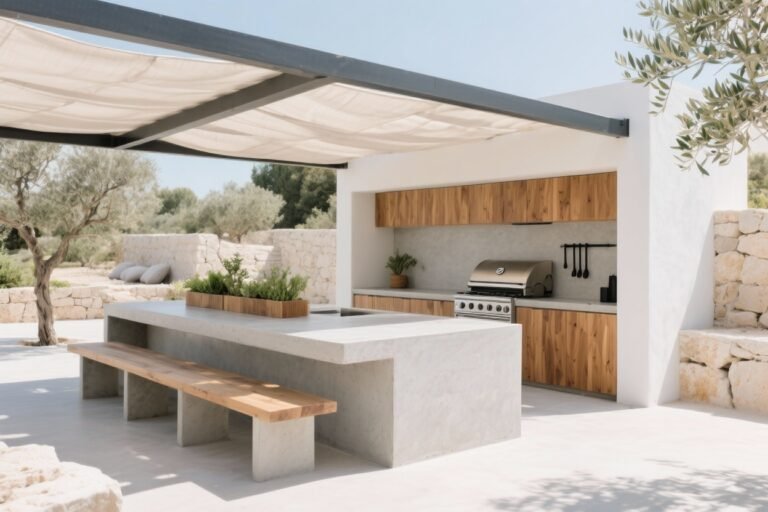
1. Anchor It With Stone And Salvaged Wood

Rustic design starts with honest, earthy materials. For outdoor kitchens, that means stone bases, rough-sawn timber, and reclaimed touches that tell a story. A chunky stone island paired with a live-edge counter? Chef’s kiss.
Why It Works
Stone brings durability and a sense of permanence, while reclaimed wood adds warmth and character—like a cozy cabin, but make it alfresco.
Tips To Nail The Look:
- Mix textures: Pair stacked fieldstone with a reclaimed wood bar top or cedar shelving.
- Use matte finishes: Brushed or honed stone prevents glare and looks more natural.
- Choose hearty species: Teak, ipe, or cedar for cabinets; seal them but keep the grain visible.
- Go for heft: Thick legs, chunky beams, and solid hardware scream sturdy and rustic.
Pro move: Work in vintage corbels or an old barn beam as a mantle over your grill. Instant patina, zero pretense.
Transform Your Home With 7,250+ Stunning Landscaping Designs—No Expensive Designers Needed!
- 🌿 Access 7,250+ stunning landscaping designs.
- 💰 Save thousands—no pro designer needed.
- 🏡 Plans for gardens, patios, walkways, and more.
- ✨ Simple, beginner-friendly DIY layouts.
- 🛠️ Customize any design to fit your yard.
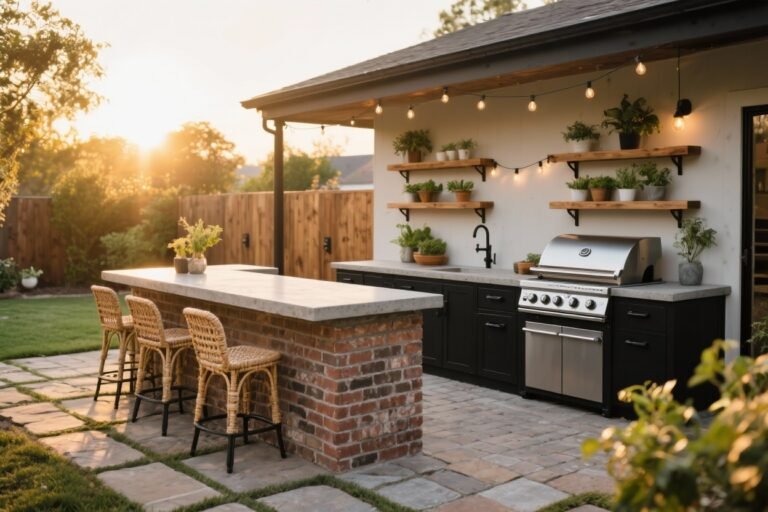
2. Layer Cozy Lighting Like A Campsite (But Chic)

Lighting is what turns “outdoor cooking space” into “dreamy hangout.” Layer it like you would inside: ambient, task, and accent. The glow should feel warm, not interrogation-room harsh.
What To Combine
- Ambient: String lights or lantern-style sconces for overall warmth.
- Task: Adjustable, focused lights over prep zones and the grill.
- Accent: Uplights on stone walls, candles in hurricane lanterns, or LED strips under counters.
Warm white (2700K–3000K) is your friend. And battery-powered lanterns? A lifesaver for late-night snacks when outlets are scarce.
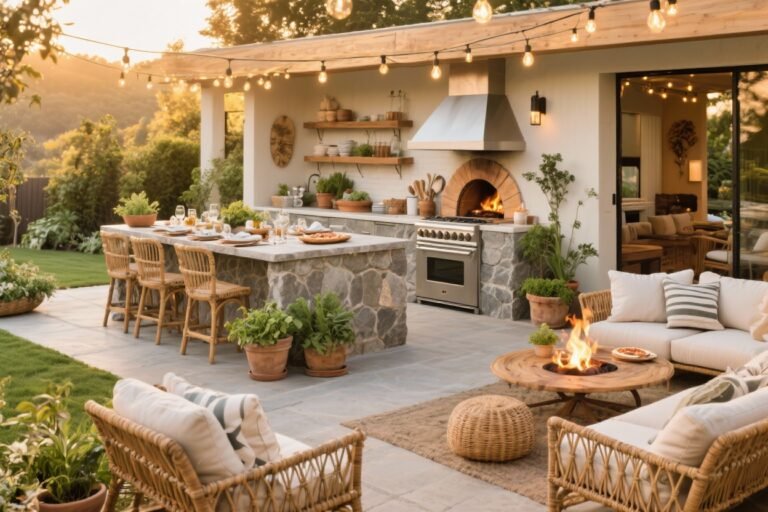
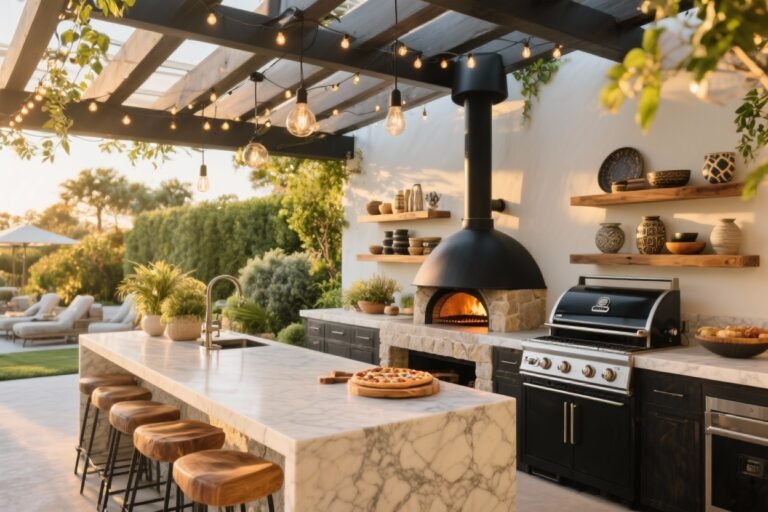
3. Add A Fire Feature For Year-Round Vibes

Nothing says “stay awhile” like fire. It’s the heart of a rustic outdoor kitchen, whether you’re roasting veggies, toasting marshmallows, or just soaking up the glow with a blanket.
Choose Your Flame
- Wood-fired oven: For pizza nights and rustic bread (yes, you’ll use it more than you think).
- Built-in fire pit or fireplace: Defines the zone and gives you a focal point.
- Smoker: Adds that slow-cooked magic—and smells incredible.
Safety FYI: Keep fire features a safe distance from wood structures, and consider a spark screen if you’re using wood. Cozy is cute—accidental bonfires are not.
4. Keep Appliances Sleek, Then Soften With Natural Finishes

Stainless steel is basically the uniform for outdoor appliances, but it can feel too sleek for rustic spaces. Balance it with earthy finishes and tactile elements so it blends in, not sticks out.
Smart Pairings:
- Stainless + stone: House your grill in a stone base with dark grout for definition.
- Metal + wood: Add wood slat panels to the fridge or side cabinets to soften the shine.
- Copper accents: A copper faucet, hood, or lighting warms up cool metals instantly.
Bonus: Choose appliances with simple lines and fewer digital doodads. Rustic feels best when it’s unfussy and practical.
5. Design A Social Layout (Because Everyone Crowds The Kitchen)

People will hover where the food is—it’s a universal truth. So plan your layout for flow and mingling. Zones are your best friend.
Think In Layers
- Hot zone: Grill, smoker, pizza oven—keep these away from seating.
- Prep zone: Counter space near the sink and trash.
- Serve zone: A bar counter or pass-through ledge so guests can graze without blocking the chef.
- Lounge zone: Comfy seating near (but not in) the action.
Include a raised bar or overhang with stools so guests can chat while you flip steaks. It’s basically their backstage pass.

6. Embrace Open Shelving And Vintage Finds
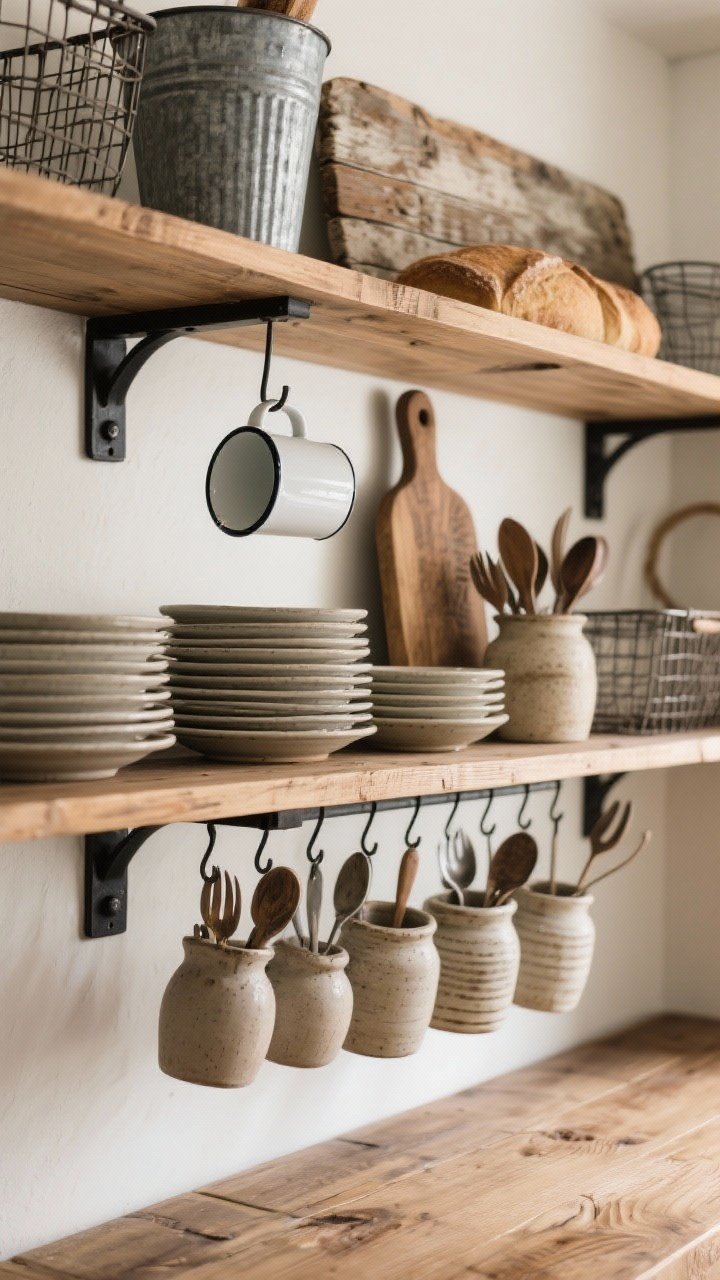
Cabinet doors? Optional. Open shelves are practical outdoors and look effortlessly rustic. Plus, you can show off that cute enamelware and those stoneware pitchers you “accidentally” collected.
How To Style It:
- Mix materials: Wood shelves with black iron brackets for strength and style.
- Display purposefully: Stack everyday plates, hang mugs, and corral utensils in crocks.
- Add vintage: Old breadboards, galvanized bins, and wire baskets = texture and charm.
Practical note: Store seasonals or soft goods in lidded boxes or weatherproof cabinets to avoid dusty drama.
7. Choose Earthy Surfaces That Age Gracefully

Rustic doesn’t mean high-maintenance. Pick materials that look better with a little wear—because they will get it. The goal is patina, not panic.
Great Countertop And Floor Options
- Leathered granite or soapstone: Soft sheen, hides smudges, survives the elements.
- Concrete: Customizable and tough; add an acid stain or seeded aggregate for character.
- Brick or natural stone pavers: For the floor—they drain well and look timeless.
Seal surfaces every season or two, especially around the sink and grill. Rustic is carefree, not careless, IMO.
8. Bring In Textiles And Greenery For Softness

Hard materials can feel cold without a little softness. Layer textiles and plants for that lived-in charm—like a garden party that just never ends.
Easy Adds:
- Outdoor rugs: Define the kitchen and seating zones; go for warm, natural tones.
- Cushions and throws: Pick performance fabrics in stripes, checks, or earthy solids.
- Potted herbs: Rosemary, thyme, and basil are pretty and practical for cooking.
- Climbing greens: Train ivy or jasmine on a trellis or pergola for instant romance.
Keep a covered bin for textiles so you can stash them during surprise showers. Your future self will thank you.
9. Add A Pergola Or Roof For Shade And Structure
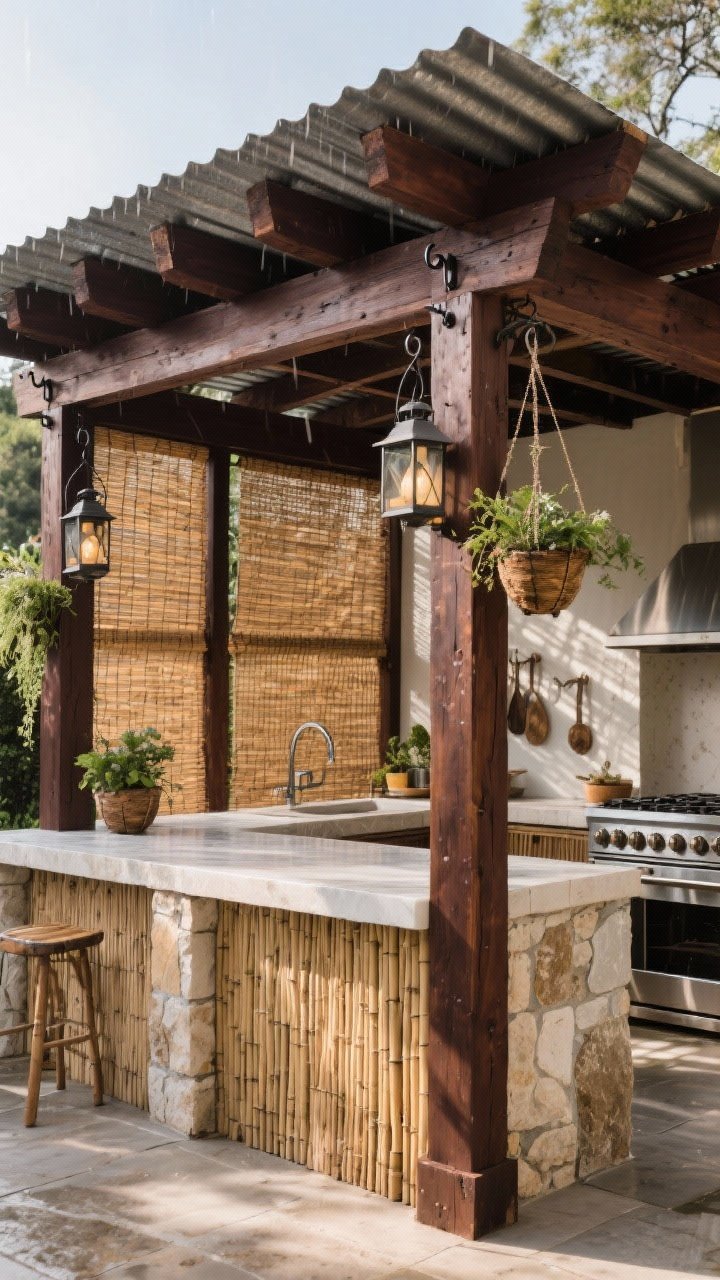
Framing your outdoor kitchen with a pergola, pavilion, or metal awning gives it a “real room” feel. It also helps your wood, fabrics, and finishes last longer. Functional and gorgeous—winning combo.
Style Moves That Work
- Timber pergola: Stain it dark for contrast, or keep it light and weathered.
- Corrugated metal roof: Industrial-meets-farmhouse, and the rain sound? So good.
- Natural shade: Weave in bamboo, reed panels, or outdoor fabric for dappled light.
Don’t forget hooks on the pergola beams for lanterns or hanging planters. Instant vertical interest with zero clutter.
10. Style With Purpose: The Little Things Matter
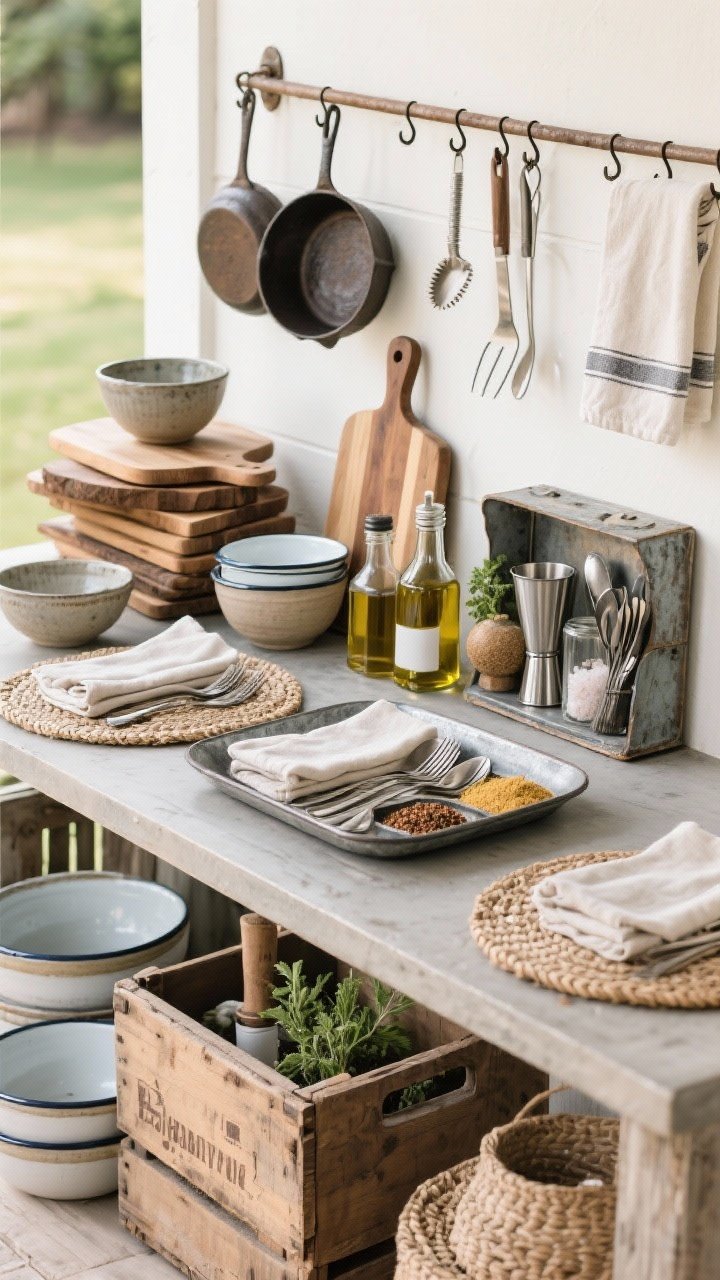
This is where your rustic outdoor kitchen goes from “nice” to “no, seriously, where did you get that?” Style it with useful, beautiful pieces—and skip the random knickknacks.
Elevate The Everyday
- Wood boards and trays: Stack cutting boards, use a large tray for oils, salts, and spices.
- Enamelware or stoneware: Durable, charming, and dishwasher-friendly if you’re lucky.
- Textured serveware: Woven placemats, linen napkins, hammered metal flatware.
- Hooks and rails: Hang cast-iron pans, tongs, and towels so they’re within reach.
- Outdoor bar kit: A vintage crate with a shaker, muddler, and bottles—hello, herb cocktails.
Keep it simple: if it doesn’t serve a purpose or spark joy (yes, we said it), it doesn’t need to live outside.
Quick Planning Checklist
- Measure zones: Leave 36–48 inches of clearance around hot and prep areas.
- Mind utilities: Gas, electric, and water lines should be planned early. Safety first.
- Weatherproof wisely: Covers, drainage, and a place to stash cushions are essential.
- Choose durable finishes: UV-resistant fabrics, sealed wood, and outdoor-rated fixtures.
- Start small: A grill station with a stone counter can evolve into your dream setup over time.
You don’t need a sprawling yard or a contractor army to pull off rustic outdoor charm. Start with honest materials, warm lighting, and a layout that makes hosting easy. Before you know it, your backyard will be the place everyone wants to linger—s’mores optional, compliments guaranteed.