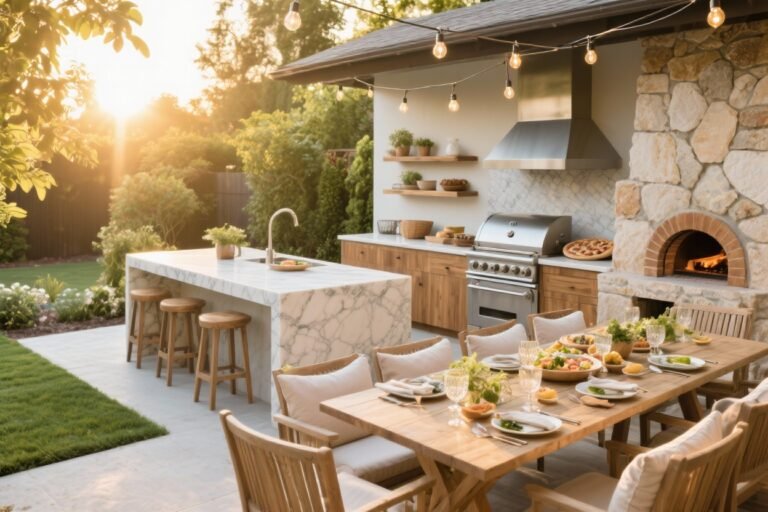
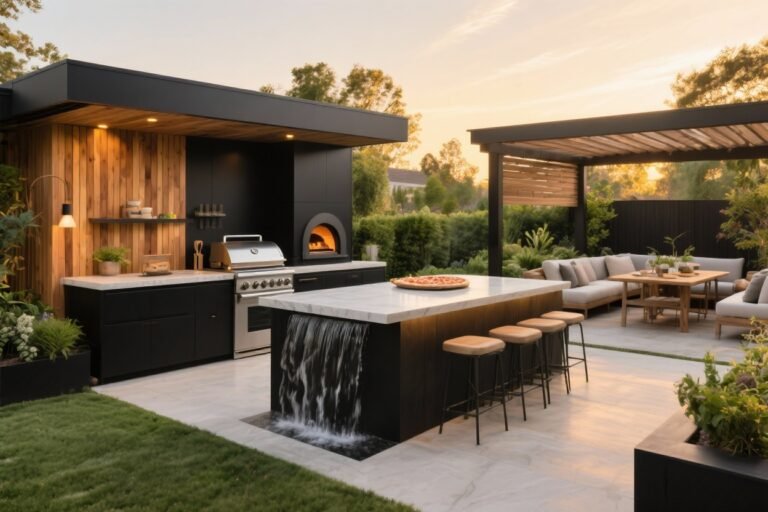
10 Small Outdoor Kitchen Ideas That Maximize Every Inch (and Look Luxe)
You don’t need a sprawling backyard to cook outside like a pro. Tiny patios, narrow balconies, awkward corners—bring ’em on. With a few smart moves, your small outdoor kitchen can serve big style and even bigger flavor.
Ready to squeeze every drop of potential out of your space? Here are 10 clever ideas that make cramped layouts feel custom, functional, and yes—ridiculously good-looking.
Tired of snacking when you’re not even hungry? This reset helps you stop the loop and feel back in control.
A simple reset for moments when cravings take over. Easy to use, easy to repeat, and designed to help you feel satisfied instead of stuck.
1. Build a Galley Layout That Flows

A galley-style setup is the MVP for small spaces. Keep everything in a straight line against one wall or fence, so you avoid awkward circulation and wasted corners.
Stick to the essentials—grill, prep surface, compact sink if you can swing it—and let it run like a sleek little train.
Pro Tips
- Standardize widths: Use 24-inch modules for base cabinets and appliances to keep a tight, efficient rhythm.
- Plan the work triangle: Arrange grill → prep → serve in that order for less back-and-forth.
- Wall-mount utilities: Magnetic knife strip, hooks for tongs, and a paper towel bar free up counter space.
Style hack: Match the cabinet fronts or cladding to your home’s exterior color for a seamless, custom vibe.
2. Choose a Slimline Grill (Or Go Modular)

That giant six-burner beast? Overkill for a small setup. Look for a slimline built-in, compact gas grill, or a modular system you can reconfigure later.
Transform Your Home With 7,250+ Stunning Landscaping Designs—No Expensive Designers Needed!
- 🌿 Access 7,250+ stunning landscaping designs.
- 💰 Save thousands—no pro designer needed.
- 🏡 Plans for gardens, patios, walkways, and more.
- ✨ Simple, beginner-friendly DIY layouts.
- 🛠️ Customize any design to fit your yard.
Bonus: Modular kits make it easy to add a smoker, pizza oven, or side burner when your budget (or confidence) grows.
Smart Picks
- Category wins: 24–30-inch grills, drop-in induction burners, portable pizza ovens.
- Fuel flexibility: Consider propane if running a gas line is a headache.
- Combo tops: A grill + griddle unit multitasks like a champ.
FYI: Check clearances for heat and ventilation—especially tight balcony spaces. Safety > s’mores.
3. Add Vertical Storage Like a Bistro

When floor space is scarce, go up. Vertical storage keeps clutter off the counters and puts tools right where you need them.
Think bistro meets workshop: clean, functional, and a little bit charming.
What to Install
- Open shelves: Use powder-coated metal or teak for weather resistance.
- Pegboards: Stainless or marine-grade—hang pans, mitts, even a tiny herb pot.
- Rail systems: S-hooks for utensils and small baskets for spices and napkins.
Style hack: Decant spices into matching stainless or amber jars. It’s a small detail that screams “I have my life together.”
4. Use a Fold-Down or Slide-Out Prep Station

Counter space is the rarest commodity outside. So make it appear on demand with fold-down or slide-out surfaces.
Stow it away when you’re done and suddenly your patio feels huge again.
Functional Add-Ons
- Fold-down shelf: Mount to a wall or fence using heavy-duty brackets.
- Pull-out boards: Hidden under the main counter—great for chopping or plating.
- Flip-up bar ledge: Add stools and boom—instant dining zone.
Pro tip: Use food-safe hardwood (like teak) or high-pressure compact laminate for durability.
5. Hide Storage in Benches and Planters

If you’re not sitting on storage, you’re missing out. Benches can hold cushions, grill covers, and bulky cookware. Planters? Great camouflage for propane tanks and ice buckets.
It’s sneaky-smart and looks intentional.
How to Pull It Off
- Bench with lift-up lids: Add soft-close hinges so they don’t slam mid-party.
- Planter panels: Build a removable front to access the tank or storage bin.
- Rolling crates: Weatherproof bins on casters slide under seating with ease.
Style hack: Match cushion fabric to your umbrella or awning for a pulled-together look.

6. Choose Surfaces That Work Overtime

Your materials should be small-space superheroes: durable, easy to clean, and good-looking year-round. If it stains, warps, or rusts? Hard pass.
Pick finishes that work outdoors and won’t mind a margarita spill (or three).
Material Wins
- Counters: Sintered stone, porcelain slab, or sealed concrete—resistant to UV and heat.
- Cabinets: Marine-grade polymer or powder-coated aluminum—no swelling, no rot.
- Decking: Composite or porcelain pavers for low maintenance and clean lines.
IMO: Pick one hero material and repeat it. Fewer finishes = calmer, larger-feeling space.
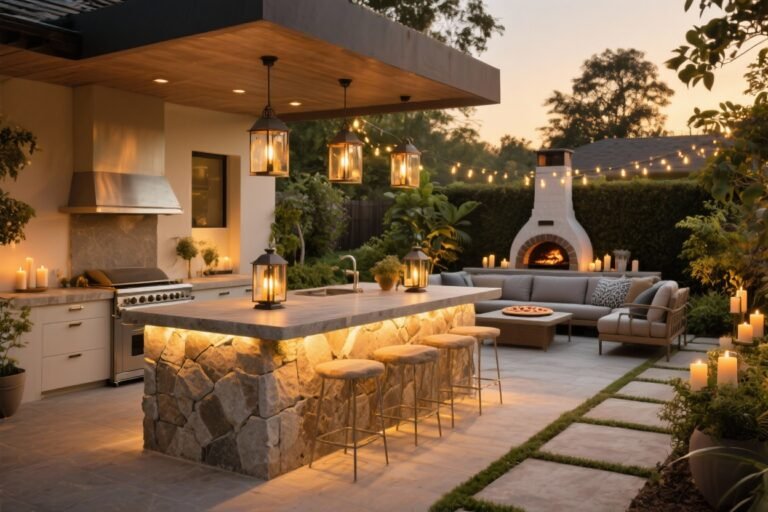
7. Make Lighting Do Double Duty

Good lighting makes tiny spaces feel intentional, not cramped. Layer task lighting for prep and ambient glow for the vibes.
Think cafe charm meets chef-level visibility.
Lighting Layers
- Task: Under-shelf LEDs or clip-on grill lights for nighttime cooking.
- Ambient: Warm string lights or low-glare wall sconces.
- Accent: Solar stake lights or LED strip under a counter lip for a floating effect.
Pro tip: Keep all bulbs in the 2700–3000K range for a cozy, flattering glow. Nobody wants interrogation-room chic.
8. Zone With Rugs, Screens, and Ceiling Lines

Even a micro patio benefits from zones—cook, prep, and chill. Zoning keeps the space organized and avoids the “everything everywhere” chaos.
And yes, visual tricks = bigger-feeling space.
Easy Zoning Moves
- Outdoor rug: A slim, easy-drain rug defines the dining nook.
- Privacy screen: Slatted wood or metal screens create a “back wall” without closing things in.
- Ceiling line: A small pergola bay, shade sail, or string light grid frames the kitchen footprint.
Style hack: Repeat stripes or slats vertically—taller lines make a small footprint feel airier.
9. Go Mobile With a Cart-Based Kitchen

No built-ins? No problem. A cart-based setup turns any corner into an outdoor kitchen and lets you rearrange for parties or storage.
It’s the renter-friendly, budget-friendly move that still looks polished.
Cart Formula That Works
- Sturdy base: Stainless or powder-coated steel with locking casters.
- Top surface: Butcher block (sealed) or stone-look for heat resistance.
- Add-ons: Towel bar, hooks, bottom shelf for cooler or bins, and a slim trash caddy.
FYI: Pair a cart with a portable grill or pizza oven for a complete, modular “kitchen” that rolls with the seasons.
10. Sneak In Hidden Appliances and Mini Luxuries

Small doesn’t have to mean basic. Add one or two stealth luxuries and watch your outdoor kitchen jump several style tiers.
We’re talking tiny upgrades with big payoff.
Mini Luxuries List
- Drop-in cooler bin: Keeps drinks icy without hogging floor space.
- Compact fridge drawer: Tucks into a 24-inch cabinet for grab-and-go essentials.
- Rail-mounted spice or sauce caddy: Your mise en place, but cute.
- Flip-up cutting board over the sink: Doubles your counter real estate.
- Slim utensil drawer: Use a weather-proof insert to keep things tidy.
Pro tip: Choose one showpiece—like a matte-black pizza oven or copper faucet—and keep everything else simple. Instant editorial moment.
Bonus Safety + Maintenance Reminders
- Clearances: Keep proper distance from siding, railings, and combustible surfaces.
- Covers count: Invest in fitted covers to extend the life of appliances and counters.
- Drainage matters: Ensure water runs away from cabinets and walls—add rubber feet or shims if needed.
Conclusion

Small outdoor kitchens thrive on intention. When every inch works—smart storage, compact appliances, layered lighting—you get a setup that feels custom and cooks like a dream.
Start with one idea, then stack on more. Before you know it, you’ll be hosting al fresco like it’s your job—no sprawling backyard required.