10 Under-the-sink Kitchen Organization Ideas That Actually Work (no Diy Headaches)
Let’s be real: the cabinet under your sink is basically a dark portal where half-used cleaners, rogue sponges, and mystery lids go to vanish. But it doesn’t have to be chaos. With a few clever tweaks, you can turn that cave into a streamlined, dare-I-say satisfying storage zone you’ll actually want to open. Ready to reclaim the abyss? Let’s do this.
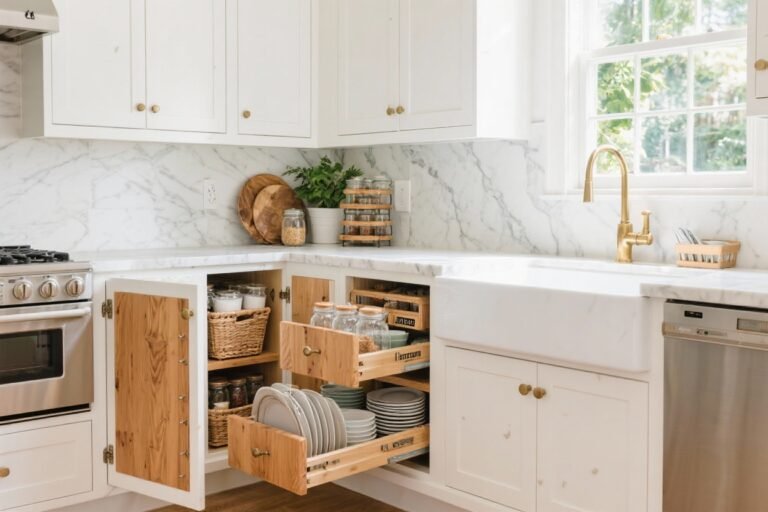
1. The Double-Decker Pull-Out Drawer You’ll Bless Daily
If you do one thing, make it this: install a two-tier pull-out organizer. It slides out like a dream and makes every inch count without elbow-diving into the back corner.
Tired of snacking when you’re not even hungry? This reset helps you stop the loop and feel back in control.
A simple reset for moments when cravings take over. Easy to use, easy to repeat, and designed to help you feel satisfied instead of stuck.
Why It Works
- Vertical storage doubles your space for sprays, dish tabs, and backup soap.
- Everything stays visible and reachable—no more duplicates because something was hiding.
Quick Tips
- Measure around your P-trap and garbage disposal before buying. Depth matters!
- Look for drawers with adjustable dividers so tall bottles don’t tip.
- Choose rust-resistant metal or heavy-duty plastic for durability.
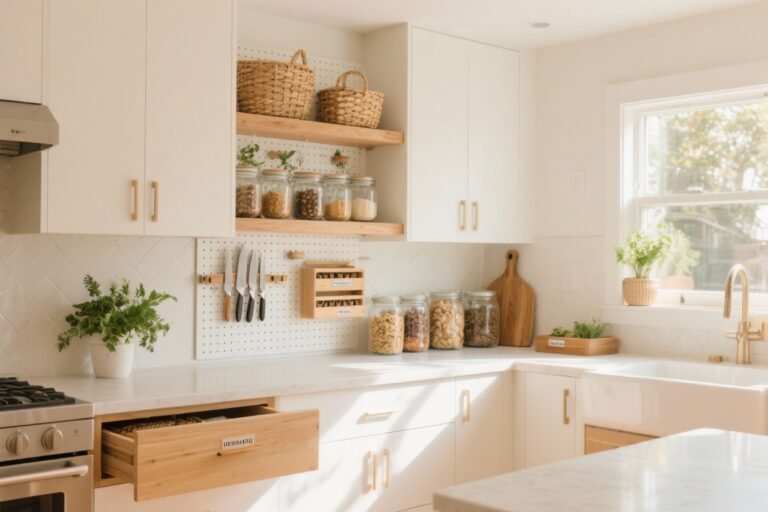
2. Door Game Strong: Over-The-Door Racks That Earn Their Keep

Don’t sleep on the inside of your doors. A simple over-the-door rack or mounted caddy can hold your most-used stuff—gloves, sponges, and dishwasher pods—so they’re not hogging shelf space.
What to Store on the Door
- Flat items: gloves, scrub pads, microfiber cloths.
- Small bottles: granite spray, wood polish, rinse aid.
- Trash bags: a slim box fits perfectly in a narrow rack.
Pro Moves
- Use Command hooks for lightweight things like brushes and dusters.
- Add a magnetic strip to hold metal scrubbers and small tools—so clever!
- Check clearance: the rack shouldn’t bang into your plumbing or snag the hinges.
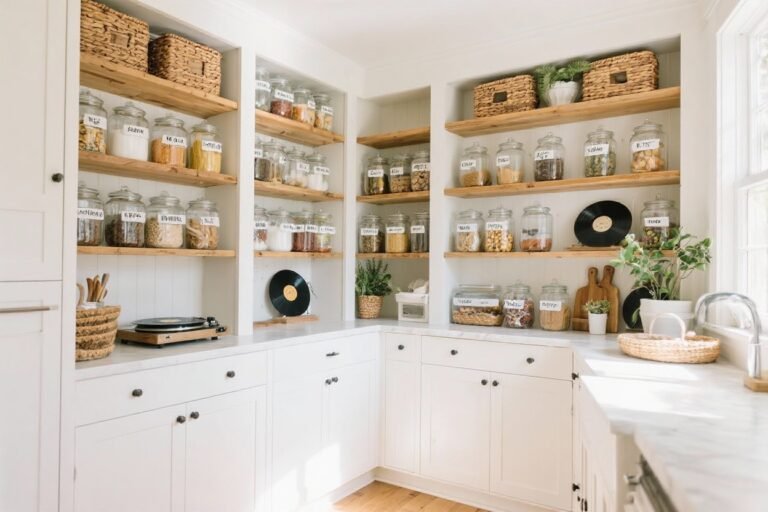
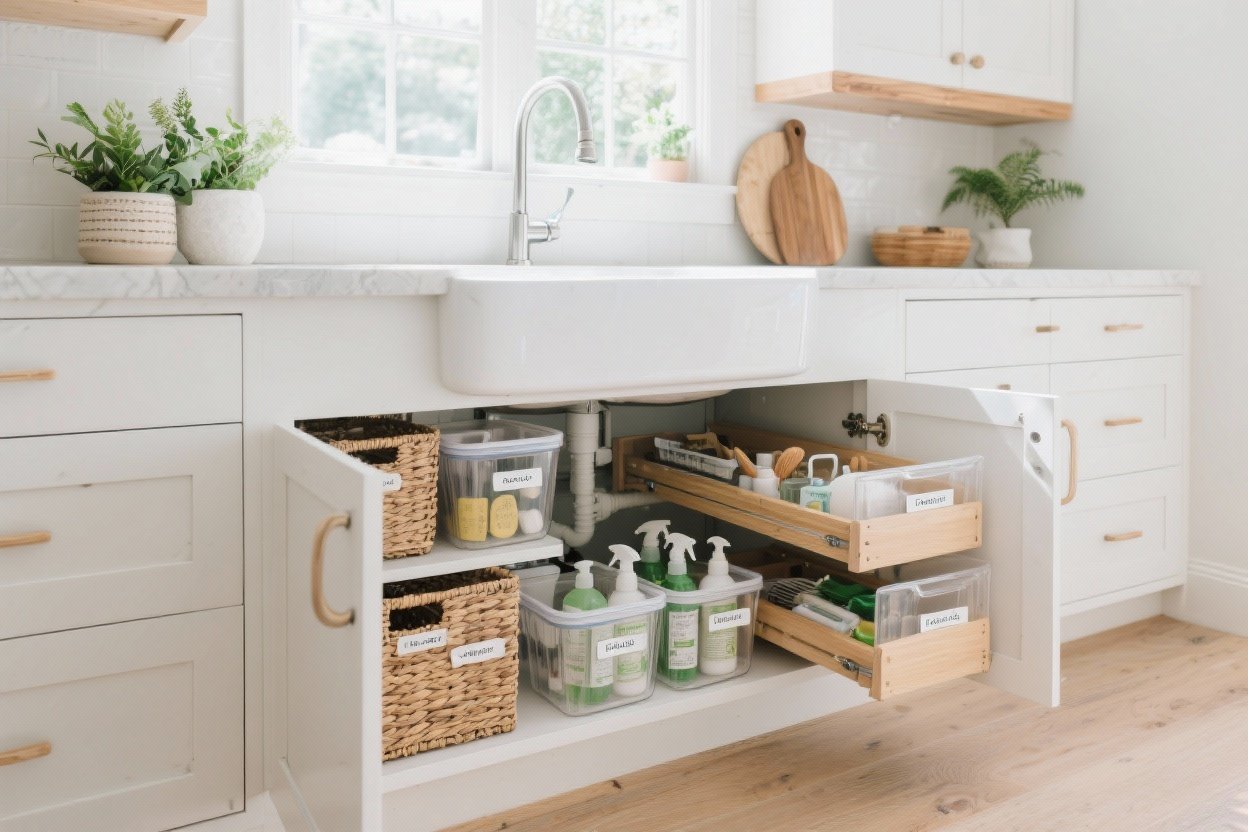
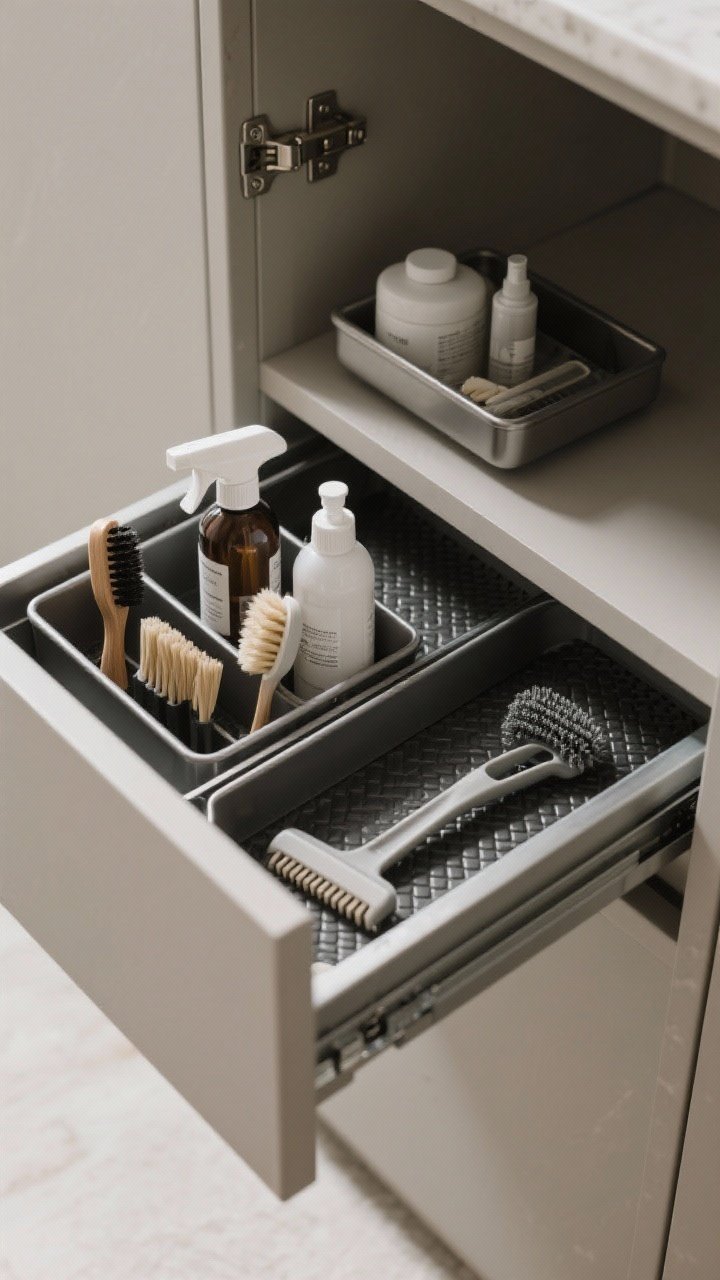
3. Bin It Like a Boss: Categorize With Stackable Containers
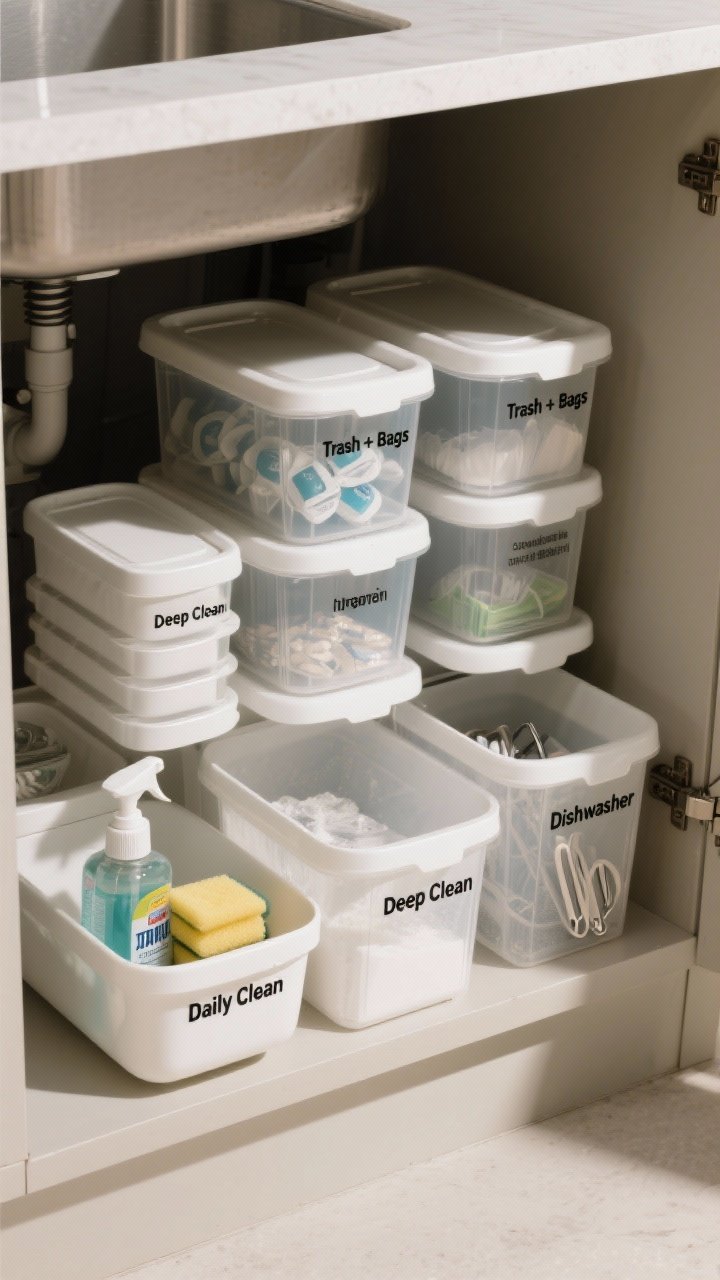
If your under-sink looks like a yard sale, bins will fix it. Use labeled, stackable containers to group things by purpose, and suddenly it all makes sense. It’s giving “organized adult” energy.
Suggested Categories
- Daily Clean: dish soap, sponge, counter spray.
- Deep Clean: degreaser, bleach, scrubbing powders.
- Dishwasher: pods, rinse aid, machine cleaner.
- Trash + Bags: liners, compost bags, clips.
Bin Tips
- Go with clear bins if you like visibility; opaque if you want a cleaner look.
- Choose low-profile bins for the front, taller ones for the back.
- Label the front and top so you can see what’s what from any angle.
4. Turn the Pipe Problem Into a Plan: Fit Around Plumbing
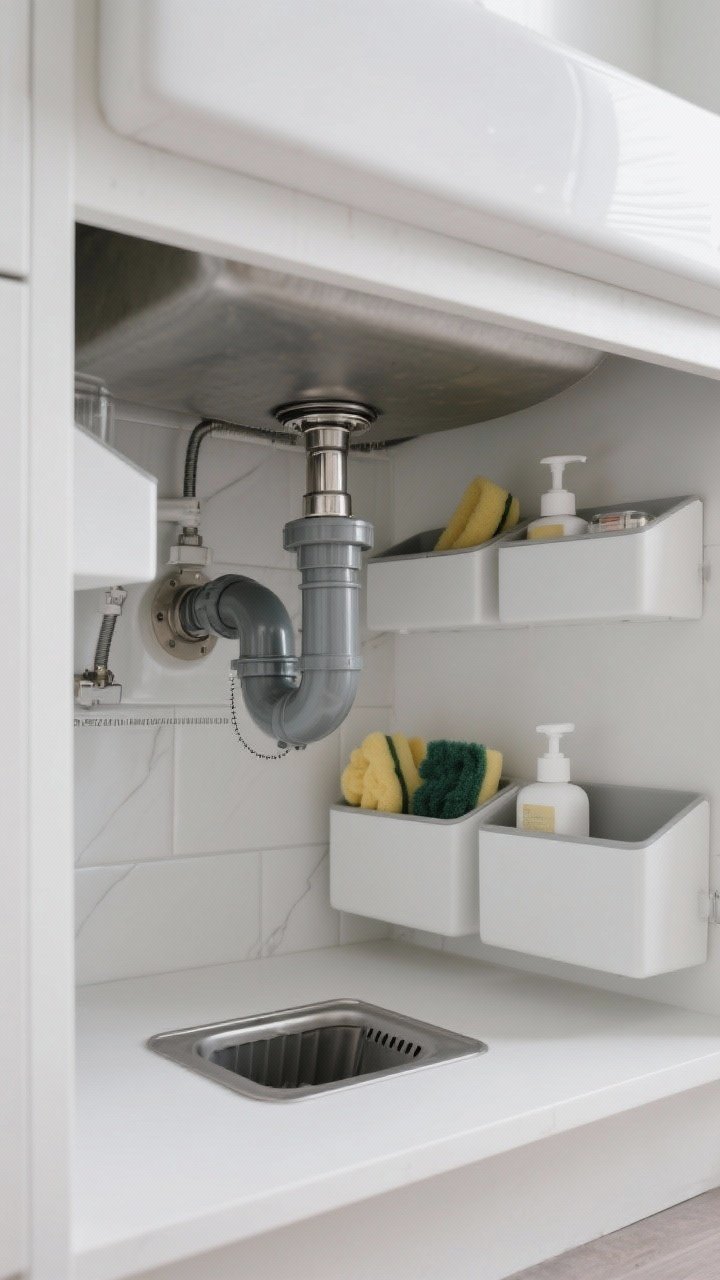
That awkward P-trap? It’s not the enemy. Design around it with U-shaped organizers and short bins that hug the pipe. The goal is to work with the space, not fight it.
Smart Workarounds
- Use a half-shelf riser on either side of the pipe to lift smaller items.
- Store backup supplies (extra sponges, refill soap) in short bins beneath the pipe.
- Leave at least 2 inches of clearance around plumbing for easy repairs.
FYI: If you have a garbage disposal, keep the area directly under it clear—you’ll thank yourself later.
Transform Your Home With 7,250+ Stunning Landscaping Designs—No Expensive Designers Needed!
- 🌿 Access 7,250+ stunning landscaping designs.
- 💰 Save thousands—no pro designer needed.
- 🏡 Plans for gardens, patios, walkways, and more.
- ✨ Simple, beginner-friendly DIY layouts.
- 🛠️ Customize any design to fit your yard.
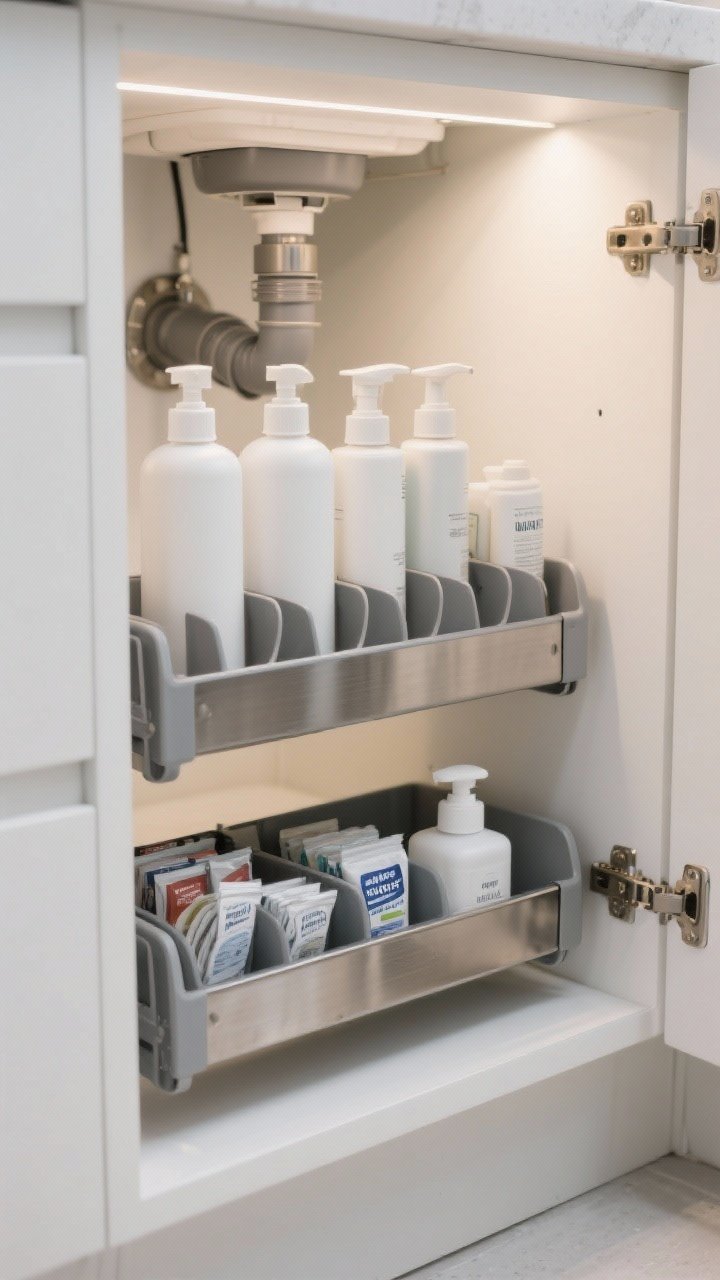
5. Slide, Don’t Shuffle: Narrow Pull-Out Trays
Forget rummaging. Add slim pull-out trays that slide from the front so even the back corner becomes usable. It’s the difference between “ugh, later” and “oh, there it is.”
Best For
- Bottles and sprays you want upright and stable.
- Cleaning tools like brushes, squeegees, and handheld scrubbers.
- Refills that usually get lost behind everything.
Install Tips
- Choose trays with low sides for easy visibility.
- Add a rubber liner to stop things from sliding around.
- Measure drawer glide clearance—hinges can be sneaky.

6. Mount A Tension Rod For Sprays (Yes, Really)
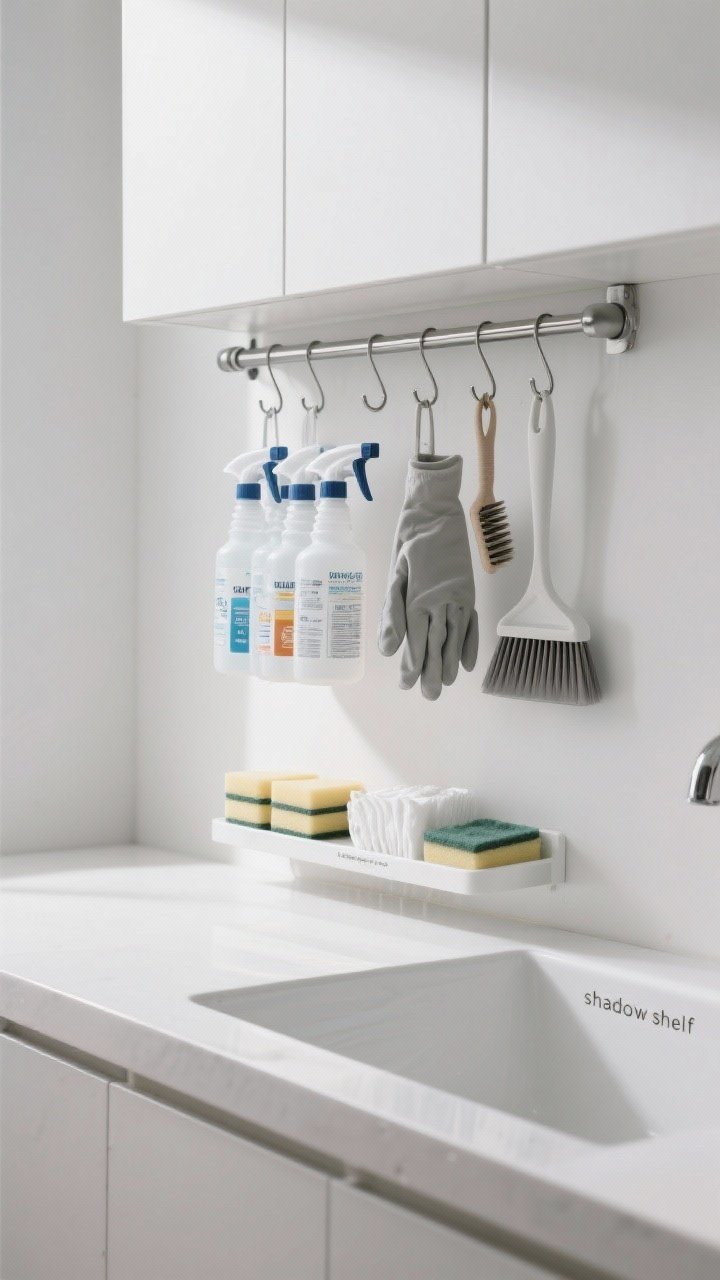
The internet didn’t lie about this one. A tension rod mounted under the sink lets you hang spray bottles by their triggers so you’re not wasting shelf space. It’s cheap, fast, and surprisingly sturdy.
How to Make It Work
- Install it high and toward the front so bottles don’t hit plumbing.
- Keep it to lighter bottles (glass + full = risky hang).
- Use S-hooks for brushes, gloves, or a mini dustpan set.
Bonus: it creates a little shadow shelf underneath where you can tuck flat items like sponges and wipes.
7. Moisture-Proof Your Zone: Liners, Vents, And Leak Sensors
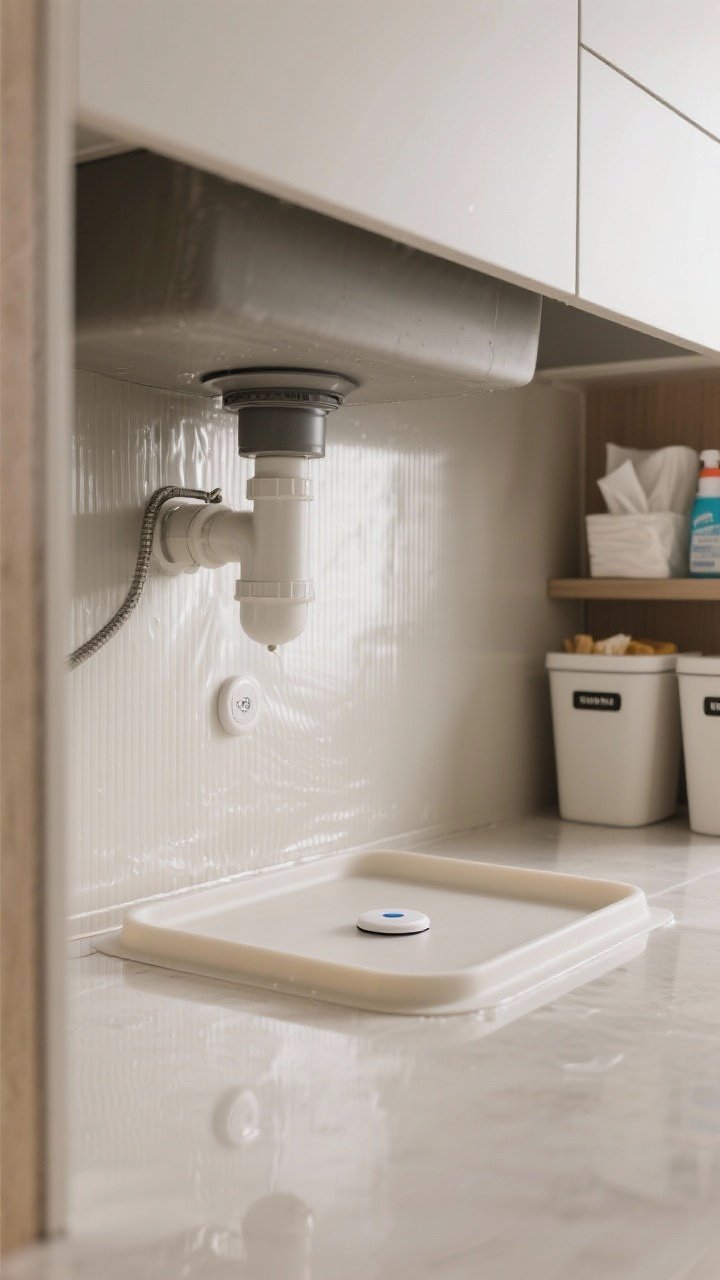
Under-sink cabinets are… damp. Protect your stuff with a combo of cabinet liner, a small vent or gap for airflow, and, if you’re extra (same), a leak sensor.
Protective Essentials
- Waterproof liner: catches drips and makes cleanup easy.
- Silicone tray or mat: especially under the plumbing area.
- Leak sensor: pings your phone if something starts dripping—worth it.
What Not To Store
- Paper goods that soak up moisture and smell weird.
- Delicate cleaners that degrade with heat/humidity (check labels).
- Pet food—hello, pests.
IMO, this is the unsexy step that saves you money and headaches later.
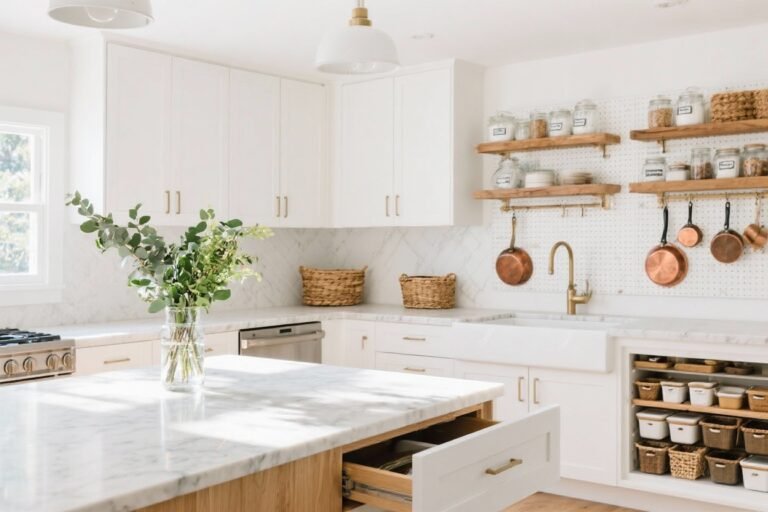
8. Corral The Tiny Stuff: Caddies, Cups, And Lazy Susans

The smallest items create the biggest mess. Keep them together with modular caddies, lidded cups, and even a mini lazy Susan for awkward corners.
What To Corral
- Dish tabs and scrub pads in a lidded container to keep them dry.
- Magic erasers in a bin so they don’t crumble into everything.
- Polishes and specialty cleaners on a small turntable for easy access.
Pro Tip
- Use drawer dividers inside bins to separate categories—no mixing tabs with steel wool.
- Label in big, bold text so kids/partners put things back correctly. In theory.
9. Create A Quick-Grab Zone For Daily Tasks
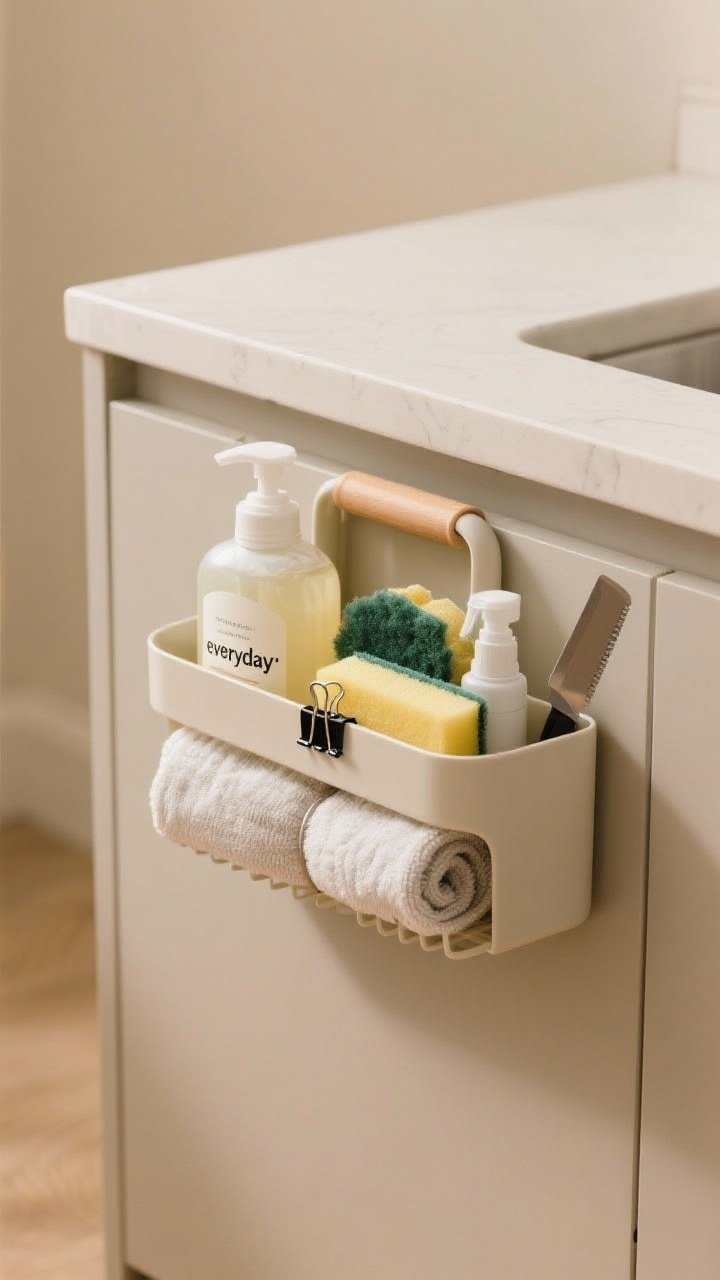
Set up a front-and-center “everyday” kit so you can clean as you go without digging. Think of it like your makeup bag—but for the sink life.
Build Your Kit
- Small handled caddy with dish soap, hand soap refill, sponge, counter spray.
- Microfiber cloths rolled and clipped with a binder clip to stay neat.
- Scraper tool for sticky messes—life-changing on glass cooktops.
Why It’s Magic
- One-hand grab-and-go when a spill happens.
- Keeps the front clear and reduces daily clutter.
- Makes tidying fast and repeatable, even on busy nights.
10. Edit Like A Minimalist: Use-It-Or-Lose-It System

The best organizer is… owning less. Under the sink is prime real estate, so run a simple use-it-or-lose-it rule that keeps things from multiplying like gremlins.
The System
- One-in, one-out: When a new cleaner comes in, finish or donate a duplicate.
- Quarterly purge: Toss expired products and half-dried sponges. Be ruthless.
- Refill zone: Keep only one open bottle and one backup per category.
Visual Cues
- Store backups in a separate bin labeled “Refills” so you see what’s low at a glance.
- Place daily items front and low, backups high and back—no confusion.
FYI: Most households need fewer products than they think. Multi-surface spray, dish soap, a degreaser, glass cleaner, and one scrub—it’s enough.
Layout Example To Steal
- Front left: Everyday caddy.
- Front right: Pull-out tray with sprays and brushes.
- Back left: Refills bin and deep-clean bin (stacked if possible).
- Back right: Lazy Susan for specialty items.
- Door interiors: Sponges, gloves, dishwasher pods, trash bags.
- Top space: Tension rod with hanging bottles.
Shopping Checklist
- Two-tier pull-out organizer
- Over-the-door racks or caddies
- Stackable, labeled bins (varied heights)
- Slim pull-out trays + rubber liners
- Tension rod + S-hooks
- Waterproof liner or silicone mat + leak sensor
- Mini lazy Susan
- Handled cleaning caddy
- Drawer dividers for bins
Final Touches That Make It Pretty
- Match your labels and bins for a clean, cohesive look.
- Decant dishwasher pods into a sealed clear container—functional and cute.
- Stick to a neutral color palette so it feels calm every time you open the door.
You don’t need a total renovation—just a few smart moves and some well-placed bins. Start with one upgrade (pull-out drawer or door storage), then layer the rest as you go. Your future self—opening a perfectly organized under-sink cabinet without a single eye roll—will be very, very proud.