10 Designer-inspired Kitchen Remodel Ideas You’ll Brag About
Ready to turn your kitchen into the kind of space that gets unsolicited “OMG, where’d you do that?” texts? You don’t need a celebrity designer or a trust fund. You just need smart, stylish moves that pack maximum impact. Let’s steal the best ideas from the pros and make them totally doable.
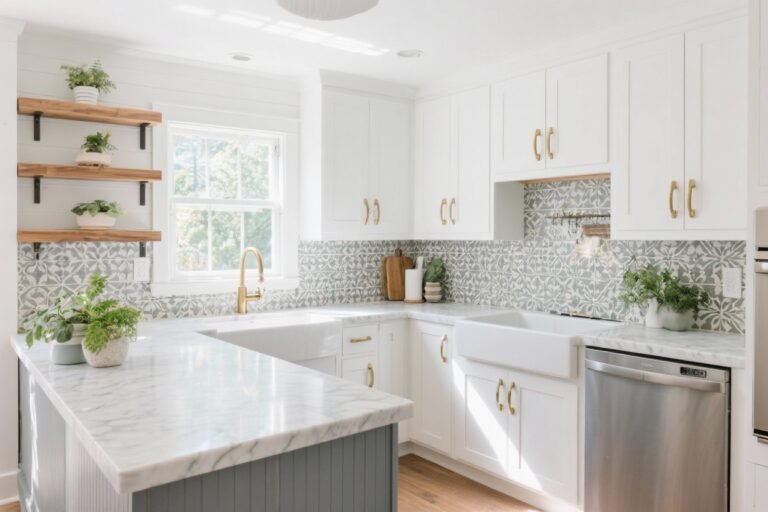
1. Make a Statement With a Bold Backsplash
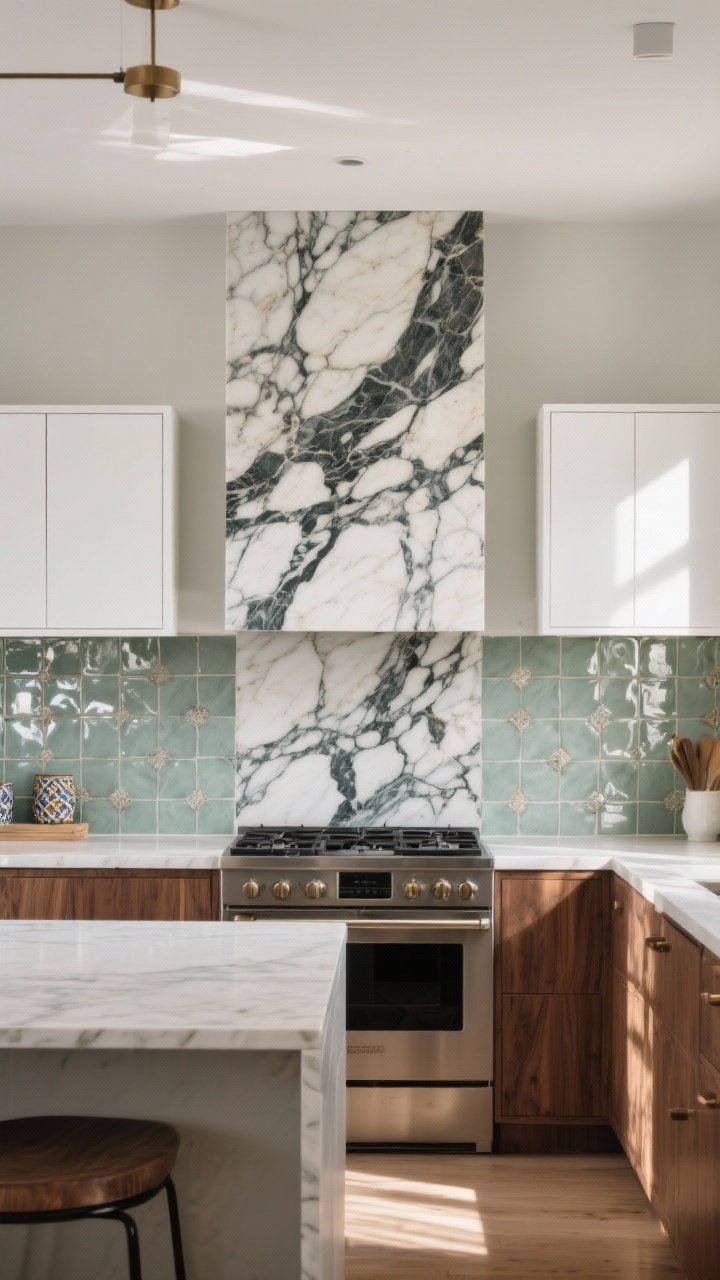
Designers don’t shy away from drama, and neither should your backsplash. A bold stone slab, patterned tile, or glossy zellige can be the entire vibe of your kitchen. It’s art you can wipe down—what’s not to love?
Tired of snacking when you’re not even hungry? This reset helps you stop the loop and feel back in control.
A simple reset for moments when cravings take over. Easy to use, easy to repeat, and designed to help you feel satisfied instead of stuck.
Pick Your Star Material
- Slab backsplashes: Marble, quartzite, or porcelain for a seamless, luxe look.
- Textured tile: Handmade zellige or terracotta for rich, imperfect charm.
- Pattern play: Herringbone, checkerboard, or bold Moroccan patterns to wake things up.
Pro tip: Run your slab all the way to the ceiling behind the range. It’s outrageous in the best way.
2. Upgrade Lighting Like a Stylist
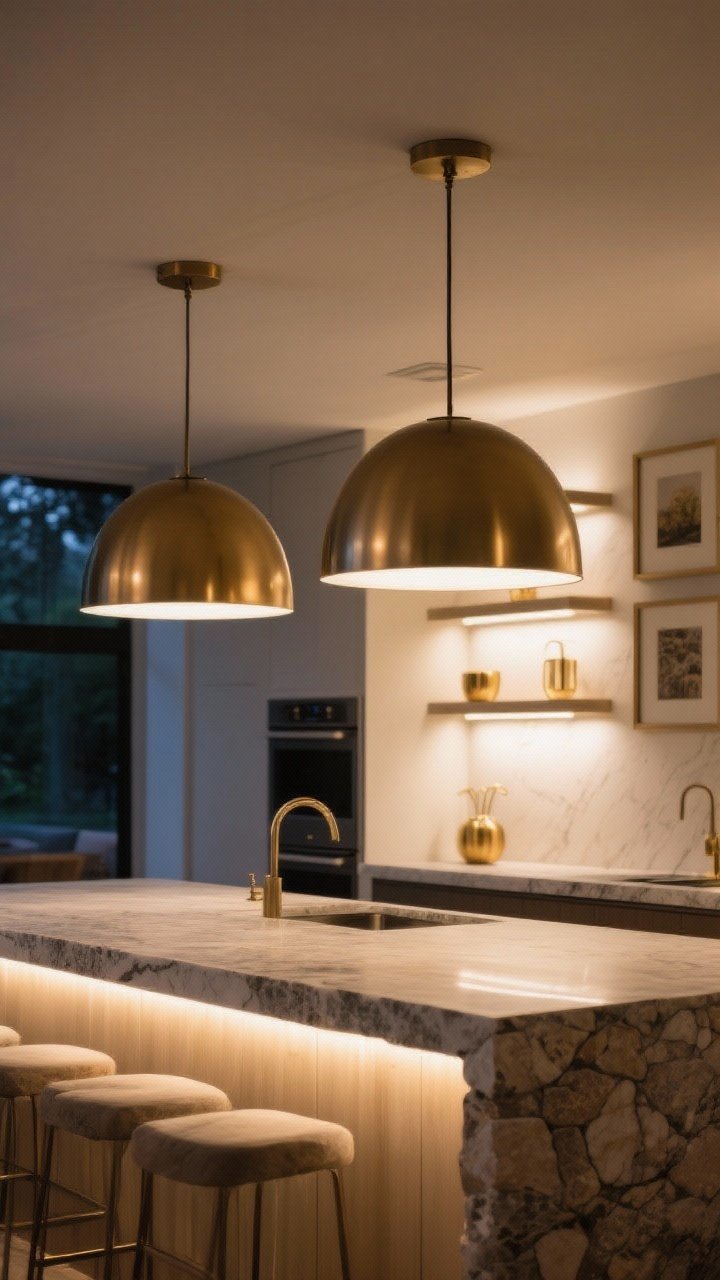
Your lighting should work like a glam squad: flattering, layered, and a little extra. Designers swear by three types—ambient, task, and accent.
Layer It Up
- Pendants: Oversized pendants above the island make everything look intentional.
- Under-cabinet LEDs: Sleek, shadow-free chopping and midnight snack runs.
- Sconces or picture lights: Above open shelves for a boutique feel.
FYI: Warm-white bulbs (2700K–3000K) are your best friend. No one wants hospital lighting with their pasta.
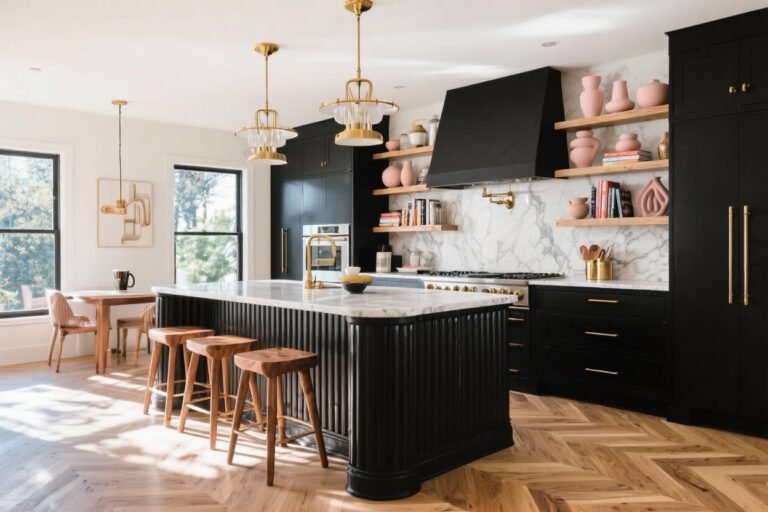
3. Mix Cabinet Colors Like a Designer
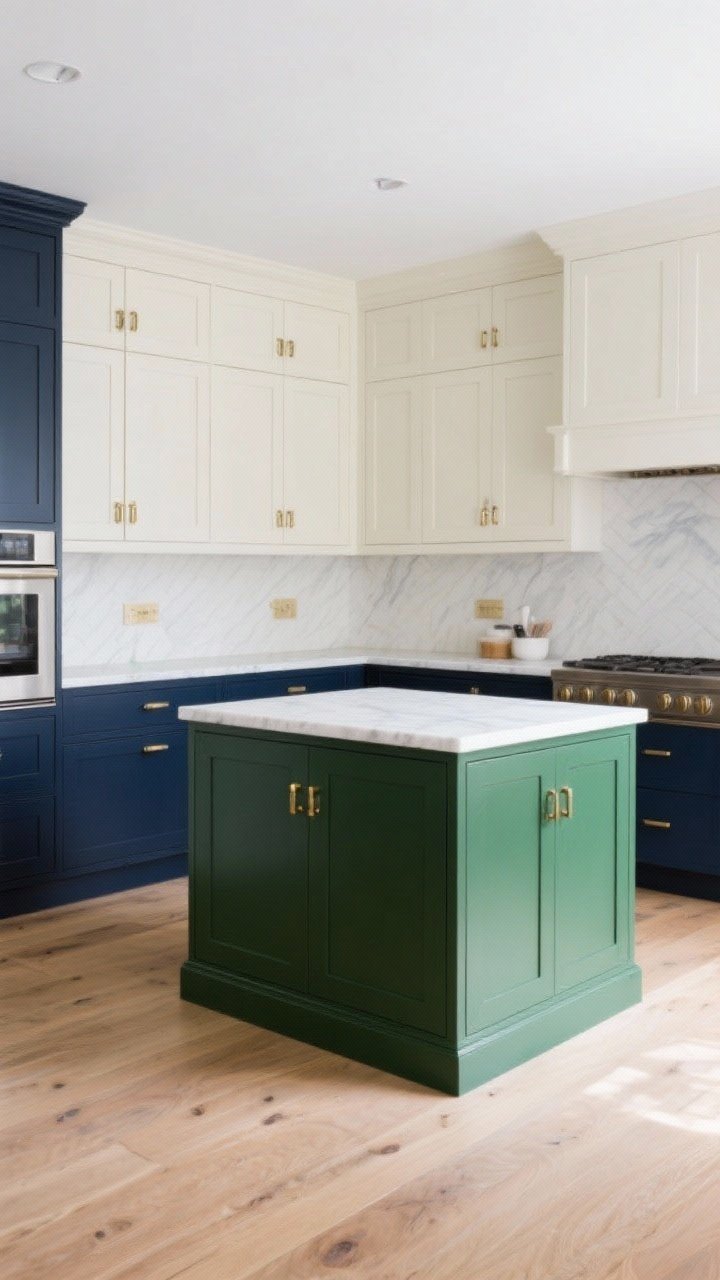
One-color kitchens are fine. Two-tone or three-tone kitchens are editorial. Designers mix shades to create depth and balance.
Transform Your Home With 7,250+ Stunning Landscaping Designs—No Expensive Designers Needed!
- 🌿 Access 7,250+ stunning landscaping designs.
- 💰 Save thousands—no pro designer needed.
- 🏡 Plans for gardens, patios, walkways, and more.
- ✨ Simple, beginner-friendly DIY layouts.
- 🛠️ Customize any design to fit your yard.
Foolproof Combos
- Dark lowers + light uppers: Think deep navy + creamy white for grounded elegance.
- Island as accent: Paint the island a bold color (forest green, inky black) for a focal point.
- Wood + paint: Walnut lowers with painted uppers feels warm and bespoke.
Keep hardware consistent so your scheme looks curated, not chaotic.
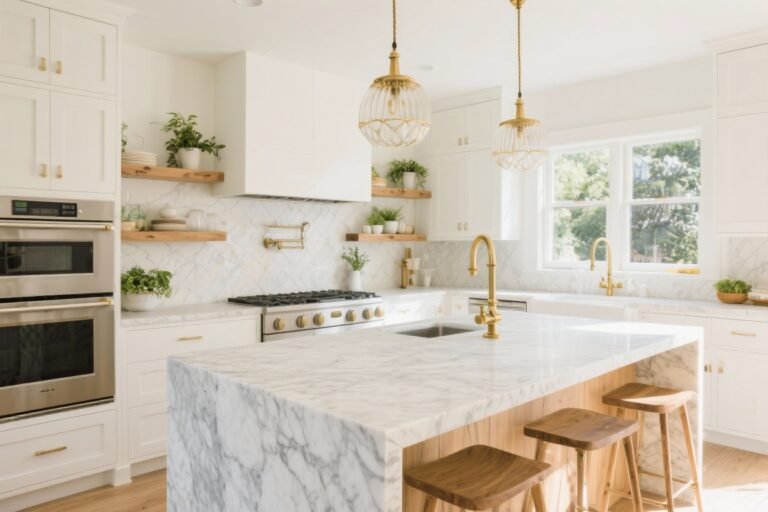
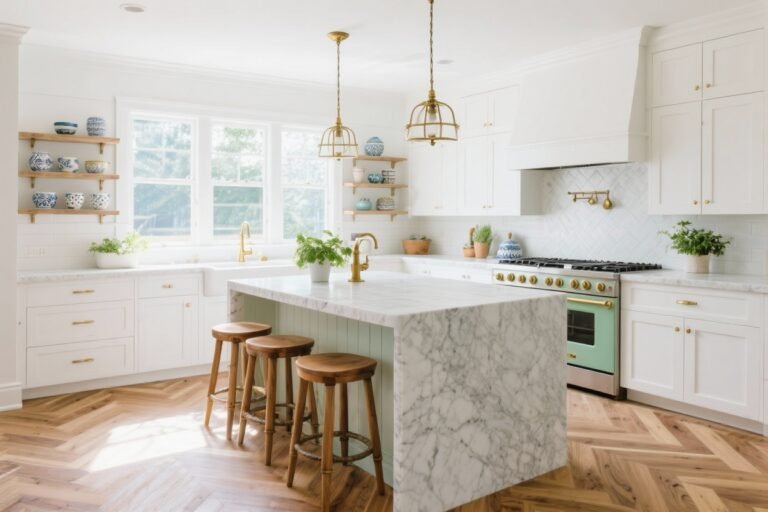
4. Treat the Island Like Furniture
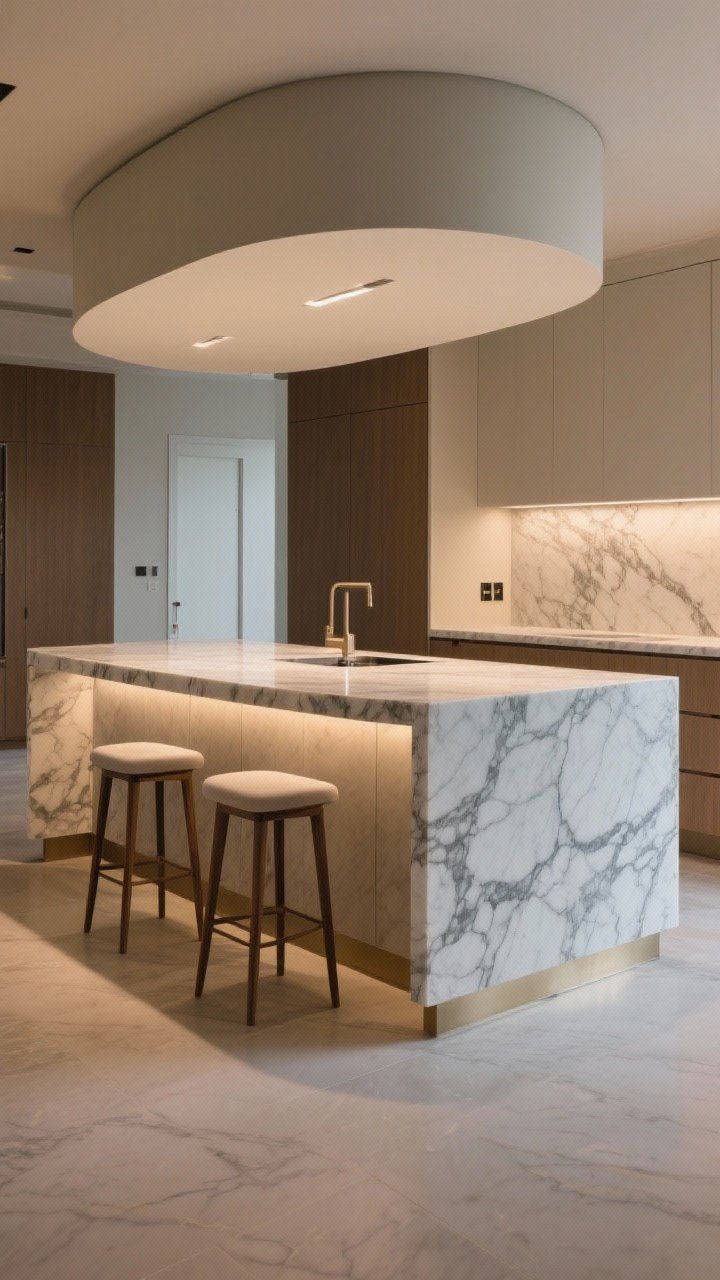
Designers don’t just slap an island in the middle of the room—they style it like a hero piece. Give it legs, a furniture-style base, or a waterfall edge and watch it go from “counter” to “centerpiece.”
Design Moves That Elevate
- Waterfall countertops: Clean, sculptural lines that scream custom.
- Furniture base: Tapered legs or recessed toe-kicks to lighten the visual weight.
- Integrated seating: A rounded overhang or banquette end for cozy breakfasts.
Bonus: Add outlets discreetly on the side. Your blender and laptop will thank you.
5. Go High-End With Strategic Surfaces
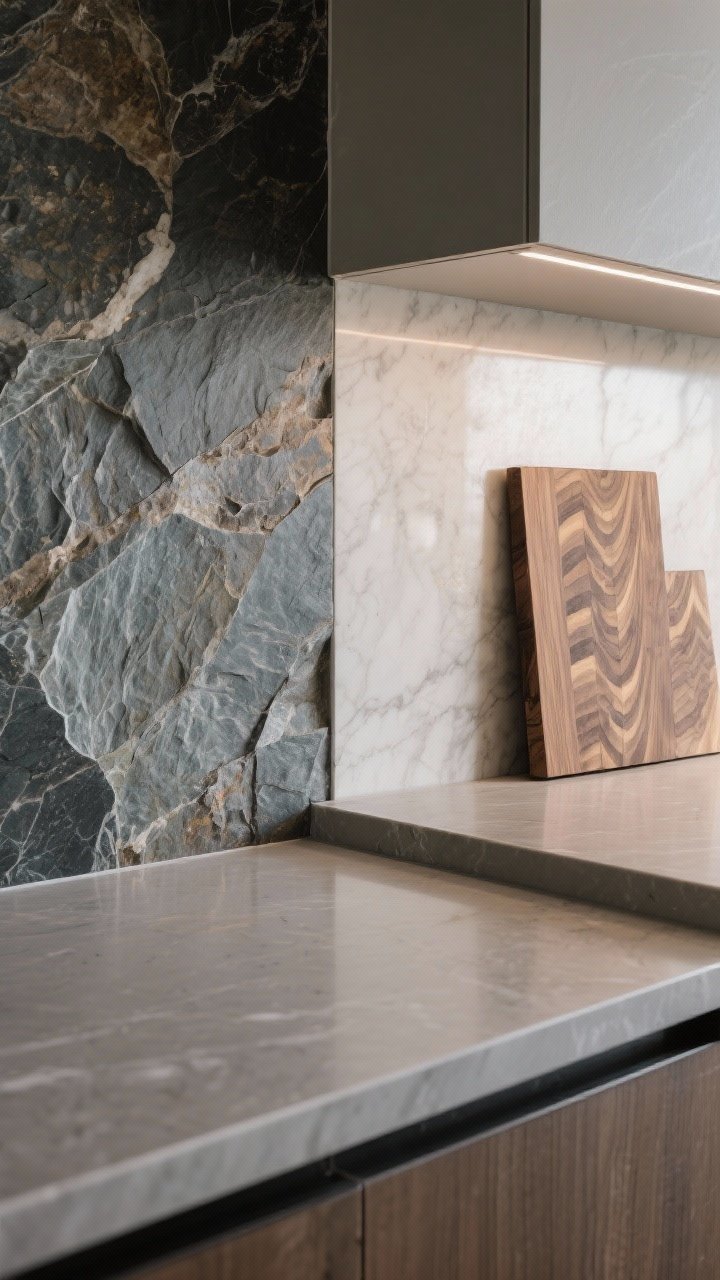
You don’t need slabs of Calacatta everywhere to feel luxe. Designers splurge where it counts and save where they can.
Smart Splurge/Saves
- Splashy slab, sensible counters: Use a stunning natural stone for the backsplash and durable quartz for the main counters.
- Butcher block zone: Add wood to part of the island for warmth and prep space.
- Textured finishes: Honed or leathered surfaces add depth and hide smudges.
Protect porous stones with a great sealant. Maintenance doesn’t have to be a saga.

6. Hide the Mess With Clever Storage
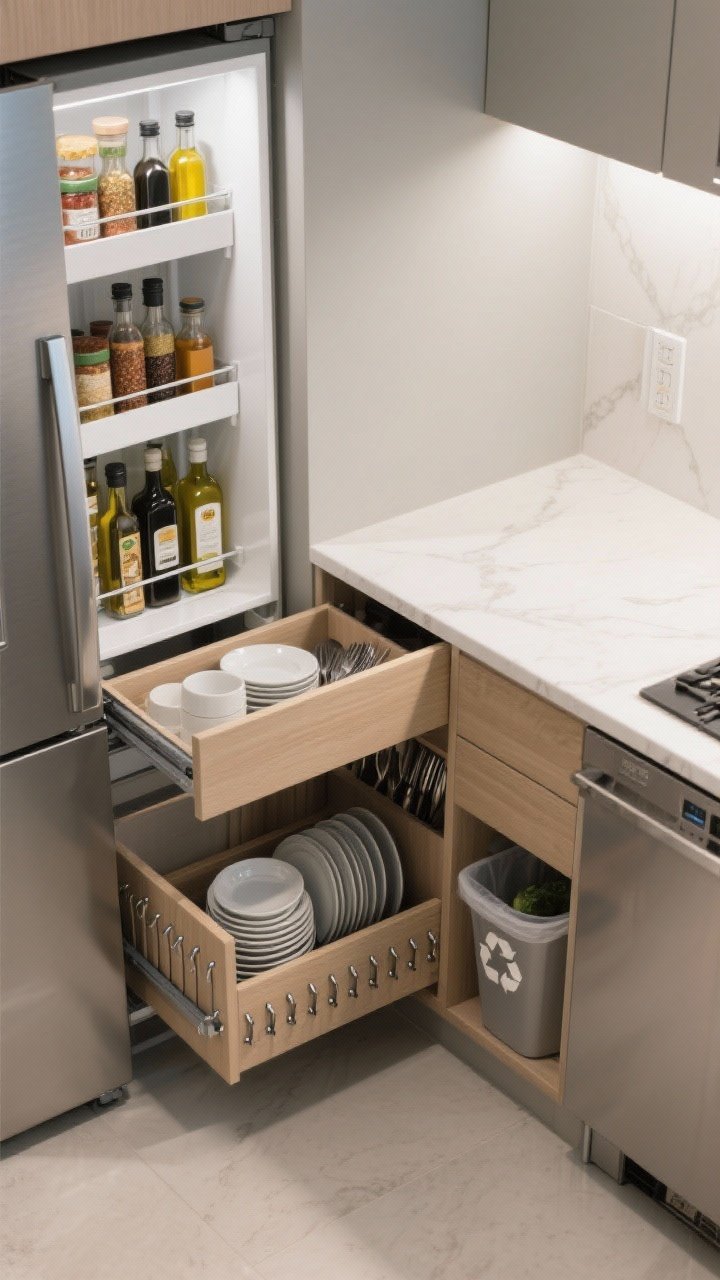
Nothing says “designer” like a kitchen that looks serene because everything has a place. And I mean everything—your stand mixer, your 72 reusable water bottles, your secret candy stash.
Built-Ins That Feel Custom
- Appliance garage: Tuck toasters and coffee makers behind a flip-up door.
- Pull-out pantries: Slim units next to the fridge make spices and oils accessible.
- Drawer upgrades: Peg systems for dishes, dividers for utensils, charging drawers for gadgets.
- Trash/recycle/compost centers: Seamless and smell-free—chef’s kiss.
IMO, deep drawers beat lower cabinets 9 times out of 10. Your back will agree.
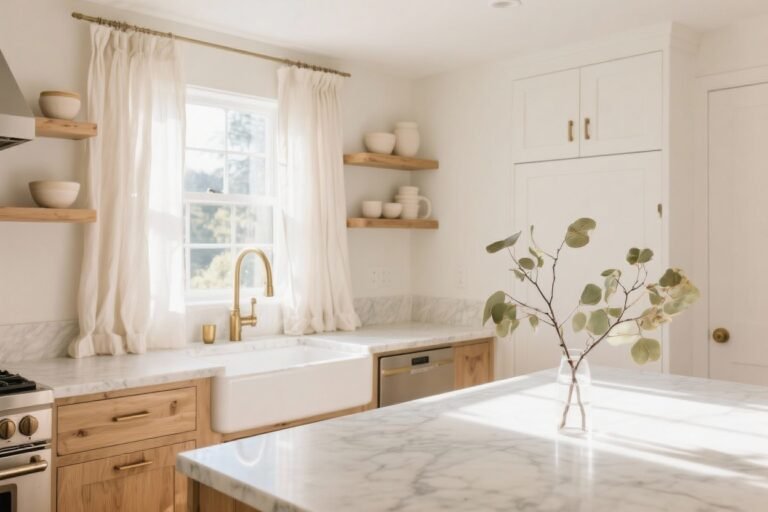
7. Embrace Warm Minimalism
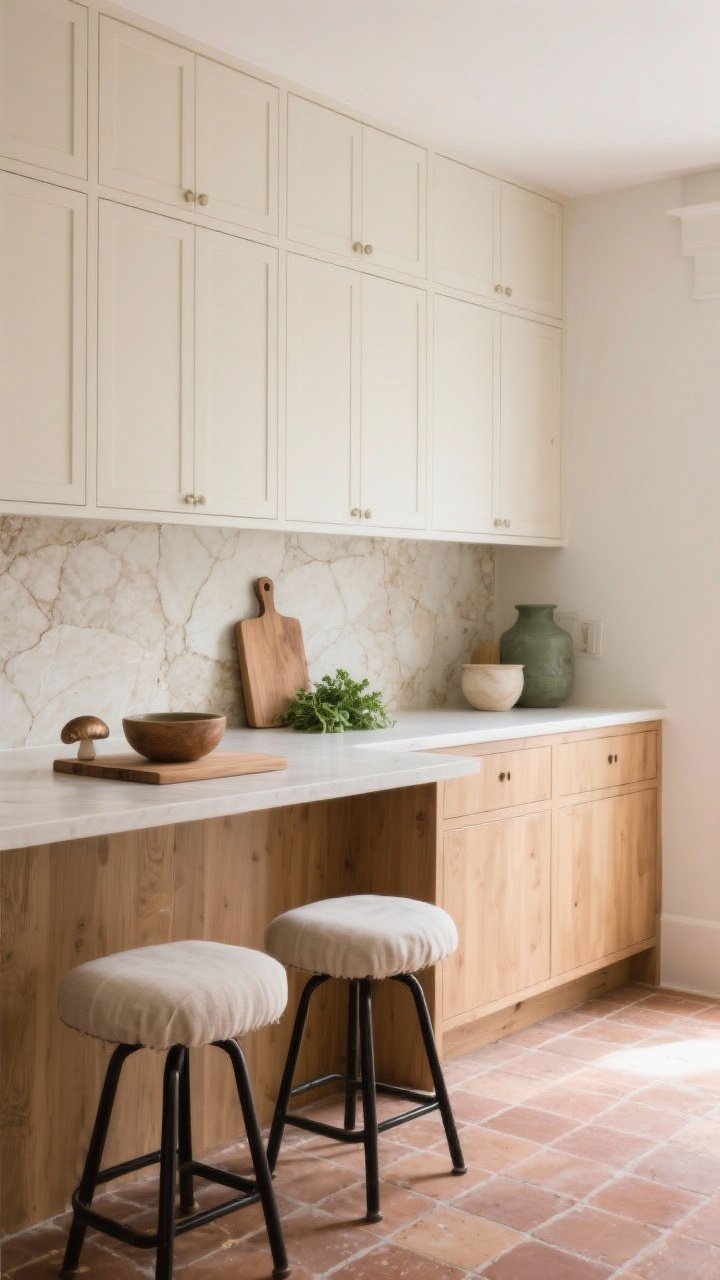
Clean doesn’t mean cold. Designers are leaning into minimal lines with cozy textures and rich tones. It feels calm without feeling empty.
How to Nail the Look
- Flat-front cabinets: Slab or thin-shaker profiles keep things sleek.
- Natural materials: Oak, travertine, clay tile, and linen stools soften the space.
- Muted palette: Think bone, mushroom, sage, and black metal accents.
Keep counters styled with just a few intentional pieces—wood boards, a ceramic bowl, fresh herbs. Done.
8. Build a Chef-Worthy Work Triangle

Pretty is great. Pretty and functional is iconic. Designers obsess over workflow so cooking feels like less of a sport.
Layout Tweaks That Matter
- The triangle: Keep the sink, stove, and fridge in a loose triangle with clear paths.
- Prep zones: Place knives, cutting boards, and trash near your main prep area.
- Secondary sink: A small prep sink on the island can be life-changing for two cooks.
- Landing zones: Leave 12–18 inches of counter space on each side of major appliances.
Small kitchen? Swap the triangle for zones and use a narrow island or a movable cart for flexibility.
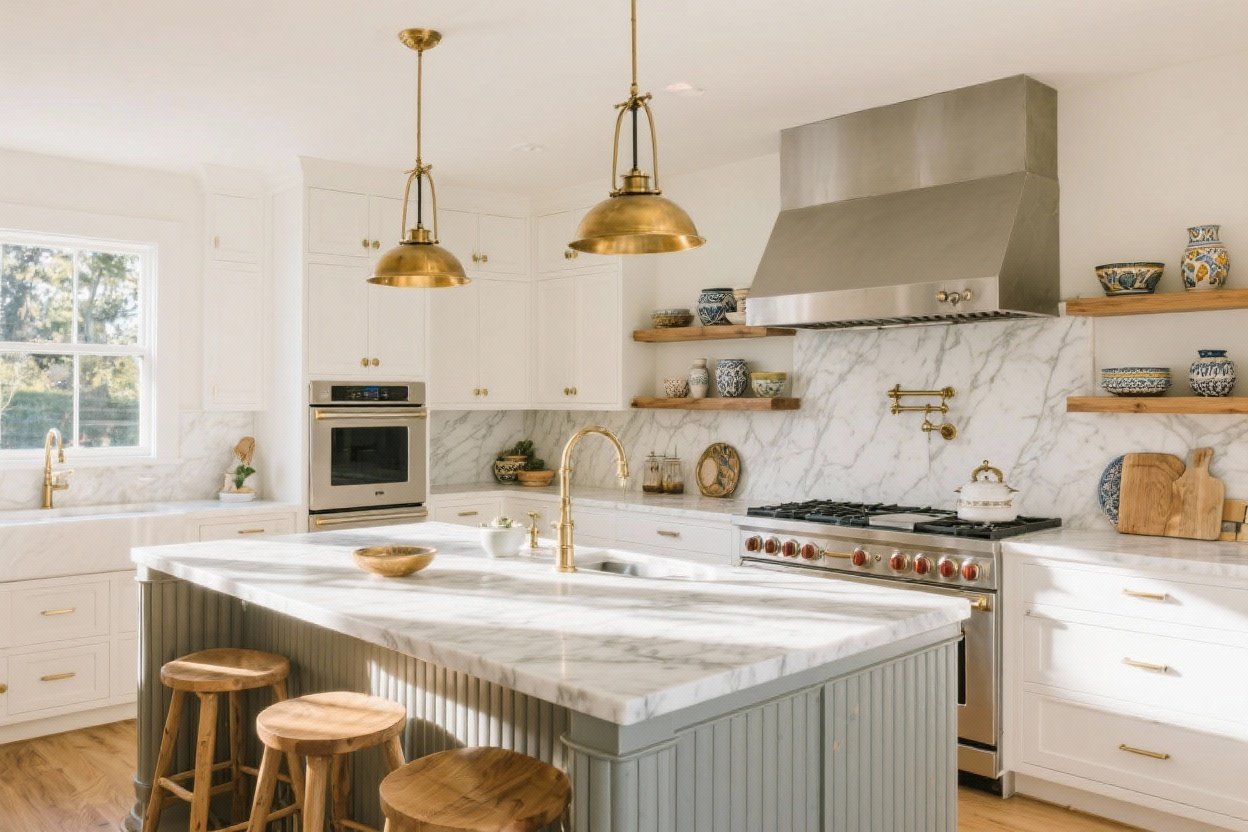
9. Style Your Range Wall Like a Showpiece
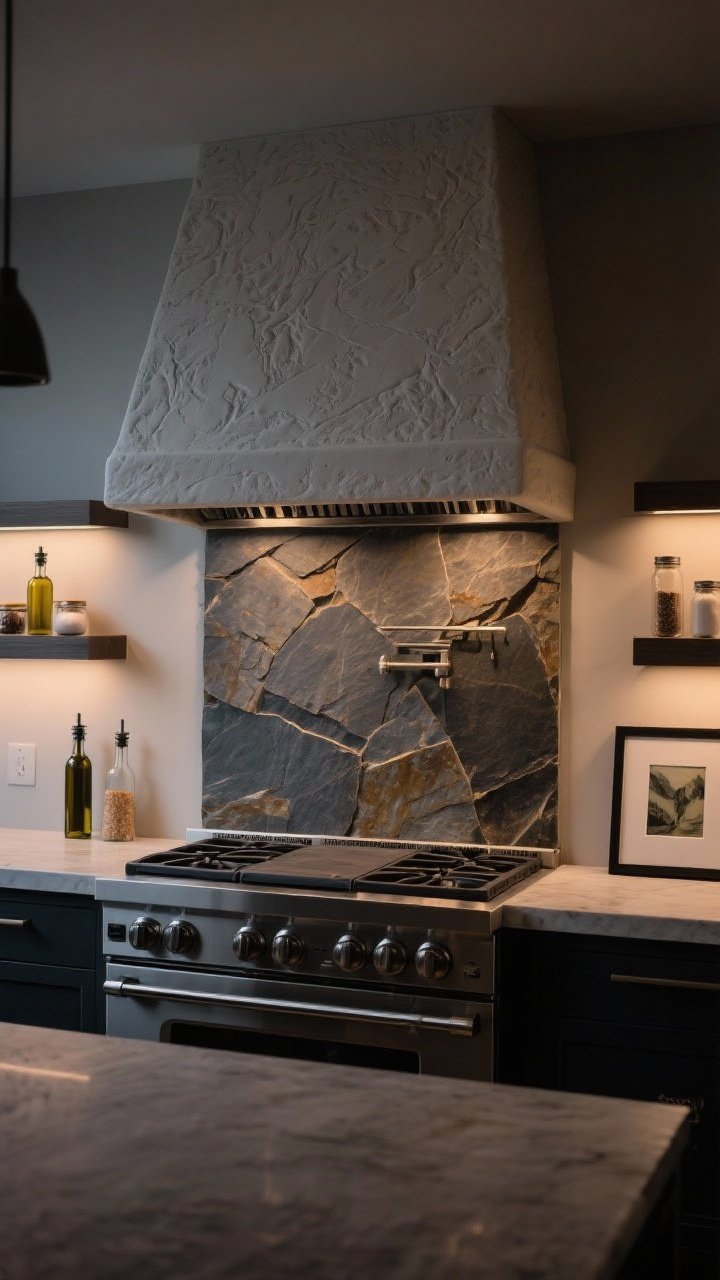
Designers treat the range wall like the kitchen’s fireplace. It’s where you bring drama—without burning dinner.
Make It Cinematic
- Custom hood: Plaster, metal, or wood-clad hoods add architecture and personality.
- Shelving moments: Flank the range with slim shelves for oils, salts, and art (yes, art).
- Feature backsplash: Bookmatched stone or a tile mural brings the wow factor.
Don’t forget ventilation. A quiet, powerful insert is the unsung hero of your crispy-skinned chicken era.
10. Add Soul With Finishes and Details
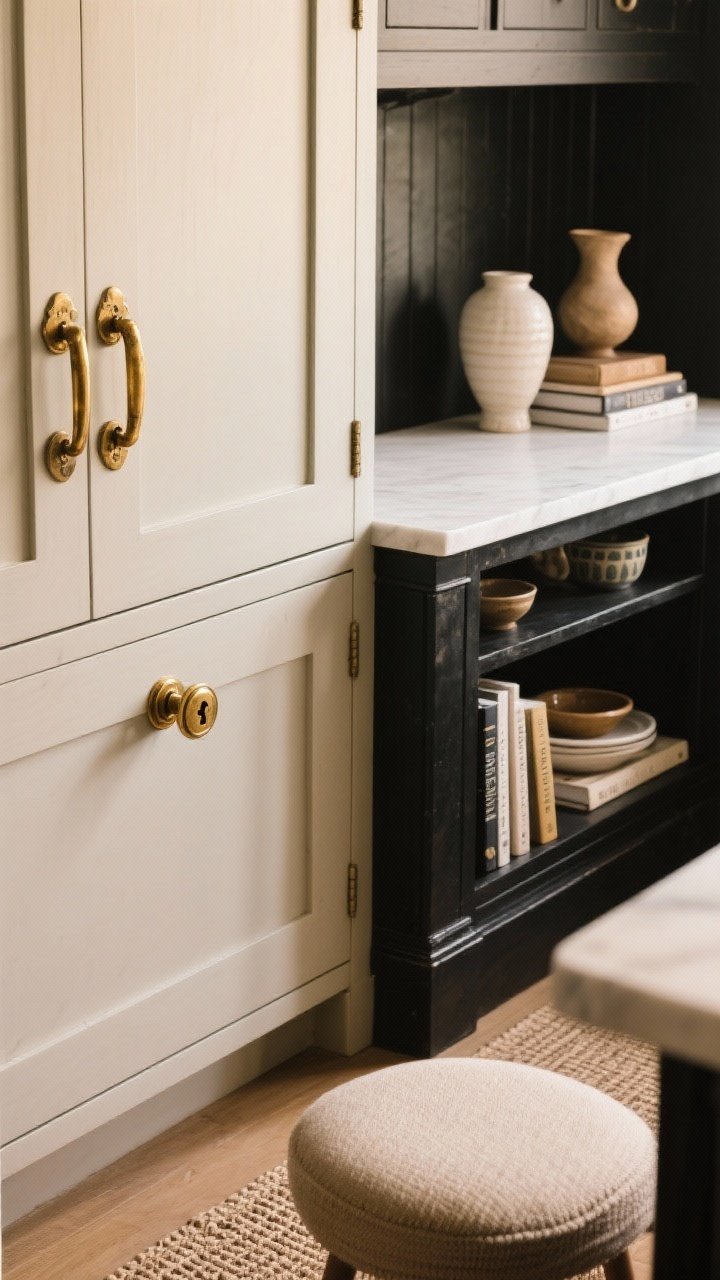
The best designer kitchens don’t feel like showrooms—they feel collected. Layer in character through finishes, hardware, and a little patina.
Small Choices, Big Impact
- Hardware mix: Knobs on uppers, pulls on lowers, maybe latches on a pantry for vintage flair.
- Metal moments: Brass, bronze, or blackened steel—pick one hero, pepper in a second sparingly.
- Textiles: Upholstered counter stools, a flat-weave runner, linen cafe curtains for softness.
- Open display: A curated shelf with cookbooks, ceramics, and one dramatic vase. Not your entire mug collection from 2009.
Patinated metals and natural stone will age. That’s called “character,” and yes, you want it.
Quick Budget-Friendly Hacks
- Swap hardware for heftier, high-quality pieces—instant upgrade.
- Under-cabinet lighting strips and dimmers change the mood for under $200.
- Paint just the island or the hood for a targeted refresh.
- Replace a section of upper cabinets with open shelves to break up bulk.
Timeline + Planning Tips
- Plan first: Measure twice, order early. Lead times can be wild.
- Sample everything: Paint, tile, and counter samples under your actual lighting.
- Power + plumbing: Decide early to avoid costly changes mid-reno.
- Live plan: Create a temporary kitchen setup—microwave, toaster oven, and a coffee corner. Sanity saver.
You’re not just remodeling—you’re curating a space that works hard and looks better. Pick two or three of these designer-inspired moves and your kitchen will feel custom, cohesive, and very you. Now go make that bold backsplash happen and send me the after pics, obviously.