10 Smart Kitchen Storage Ideas for Clutter-free Counters You’ll Love Using
Your counters aren’t a drop zone. They’re a stage for coffee, chopping onions, and maybe the occasional victory dance when the soufflé doesn’t collapse. If yours are buried under gadgets and random mail, it’s time for a strategic reset. These 10 smart kitchen storage ideas will clear the chaos and make your kitchen feel bigger, brighter, and actually fun to cook in.
1. Banish Bulk With a Coffee Station Drawer

Coffee stuff spreads like confetti: scoops, pods, filters, syrups. Park it all in a single, purpose-built drawer and reclaim your counter in one move. Bonus: your morning routine gets way faster.
Tired of snacking when you’re not even hungry? This reset helps you stop the loop and feel back in control.
A simple reset for moments when cravings take over. Easy to use, easy to repeat, and designed to help you feel satisfied instead of stuck.
How to Set It Up
- Shallow drawer + dividers: Use an adjustable organizer for pods, filters, tea bags, and stirrers.
- Non-slip liners: Keep bottles and tins from rolling every time you open the drawer.
- Mini bin for extras: Corral sugar packets, cinnamon, and cocoa in one small container.
Keep the machine on the counter, but everything else hidden. It looks sleek and feels very “barista but make it minimalist.”
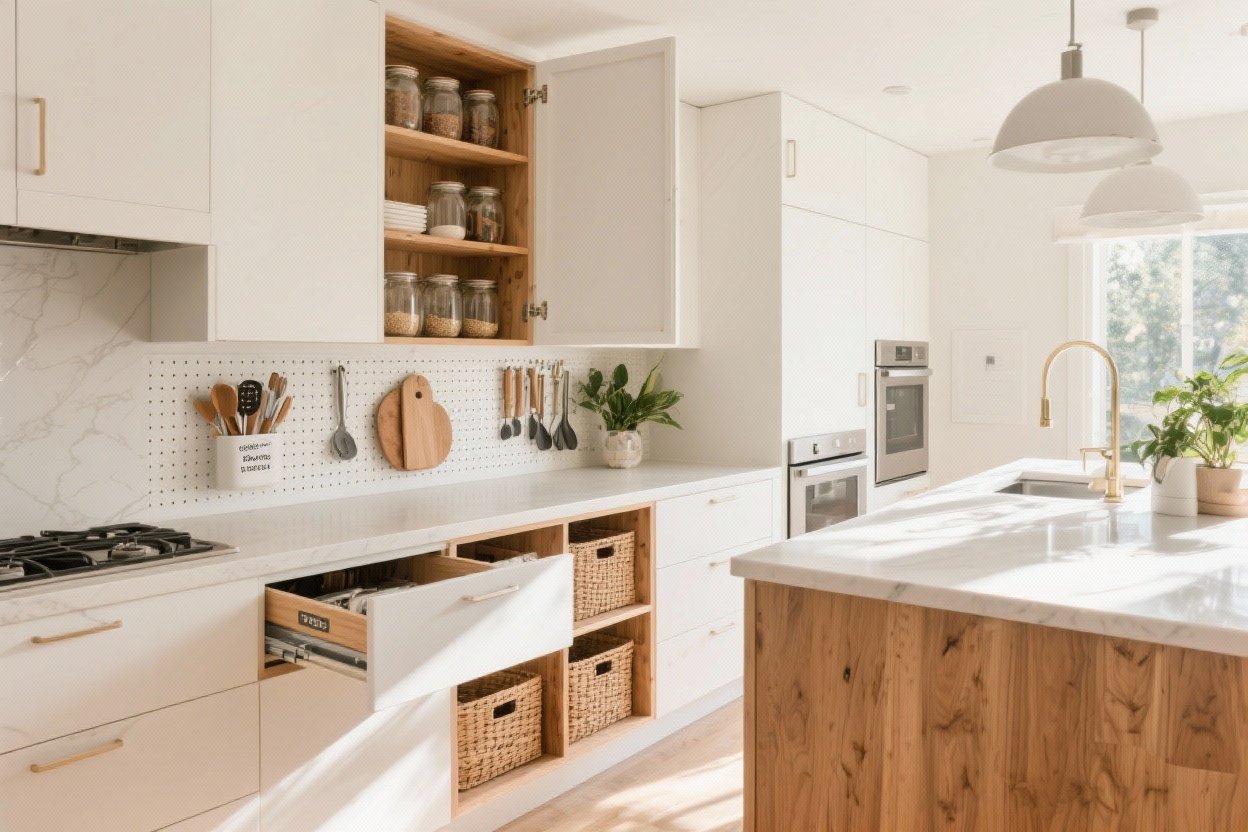
2. Go Vertical With Wall Rails And Magnetic Strips

Walls are prime real estate. A simple rail system or magnetic knife strip frees up serious counter space and keeps essentials within reach.
What to Hang
- Utensils: Ladles, tongs, spatulas—hang what you use daily on S-hooks.
- Knives: Magnetic strip = no bulky block eating counter space.
- Small pans or strainers if your rail is sturdy and near the stove.
FYI, keep it curated. If the wall looks like a garage pegboard, you’ve gone too far.
3. Add Pull-Outs To Dead-Zone Lower Cabinets

Nothing says “kitchen chaos” like that deep cabinet where appliances disappear forever. Install pull-out shelves so your blender and food processor glide out like they live in a boutique.
Transform Your Home With 7,250+ Stunning Landscaping Designs—No Expensive Designers Needed!
- 🌿 Access 7,250+ stunning landscaping designs.
- 💰 Save thousands—no pro designer needed.
- 🏡 Plans for gardens, patios, walkways, and more.
- ✨ Simple, beginner-friendly DIY layouts.
- 🛠️ Customize any design to fit your yard.
Smart Pull-Out Ideas
- Two-tier trays: Separate bulky items (bottom) from accessories (top).
- Adjustable heights: Make room for tall pitchers and baking tins.
- Label fronts: So you don’t open five pull-outs hunting for the waffle iron.
This is one of those upgrades that feels like a renovation—but costs way less.
4. Use The Backs Of Doors Like a Storage Ninja

Those cabinet and pantry doors? They’re basically blank canvases for over-the-door racks, slim shelves, and stick-on hooks. Perfect for the awkward stuff that never sits right on a shelf.
Where It Shines
- Pantry doors: Spice racks, foil and wrap organizers, snack bins.
- Under-sink doors: Cleaning gloves, brushes, dishwasher tabs in a caddy.
- Upper cabinet doors: Flat lids or cutting boards with low-profile holders.
Pro tip: Measure door clearance so racks don’t slam into shelves. Ask me how I learned that one.
5. Decant Like a Designer, Label Like a Librarian

Bulky boxes and crinkly bags hog space. Decant dry goods into uniform, stackable containers and watch your pantry breathe a sigh of relief. It looks chic and saves you from opening a bag of flour that’s somehow empty.
Make It Practical
- Choose clear, airtight containers: Keep grains and snacks fresh and visible.
- Stack by height: Tall for pasta, medium for cereal, small for nuts and seeds.
- Label clearly: Include cooking times for grains and expiration dates on the bottom.
IMO, this turns weekly meal prep from “ugh” to “ooh.” It’s oddly satisfying.

6. Install A Hidden Appliance Garage

If you love your toaster but hate looking at it, a countertop appliance garage is the move. It’s a cabinet or roll-up door on the counter that hides small appliances while keeping them plugged in and ready.
Design Tips
- Place near outlets: So your mixer and toaster don’t need unplugging every time.
- Use tambour or pocket doors: They slide or tuck away without blocking workspace.
- Add a pull-out tray: Roll your appliances out to use them, then roll away.
Looks polished, works hard, and kills cord clutter in one swoop.
7. Double Your Storage With Shelf Risers And Under-Shelf Baskets

Cabinets with tall shelves waste air space. Add shelf risers for a second level and clip under-shelf baskets to grab the void underneath. Suddenly, you have twice the room—no renovation needed.
Where To Use Them
- Mugs and bowls: Risers keep stacks safe and separate.
- Snack zones: Baskets hold bars or bread without taking shelf space.
- Plates and lids: Vertical sorters paired with risers = chef’s kiss.
Keep things light in those baskets. Heavy stuff belongs on the actual shelf, not dangling in space.
8. Corral Cutting Boards, Sheets, And Lids Vertically
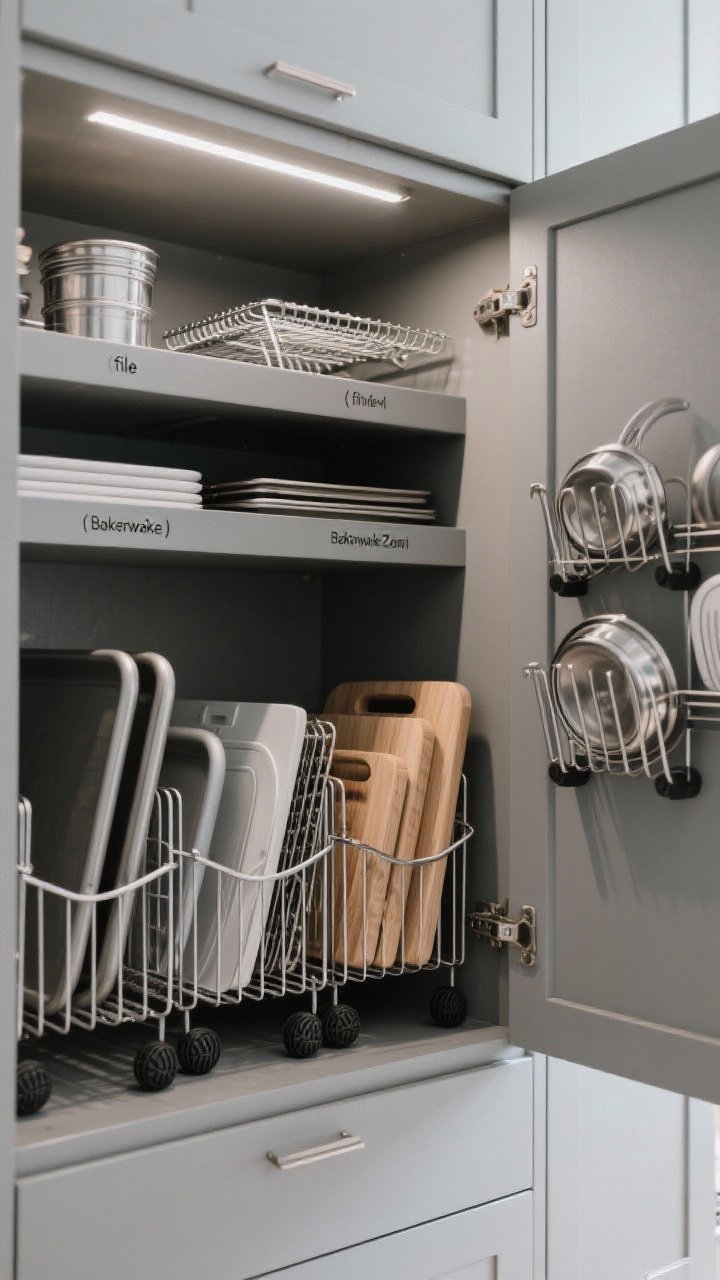
Flat-stacking is a trap. Flip the script and store slim items vertically using dividers. You’ll stop the avalanche every time you reach for a sheet pan.
Easy Wins
- File-style organizers: Use tension dividers or wire racks inside cabinets.
- Bakeware zones: Separate by category—baking sheets, cooling racks, cutting boards.
- Lid chaos control: A dedicated rack for lids saves your sanity (and fingers).
It’s the filing cabinet system, but for your kitchen. Surprisingly addictive.
9. Create a Snack And Breakfast Drawer For Grab-And-Go Calm

Mornings get messy fast. Set up a low, kid-friendly drawer with bins for snacks, oatmeal cups, and granola bars. For adults, add nut butters, chia, and your protein powder.
How To Keep It Tidy
- Use modular bins: One bin per category; refill easily after grocery runs.
- Leave space for rotation: Old in front, new in back to avoid sad, stale crackers.
- Include portion containers: Small lidded cups make lunch packing a breeze.
FYI, labeling bins reduces “where’s the…?” questions by about 90%.
10. Style Your Countertops With Intentional “Stations”

Even minimalists need a few things out. The trick is styling functional stations so they look intentional, not chaotic. Think curated, not cluttered.
Station Ideas
- Cooking zone: Oil, salt cellar, pepper mill, and a utensil crock on a tray by the stove.
- Produce bowl: One pretty bowl for daily-use fruits—everything else lives in the fridge.
- Sink setup: Attractive tray with soap, scrub brush, and a small towel—no random bottles.
Use trays to define boundaries. If it doesn’t fit the tray, it doesn’t live on the counter. Ruthless? A little. Effective? Absolutely.
Quick Maintenance Rituals
- One-minute reset at night: Clear surfaces, wipe, and put stray items back in their zones.
- Weekly edit: Remove “clutter squatters” that migrated to the counter.
- Seasonal purge: Donate gadgets you haven’t used in months. Be honest—no one needs three peelers.
Final Thought: A clutter-free kitchen isn’t about hiding everything—it’s about giving everything a home. Start with one idea, then stack a few more as you go. Before you know it, your counters will be clear, your mornings smoother, and your kitchen will finally look as good as your Pinterest board. Happy organizing!


