10 Easy Landscape Ideas for Beginners That Look Shockingly Pro
You don’t need a landscape architecture degree to make your yard look amazing. You just need a plan, a bit of patience, and maybe a sturdy pair of gloves. These 10 easy landscape ideas for beginners will help you transform that blah patch of grass into a space you’ll actually brag about. Think low-stress projects, quick wins, and tips that won’t torpedo your weekend.
1. Start With a Simple Shape (And Stick to It)
Before you buy a single plant, decide on a shape for your beds and borders. Curves feel organic and soft; straight lines feel modern and structured. Pick one and repeat it for instant cohesion.
Tired of snacking when you’re not even hungry? This reset helps you stop the loop and feel back in control.
A simple reset for moments when cravings take over. Easy to use, easy to repeat, and designed to help you feel satisfied instead of stuck.
Why It Works
- Consistency makes your yard look intentional, not random.
- Curves guide the eye; straight edges are easier to mow (your future self says thank you).
How To Do It
- Use a hose to lay out a gentle **curve**; spray-paint along it to mark.
- Prefer modern? Snap a chalk line for a crisp, **straight-edge bed**.
- Repeat the shape around the yard so everything feels like part of the same story.
Pro tip: Keep paths and bed edges at least 2–3 feet wide so plants have space to fluff up without smothering your walkway.
2. Plant In Easy Clusters (Think 3, 5, or 7)
Single plants get lost. Groups make impact. Planting in odd-numbered clusters looks natural and full—even if you only use a few varieties.
Beginner-Friendly Plants
- Sun: Coneflower, Black-eyed Susan, Russian Sage, Catmint
- Shade: Hosta, Ferns, Astilbe, Heuchera
- Evergreen backbone: Boxwood, Dwarf Alberta Spruce, Holly
Planting Tips
- Place taller plants in back, medium in the middle, short in front—like a stage.
- Repeat clusters along your border for rhythm (yes, your yard can have rhythm).
- Leave room for growth: check the tag and resist overcrowding. Future you = grateful.
FYI: The fewer kinds you pick, the more polished it looks. Aim for 5–7 total varieties across the space.
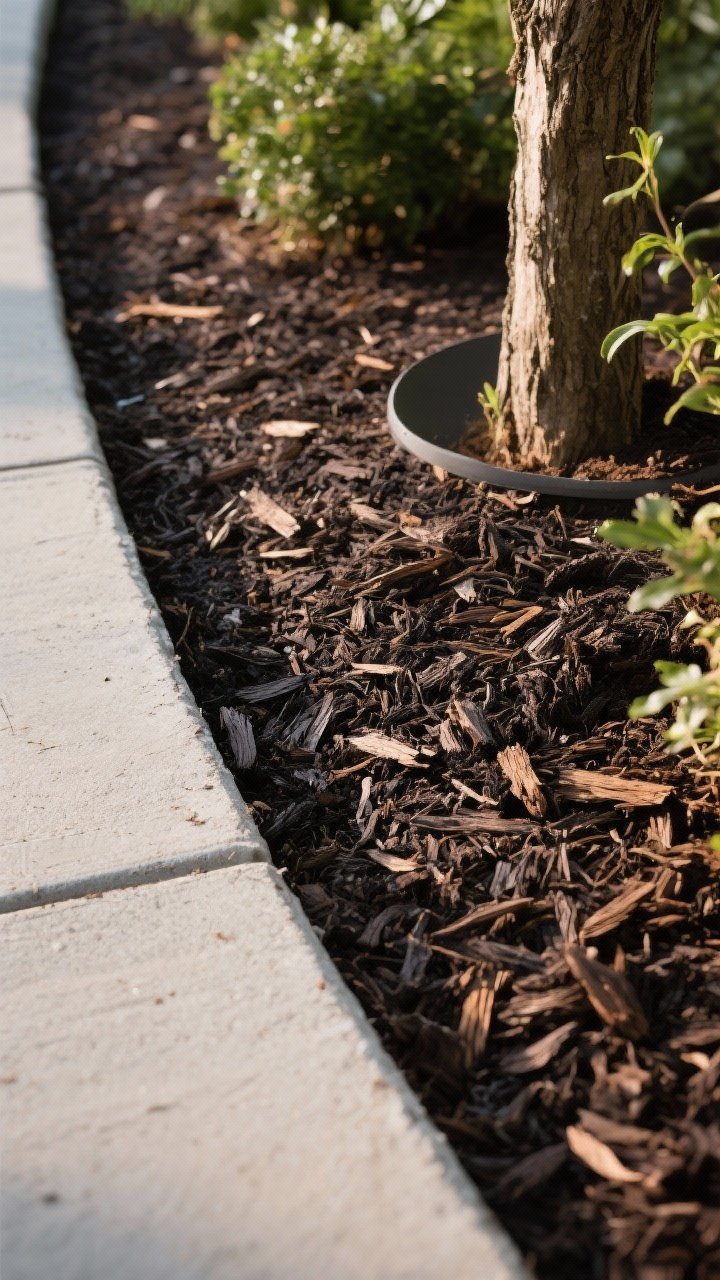
3. Mulch Like You Mean It
Mulch is the ultimate beginner hack. It hides sins, makes colors pop, and keeps weeds at bay. Plus, your beds will look finished in under an hour.
Transform Your Home With 7,250+ Stunning Landscaping Designs—No Expensive Designers Needed!
- 🌿 Access 7,250+ stunning landscaping designs.
- 💰 Save thousands—no pro designer needed.
- 🏡 Plans for gardens, patios, walkways, and more.
- ✨ Simple, beginner-friendly DIY layouts.
- 🛠️ Customize any design to fit your yard.
Mulch Basics
- Depth: Spread 2–3 inches—more than that can smother roots.
- Type: Shredded hardwood for a classic look, dark-dyed for contrast, or natural pine straw in coastal/wooded areas.
- Spacing: Keep mulch a few inches away from trunks and stems to prevent rot.
Pro tip: Add a crisp edge before mulching. A simple spade-cut trench creates a clean line that screams “pro job.”
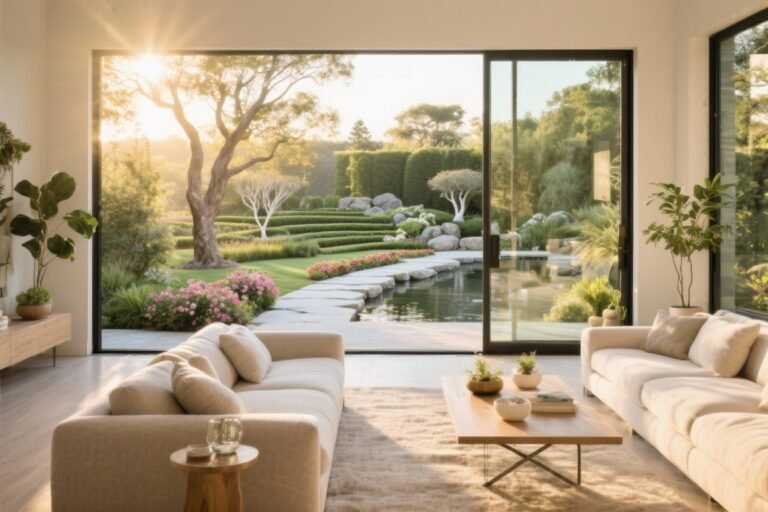
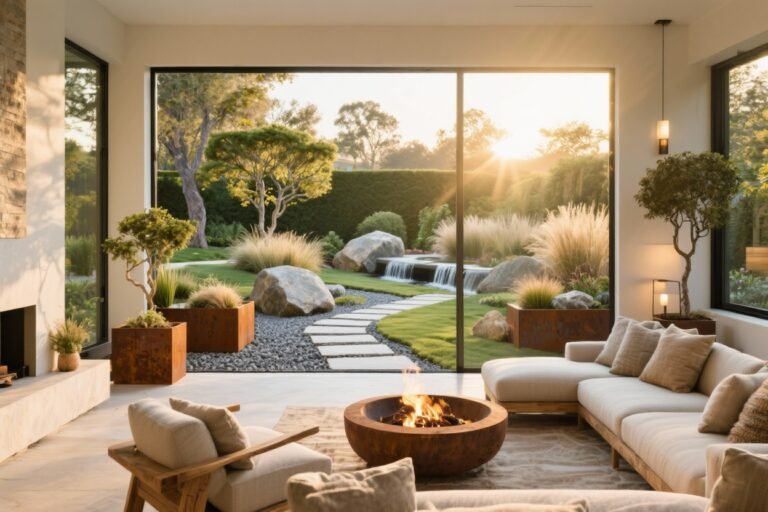
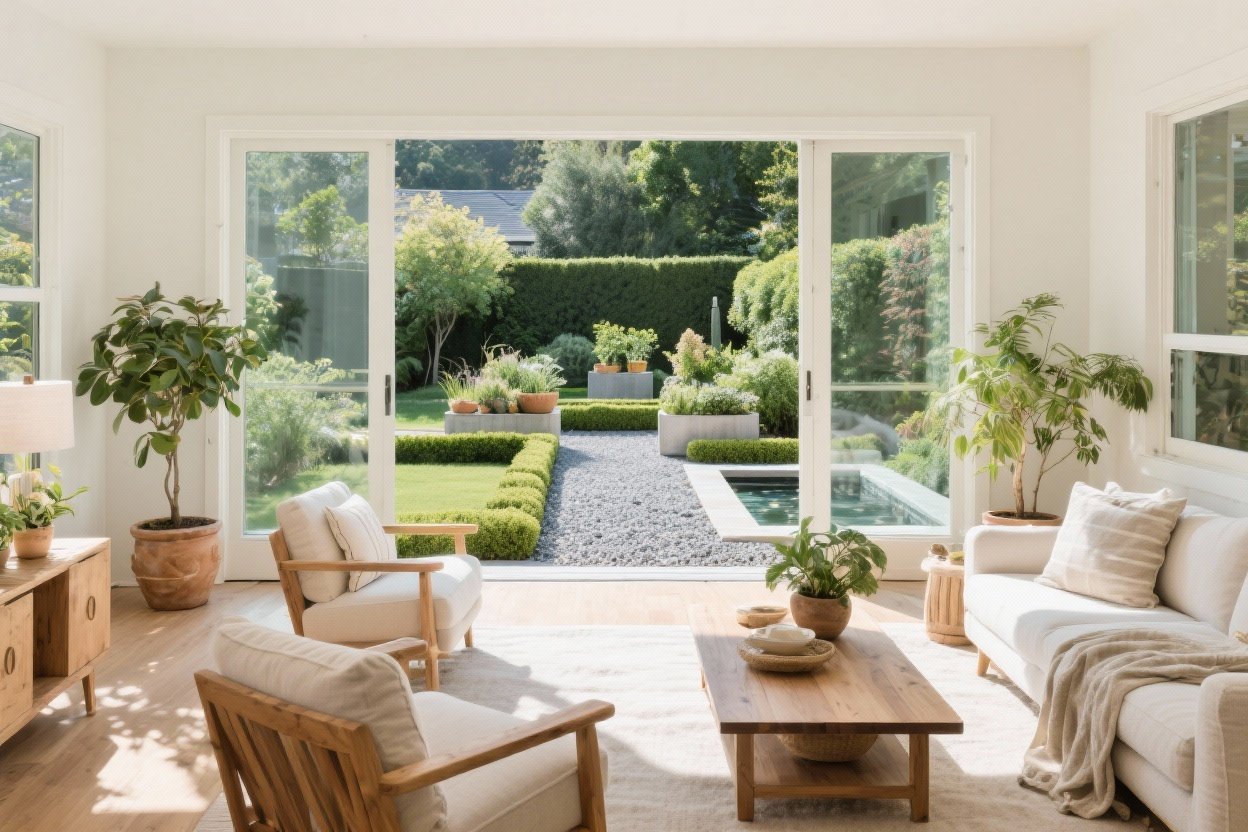
4. Create a Focal Point (Because Your Yard Needs a Lead Actor)
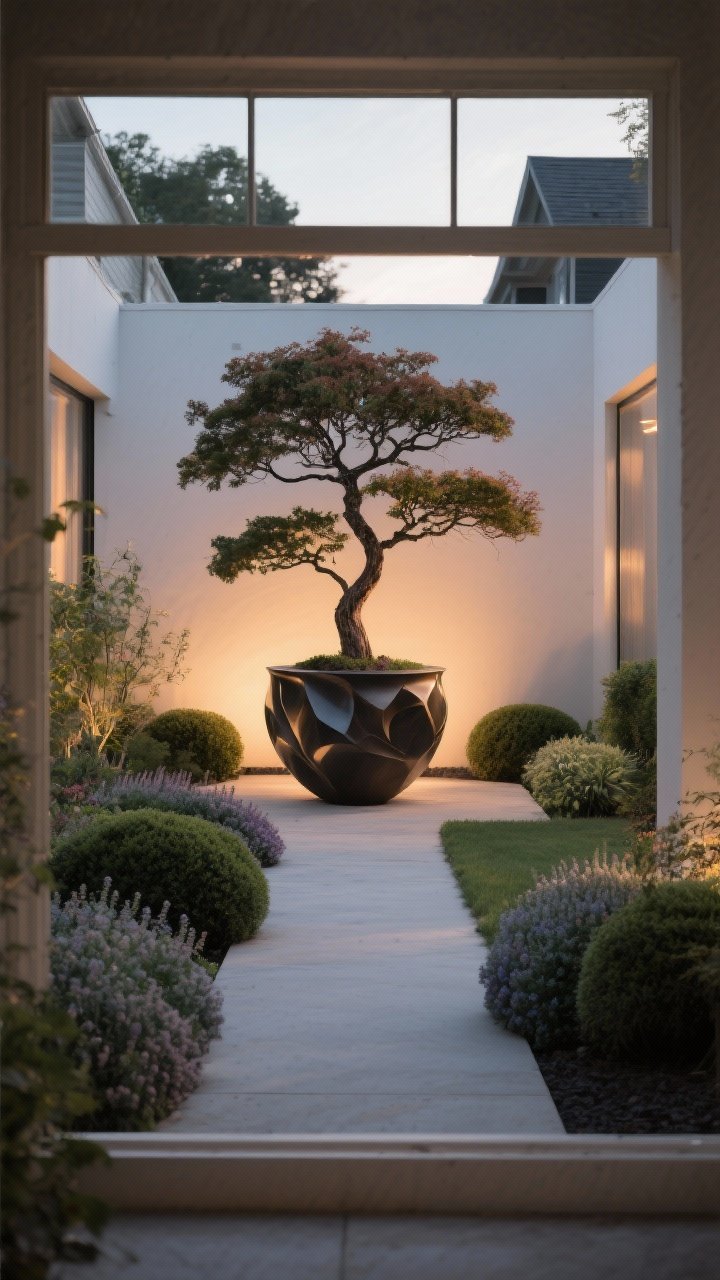
Every great landscape has a moment. It could be a small tree, a birdbath, or a striking urn. Give the eye somewhere to land, and the whole yard feels designed.
Focal Point Ideas
- Small trees: Japanese maple, Serviceberry, Crape Myrtle (dwarf)
- Objects: Oversized planter, birdbath, sculptural trellis, boulder
- Color pop: A painted bench or pot in a bold hue
Placement Tips
- Anchor focal points at the end of a path or centered in a view from your window.
- Frame them with lower plants so they don’t feel random.
IMO: One statement is better than five shouting at once. Keep it simple.
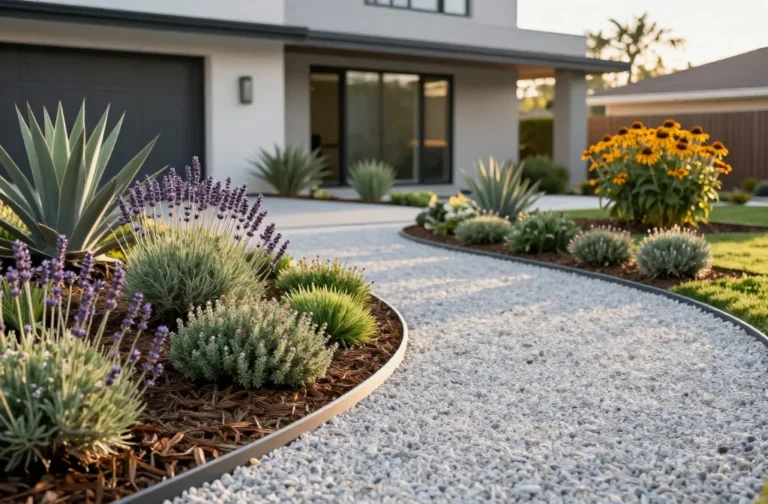
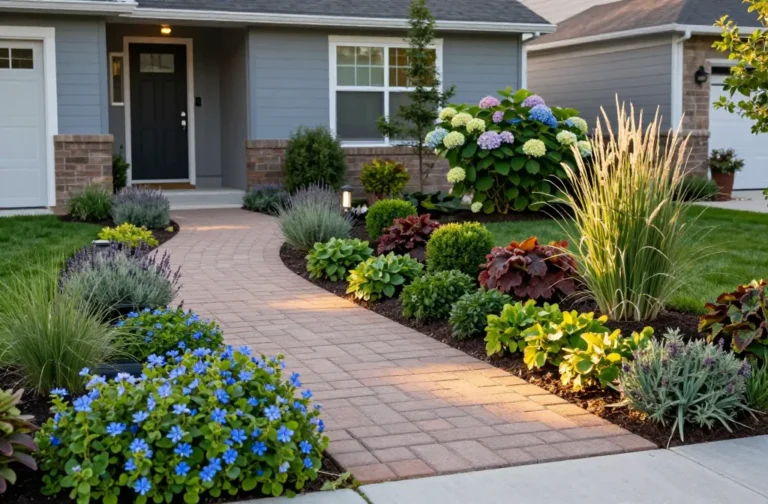
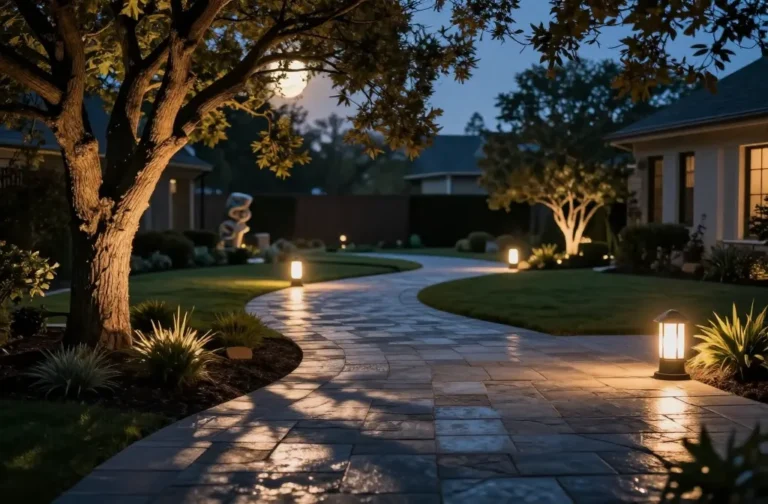
5. Build A Simple Path You’ll Actually Use
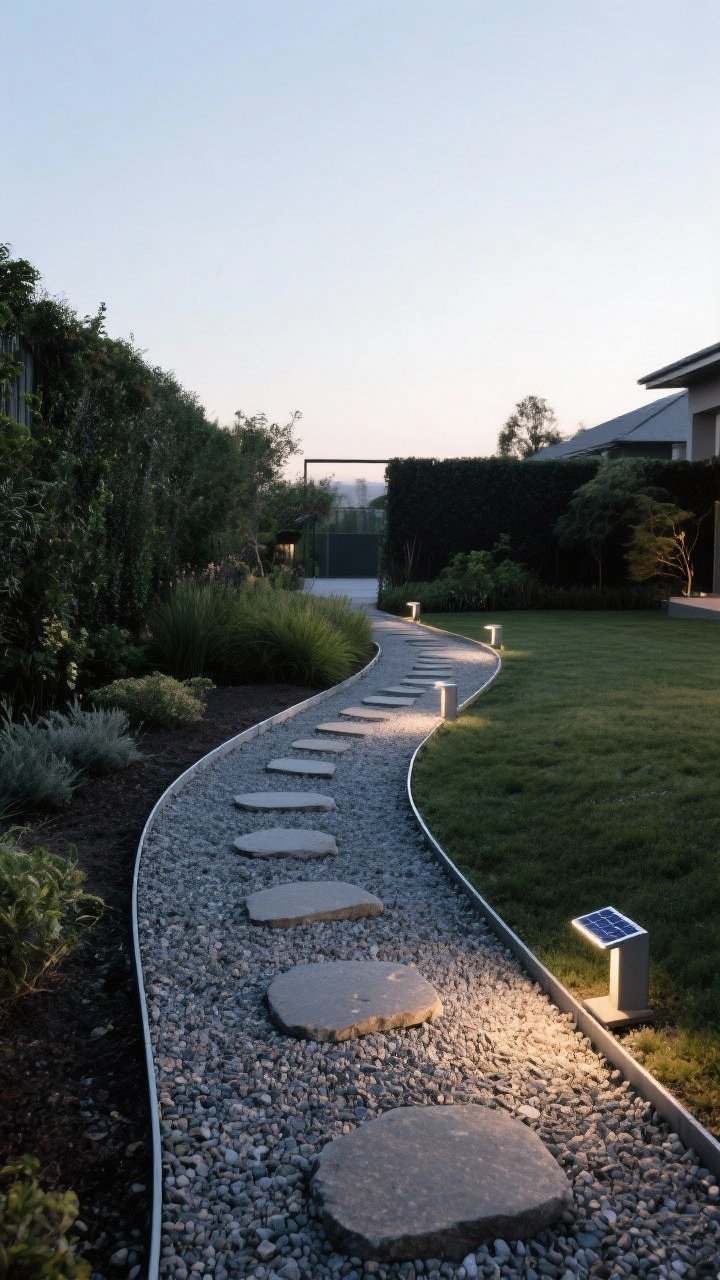
Paths make spaces feel connected and intentional, and they prevent your lawn from becoming a muddy shortcut. You don’t need a masonry degree—just a plan and a shovel.
Path Options
- Gravel: Affordable, flexible, and drains well. Add edging to keep it tidy.
- Stepping stones: Natural stone or concrete pads spaced for a comfortable stride.
- Mulch path: Super easy—lay landscape fabric and cover with wood chips.
Layout Tips
- Design for where you already walk—the “desire path” is real.
- Keep paths at least 30–36 inches wide; 42 inches is comfy for two people.
- Use curves to feel relaxed; straight lines for a modern vibe.
Pro tip: Add low solar lights along the edge for instant drama and safety. No electrician required.

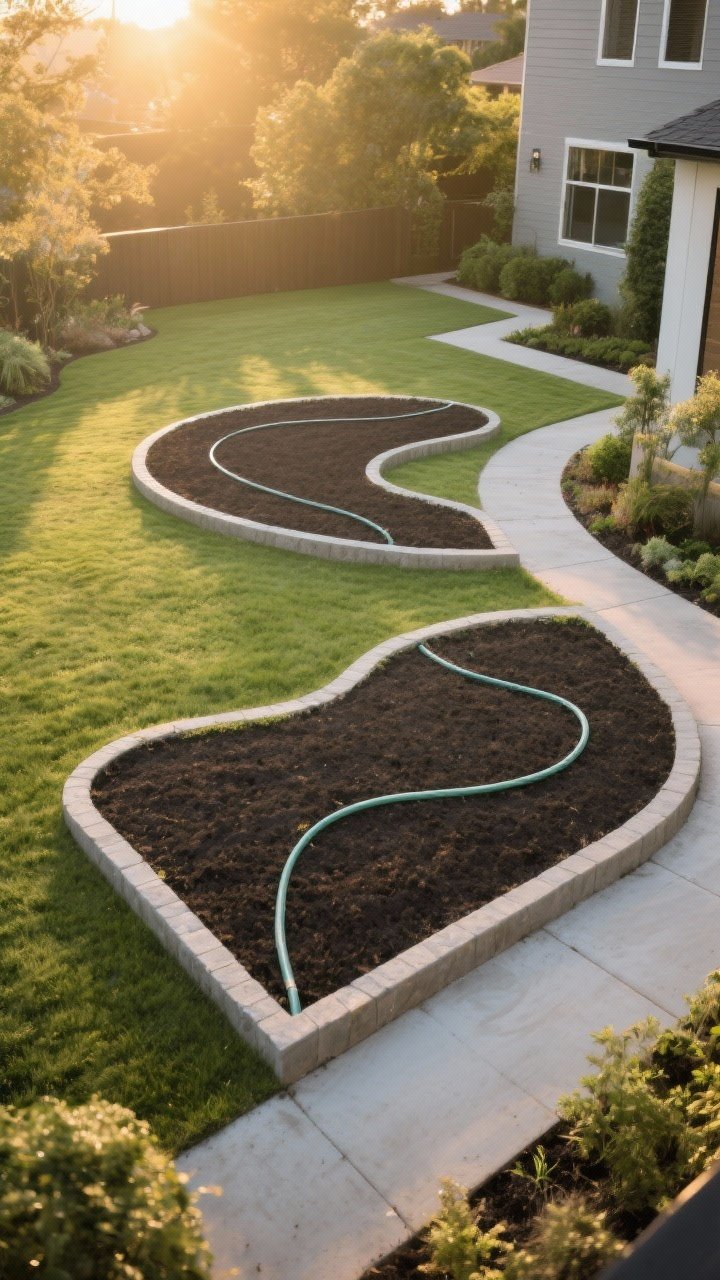
6. Try Raised Beds Or Borders For Easy Wins
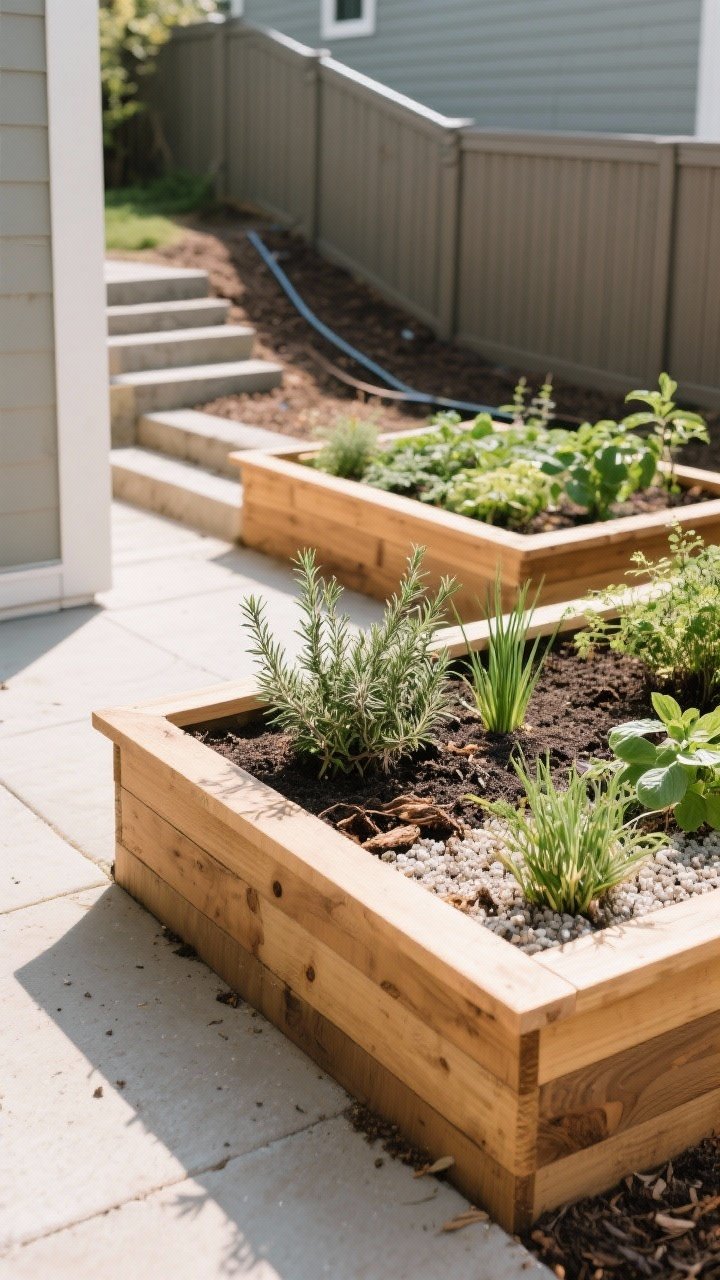
Raised beds are beginner-friendly and great for bad soil. They keep things tidy, protect plants, and make you look like you know what you’re doing (you do).
Where To Use Them
- Along fences: Define your boundary with a neat raised border.
- Near patios: Create a kitchen garden with herbs and compact veggies.
- On slopes: Terrace with low retaining walls to prevent erosion.
Build & Fill
- Use rot-resistant wood, stone blocks, or metal. Keep the height 8–16 inches.
- Fill with a mix of topsoil, compost, and perlite for drainage.
- Plant herbs like rosemary, thyme, basil, and chives near cooking areas for fragrance and easy snipping.
FYI: Drip irrigation plus mulch equals low maintenance and happy plants.
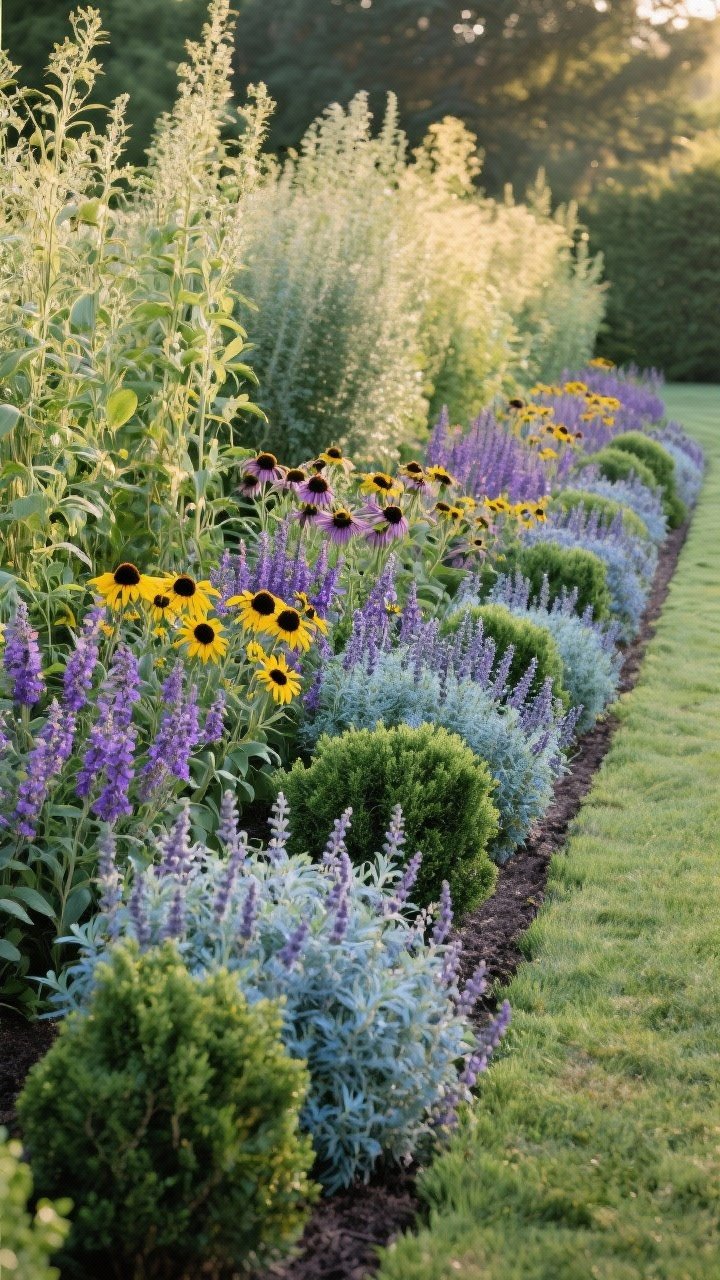
7. Mix Evergreens With Seasonal Color
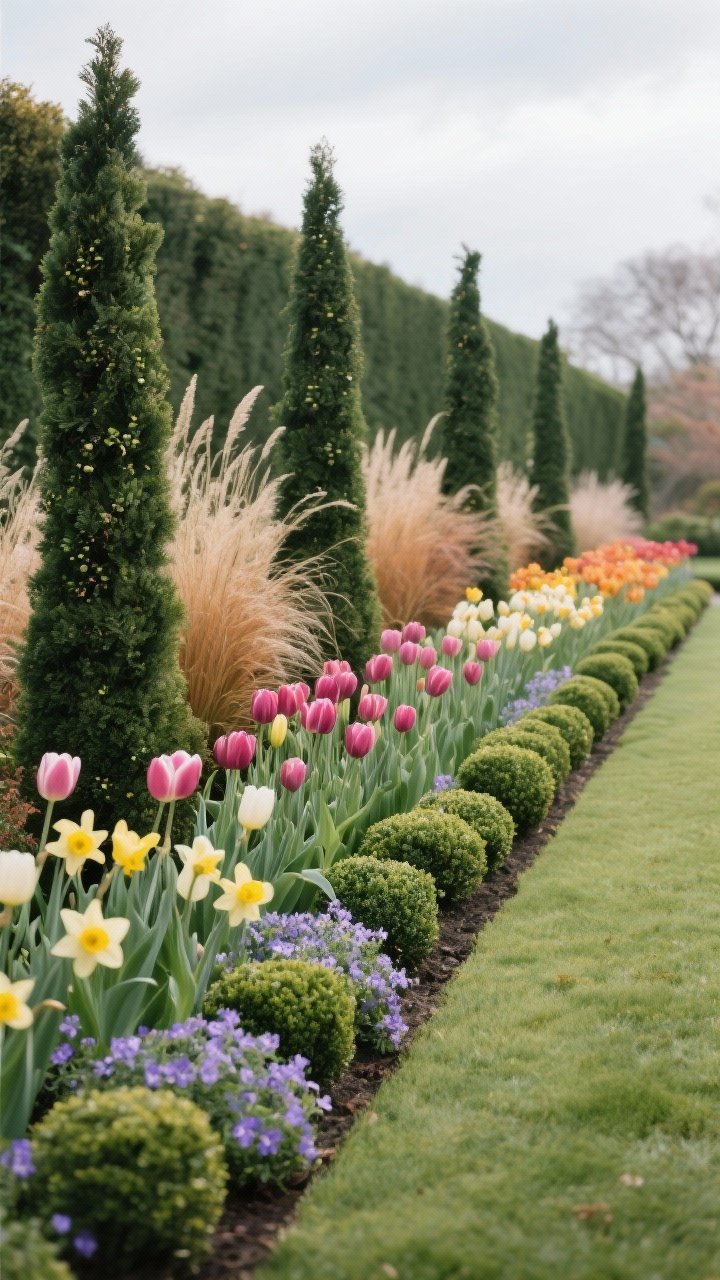
The secret to a yard that looks good year-round? Evergreens. Add seasonal flowers around them and bam—you’ve got structure with changing highlights.
Evergreen Anchors
- Small: Dwarf boxwood, Sky Pencil holly, dwarf Hinoki cypress
- Medium: Inkberry holly, Nandina, Mountain laurel
Seasonal Color Combos
- Spring: Tulips, daffodils, and creeping phlox under evergreens
- Summer: Daylilies, salvia, zinnias for long-blooming color
- Fall: Mums and asters with ornamental grasses
- Winter: Hellebores and red twig dogwood for structure
Pro tip: Plant bulbs in fall around evergreen bases. When the evergreens are sleepy, bulbs do the heavy lifting.
8. Add Low-Maintenance Lighting For Instant Magic
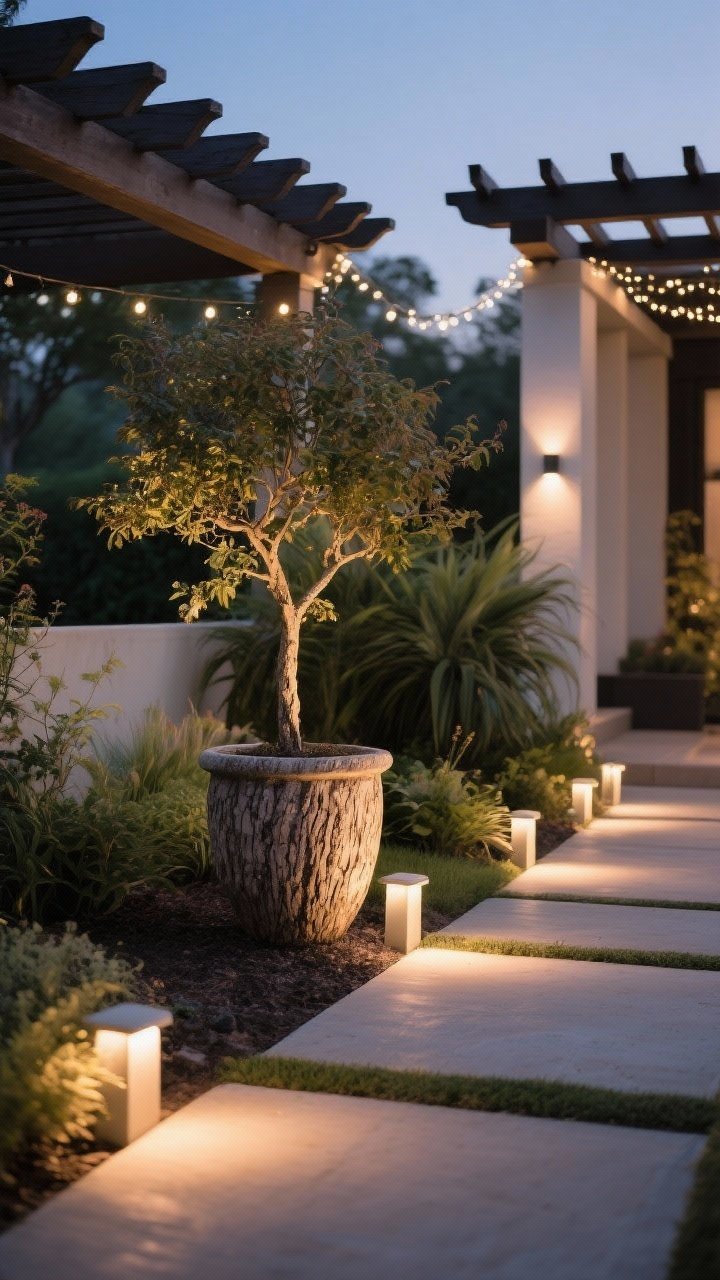
Lighting is the easiest way to upgrade your yard in one evening. It’s also a safety win (stairs and dark corners, we’re looking at you).
Lighting Basics
- Path lights: Space 5–8 feet apart for a soft, dotted line—no runway vibes.
- Uplights: Aim at trees or focal points for drama and texture.
- String lights: Over patios or pergolas for ambient glow.
Beginner Tips
- Choose solar if you want zero wiring; plug-in kits offer more brightness and control.
- Warm white (2700–3000K) looks cozy and natural.
- Hide fixtures behind plants to light the plant, not the lamp.
Pro tip: Put everything on a timer or smart plug—set it and forget it.
9. Use Containers To Test (And Steal The Show)
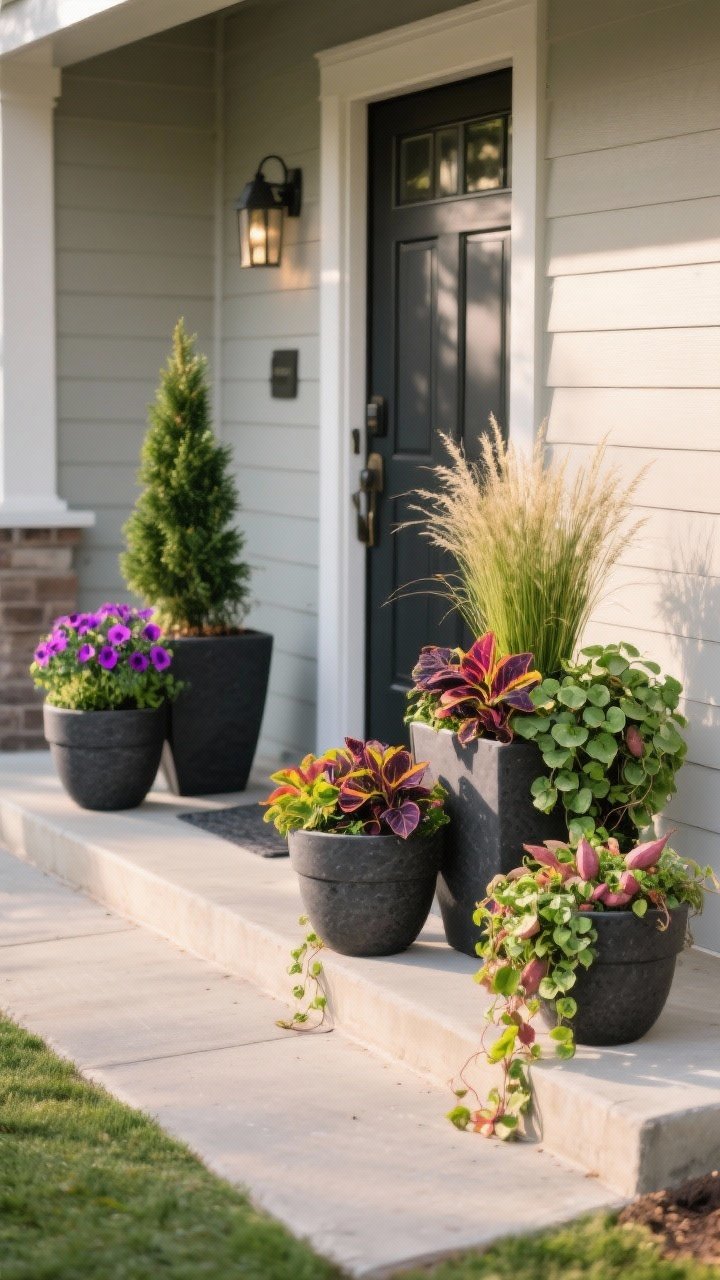
Containers are training wheels for landscaping. They’re portable, dramatic, and perfect if your soil is meh. Plus, they change with the seasons without digging up your yard.
Container Formula: Thriller, Filler, Spiller
- Thriller: Tall focal—dwarf grass, cordyline, or small conifer
- Filler: Medium plants—petunias, begonias, lantana, coleus
- Spiller: Trailing—sweet potato vine, creeping jenny, ivy
Placement & Style
- Flank the front door with matching planters for instant curb appeal.
- Group containers in odd numbers for a mini garden moment on patios.
- Choose pots that match your home’s vibe—terra-cotta for rustic, black fiberstone for modern.
Water warning: Container soil dries fast. Add water-holding crystals or mulch the top to stretch time between waterings.
10. Keep Maintenance Simple With Smart Habits
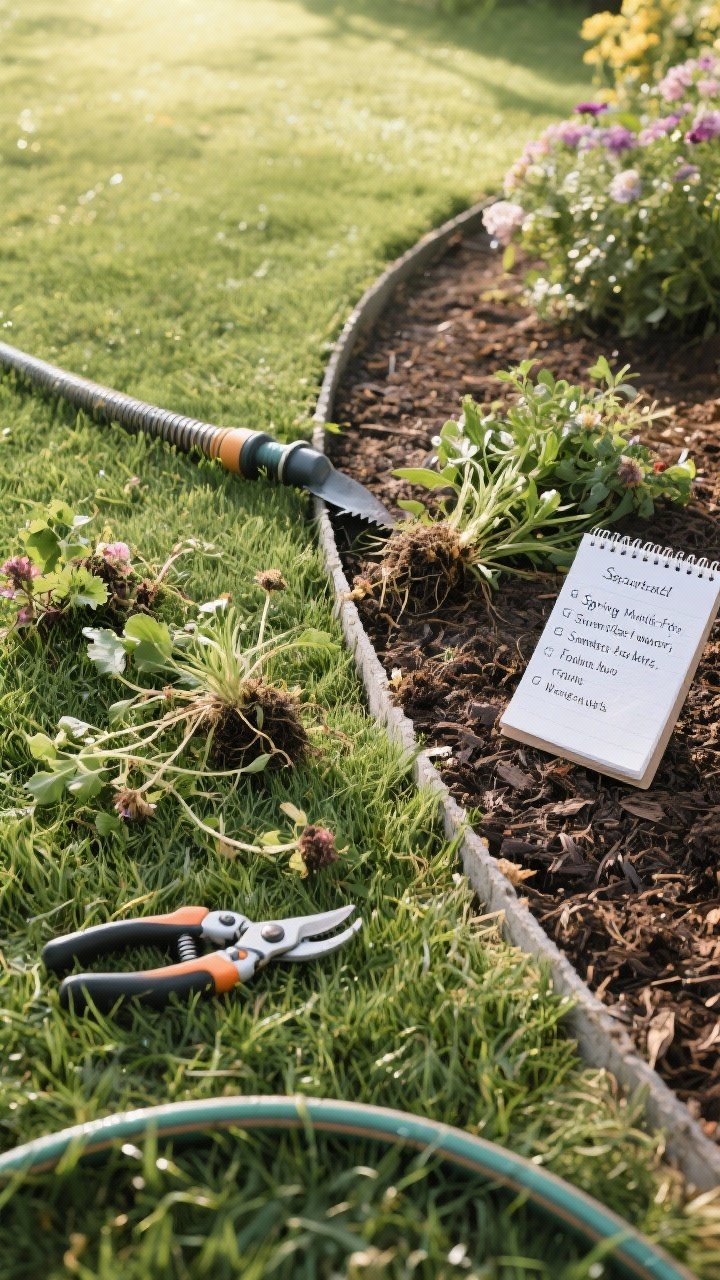
A little routine goes a long way. If your yard looks great on day one but turns into a jungle by month three, it’s not your fault—just the wrong habits.
Weekly 20-Minute Tidy
- Weed while you water: Quick pull-ups before they seed.
- Edge touch-ups: A half-moon edger keeps lines crisp fast.
- Deadhead blooms: Snip spent flowers to keep plants blooming longer.
Seasonal Cheatsheet
- Spring: Feed with a slow-release fertilizer, refresh mulch, plant new perennials.
- Summer: Deep water 1–2 times a week; raise mower blade to shade roots.
- Fall: Plant bulbs, divide perennials, overseed bare lawn patches.
- Winter: Prune only what’s recommended; protect tender plants with burlap in cold zones.
Pro tip: Choose native or climate-appropriate plants. They drink less, need less fuss, and attract the good bugs—pollinators for the win.
Bonus Mini-Guide: Watering Without Overthinking
- Water deeply, less often—aim for 1 inch per week total, rain included.
- Morning is best. Evening watering invites mildew and drama.
- Use a soaker hose or drip line under mulch for set-it-and-forget-it efficiency.
Friendly reality check: You don’t need to do all of this at once. Pick two or three ideas, start small, and build from there. With a clean shape, a few clustered plants, and fresh mulch, your yard will already look like you hired help. Then add a focal point, a couple of lights, and a path when you’re ready.
You’ve got this. Your yard is about to glow up—and your neighbors will definitely notice.