10 Brilliant Kitchen Storage Ideas That Instantly Add More Space You’ll Love
Your counters are full, the pantry is chaos, and you’re one Tupperware avalanche away from a meltdown. Good news: your kitchen is hiding space you haven’t met yet. Let’s unlock it—without tearing down walls or joining a minimalist cult.
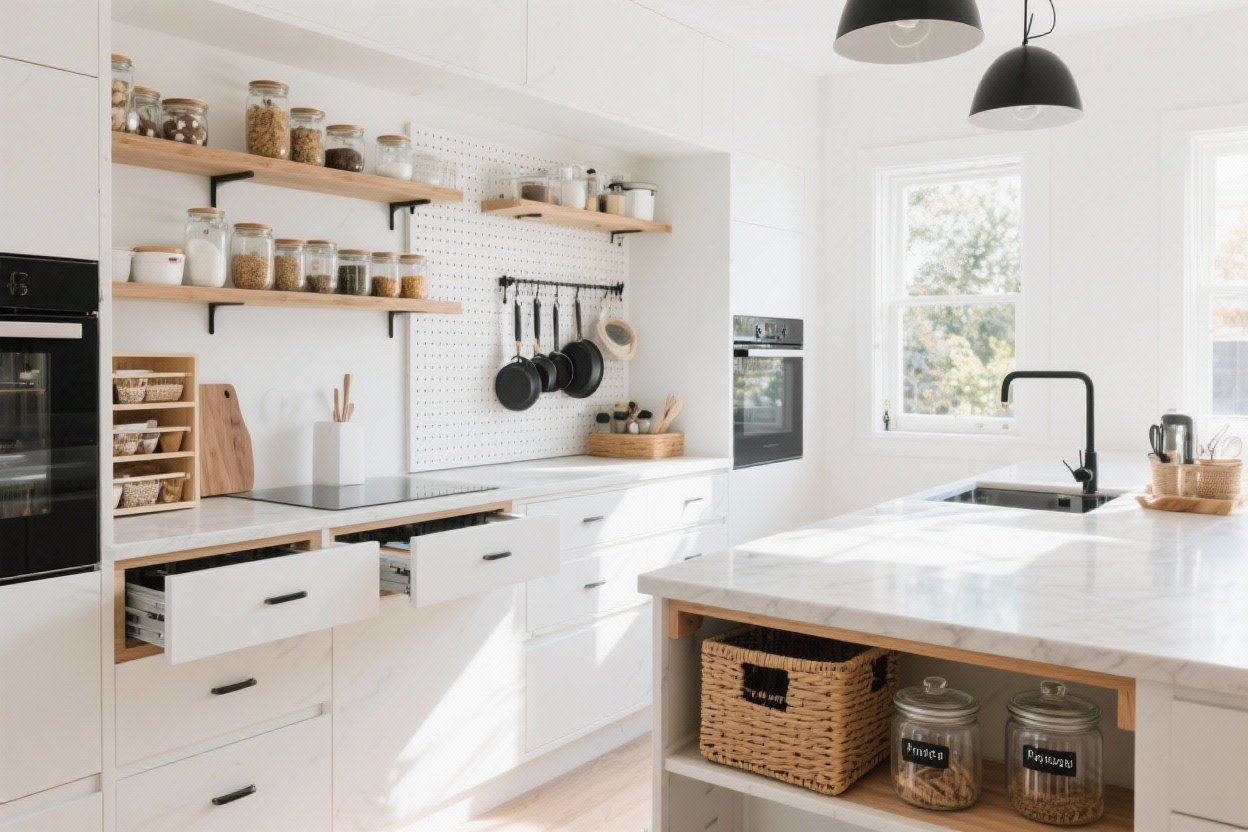
1. Swap Bulky Cabinets for Sleek Pull-Outs
Cabinets look innocent… until you realize half the space is dead air. Pull-outs change the game by sliding everything into view, so you stop buying duplicate paprika.
Tired of snacking when you’re not even hungry? This reset helps you stop the loop and feel back in control.
A simple reset for moments when cravings take over. Easy to use, easy to repeat, and designed to help you feel satisfied instead of stuck.
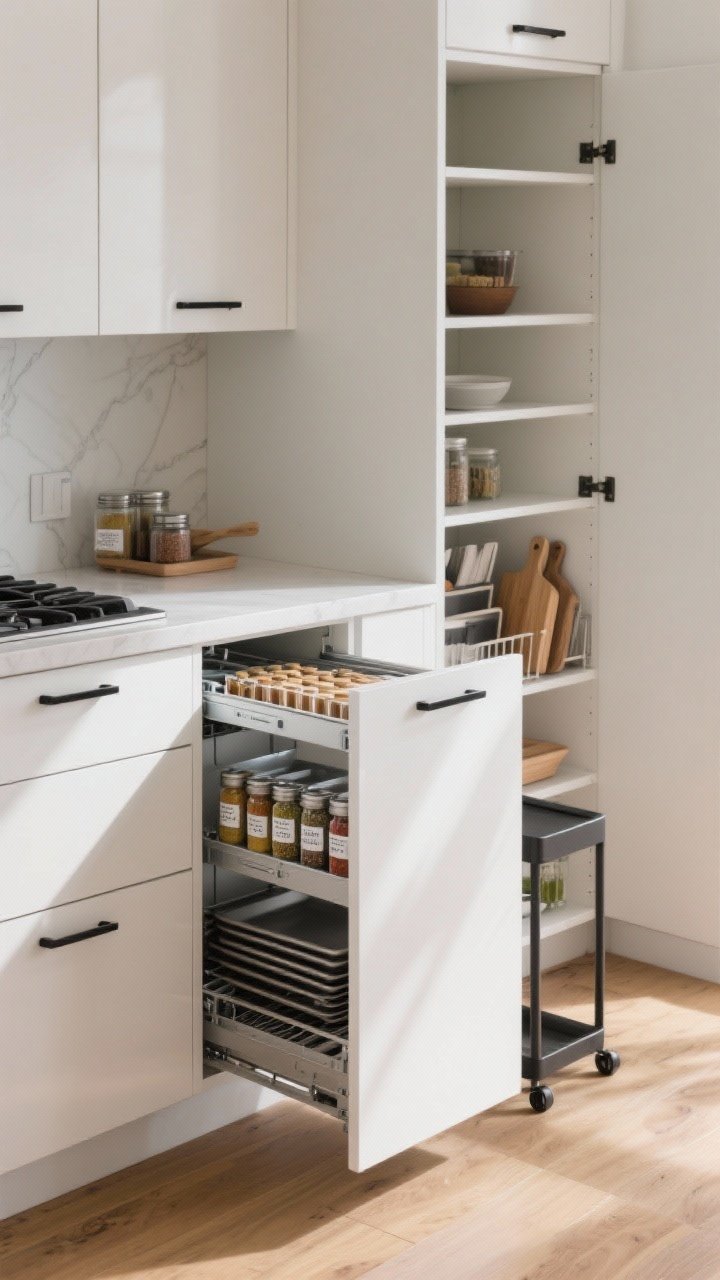
Where Pull-Outs Shine
- Spice pull-outs: Narrow 6–9″ units that slide next to the range. Every label, visible. Chef’s kiss.
- Tray dividers: Vertical pull-outs for sheet pans and cutting boards—no more clanging stacks.
- Pantry pull-outs: Full-height towers with shallow shelves so nothing gets lost in the back.
Pro tip: Choose soft-close hardware and shallow shelves (3–4″ deep) to prevent tipping. If you rent, use freestanding pull-out carts inside existing cabinets—no drilling required.
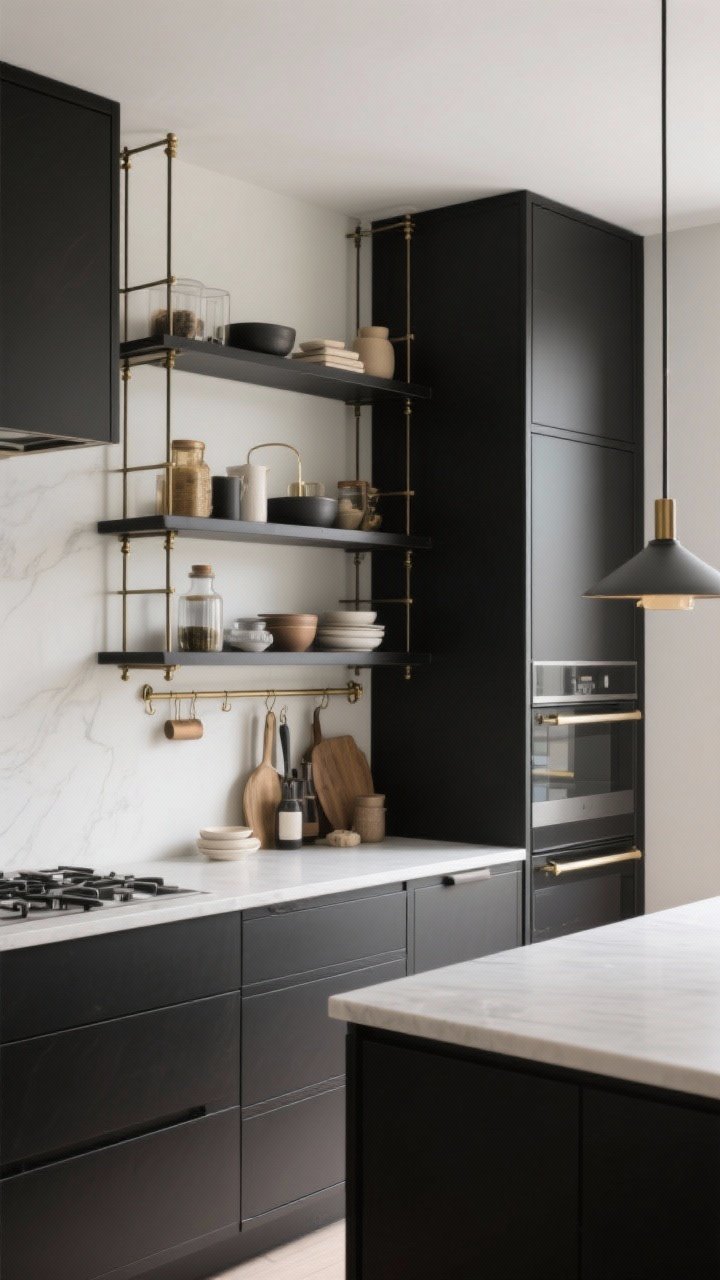
2. Go Vertical With Wall Rails and Magnetic Magic
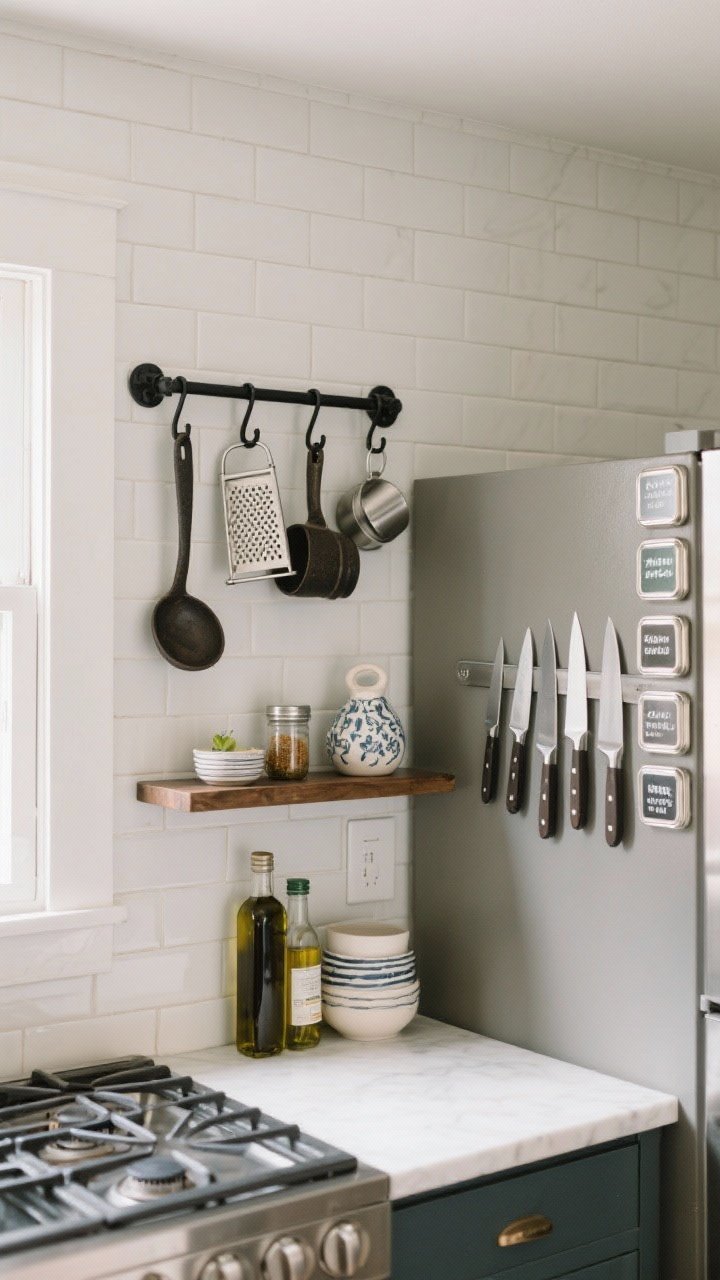
Your walls are basically unused real estate. Hang a rail. Add hooks. Suddenly, your utensils, pans, and mugs have a chic new address.
Smart Vertical Zones
- Magnetic knife strips: Safer than a jumbled drawer and way cooler-looking. Keep 16″ from the stove.
- Utility rails: Hang ladles, graters, and measuring cups. Add a small shelf for oils you actually use.
- Magnetic spice tins: The side of your fridge can hold a whole spice collection—label the lids for sanity.
FYI: Not everything should hang. Keep heavy cast iron on sturdy hooks and give breakables (looking at you, ceramics) a stable shelf.
3. Build a Pantry Inside Your Doors
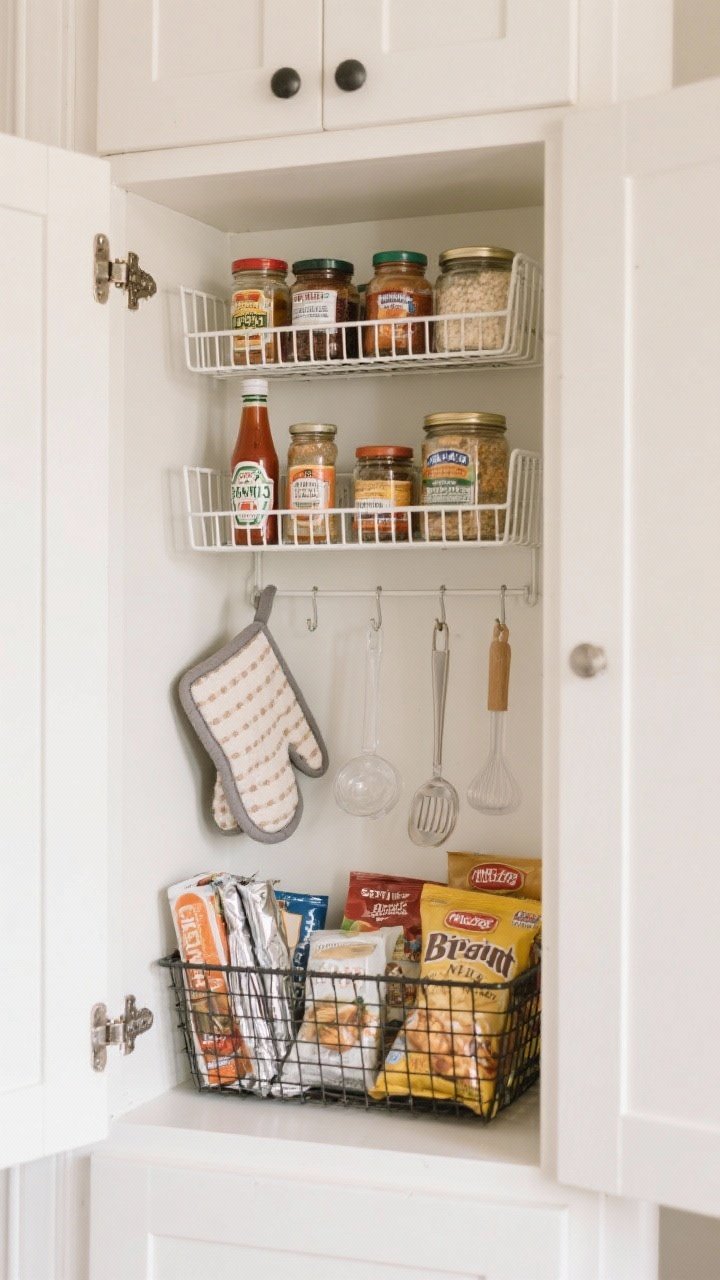
Open your cabinet doors. See that empty space? That’s your new pantry. Over-the-door racks and shallow shelves basically double your storage without eating into the cabinet itself.
Transform Your Home With 7,250+ Stunning Landscaping Designs—No Expensive Designers Needed!
- 🌿 Access 7,250+ stunning landscaping designs.
- 💰 Save thousands—no pro designer needed.
- 🏡 Plans for gardens, patios, walkways, and more.
- ✨ Simple, beginner-friendly DIY layouts.
- 🛠️ Customize any design to fit your yard.
Door Storage That Works
- Shallow shelves (2–3″ deep): Perfect for sauces, spices, and jars.
- Wire baskets: Corral wraps, foils, and snack packs. Kids can grab without wrecking the rest.
- Command hooks: Hang potholders, oven mitts, even measuring spoons. Zero tools, zero regrets.
Important: Watch hinge clearance. Mount shelves so doors still close, and stick heavier items low for balance.
4. Double Your Drawers With In-Drawer Layers
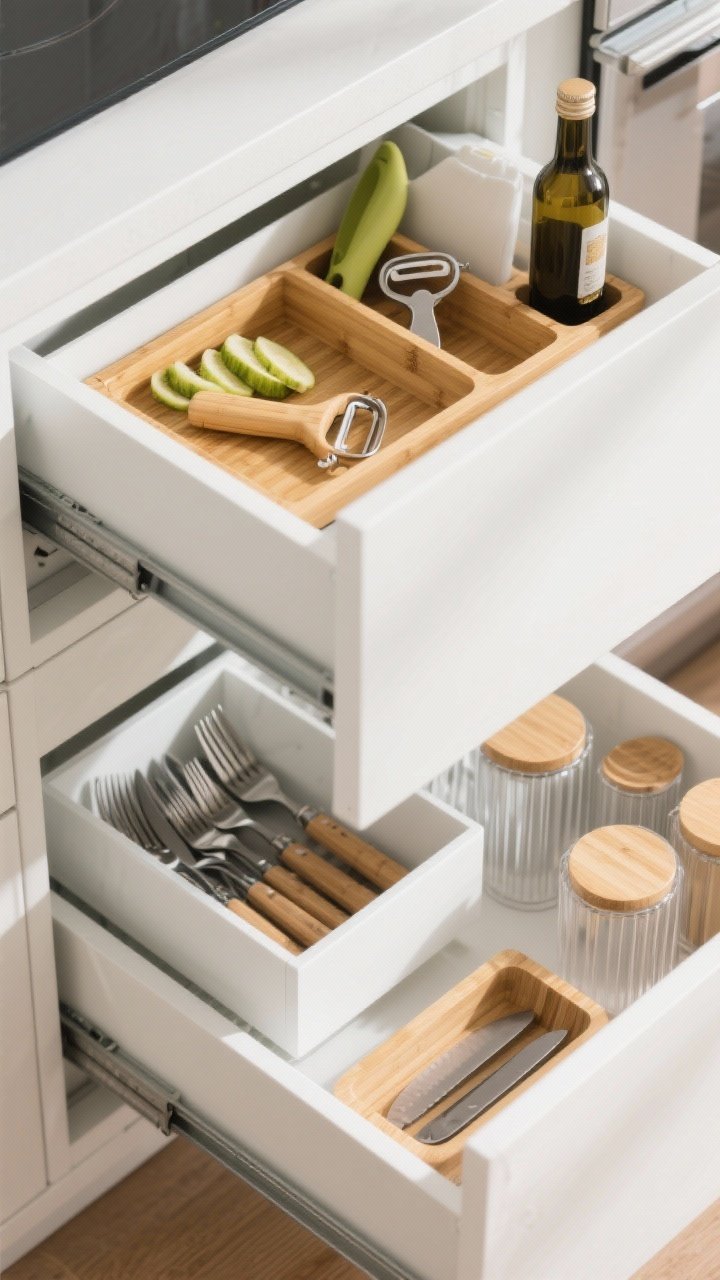
If your drawers are a jumble, try stacking. In-drawer organizers create levels so you can store smaller items above larger ones without cramming.
What to Stack
- Cutlery + gadgets: Add a sliding top tray for peelers and bottle openers. Cutlery chills below.
- Lids + containers: Store lids vertically in a divider, bowls nested beneath. No more lid limbo.
- Knife blocks: In-drawer knife trays free up counter space and keep blades safe.
Pro tip: Use adjustable bamboo or acrylic organizers so you can tweak the layout as your drawer evolves. Because it will.
5. Say Yes to Slim Gaps: Fillers and Kickspace Drawers
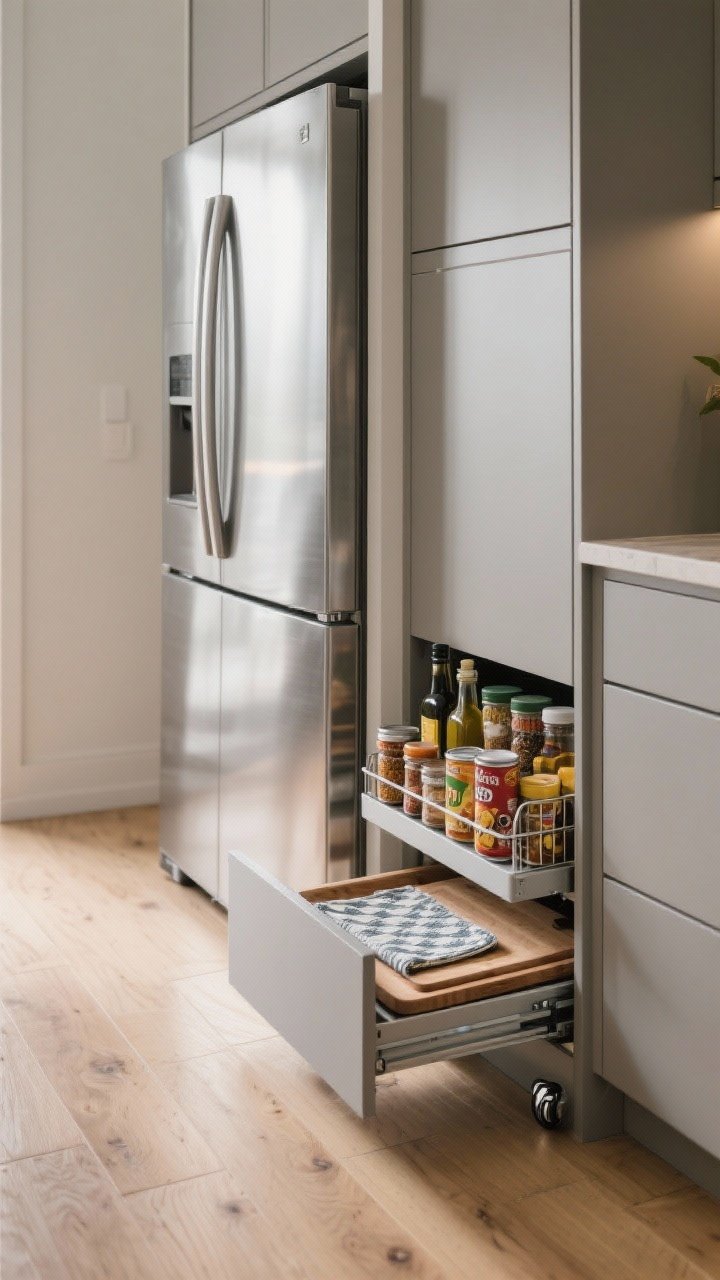
Those weird skinny spaces next to your fridge? Goldmines. Install filler pull-outs or tap into the budget-friendly toe-kick zone below cabinets.
Hidden Space, Big Payoff
- Filler pull-outs: Spice jars, oils, and baking sheets live here rent-free.
- Toe-kick drawers: Slide-out trays for baking sheets, placemats, or extra cutting boards.
- Fridge gap caddies: Narrow rolling carts hold canned goods and snacks—great for small kitchens.
Note: Toe-kick drawers need a carpenter or a decent DIY moment. Measure twice; crumbs will find their way in regardless—vacuum occasionally.

6. Put Your Corners to Work (No More Dead Zones)
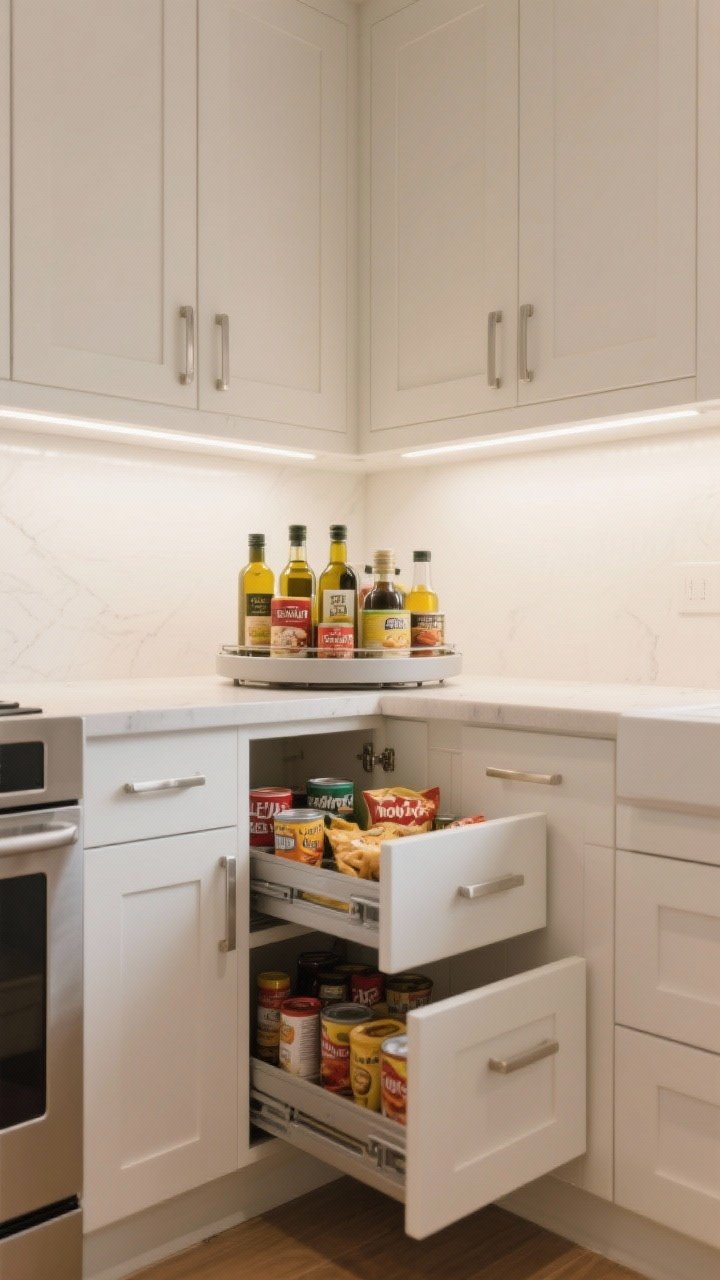
Corner cabinets are where good Tupperware goes to disappear. Time to rescue that space with smarter hardware.
Corner Heroes
- Lazy Susans: Classic for a reason. Perfect for canned goods, oils, and snacks.
- Blind-corner pull-outs: Shelves that slide out in stages so everything is reachable—zero contortion required.
- Diagonal drawers: If you’re renovating, diagonal drawers look custom and hold bigger items.
IMO: If you can only add one thing to a chaotic kitchen, make it a blind-corner pull-out. The space it unlocks is wild.
7. Shelf Smarter: Add Risers, Under-Shelf Baskets, and Adjustable Pegs
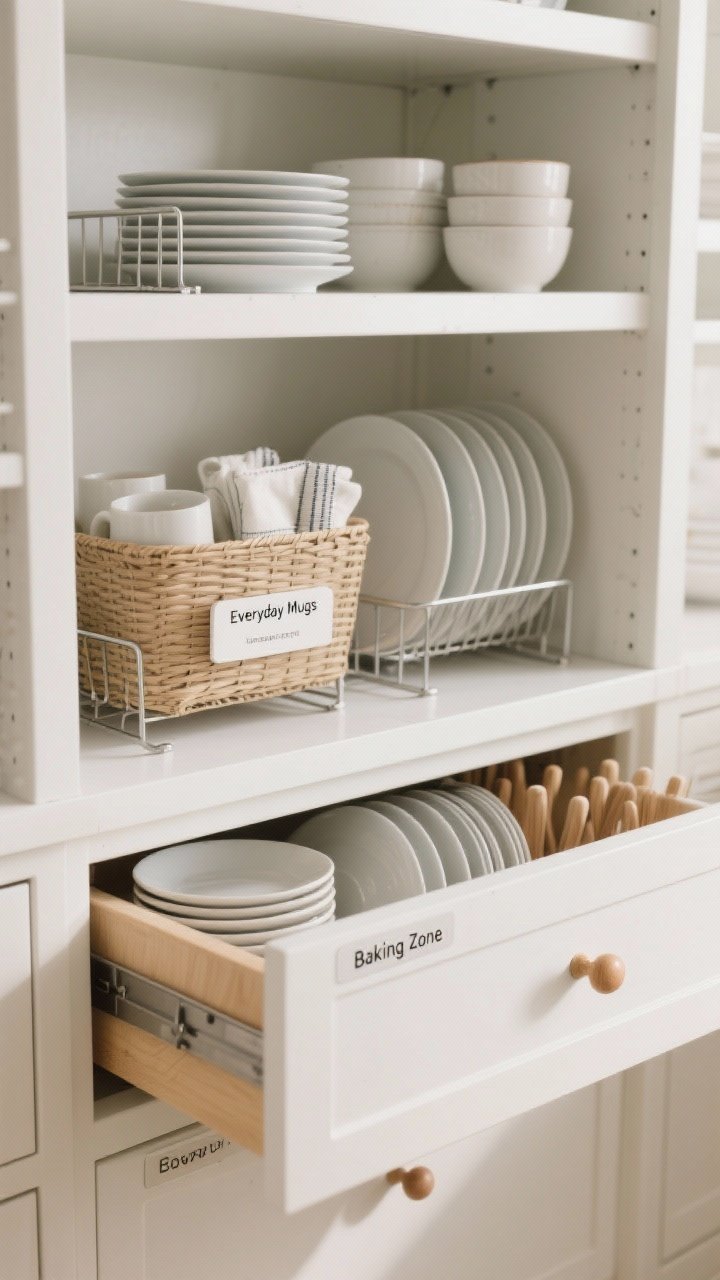
Most shelves are too tall for what you store, leaving that annoying empty space up top. Break it up with layers and custom inserts.
Layer Your Shelves
- Risers: Double-deck your plates and bowls so you use the whole height.
- Under-shelf baskets: Slide onto existing shelves to hold wraps, napkins, or small plates.
- Peg systems: In deep drawers, wooden pegs keep stacks of dishes from sliding around.
Pro tip: Color-code or label shelves lightly—“Everyday Mugs,” “Baking Zone”—so the whole household can actually keep it tidy.
8. Roll With It: Carts, Islands, and Slide-Out Workstations
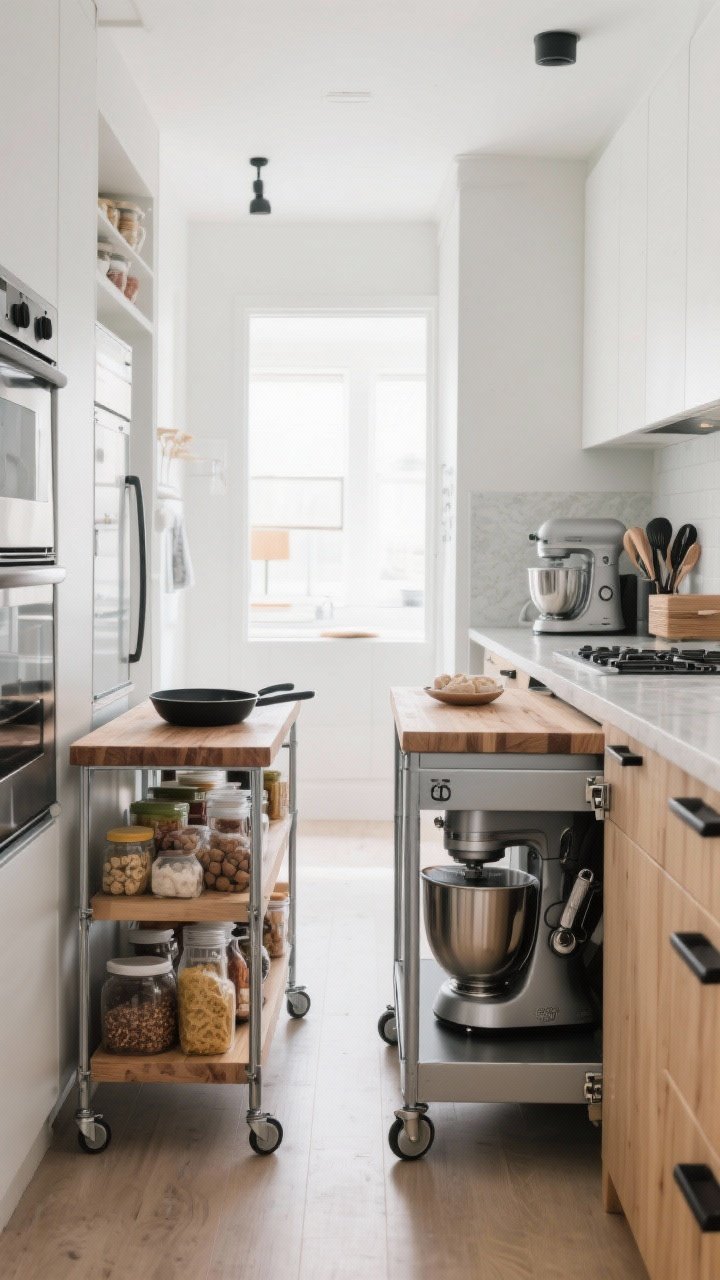
No room for a permanent island? Rolling carts give you surface area and storage that tuck away when you’re done. It’s like having a sous-chef on wheels.
Best Uses for Rolling Storage
- Narrow carts: Fit between appliances or by the entry. Load with pantry staples or baking tools.
- Butcher-block tops: Extra prep space and a place to park hot pans.
- Appliance garages on wheels: Keep your mixer, blender, and attachments together—roll out when needed.
FYI: Locking casters are non-negotiable. Choose one or two finishes that match your hardware so it looks intentional, not dorm-room.
9. Decant, Label, and Zone Like a Grocery Store
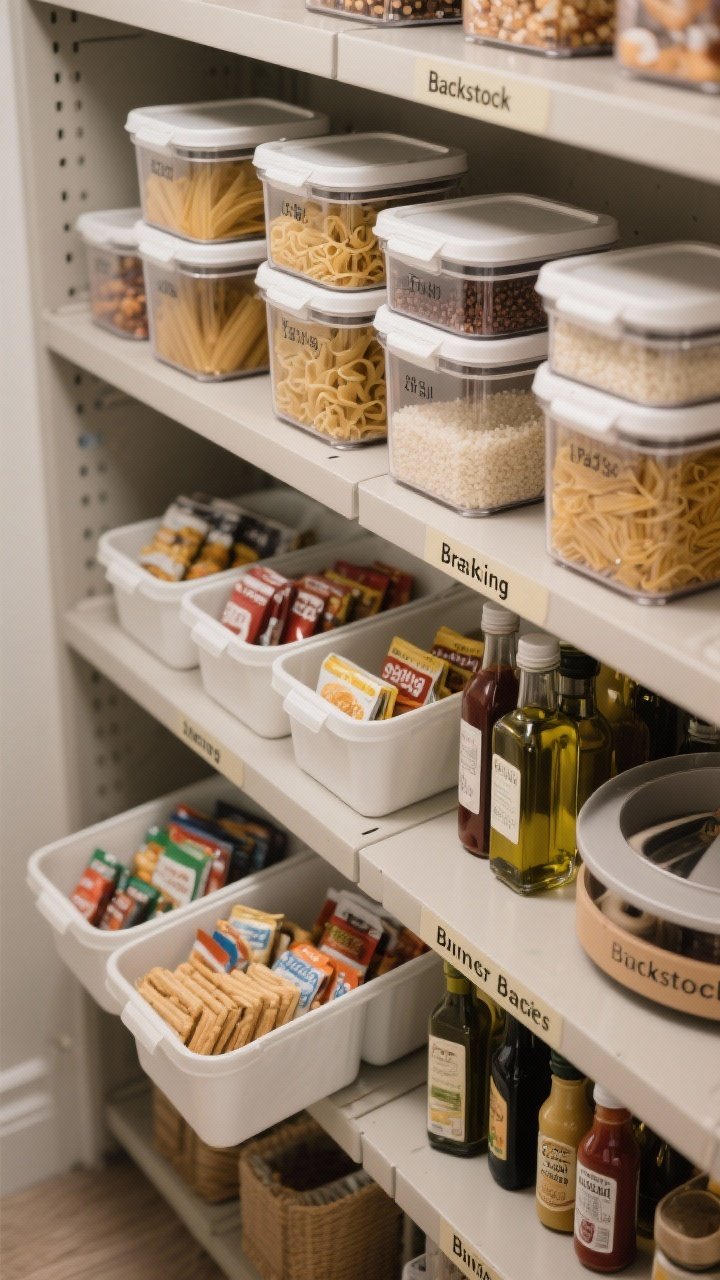
Clutter often isn’t a space issue—it’s a system issue. Decanting and zoning makes everything visible and stops overbuying. Your wallet will thank you.
How to Set Up Your Zones
- Decant dry goods: Clear airtight containers for pasta, rice, and snacks. Uniform shapes = better stacking.
- Label everything: Use simple, washable labels. Include cook times on pasta jars so you’re not guessing.
- Create zones: Baking, breakfast, snacks, dinner bases. Keep frequently used items at eye level.
- Use bins and turntables: Group small items (sauce packets, bars) and corral oils or condiments on a lazy Susan.
Pro tip: Leave a “backstock bin” on a high shelf for duplicates. When it’s full, stop buying that thing. Groundbreaking, I know.
10. Ceiling to Counter: Shelves, Pot Racks, and Tall Cabinets
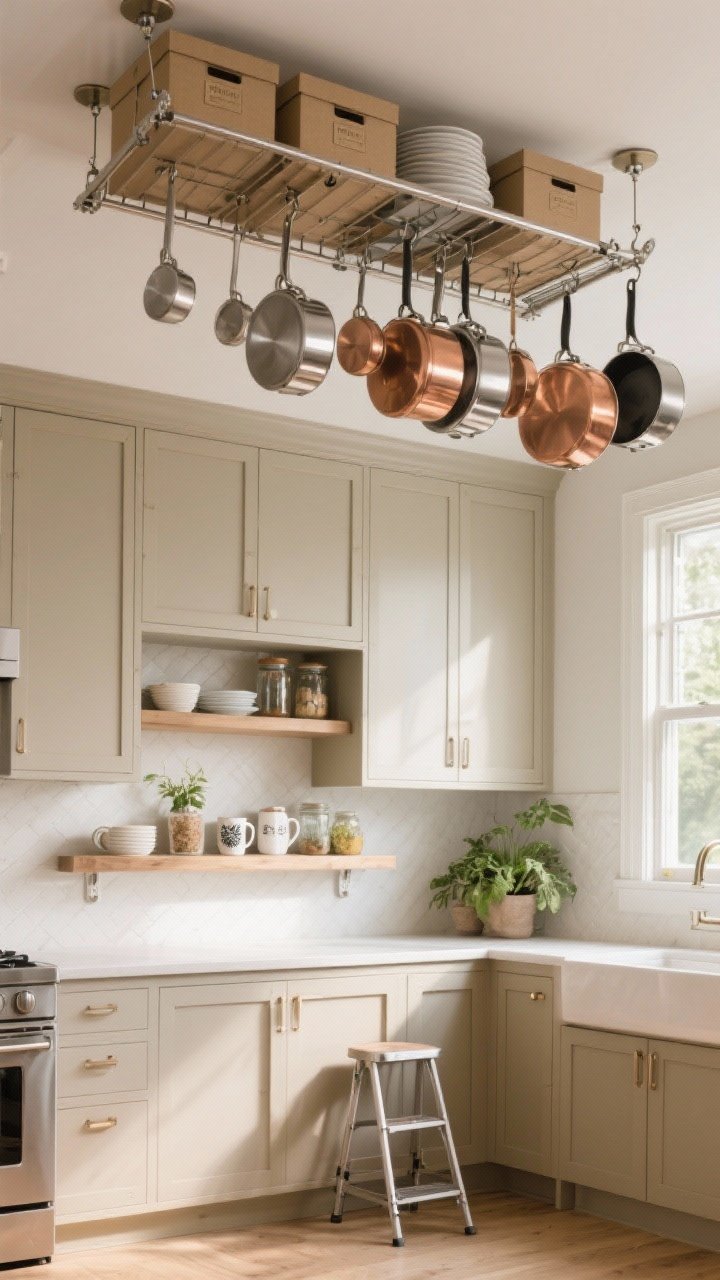
Look up—there’s more storage up there. If your cabinets stop short of the ceiling, you’re missing out on an entire shelf’s worth of space.
Take It Up a Notch
- Extend cabinets upward: Add matching boxes or floating shelves for rarely used serveware.
- Pot racks: Ceiling or wall-mounted racks free up cabinet real estate and look super chef-y.
- Over-window shelves: Bridge small windows with a slim shelf for plants, mugs, or jars.
Safety check: Use proper anchors and studs for pot racks and high shelves. Store lighter or less-used items up top and keep a slim foldable step stool nearby.
Bonus Styling Tips So It Still Looks Chic
- Repeat materials: Match rails, racks, and hardware (matte black, brass, or stainless) to feel cohesive.
- Mix closed and open: Keep everyday workhorses visible and stash mismatched items behind doors.
- Leave breathing room: Negative space is your friend—don’t pack every inch to the max.
Quick Maintenance Routine: Five minutes a day to return things to their zones keeps the whole system humming. Set a phone reminder if you’re the “I’ll do it later” type. Same.
Conclusion
Your kitchen isn’t too small—it’s just under-organized. Start with one or two ideas that fit your space, like a spice pull-out or wall rail, and build from there. In a week, you’ll open your cabinets without flinching—and maybe even enjoy cooking again. Wild concept, right?


