
10 Smart Kitchen Storage Ideas Designers Swear by (and You’ll Love)
Let’s be real: the kitchen is where clutter goes to flex. Lids rebel, spices vanish, and Tupperware multiplies like rabbits. The good news? Designers have clever tricks to tame it all without turning your space into a boring storage bunker. Below, you’ll find 10 smart kitchen storage ideas designers swear by—easy to implement, renter-friendly options included. Ready to make your kitchen feel twice as organized without a remodel? Let’s dive in.
1. Elevate With a Two-Tier Strategy

Vertical space is the unsung hero of kitchen storage. If your cabinets and counters feel crowded, look up. Designers love a two-tier strategy for maximizing every inch—inside cabinets, on counters, even under sinks.
Tired of snacking when you’re not even hungry? This reset helps you stop the loop and feel back in control.
A simple reset for moments when cravings take over. Easy to use, easy to repeat, and designed to help you feel satisfied instead of stuck.
Try These
- Stacking shelves inside cabinets: perfect for plates and bowls you reach for daily.
- Two-tier turntables for spices or condiments: twice the access, zero digging.
- Expandable under-sink racks that work around the pipes. It’s chaos down there—tame it.
Bonus: Go for clear or wire versions so the look stays airy, not bulky.
2. Go Deep With Drawer Inserts (Custom Look, Not Custom Cost)

Designers adore drawers because they bring everything to you. But the magic is in the inserts. They keep utensils, lids, spices, and even snacks from turning into a junk drawer situation.
Designer-Favorite Inserts
- Adjustable bamboo dividers for utensils and gadgets—slide to fit your stuff.
- Tilted spice trays so labels face up. No more spice Jenga.
- Lid organizers that sit in deep drawers: game-changer for food storage chaos.
- Knife blocks that live inside a drawer: safer, sleeker, more counter space.
FYI: Measure your drawers and map the layout first. That five-minute prep will make your inserts feel custom.
3. Rethink Your Pantry With Zones

Pantries aren’t just for hoarding pasta. Designers create zones so nothing gets lost behind the lentils. It makes restocking mindless and meal prep faster.
Transform Your Home With 7,250+ Stunning Landscaping Designs—No Expensive Designers Needed!
- 🌿 Access 7,250+ stunning landscaping designs.
- 💰 Save thousands—no pro designer needed.
- 🏡 Plans for gardens, patios, walkways, and more.
- ✨ Simple, beginner-friendly DIY layouts.
- 🛠️ Customize any design to fit your yard.
Zone Ideas That Work
- Breakfast zone: cereals, spreads, granola, honey, tea.
- Grab-and-go: snacks and bars in bins for quick reach.
- Baking corner: flour, sugar, baking powder, sprinkles—clear canisters, labeled.
- Backstock bin: extras of oils, sauces, or broths so you always know what’s left.
Pro tip: Use deep bins on lower shelves and shallow bins up high so items don’t disappear into the void. And yes, labels matter—keep them simple and consistent.
4. Mount It: Rails, Racks, and Magnetic Strips
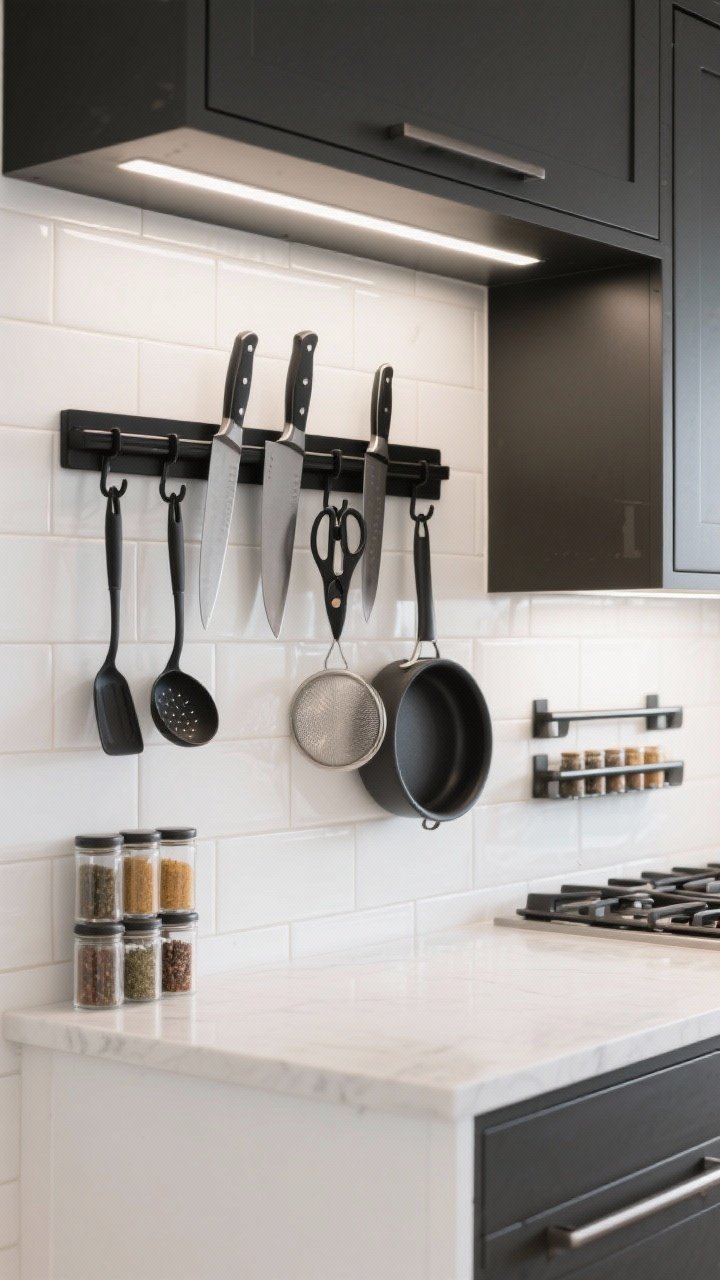
When counter space is precious, move essentials to the walls. Designers love mounted storage because it’s both functional and pretty when styled right.
Great Wall Moves
- Magnetic knife strips: pro look, safer for blades, frees up space.
- Hanging rails with hooks: corral ladles, scissors, strainers, and small pans.
- Pot lid bars mounted inside cabinet doors: sneakily smart.
- Spice shelves near the stove: like a mini apothecary, but edible.
Keep it cohesive: pick one metal finish and repeat it so the wall moment feels intentional, not random.
5. Double-Duty Islands and Carts

No built-in island? No problem. Designers use rolling carts and storage islands to add drawers, shelves, and prep space all at once. They’re MVPs for renters and small kitchens.
What to Look For
- Open lower shelves for baskets full of produce or mixing bowls.
- Closed drawers to hide tools, napkins, and awkward gadgets.
- Drop leaves for instant extra counter space when needed.
- Locking wheels so it doesn’t drift mid-chop. Awkward.
Style matters too—wood warms things up, stainless feels pro. Choose what matches your vibe and your cookware.

6. Use the Backs of Doors Like a Pro

Designers look at doors—cabinet doors, pantry doors, even the sides of fridges—and see hidden real estate. The trick is to use low-profile systems that don’t block the door from closing.
Door-Back Heroes
- Shallow racks for spices, oils, and foil/plastic wrap.
- Over-the-door baskets in pantries for snacks, onions, or bags.
- Command hooks for oven mitts, aprons, and measuring cups.
- File organizers as pan or cutting board holders mounted inside doors.
Check clearance before installing: close the door gently to confirm nothing collides with shelves inside.
7. Corral Appliances With Zones and Lifts
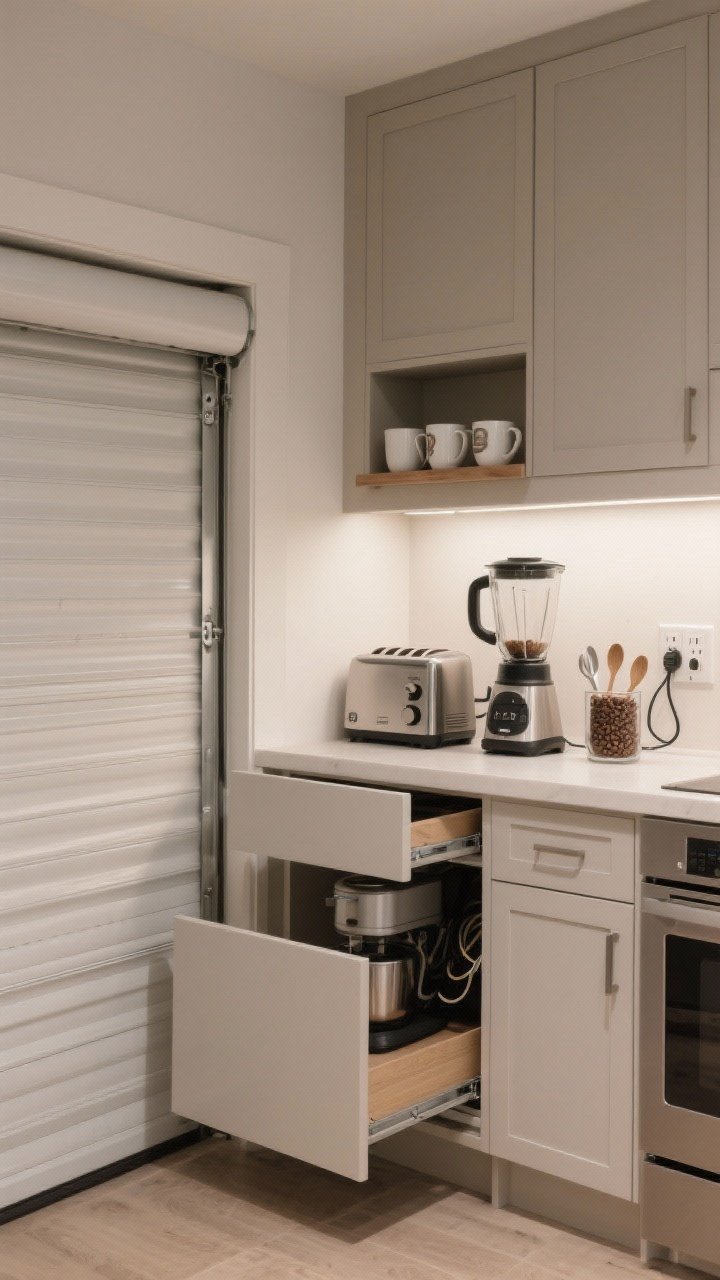
Bulky appliances eat counter space. Designers either hide them smartly or display them in a way that feels intentional. The key is creating an appliance zone and sticking to it.
Make It Work
- Appliance garage: a cabinet with a roll-up or lift door near outlets for toasters, blenders, and coffee gear.
- Pull-out shelves: great for stand mixers—easy access, easy put-away.
- Lift-up mixer shelves: if you bake a lot, these are life-changing. Heavy mixer, zero heavy lifting.
- Coffee station: mugs on a shelf, beans in an airtight canister, spoons in a cup. Done.
Keep cords tidy with cable clips or a slim cable box. Cluttered wires ruin the vibe fast.
8. File, Don’t Stack: The Vertical Pan Revolution

Stacking pans and cutting boards is chaos. Designers “file” them vertically so each piece is grab-and-go. It’s simple, it’s smart, and you’ll wonder why you waited.
How to Set It Up
- Adjustable pan racks or magazine holders for baking sheets and cutting boards.
- Dividers in lower cabinets: perfect for lids, trays, and cooling racks.
- Plate racks if you use one size often—looks chic and saves time.
Place the heaviest items waist-high so you’re lifting with less effort. Your back will thank you.
9. Decant the Essentials (Strategically, Not for Instagram)

Decanting can be a chore—but done right, it’s a designer-approved way to streamline and reduce waste. The trick is to only decant what you actually use and to keep it practical, not precious.
Smart Decanting Rules
- High-use items only: rice, oats, pasta, cereal, flour, sugar.
- Airtight containers labeled with cook times or expiration dates.
- Uniform sizes so they stack and line up neatly.
- Secondary bins for the rest—snacks, packets, pouches—no need to decant everything.
IMO, clear containers with wide mouths are best. If it’s annoying to refill, you won’t use it.
10. Style Your Open Shelves With Hidden Storage
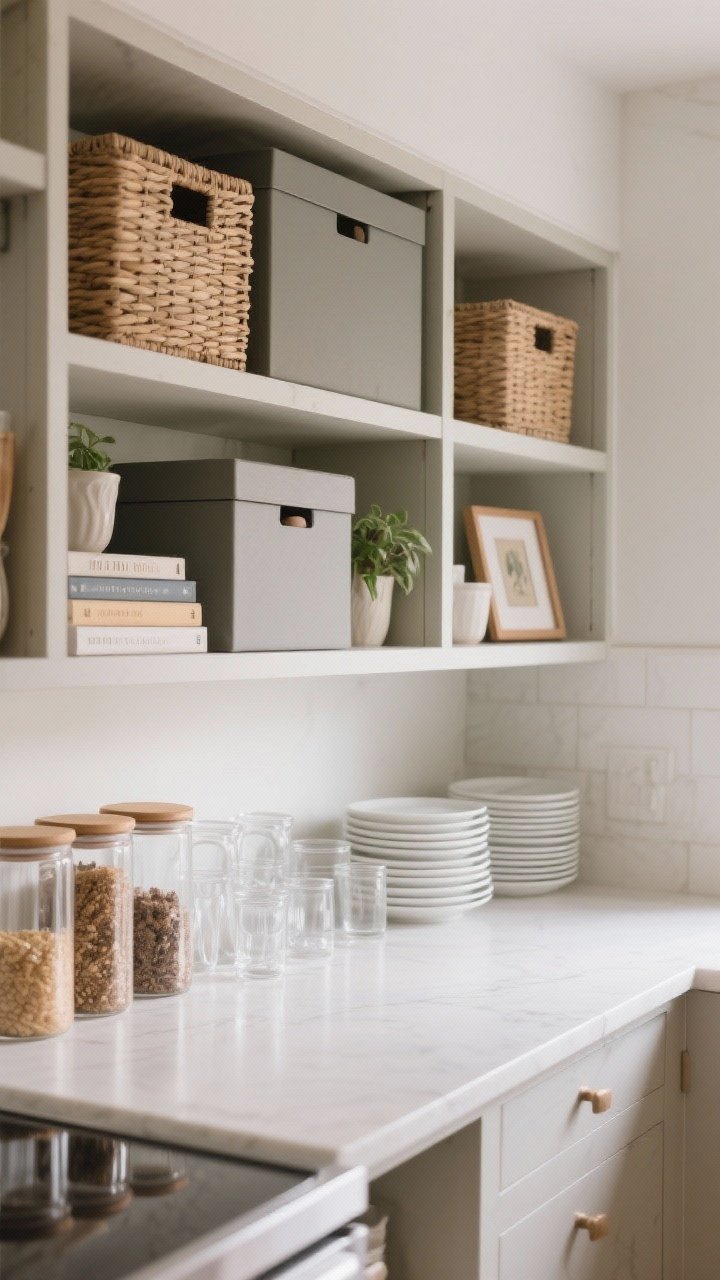
Open shelves are gorgeous but can look messy fast. Designers sneak in closed containers and layer in everyday pieces so it’s pretty and practical.
Open Shelf Formula
- Closed baskets or lidded boxes for snacks, chargers, or small tools.
- Canisters for tea, coffee, or baking staples—stackable if possible.
- Everyday plates and glasses front and center—these double as decor.
- One “moment” per shelf: a plant, cookbook stack, or small art piece to keep it curated.
Stick to two or three materials—like glass, wood, and matte ceramic—so it doesn’t look like a yard sale.
Quick Win Checklist
- Measure your drawers and shelves before buying inserts or bins.
- Label zones and containers—simple fonts, consistent style.
- Group items by task: coffee, baking, lunch prep, snacks.
- Use risers and turntables to see everything at a glance.
- Edit duplicates ruthlessly. You don’t need four can openers. You just don’t.
There you have it—10 smart kitchen storage ideas designers swear by that actually work in real homes. Start with one or two wins (drawer inserts, vertical pan storage) and build from there. Your kitchen’s about to feel calmer, cleaner, and way more you. Now go open that cabinet without flinching.


