Viral Dollar Store Seed Starting Hacks That Actually Work
Let’s skip the fluff: you can start seeds for cheap, and yes, the dollar store can absolutely help. The trick? Pick the right items and use them the right way. I’ve tried these hacks, tweaked them, and tossed the duds—so you only get the ones that actually deliver. Ready to turn $10 into a tiny jungle on your windowsill?
Shop Smart: What’s Worth Grabbing (And What’s Not)
Not everything in the dollar aisle is a bargain. Some things rock, some things flop. Here’s the cheat sheet.
Tired of snacking when you’re not even hungry? This reset helps you stop the loop and feel back in control.
A simple reset for moments when cravings take over. Easy to use, easy to repeat, and designed to help you feel satisfied instead of stuck.
- Must-buys: Clear storage bins (instant greenhouses), aluminum baking pans, plastic cups, zip-top bags, dish pans, spray bottles, binder clips, masking tape, plastic wrap, coffee filters, and LED clip lights (if you get lucky).
- Usually fine: Peat pellets, coco coir bricks, seed labels, cheap measuring spoons, hydrogen peroxide, isopropyl alcohol.
- Hard pass: Off-brand “potting soil” that looks like mulch, mystery seed packets with no dates, and flimsy grow lights that scream mood lighting, not photosynthesis.
Why This Matters
Good seeds and decent light set your success rate. Containers and humidity domes? That’s where the bargains shine.
DIY Mini Greenhouses That Keep Seeds Cozy
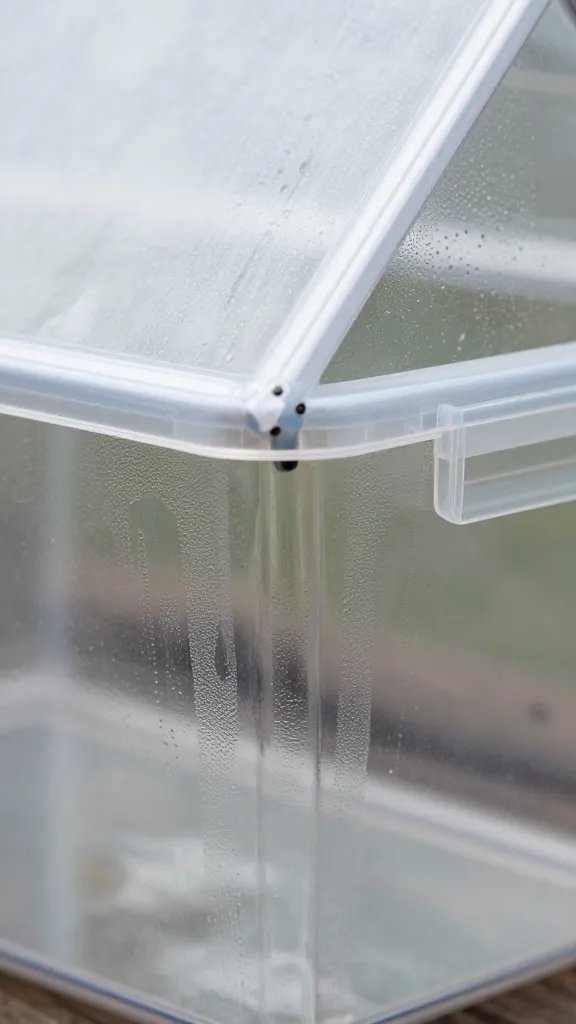
Humidity turns sprouting from guesswork into science. You can create a stable, warm, moist environment with a few $1 items.
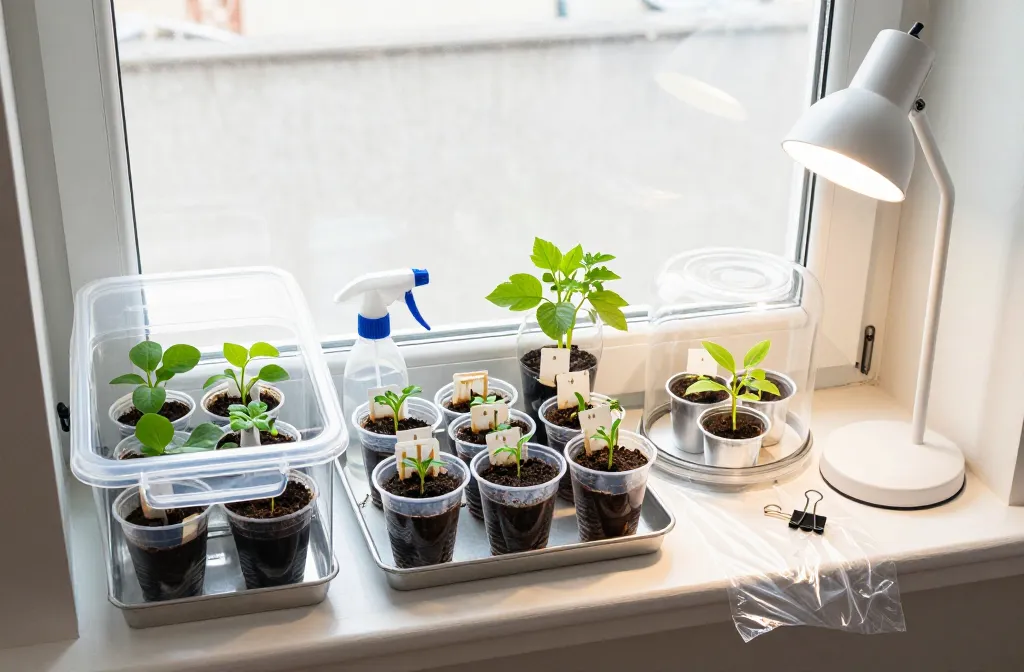
- Clear Storage Bins + Baking Trays: Line an aluminum baking pan with paper towels, add your seed cups or cell packs, and pop a clear bin over the top like a lid. Instant humidity dome with room for air.
- Clamshell Food Containers: Those salad or pastry clamshells make perfect micro-domes. Poke 4-6 tiny holes up top so you don’t grow a mold farm.
- Zip-Top Bag Domes: Put a cup or pot inside a gallon zip bag, blow a little air in, and seal 80%. Cheap, cheerful, and wildly effective for peppers and herbs.
Pro Tip
Vent, always. Open domes a crack after germination. Seedlings need air flow or they stretch and sulk.
Containers: Free (Or Almost) And Perfectly Functional
You don’t need fancy trays. You need drainage and structure. That’s it.
Transform Your Home With 7,250+ Stunning Landscaping Designs—No Expensive Designers Needed!
- 🌿 Access 7,250+ stunning landscaping designs.
- 💰 Save thousands—no pro designer needed.
- 🏡 Plans for gardens, patios, walkways, and more.
- ✨ Simple, beginner-friendly DIY layouts.
- 🛠️ Customize any design to fit your yard.
- Plastic Cups: Drill or poke 3-5 holes in the bottom. Use two-cup method: one cup with holes nests inside a solid cup for bottom watering.
- Egg Cartons: Use only the plastic ones, not paper. Paper dries unevenly and falls apart. Poke holes, set in a tray, and go.
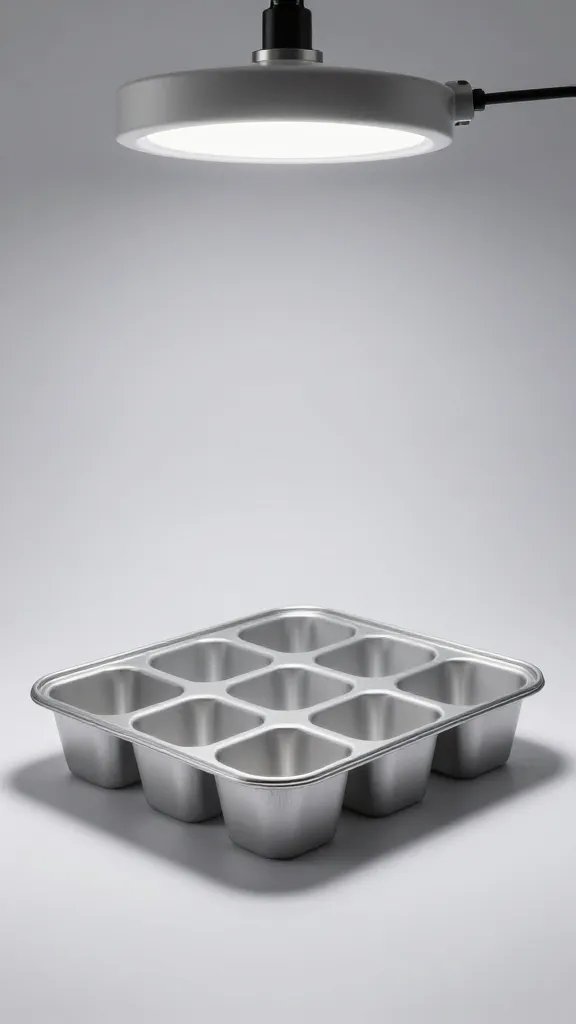
- Aluminum Pans: Act as sturdy catch trays. Add a wire cooling rack (also from the dollar store) to elevate pots for better drainage.
- Paper Towel Tubes: Slice into 2-3 inch rings, set them on a tray, line inside with a coffee filter strip, fill with mix. Biodegradable, tidy, adorable.
Label Like A Pro
Masking tape + a Sharpie beats most flimsy tags. Stick labels on the tray edge so water doesn’t smear the ink. FYI, write the sowing date too—future you will thank you.
Seed-Starting Mix On A Budget (That Actually Drains)
The worst rookie mistake? Using heavy garden soil or bargain “potting soil” that compacts like a brick. Mix your own with dollar-store finds.
- Base: Coco coir brick (hydrated) or peat pellets broken up.
- Aeration: Perlite if you can find it; if not, mix in a bit of coarse sand from craft supplies. Aim for a light, fluffy texture.
- Extras: A pinch of vermiculite if available helps moisture balance.
Sanitation Hack
Mix 1 teaspoon hydrogen peroxide (3%) per cup of water. Lightly moisten your mix with it to knock back mold spores. Don’t overdo it—just the first watering.
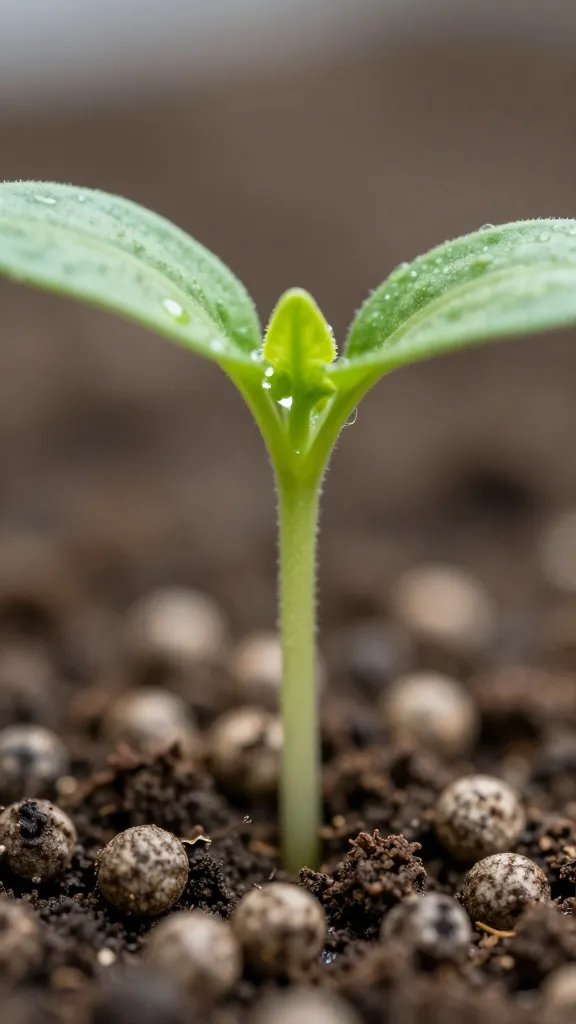
Warmth, Light, And Water—The Big Three
If your seeds don’t sprout, it’s usually a warmth thing. If they sprout and flop, it’s usually a light thing. Watering? That’s where damping-off sneaks in.
- Warmth: Use the top of your fridge or a bathroom with stable temps. Slip trays inside clear bins to trap a few extra degrees. Pepper and tomato seeds love 70-80°F.
- Light: Cheap LED shop lights beat overpriced “grow” bulbs if they’re 4000–6500K. Place 2-3 inches above seedlings. If all you have is a bright window, rotate daily and lower the light as close as possible. IMO, add a dollar-store clip light to fill shadows.
- Water: Bottom water using baking pans as reservoirs. Let the soil wick for 10-15 minutes, then drain. Top watering with a spray bottle only for the first few days.
Stretch Test
If seedlings look tall and spindly, the light sits too high. Move it closer. No mercy.

Germination Shortcuts That Actually Work
Want faster sprouts? Use these tricks.
- Paper Towel “Pre-Sprout” Method: Seeds go between moist (not dripping) paper towels inside a zip bag with air. Keep warm. Transplant the moment you see a tiny root.
- Scarify Tough Seeds: Rub morning glory or nasturtium seeds on a nail file. You’ll see faster, more even sprouting.
- Soak Overnight: Peas, beans, and beets love a quick soak. Add a drop of hydrogen peroxide to keep water clean.
Airflow, Mold Control, And The Dreaded Damping-Off
Fuzzy white growth? Seedlings keeling over? You caught damping-off. Beat it with these small tweaks.
- Vent Early: As soon as seeds sprout, crack domes or remove them fully.
- Fan It: A small USB fan from the dollar aisle works. Gentle breeze builds stronger stems.
- Cinnamon Dusting: Lightly sprinkle ground cinnamon on the surface. It’s a mild antifungal and smells like you baked victory.
- Water Timing: Mornings only. Let the surface dry slightly between waterings.
When To Fertilize
After the first set of true leaves, feed weekly with diluted all-purpose liquid fertilizer (quarter strength). Seedlings don’t need a buffet—just a snack.
Transplant Time: Don’t Shock Your Babies
You grew them. Now don’t nuke them with sun and wind. Harden off slowly.
- Hardening Off: Start with 1-2 hours of bright shade outside, then increase daily over a week.
- Dollar-Store Shade: Use mesh laundry bags or sheer curtains as sun diffusers on harsh days.
- Upgrade Pots: Move into 16–18 oz cups with drainage if your last frost date still lurks. Bottom water and keep the light close.
Frequently Asked Questions
Can I use dollar-store seed packets?
Sometimes. Check for a packed-for date and a botanical name on the packet. If both look legit and the seeds aren’t ancient, try them. For fussy crops (onions, celery, peppers), I’d buy name-brand seeds, IMO.
Do I really need special grow lights?
No. Bright, cool-white LED shop lights work great. Keep them 2-3 inches above seedlings and run 14-16 hours a day. Weak light equals leggy plants—no negotiating there.
What’s the best cheap seed-starting mix?
Hydrate coco coir, fluff it, and mix in perlite if you can. If you only have peat pellets, break them up and add a little vermiculite. Keep it airy. Heavy soil suffocates roots and invites mold.
How do I stop mold under humidity domes?
Vent early, water less, and aim a small fan across the surface. You can mist with a weak hydrogen peroxide solution once, then switch to plain water. Cinnamon on the surface helps, too.
When do I fertilize seedlings?
Wait for the first true leaves, then feed a diluted liquid fertilizer every 7-10 days. Start at quarter strength. Overfeeding burns tender roots faster than you can say “oops.”
Why are my seedlings falling over?
That’s damping-off or weak stems from poor light. Increase airflow, remove the dome, water in the morning, and drop the light closer. If the stem pinches at soil level, start over with cleaner mix and better ventilation.
Conclusion: Small Budget, Big Harvest
You don’t need pricey gear to start strong, healthy seedlings. You need light, airflow, warmth, and a few clever dollar-store upgrades. Keep it simple, keep it clean, and tweak as you go. Do that, and your spring garden will look like you robbed a nursery—in the best way possible. FYI: your wallet will still be smiling.