10 Affordable Kitchen Storage Ideas That Look Custom-built (without the Designer Price)
You want a kitchen that looks like it was crafted by a bespoke cabinet maker, but your budget is over there eating instant ramen. Good news: you don’t need a massive remodel to get that custom, high-end vibe. With a few smart upgrades and some sneaky tricks, you can make your kitchen look tailored, organized, and expensive—without the scary invoice.
Let’s turn that daily “Where does this go?” chaos into a space that’s functional, stunning, and low-key brag-worthy.
Tired of snacking when you’re not even hungry? This reset helps you stop the loop and feel back in control.
A simple reset for moments when cravings take over. Easy to use, easy to repeat, and designed to help you feel satisfied instead of stuck.
1. Build-In Vibes With Stackable Pantry Bins + Labels

Want your pantry to look like a magazine spread? Use clear stackable bins in uniform sizes, and label everything. It gives those loose-packed shelves a cohesive, custom-built feel—minus the custom bill.
How to Pull It Off
- Choose one style of bin or basket and commit. Mixed styles look messy fast.
- Stick with square or rectangular bins to maximize every inch.
- Use bin clips or vinyl labels with clean fonts for that pro vibe.
- Decant bulk items like flour, pasta, and snacks into airtight containers.
Pro tip: Line your shelf edges with a thin wood trim strip and paint it to match your cabinets. It instantly looks built-in, and it’s a $15 upgrade.
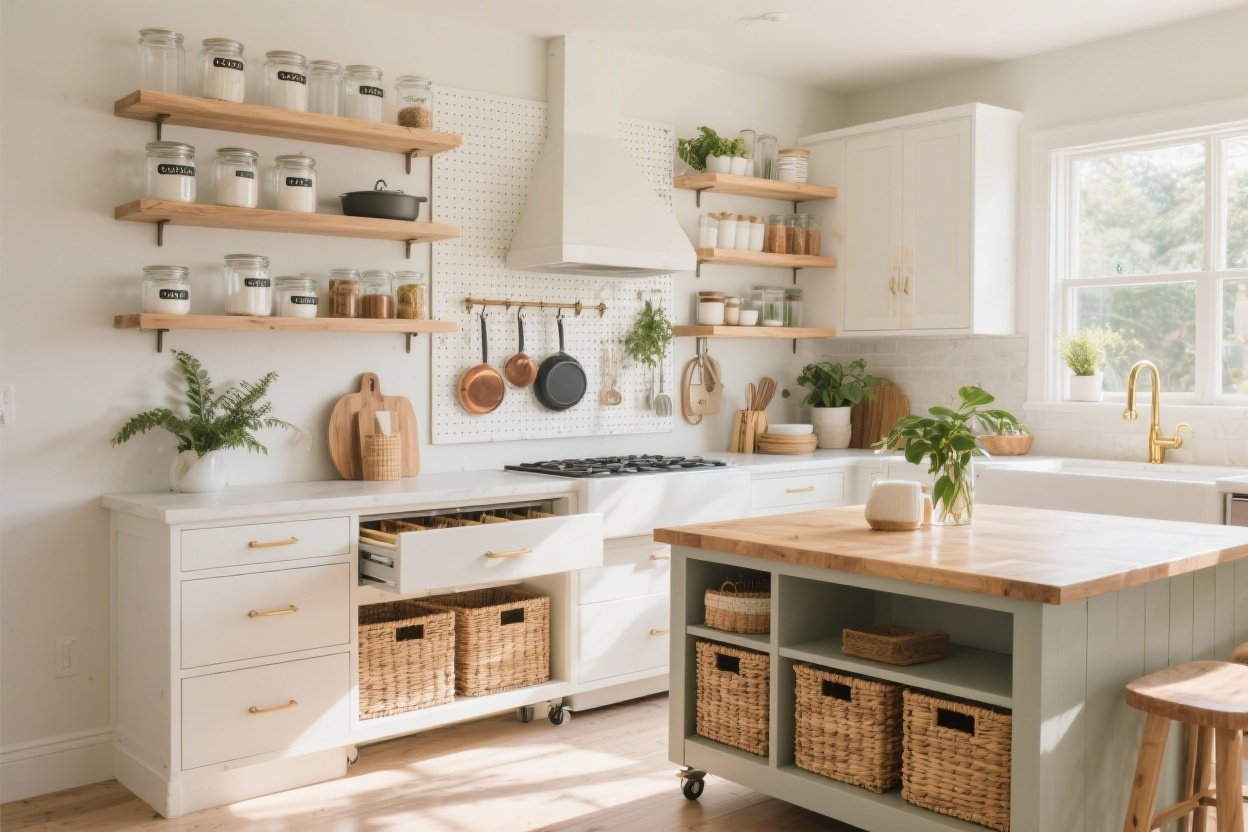
2. Fake a Custom Range Wall With Rail Systems

Designers love a tailored cooking zone with hooks, rails, and neatly corralled tools. You can replicate it with a wall-mounted rail system above the range or along your backsplash.
What to Hang
- Frequently used tools: ladles, spatulas, tongs
- Mini shelves for oils, salt, pepper
- Small cutting boards or a pot lid holder
Keep the palette tight: black or brass rails with matching hooks. It looks curated, functions hard, and FYI—no rummaging in drawers mid-sauté.
Transform Your Home With 7,250+ Stunning Landscaping Designs—No Expensive Designers Needed!
- 🌿 Access 7,250+ stunning landscaping designs.
- 💰 Save thousands—no pro designer needed.
- 🏡 Plans for gardens, patios, walkways, and more.
- ✨ Simple, beginner-friendly DIY layouts.
- 🛠️ Customize any design to fit your yard.
3. Install Toe-Kick Drawers (Hidden Storage = Chef’s Kiss)

That skinny space under your base cabinets? It’s prime real estate. Add toe-kick drawers for baking sheets, cutting boards, placemats, or pet bowls.
Why It Feels Custom
- Invisible profile keeps the lines clean.
- Maximizes dead space—like a secret room for kitchen stuff.
- Great for tiny kitchens where every inch counts.
DIY kits are available, or a handy person can retrofit existing base cabinets. Choose soft-close hardware to elevate the feel.
4. Add Shelf Risers and Under-Shelf Baskets for Vertical Magic
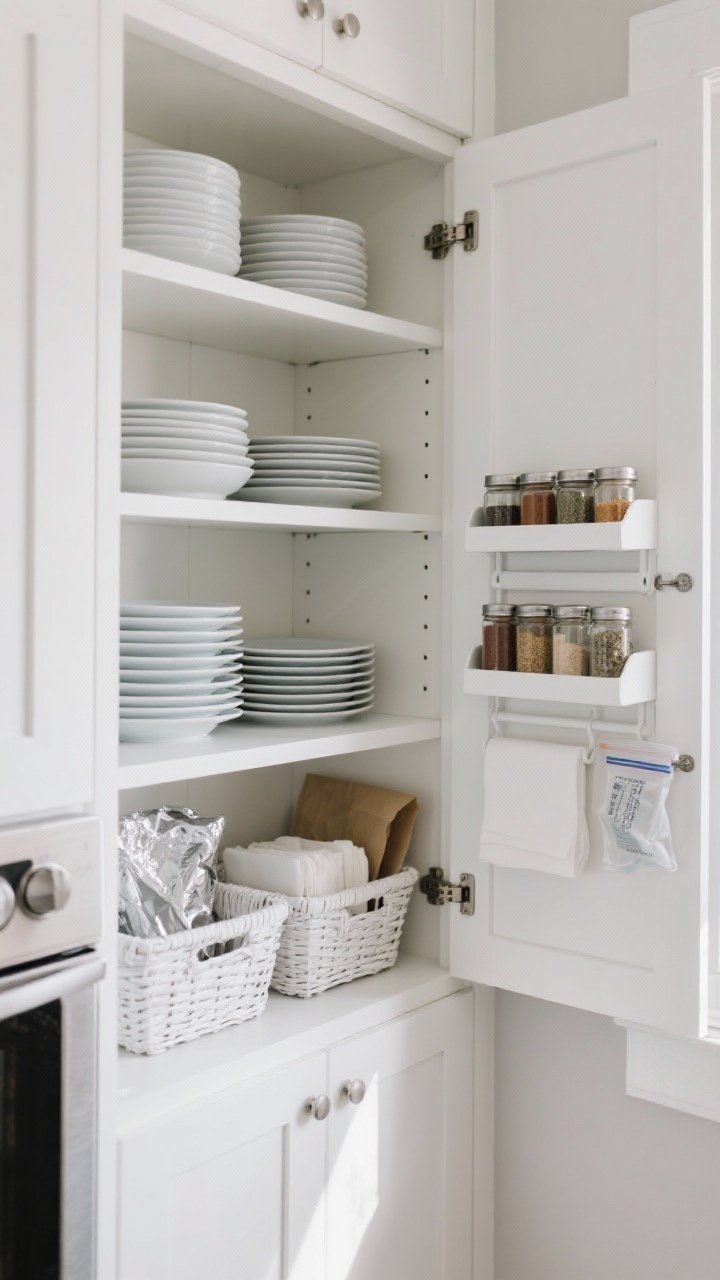
If your shelves have tall gaps, you’re losing storage. Add shelf risers and clip-on under-shelf baskets to double your capacity without installing more cabinets.
What Works Best
- Risers for plates and bowls—no teetering stacks.
- Under-shelf baskets for wraps, napkins, or mugs.
- Cabinet door racks for lids, spices, or zip bags.
Match the color to your shelves (white on white, wood on wood) to keep it looking like it came with the kitchen.
5. Turn a Basic Island Into a Storage Powerhouse
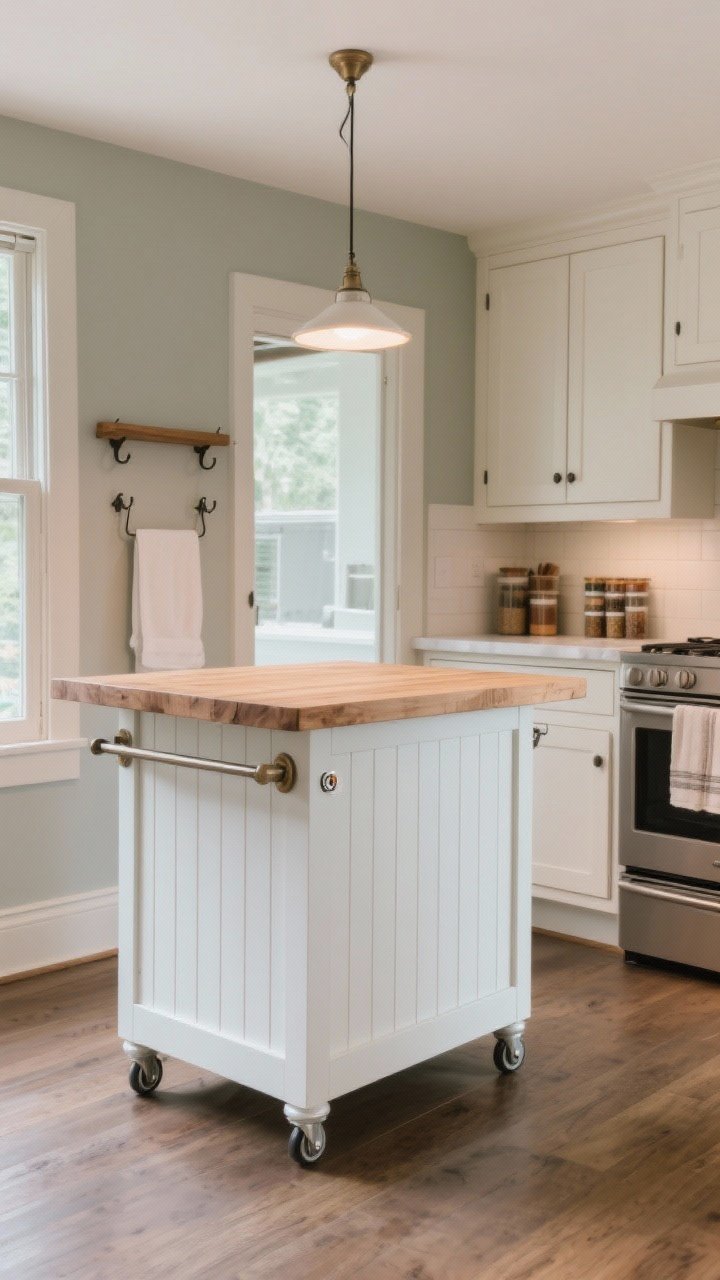
No built-in island? No problem. Grab a simple cart or off-the-shelf island, and add custom-looking upgrades that make it feel integrated.
Upgrades That Look $$$
- Paint or stain to match your cabinets or contrast on purpose.
- Add trim or beadboard to the sides for texture.
- Swap the top for a butcher block or stone-look slab.
- Mount towel bars, hooks, and a spice rail to the ends.
Finish with casters you can lock. Mobile when you need it, stable when you don’t—very custom, IMO.

6. Use Pull-Outs Everywhere (Drawer Dividers, Too)

Nothing says “custom kitchen” like smooth pull-outs and perfectly fitted dividers. Retrofitting these inside standard cabinets is cheaper than new cabinetry—and way more user-friendly.
Where to Install
- Lower cabinets: full-extension pull-out trays for pots, pans, and small appliances.
- Under sink: U-shaped caddy to dodge the plumbing and corral cleaners.
- Drawers: knife blocks, utensil trays, spice inserts, and lid organizers.
Choose wood or bamboo inserts for that upscale look, or black metal for a modern vibe. Either way: no more digging for the colander.
7. Create a Built-In-Looking Coffee or Tea Zone
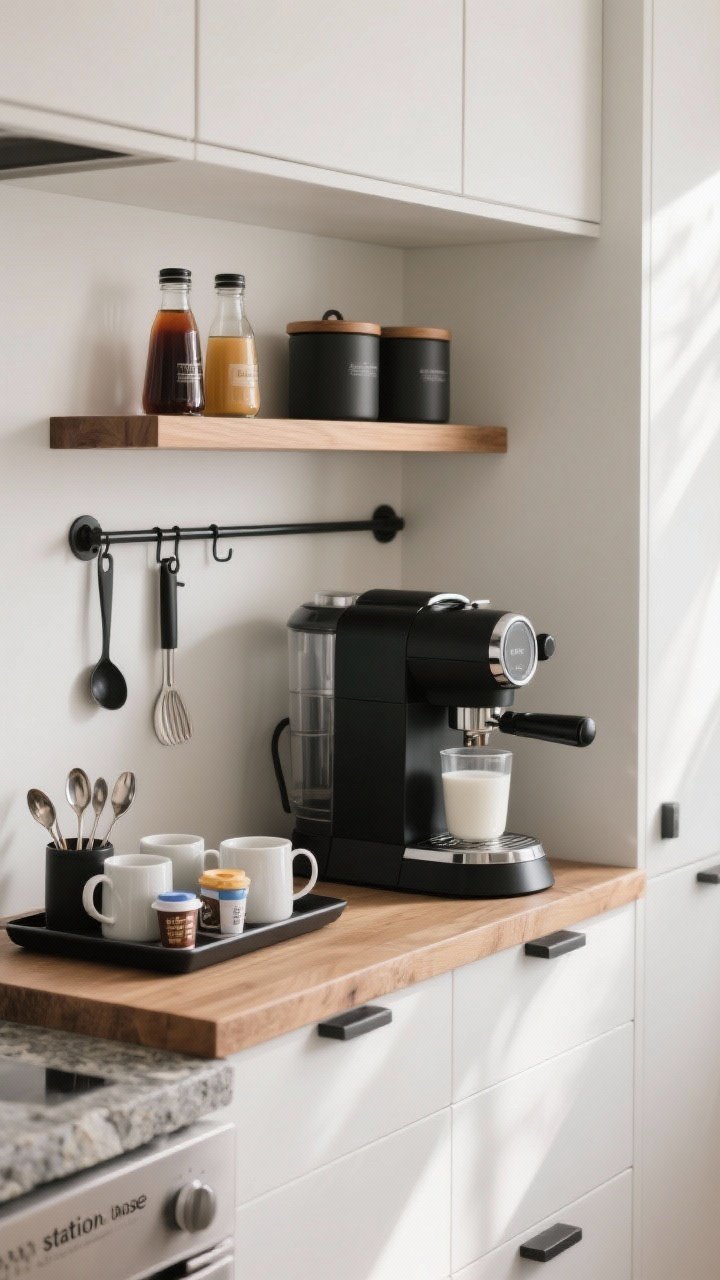
Corral all your caffeine chaos in one spot and make it look intentional. A mini beverage station feels custom and keeps the morning traffic flow under control.
How to Style It
- Use a tray or shallow drawer for mugs, spoons, sweeteners, and pods.
- Add a floating shelf above for syrups and canisters.
- Mount a small rail for measuring spoons or a milk frother.
- Place a stone or wood slab beneath the machine as a “station base.”
Keep everything within arm’s reach and in matching containers. Bonus points if you decant tea bags into acrylic dividers. Yes, you’re fancy now.
8. Go Ceiling-High With Faux Built-In Shelving
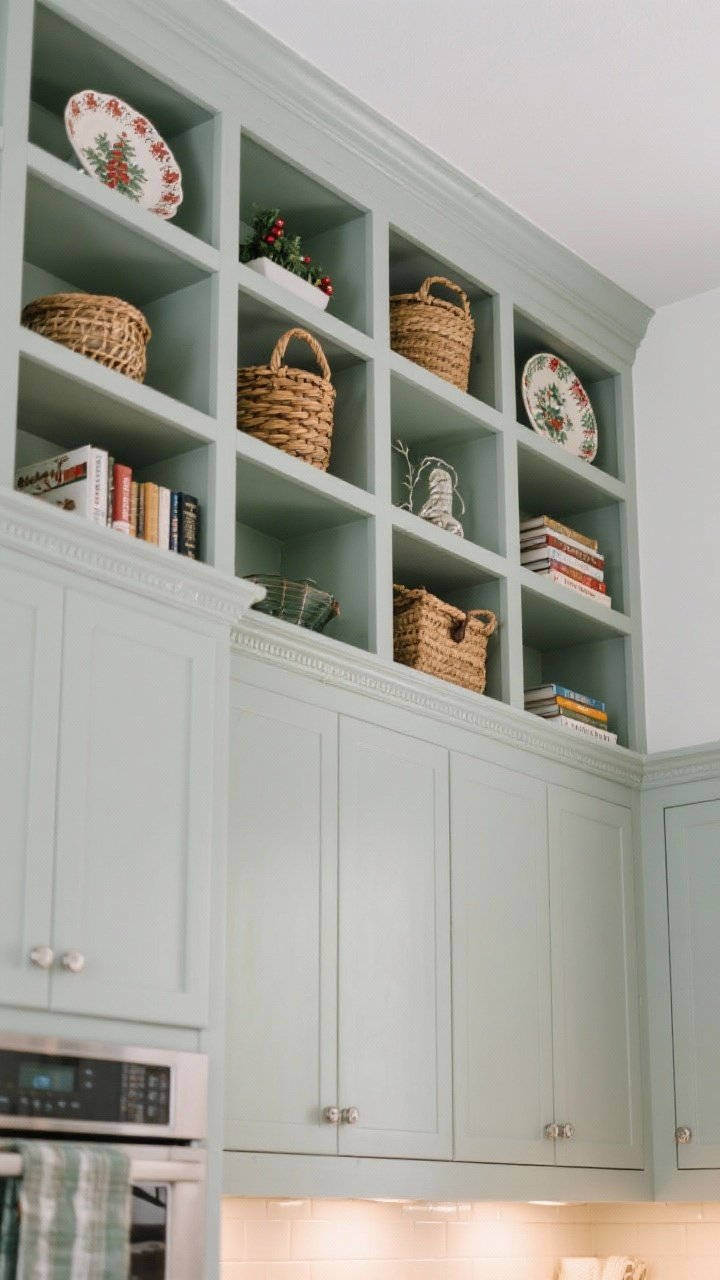
Upper cabinets that stop short of the ceiling can look choppy. Extend the look upward with painted shelving or boxy open cubes that match your cabinets for that custom, ceiling-to-crown finish.
What to Store Up Top
- Occasional-use items: holiday platters, vases, party glassware.
- Pretty baskets with lids for lesser-used tools or linens.
- Cookbooks stacked horizontally for a styled look.
Paint shelves the same color as your cabinetry and add a simple crown molding strip. Suddenly: designer kitchen energy.
9. Use Pegboards and Inside-Door Storage Like a Pro
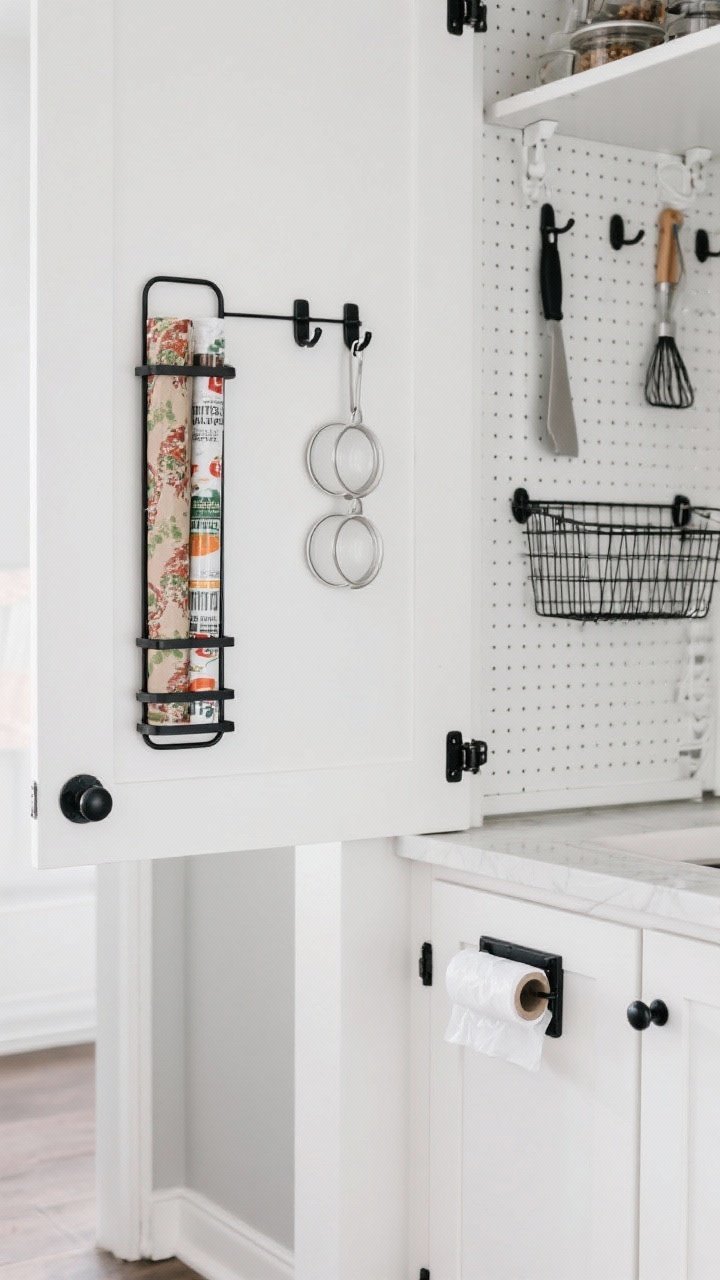
Designers love hidden organization. Use the insides of cabinet doors and pantry walls for pegboards, shallow racks, and holders that keep essentials within easy reach—but out of sight.
Smart Spots to Add Storage
- Inside doors: spice racks, wrap organizers, measuring cup hooks.
- Pantry wall: pegboard with adjustable hooks for tools and baskets.
- Under-sink door: trash bag roll holder or cleaning caddy.
Keep hardware finishes consistent so everything feels intentional, not slapped together. Small detail, big pay-off.
10. Style a Luxe-Looking Open Shelf With Workhorse Bins
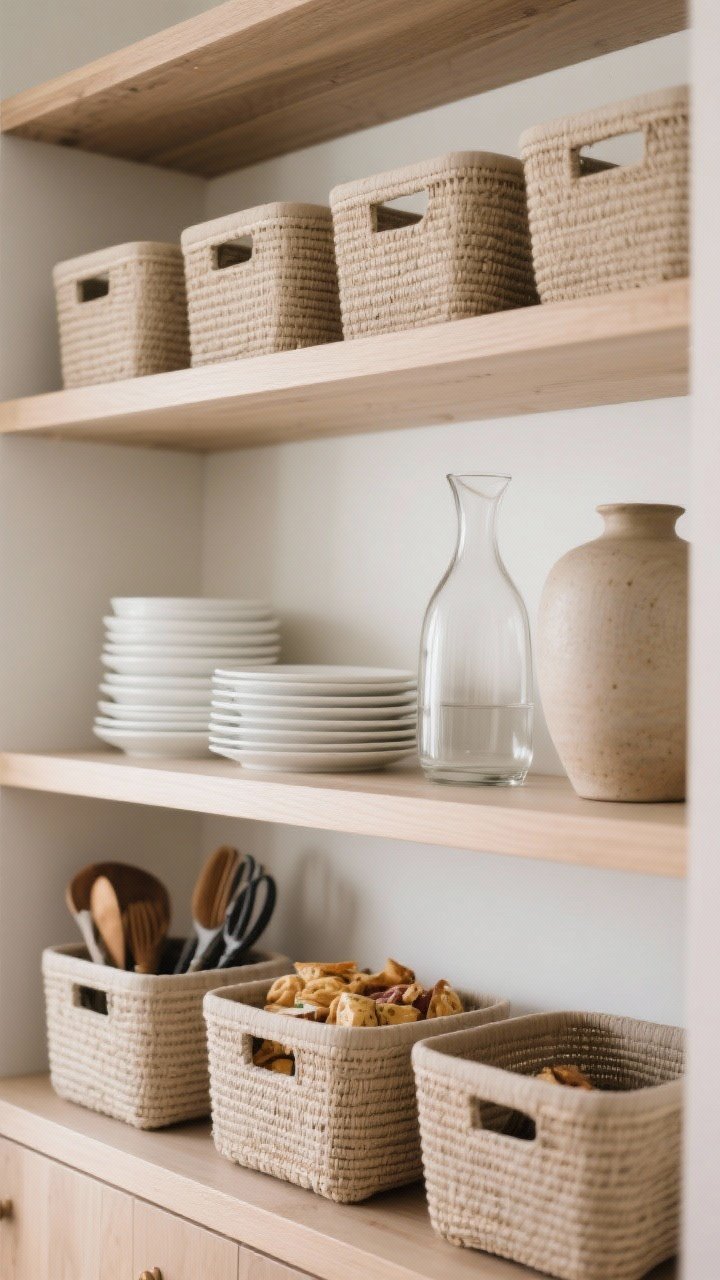
Open shelves can look messy fast—unless you treat them like a curated display. Mix closed storage with the pretty stuff so it looks designer and functions daily.
Formula That Never Fails
- Closed baskets on the bottom shelf for snacks or tools.
- Everyday dishes stacked in 2-3 neat piles.
- One or two tall items like a vase or carafe for height.
- Color control: stick to 2-3 tones (wood, white, and one accent).
Use matching bins from top to bottom so it reads as one built piece, not random storage. It’s basically a Pinterest board you can eat from.
Quick Shopping Checklist
- Clear stackable pantry bins + labels
- Rail system with hooks and small shelves
- Toe-kick drawer kits
- Shelf risers and under-shelf baskets
- Island/cart + trim, paint, and butcher block
- Pull-out trays and drawer dividers
- Tray and canisters for a beverage station
- Floating shelves and crown molding trim
- Pegboard and door-mounted racks
- Closed baskets and opaque bins for open shelving
Pro Styling Tips
- Keep finishes consistent (black, brass, or chrome) so everything feels custom.
- Repeat materials like wood, glass, and linen for cohesion.
- Use soft-close hardware whenever possible—it’s a small upgrade with big impact.
- Stick to two label styles max to avoid visual clutter.
Budget-Saving Hacks
- Paint and trim can make a $100 piece look like $1,000. Don’t skip them.
- Measure three times before buying inserts—returns are a vibe killer.
- Shop “open box” or resale for premium organizers. A wipe-down and you’re golden.
You don’t need a full renovation to get that tailor-made kitchen. With the right organizers, a splash of trim, and a few smart upgrades, your space can look custom-built and work way harder for you. Ready to give your kitchen main-character energy? Go grab those labels and let’s make it happen.


