10 Cheap Landscape Ideas That Look High-end (without the Sticker Shock)
You don’t need a landscaper, a backhoe, or a trust fund to make your yard look like a resort. You just need a plan, a weekend, and maybe a very persuasive playlist. These 10 cheap landscape ideas that look high-end will stretch your budget and still make your neighbors ask, “Wait, how much did that cost?”
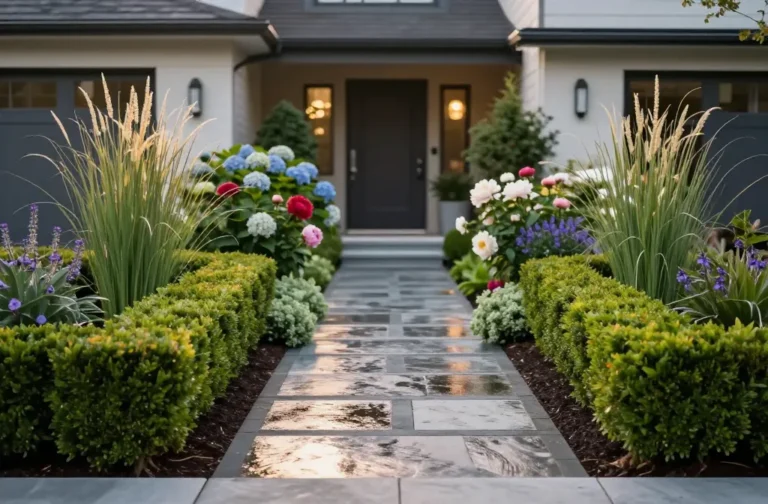
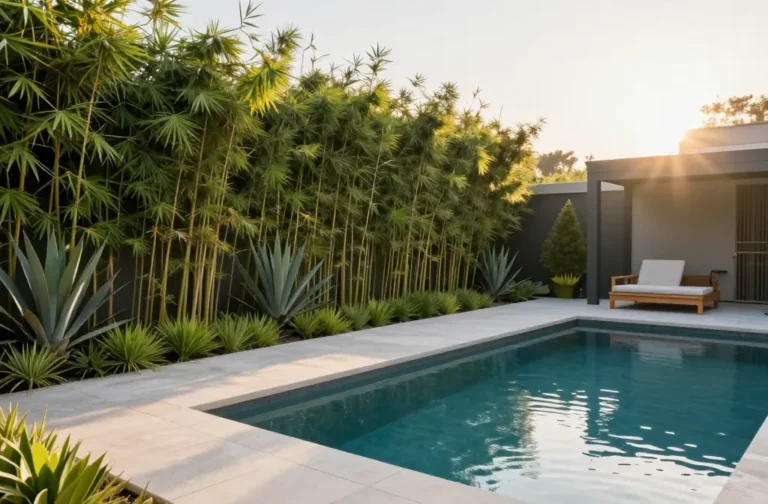
1. Frame Your Space With Clean Edging

Edging is the eyeliner of landscaping: subtle, sharp, and instantly transformative. Define your beds with crisp lines using budget-friendly materials like pavers, metal strips, or even repurposed bricks.
Tired of snacking when you’re not even hungry? This reset helps you stop the loop and feel back in control.
A simple reset for moments when cravings take over. Easy to use, easy to repeat, and designed to help you feel satisfied instead of stuck.
Why It Looks Expensive
Clean boundaries scream “intentional design.” Even if your plants are still growing in, a tidy outline makes everything look polished and finished.
Smart Tips:
- Use steel or aluminum edging for a modern, thin profile that disappears into the soil.
- Flip old bricks on edge for a classic look—free if you’ve got leftovers in the garage.
- Cut a natural edge with a flat spade and maintain it seasonally. Cheapest option, big impact.
2. Go Big With Mulch (And Go Dark)

Mulch is basically Photoshop for garden beds. It hides sins, kills weeds, and makes everything look rich and cohesive—especially if you go with dark brown or black mulch.
Why It Looks Expensive
Dark mulch creates contrast with greenery and makes colors pop, like a good backdrop in a gallery. Also, fewer weeds = more zen.
Transform Your Home With 7,250+ Stunning Landscaping Designs—No Expensive Designers Needed!
- 🌿 Access 7,250+ stunning landscaping designs.
- 💰 Save thousands—no pro designer needed.
- 🏡 Plans for gardens, patios, walkways, and more.
- ✨ Simple, beginner-friendly DIY layouts.
- 🛠️ Customize any design to fit your yard.
Smart Tips:
- Buy in bulk from a local supplier instead of bags—cheaper by the yard.
- Lay a clean edge first for that crisp “designer” finish.
- Skip dyed mulch near water features; go natural to avoid dye runoff.
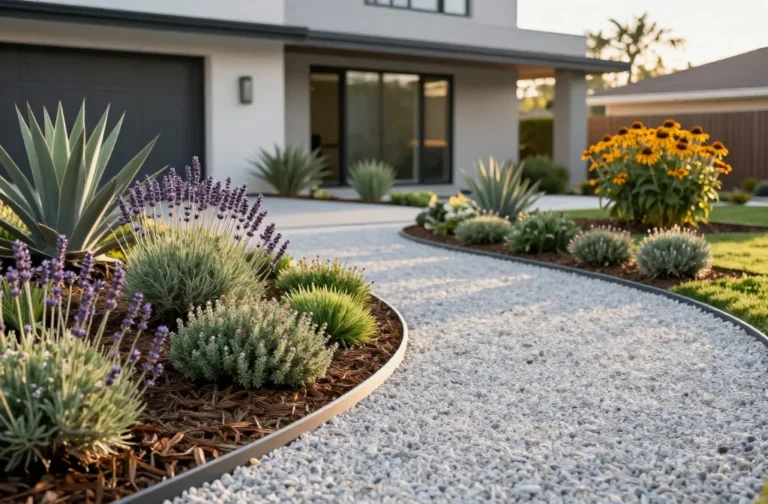
3. Create A Gravel Patio For Instant Lounge Vibes
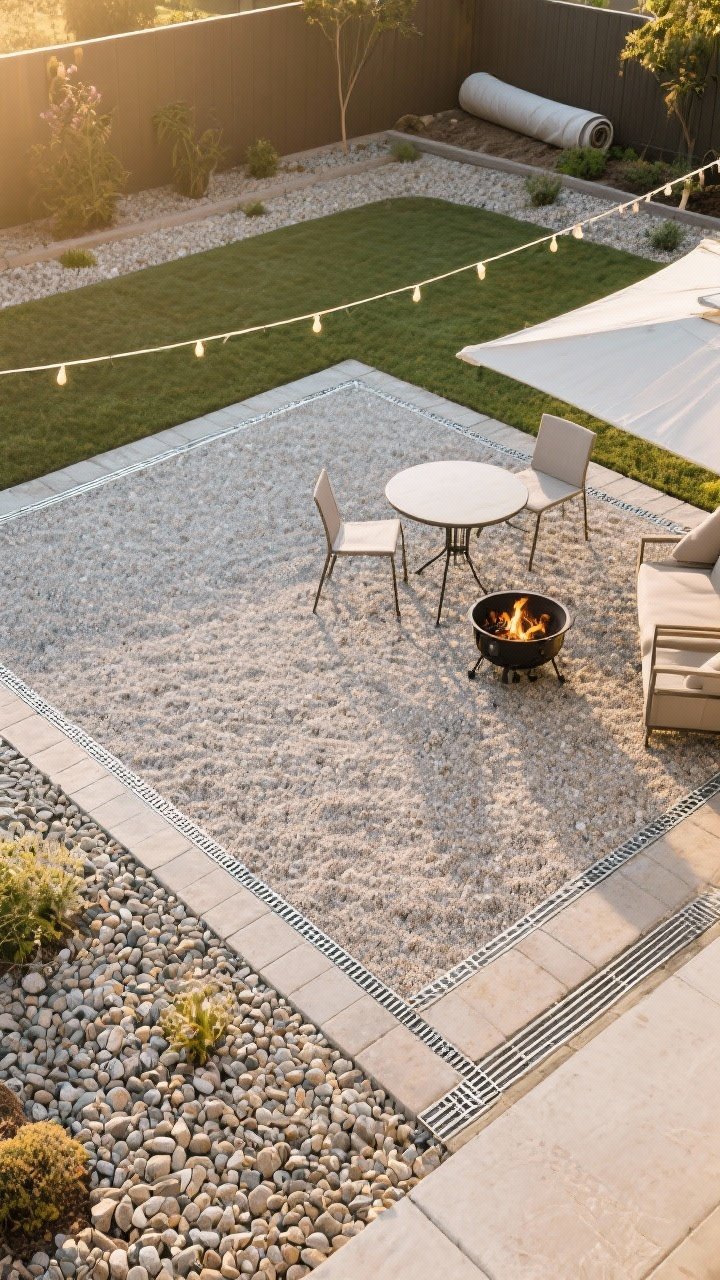
No concrete pour, no problem. A gravel patio is the fast-track to a chic seating area—perfect for bistro sets, fire pits, or your new outdoor office (Wi-Fi permitting).
How To Build It (Weekend Project)
- Mark the area with string or spray paint.
- Excavate 2–3 inches, lay landscape fabric (hello, weed control).
- Pour compactable gravel (decomposed granite or crushed stone) and tamp it down.
- Edge with pavers or metal so it stays tidy.
FYI: Add a pea gravel top layer if you like a softer, underfoot feel. Just note it can shift—use furniture with wide feet.
4. Plant In Masses, Not Singles

One lonely plant looks like an afterthought. A group of five? That’s a design choice. Mass plantings make small budgets look luxe because repetition looks intentional and lush.
Best Budget-Friendly Plants For Grouping
- Ornamental grasses (fountain grass, blue fescue) for movement and texture.
- Groundcovers (creeping thyme, mondo grass) to fill space for cheap.
- Perennials (salvia, black-eyed Susan, catmint) for color that returns every year.
Pro Move: Plant in odd numbers (3, 5, 7). It tricks the eye into seeing abundance and flow.
5. Add Lighting For Nighttime Drama
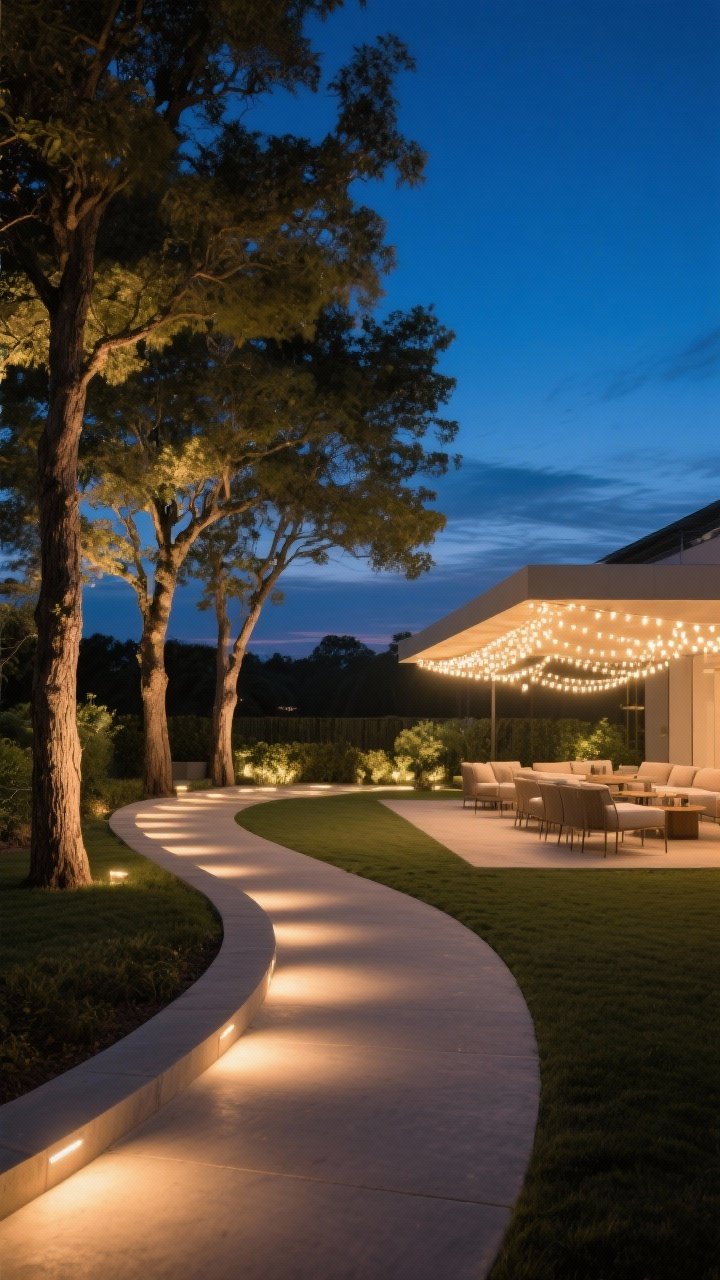
Want instant high-end without the high-end price? Outdoor lighting. Solar or low-voltage lights can make your yard look like a boutique hotel after dusk.
Where To Place Lights
- Path lights to guide the way (and reduce stumbles—you’re welcome).
- Uplights on trees to add vertical drama and shadows.
- String lights over seating or along fences for warm ambiance.
IMO, avoid the “runway look.” Stagger path lights and aim for subtle pools of illumination.

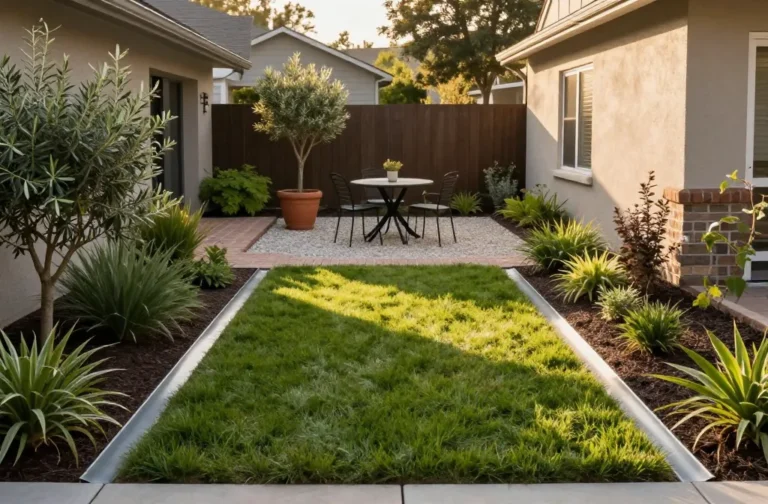
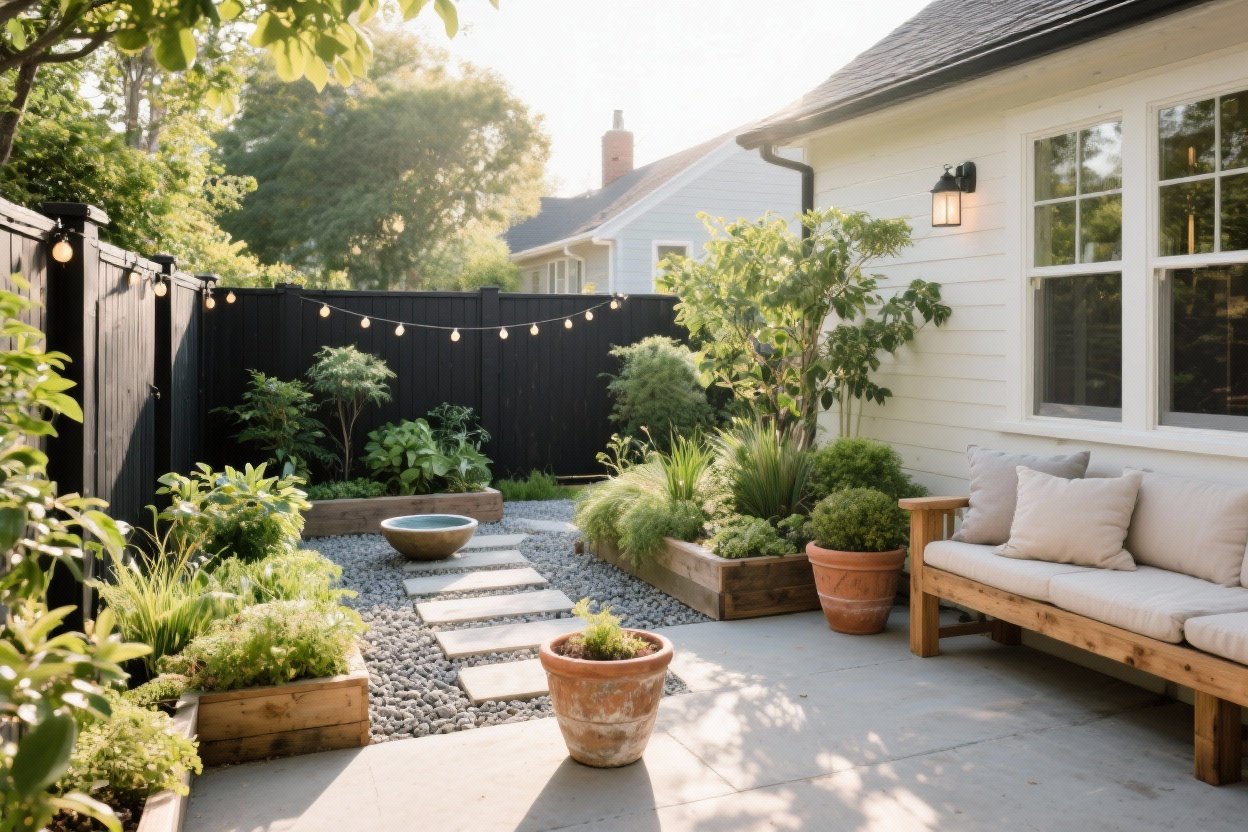
6. Build A Raised Bed With Lumber Or Stone
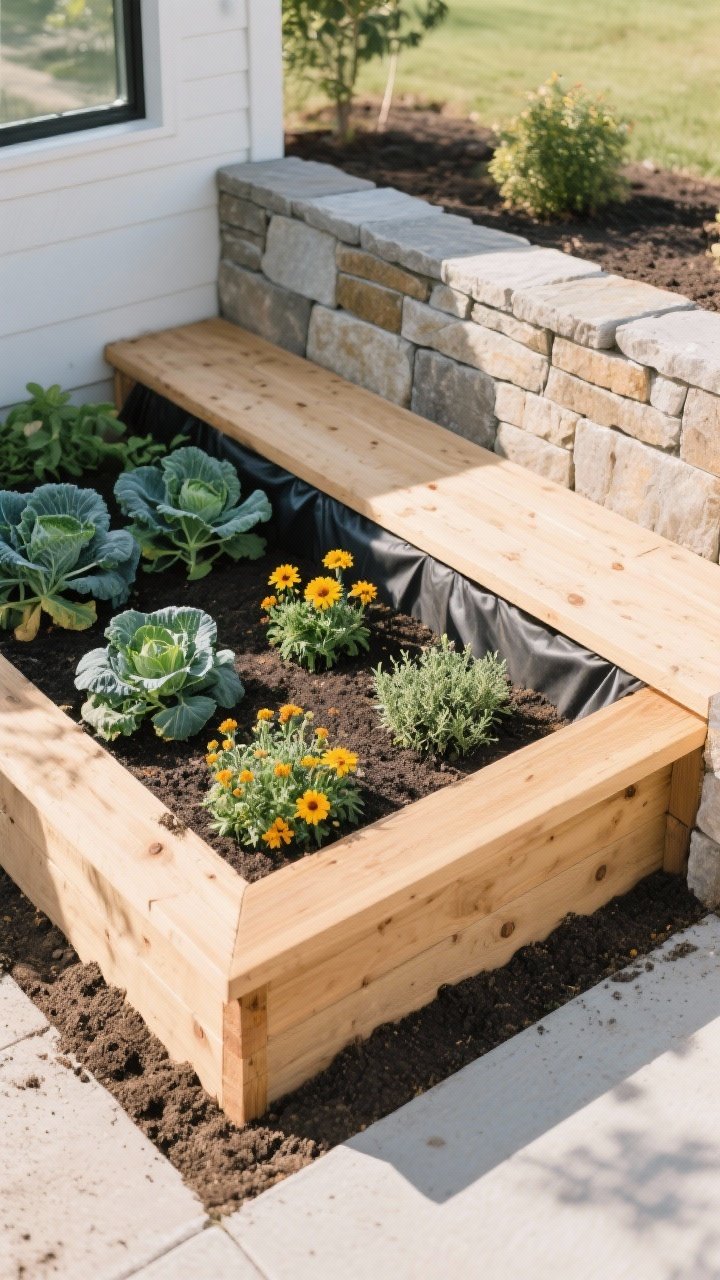
Raised beds instantly look “finished,” even if you’re growing humble herbs and cherry tomatoes. They add structure, height, and a designer vibe for surprisingly little cash.
Budget Build Options
- Cedar boards: Naturally rot-resistant and clean-lined.
- Pressure-treated lumber: Cheapest option; line the inside with landscape fabric.
- Stacked stone or retaining wall blocks: Heavier lift, super polished result.
Design Tips:
- Keep beds no wider than 4 feet so you can reach the center.
- Top with a 2×4 cap for seating and a finished look.
- Mix edibles and ornamentals—think kale + calendula + thyme. Chef’s kiss.
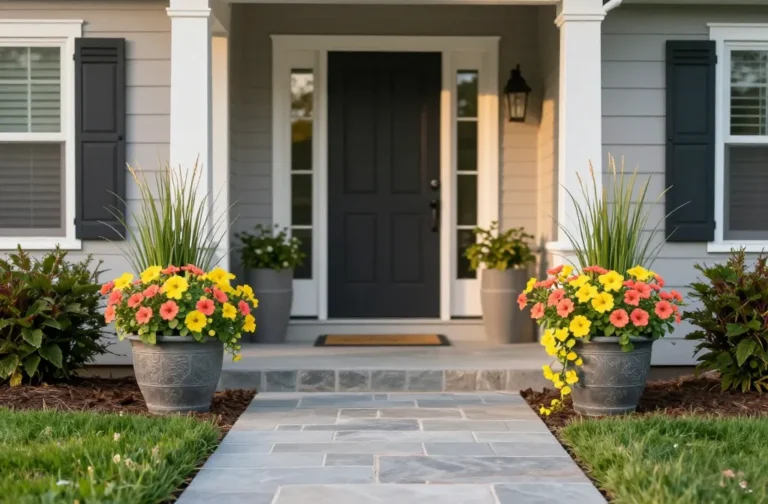
7. Use Potted Plants Like Sculptures
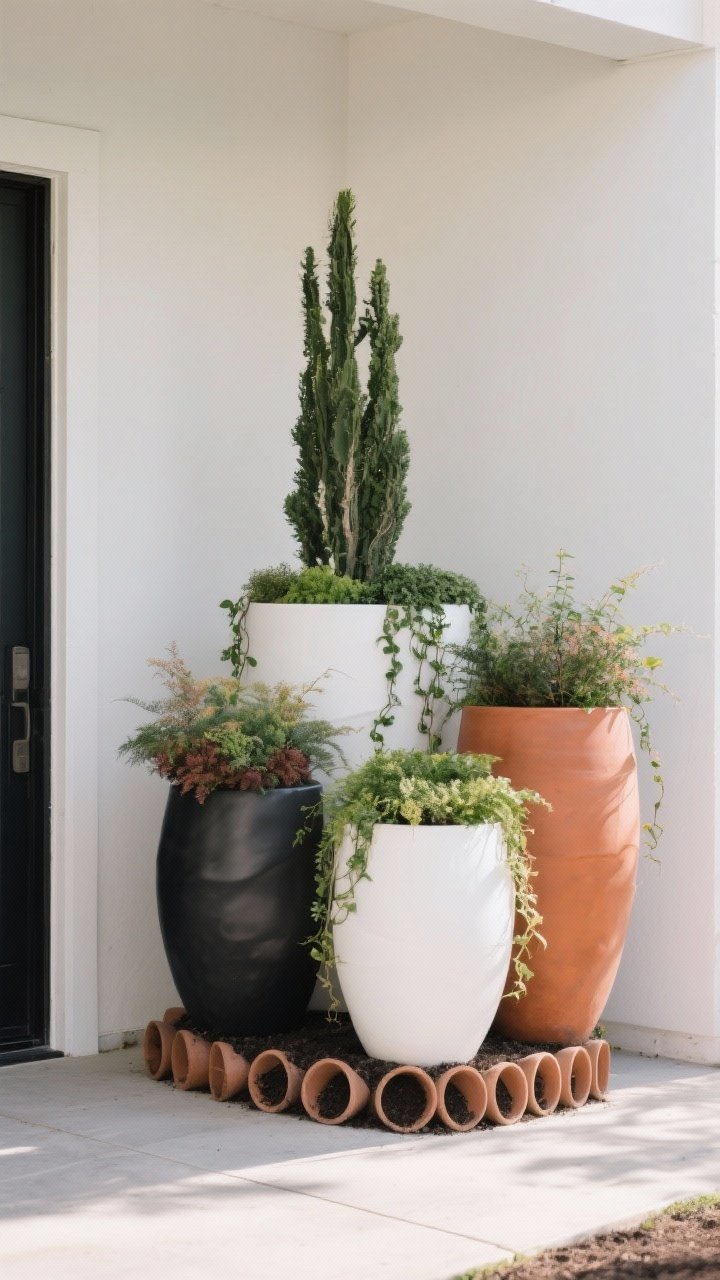
Pots are your cheat code. Cluster a few large planters at the entry, on the patio, or by the garage to create instant focal points—even if the rest is still “in progress.”
How To Get The High-End Look On A Budget
- Go big—one large pot looks pricier than several small ones.
- Stick to a color palette: black, white, or terracotta always reads chic.
- Use the thriller-filler-spiller formula: tall center, mid-height fillers, trailing edges.
- Hack alert: Fill the bottom third with empty nursery pots to save on soil.
Seasonal swap? Keep the pot and change the plants for an always-fresh look.
8. Lay A Simple Path (Hello, Garden Glow-Up)
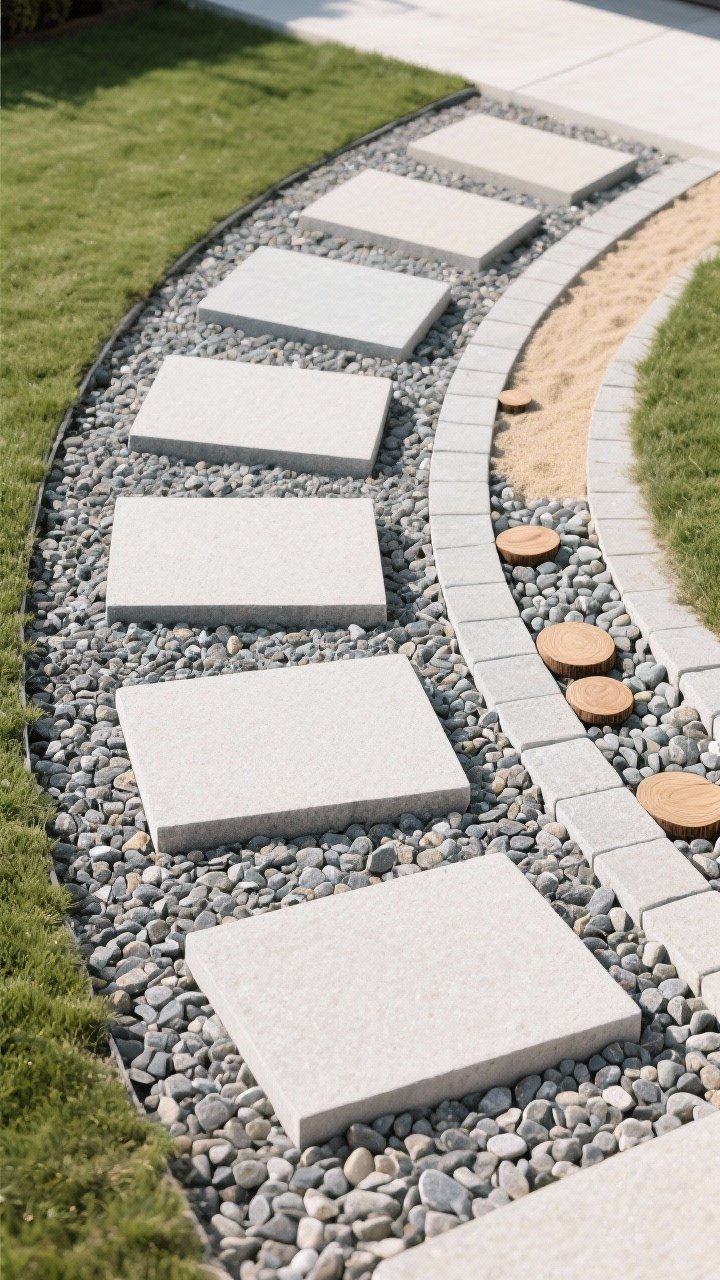
Paths add structure and elegance without needing a landscape architect. A simple stepping-stone path is affordable, functional, and very “weekend warrior.”
Easy Path Ideas
- Stepping stones set in gravel with a few inches between for a modern vibe.
- Paver walkway with sand base—classic and durable.
- Wood rounds set in pea gravel for a rustic-meets-chic look.
Pro Tip: Curve your path slightly. Gentle curves look more natural and high-end than a straight shot, unless you’re going for formal vibes.
9. Dress Your Fence (Or Hide It Artfully)
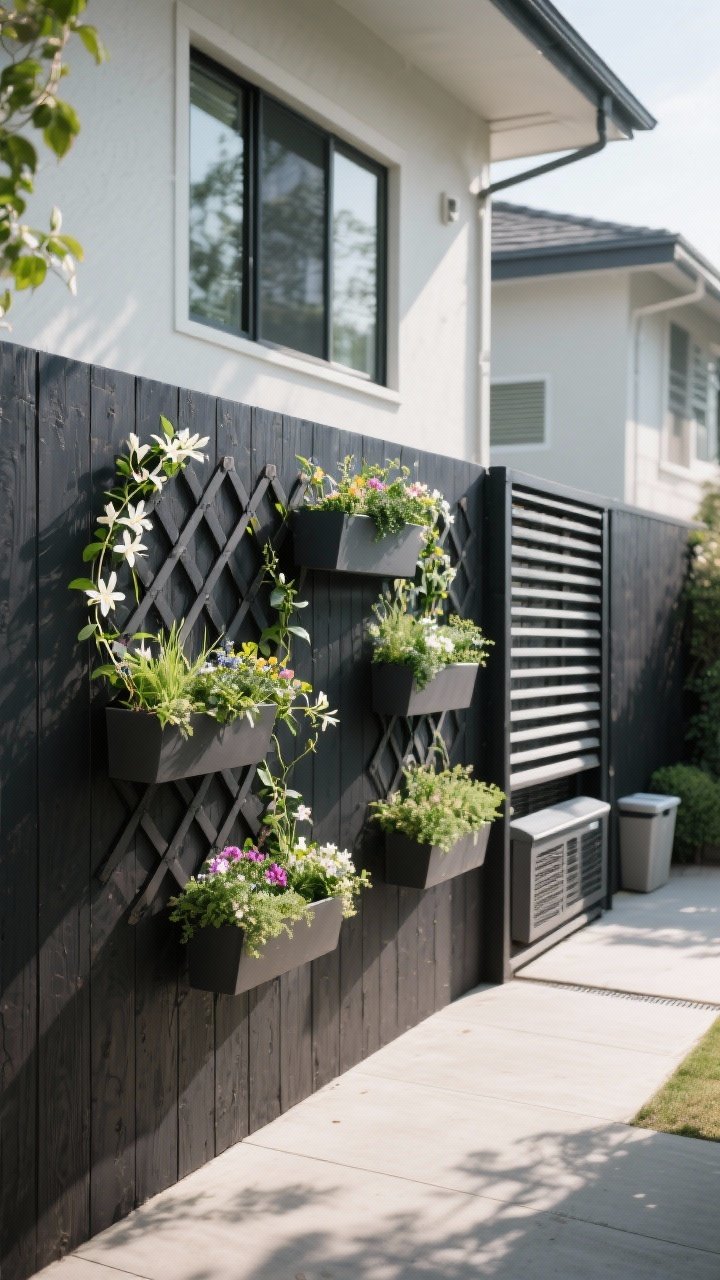
Fences are like blank walls—full of potential. Turn that big rectangle into a design moment with vertical elements that add interest and make your yard feel layered.
Budget-Friendly Fence Upgrades
- Stain it a rich tone for a premium feel (charcoal stain = instant modern).
- Hang planters or window boxes for color and texture.
- Install a simple trellis and grow vines like jasmine, clematis, or star jasmine for fragrance.
- Add a slatted screen to hide AC units or bins while looking intentional.
FYI: Climbing plants are the slow-burn secret to luxe. Give them a season, and they’ll pay you back in shade and ambiance.
10. Create A Focal Fire Feature (On A Budget)
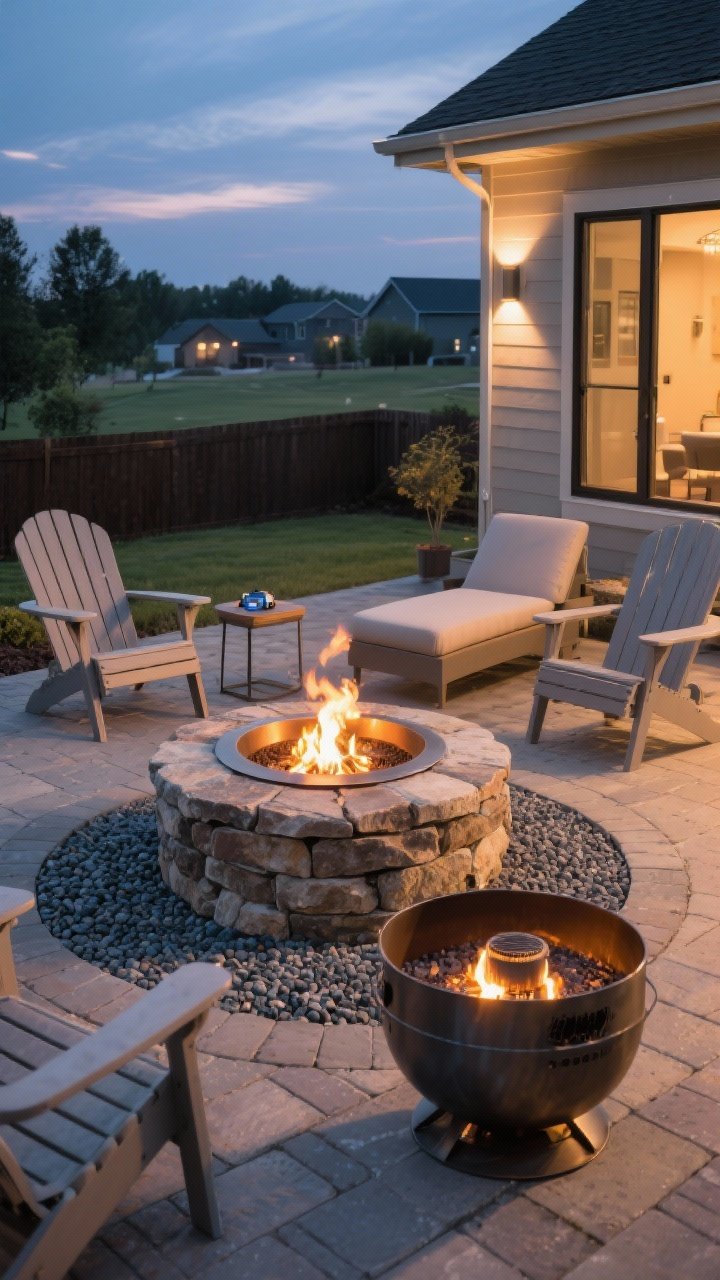
Fire makes any yard feel like a destination. A DIY fire pit or simple gas bowl can be the architectural anchor your space needs—without you taking out a second mortgage.
Affordable Fire Feature Options
- Stacked stone ring with a metal insert—classic, sturdy, and under a couple hundred bucks.
- Propane fire bowl for renters or patio dwellers—no ashes, minimal mess.
- Modern steel ring with pea gravel surround for that desert-retreat aesthetic.
Safety & Style Tips:
- Keep 10 feet from structures and always check local fire codes.
- Surround with gravel or pavers to define the zone.
- Add Adirondacks or low lounge chairs and a side table—done and done.
Pulling It All Together
Here’s the magic: combine a few of these moves and your yard will look curated fast. For example: crisp edging + dark mulch + a gravel patio + string lights = magazine vibes on a ramen budget.
Bonus Budget Hacks (Because I Like You)
- Shop the clearance rack at nurseries. Plants recover beautifully with a little TLC.
- Split perennials and trade with neighbors. Free plants = best plants.
- Buy smaller sizes and give them a season to fill in. Patience pays (literally).
- Use native plants so you spend less on water and maintenance.
You don’t need to do it all at once. Pick one area, give it a glow-up, then build from there. Your yard doesn’t need to be perfect—it just needs a plan and a few smart upgrades. Now grab that shovel (and a beverage) and make your outdoor space look high-end on a low budget. You’ve got this.