10 Simple Landscape Ideas You Can Finish in a Weekend That Wow
Got a free weekend and a yard that’s begging for a glow-up? Let’s turn that “ehh” space into something swoon-worthy—without renting a backhoe or draining your bank account. These projects are fast, satisfying, and low-stress. Grab your gloves, cue your favorite playlist, and let’s make your neighbors a tiny bit jealous.
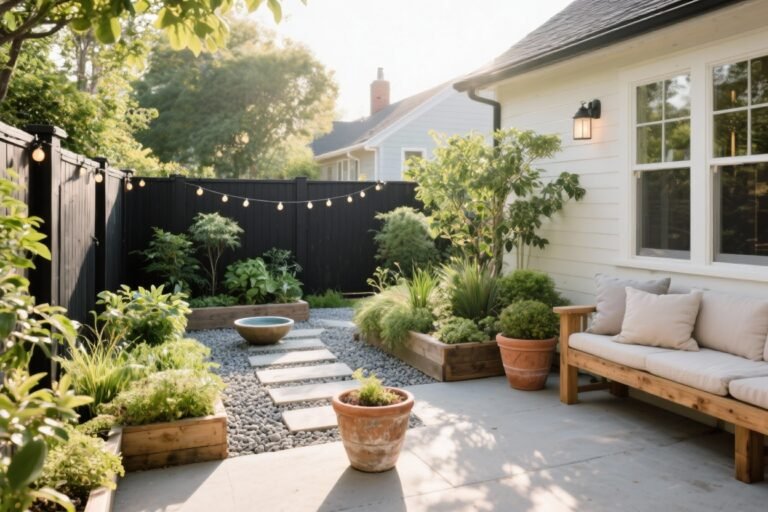
1. Frame Your Entry With A Welcoming Border
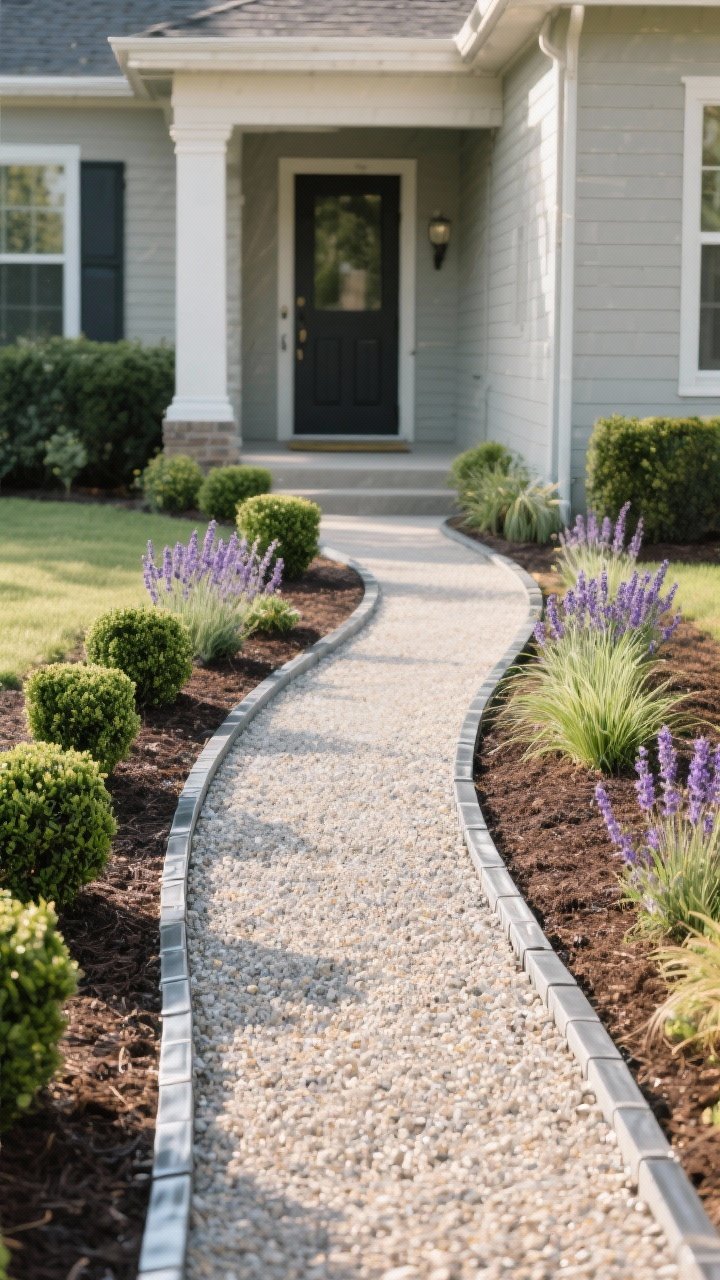
Your front walkway is the handshake of your home. Give it a little polish with a clean, simple border that guides the eye and says “yes, we have our lives together.”
Tired of snacking when you’re not even hungry? This reset helps you stop the loop and feel back in control.
A simple reset for moments when cravings take over. Easy to use, easy to repeat, and designed to help you feel satisfied instead of stuck.
How To Do It
- Pick your edge: Pavers, stone, metal edging, or pressure-treated lumber. Keep it consistent with your home’s style.
- Define the curve: Use a garden hose to sketch a graceful shape. Curves feel softer and more expensive.
- Plant low and tidy: Think boxwood, lavender, or mondo grass. Add a thin mulch layer to crispen the look.
Pro Tip: Keep plants 6–12 inches away from the walkway so they don’t crowd your ankles (or your mail carrier).
2. Create A Weekend Fire Pit That Looks Custom
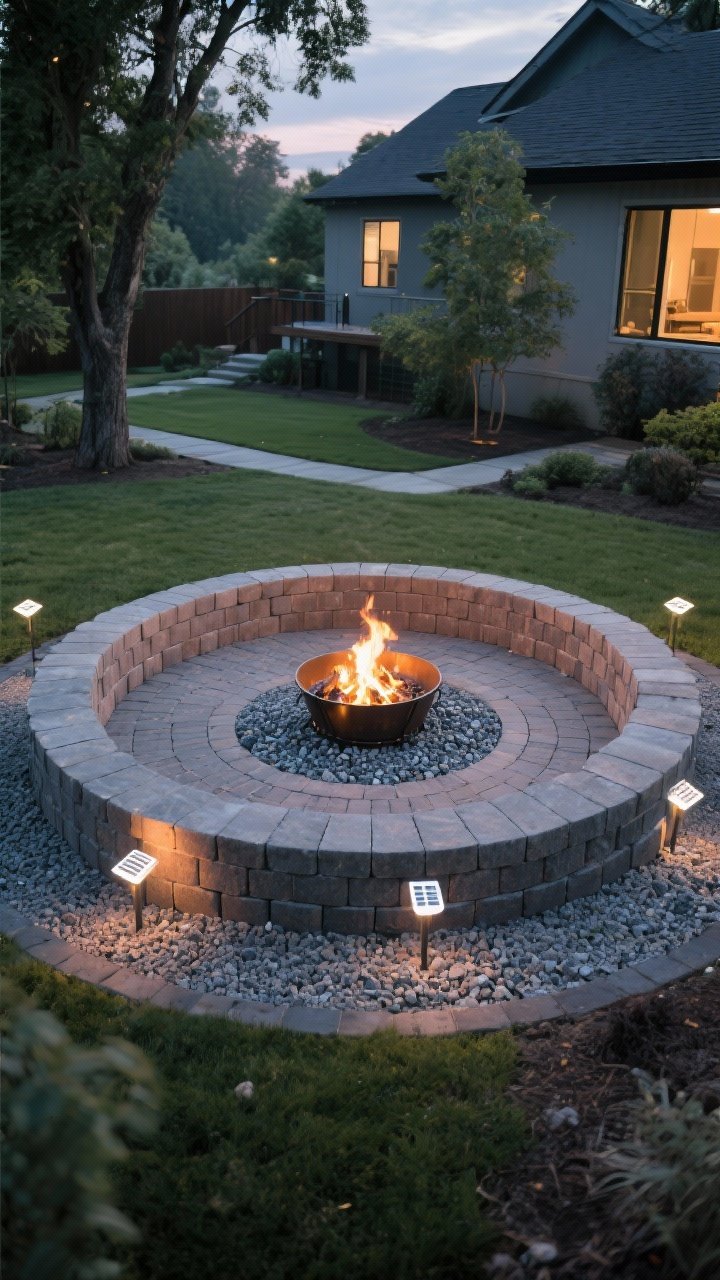
Few things beat s’mores on a Saturday night. A DIY fire pit instantly turns a blah yard into a hangout spot. No masonry degree required.
How To Do It
- Pick your spot: At least 10 feet from structures or trees. Check local codes—FYI, some areas have rules.
- Dig and base: Remove sod, dig 2–3 inches, and add paver base or gravel for drainage.
- Stack the ring: Use fire-rated retaining wall blocks or a metal fire ring. Keep it level.
- Finish with gravel: Fill the center with pea gravel or decomposed granite to avoid muddy messes.
Pro Tip: Dot a few solar path lights around the zone. Instant atmosphere with zero wiring.
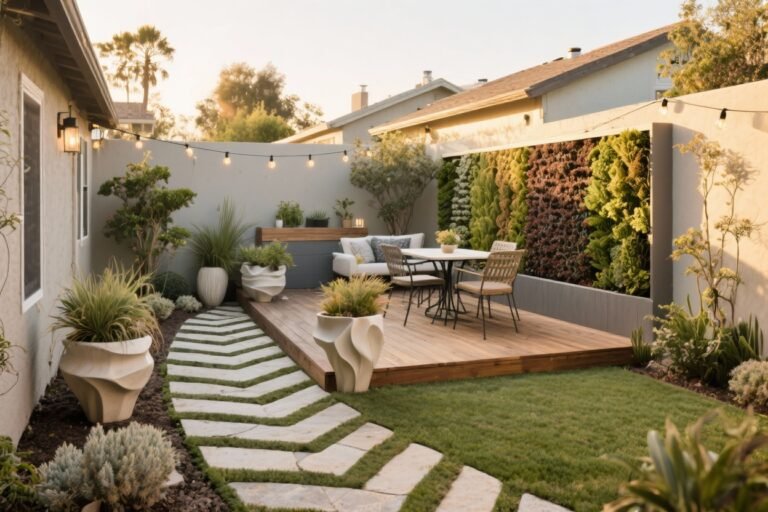
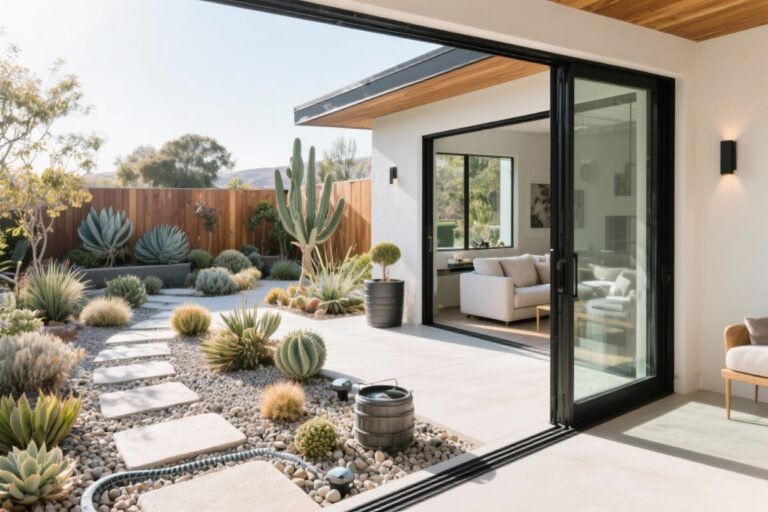
3. Lay A Simple Gravel Patio (No Concrete, No Problem)
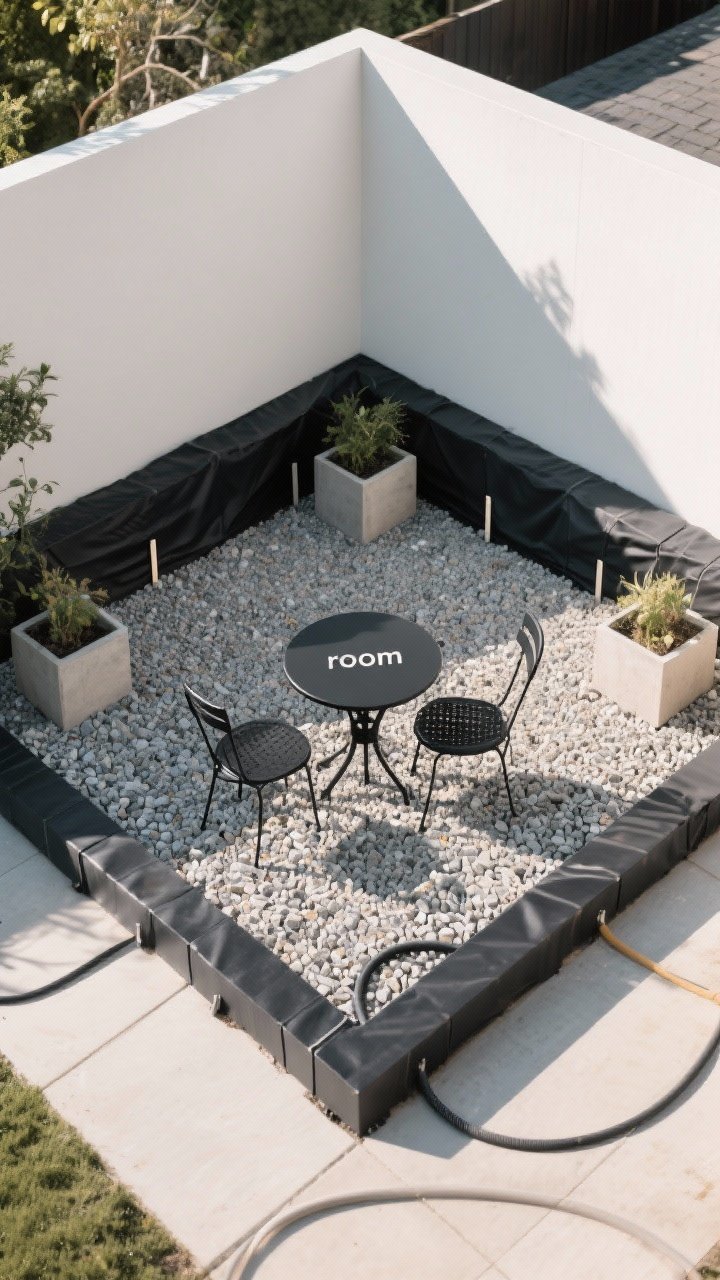
Need extra seating space but not ready for a deck? A gravel patio is the perfect middle ground—low cost, high style, and super doable in a day.
Transform Your Home With 7,250+ Stunning Landscaping Designs—No Expensive Designers Needed!
- 🌿 Access 7,250+ stunning landscaping designs.
- 💰 Save thousands—no pro designer needed.
- 🏡 Plans for gardens, patios, walkways, and more.
- ✨ Simple, beginner-friendly DIY layouts.
- 🛠️ Customize any design to fit your yard.
How To Do It
- Mark the shape: Use stakes and string or your trusty garden hose.
- Prep the base: Remove grass, lay landscape fabric to zap weeds, then add 2–3 inches of compacted gravel.
- Edge it: Steel edging looks sleek; pavers add charm. Either works.
- Top with chairs and a bistro table: Add planters and boom—you’ve got outdoor “rooms.”
Style Move: Choose crushed gravel over rounded pea gravel for better footing under chairs.
4. Build A Raised Bed That Makes You Look Like A Pro
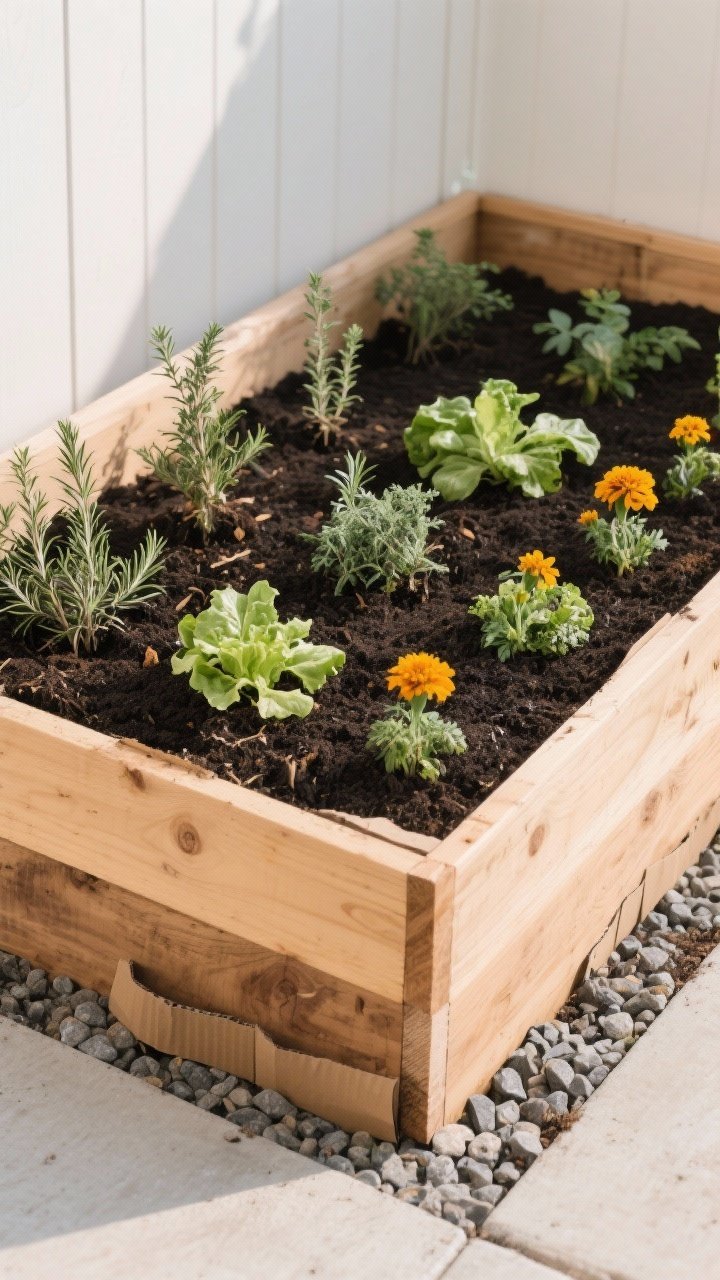
Want instant architecture and better soil? Raised beds deliver structure and actual veggies. Even if you’re just here for the tomatoes, the form matters.
How To Do It
- Use durable materials: Cedar or composite boards, 10–16 inches high.
- Keep it simple: 4×8 feet is a classic. It fits neatly and is easy to reach from all sides.
- Layer your soil: Bottom layer of sticks or cardboard, then good-quality soil-compost mix.
- Add a subtle border: Gravel or mulch around the bed keeps it crisp and clean.
Plant Picks: Herbs (rosemary, thyme), salad greens, and marigolds for easy color and pest control.
5. Go Big On Mulch And Call It A Makeover
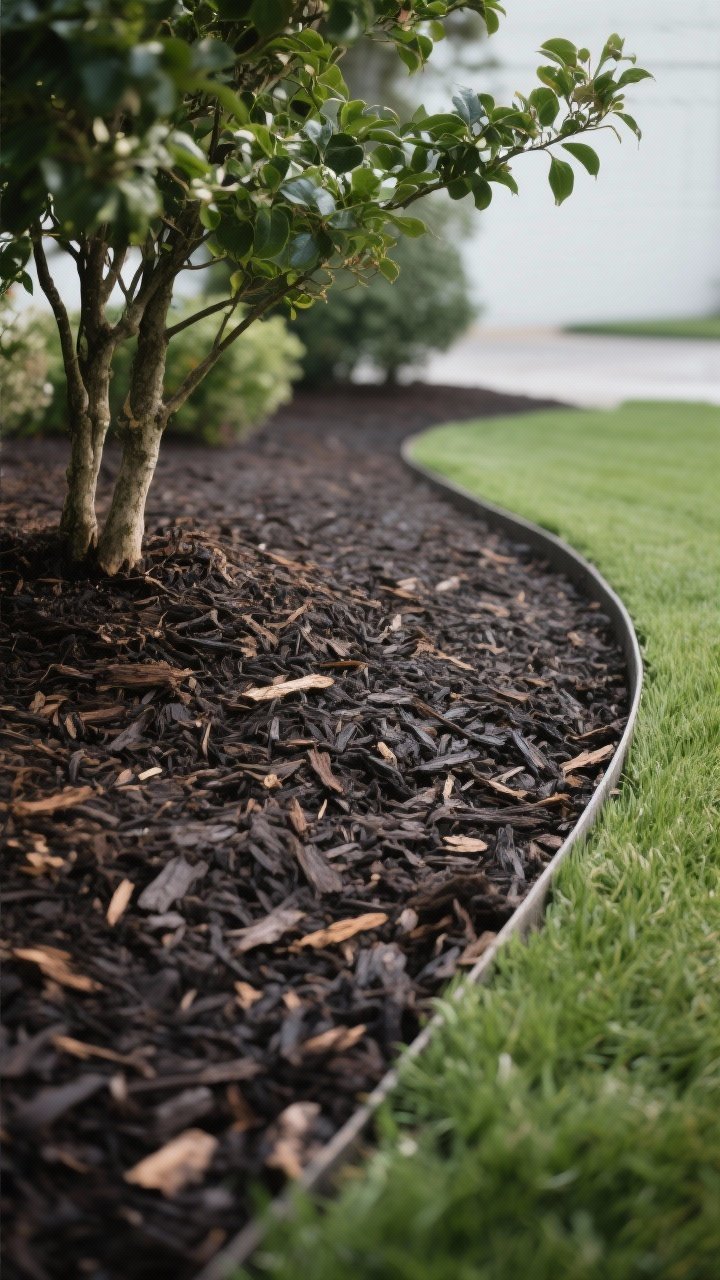
Too many random plants? Mulch is your magic eraser. It covers sins, evens out textures, and makes everything look intentional in about two hours.
How To Do It
- Weed first, then edge: A clean trench edge (2–3 inches deep) around beds instantly ups the polish.
- Spread 2–3 inches of mulch: Choose shredded bark or pine straw for a classic look.
- Leave space around trunks: No mulch volcanoes. Keep 3–6 inches clear around plants.
Why it works: Mulch reduces weeds, retains moisture, and adds contrast so your plants pop without trying too hard.

6. Add Pathway Lighting That Feels Like A Boutique Hotel
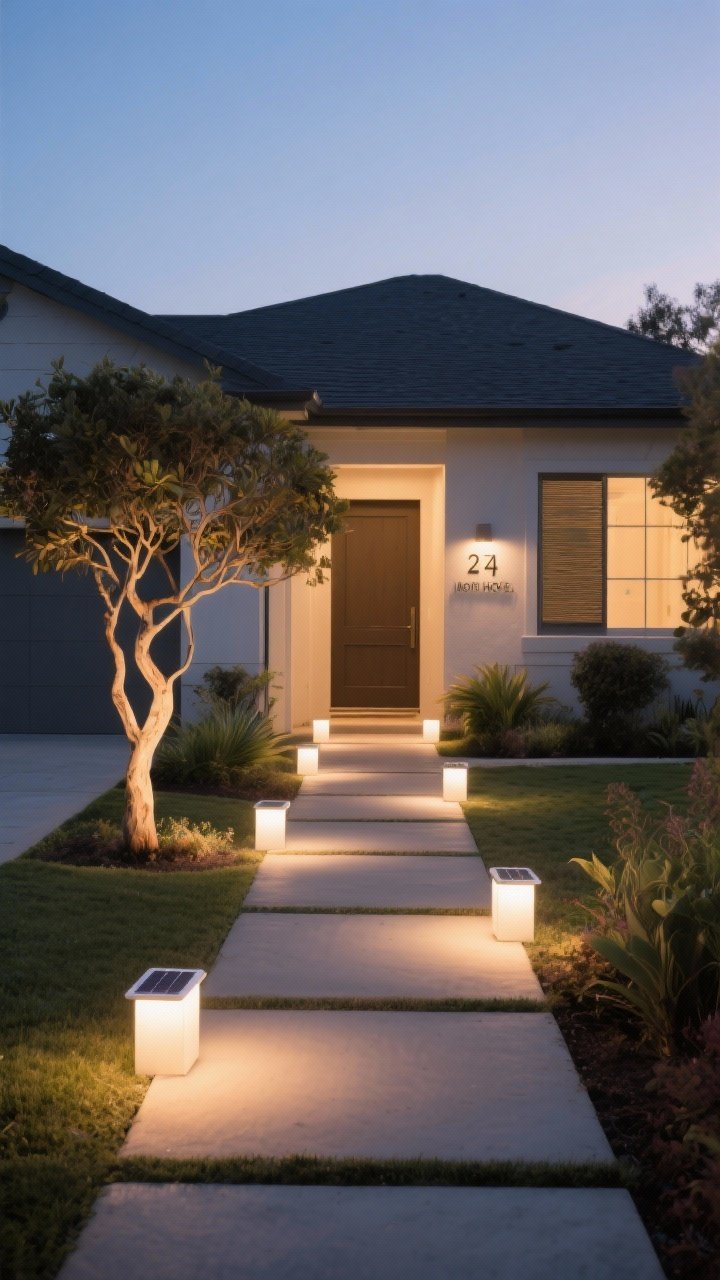
Lighting is the vibe-setter. Even basic landscaping looks intentional when it’s softly lit. Plus, it’s safer—no twisted ankles on your watch.
How To Do It
- Go solar for speed: Choose warm white (2700–3000K) for cozy glow.
- Space them 5–8 feet apart: Stagger lights for a natural, non-runway feel.
- Highlight focal points: Add a couple spotlights to uplight a tree or house number. Subtle drama = chef’s kiss.
IMO: A single uplight on a pretty tree looks way more expensive than it is.
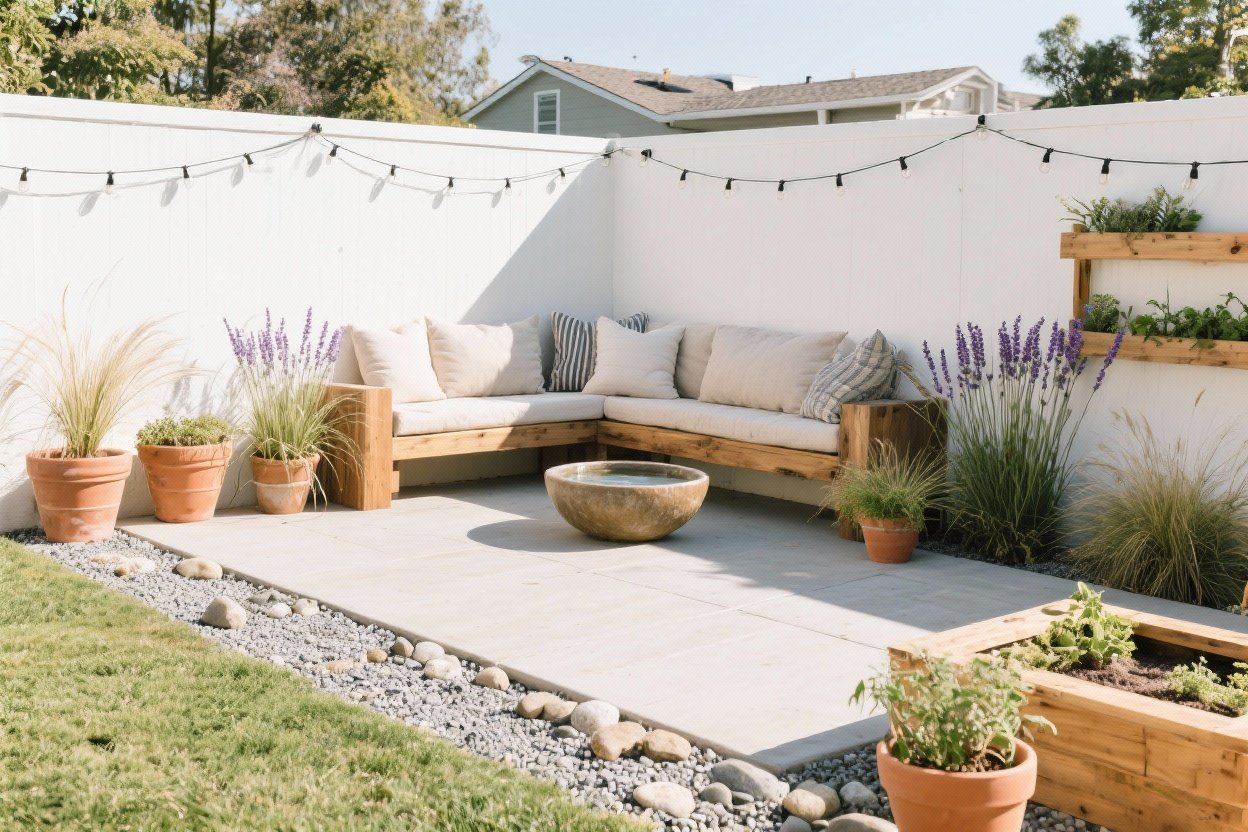
7. Install A Quick Privacy Screen (Without Building A Fence)
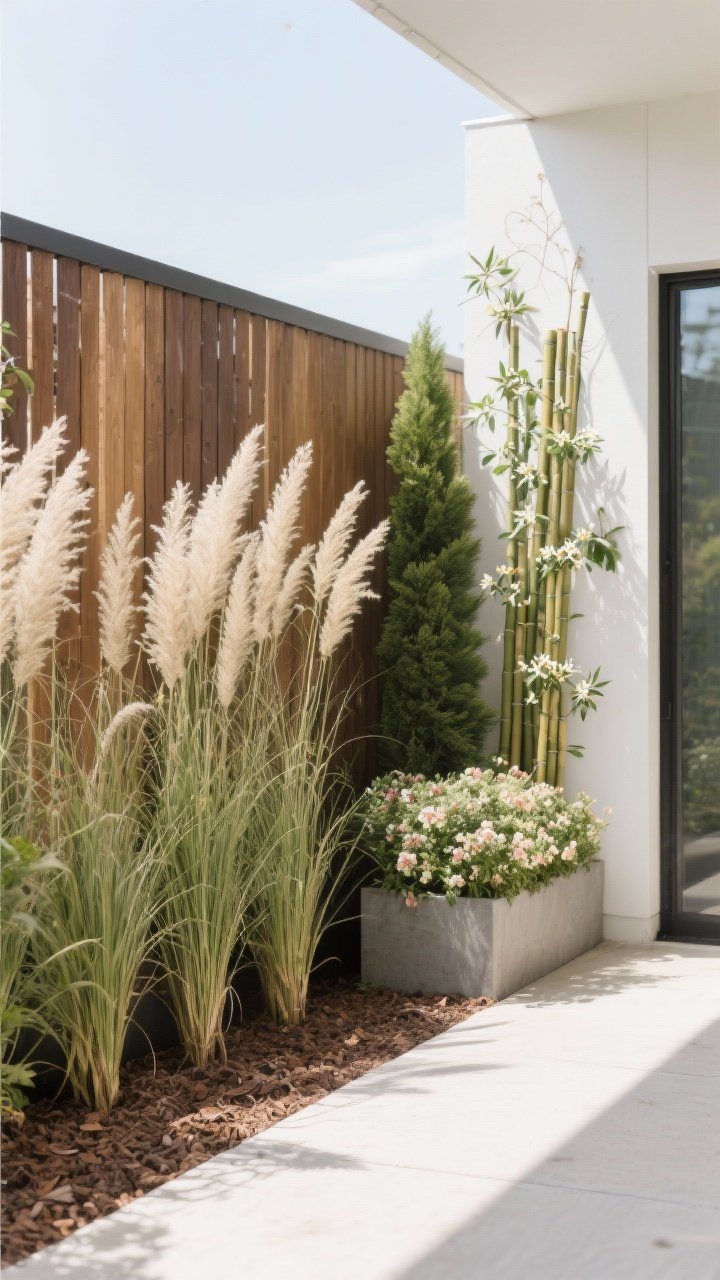
Need a little separation from the neighbors? You don’t have to go full fence mode. A living or decorative screen does the job fast and looks stylish.
How To Do It
- Plant a trio: Three tall grasses (like Miscanthus or Karl Foerster) or narrow evergreens in a line. Instant visual buffer.
- Try a panel: Lattice or slatted wood panel with vines (star jasmine, clematis) for quick coverage.
- Anchor with planters: If you’re renting, use tall planters filled with bamboo or ficus (clumping bamboo only, please).
Smart Move: Mix heights and textures—one evergreen, one flowering shrub, and one grass—so it looks lush year-round.
8. Create A Mini Pollinator Patch That Works Overtime
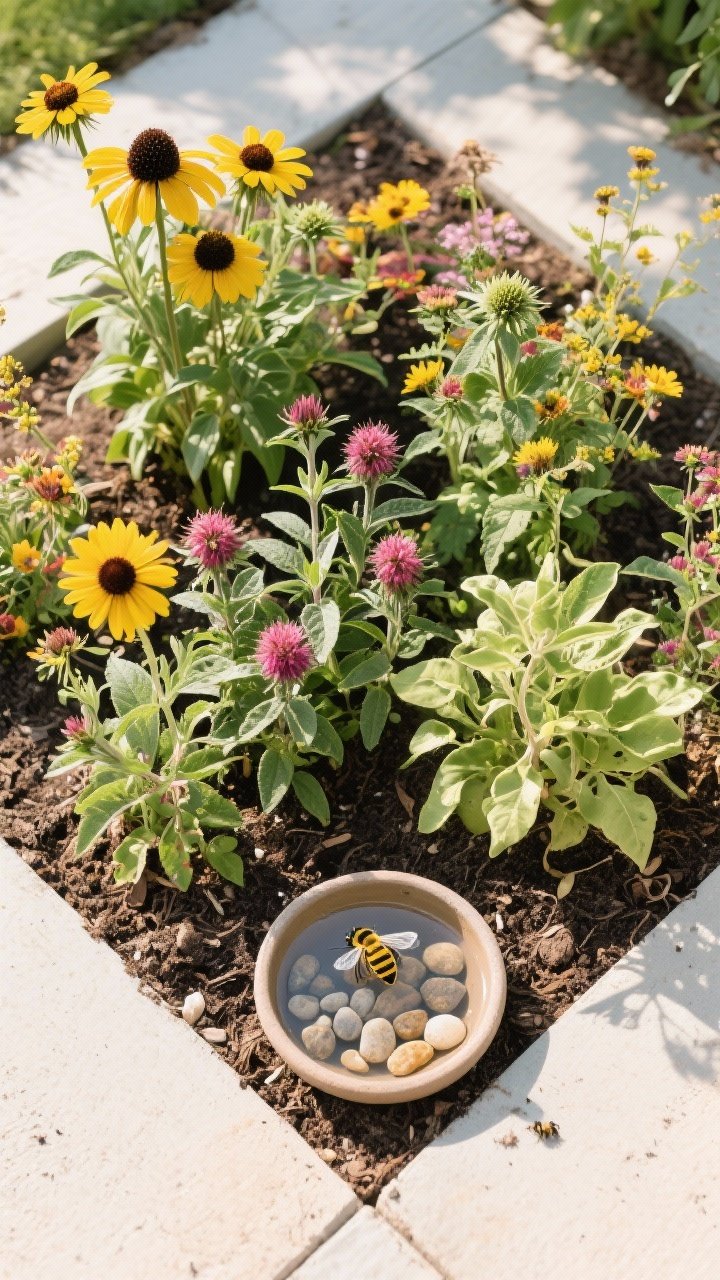
Pretty, low-maintenance, and good for the planet? Yes, we love a multitasker. A small pocket of pollinator-friendly plants brings color and useful buzz.
How To Do It
- Pick a sunny 4×6 area: Remove grass and add compost for a strong start.
- Choose natives: Coneflower, black-eyed Susan, salvia, bee balm, and milkweed are reliable favorites.
- Stagger bloom times: Spring, summer, fall—give the bees a full-season buffet.
- Add a water dish: A shallow saucer with pebbles is a tiny bee spa. Adorable and useful.
FYI: Skip pesticides here. Your winged guests will thank you.
9. Define Zones With Container Clusters
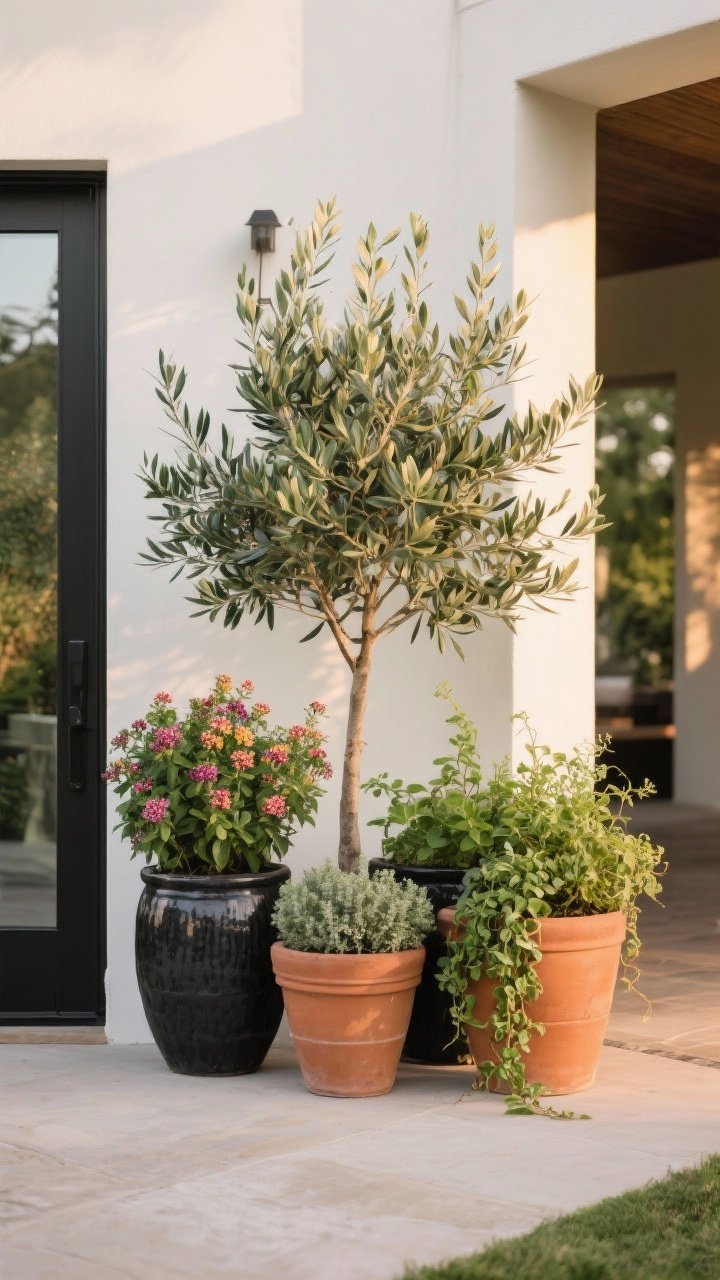
Containers are the cheat code of landscaping. They shape space, add color, and can move with you if you change your mind (or your address).
How To Do It
- Group in threes: One tall, one medium, one trailing. Vary heights and textures for drama.
- Stick to a palette: Two pot colors tops—think black and terracotta or charcoal and cream.
- Mix plant types: Thriller (upright), filler (bushy), spiller (trailing). Classic for a reason.
- Use them as markers: Flank an entry, outline a patio, or mark the start of a pathway.
Low-Lift Picks: Olive tree + lantana + creeping jenny; Boxwood + white petunias + ivy; Cordyline + heuchera + trailing verbena.
10. Add A Water Feature You Can Actually Set Up Today
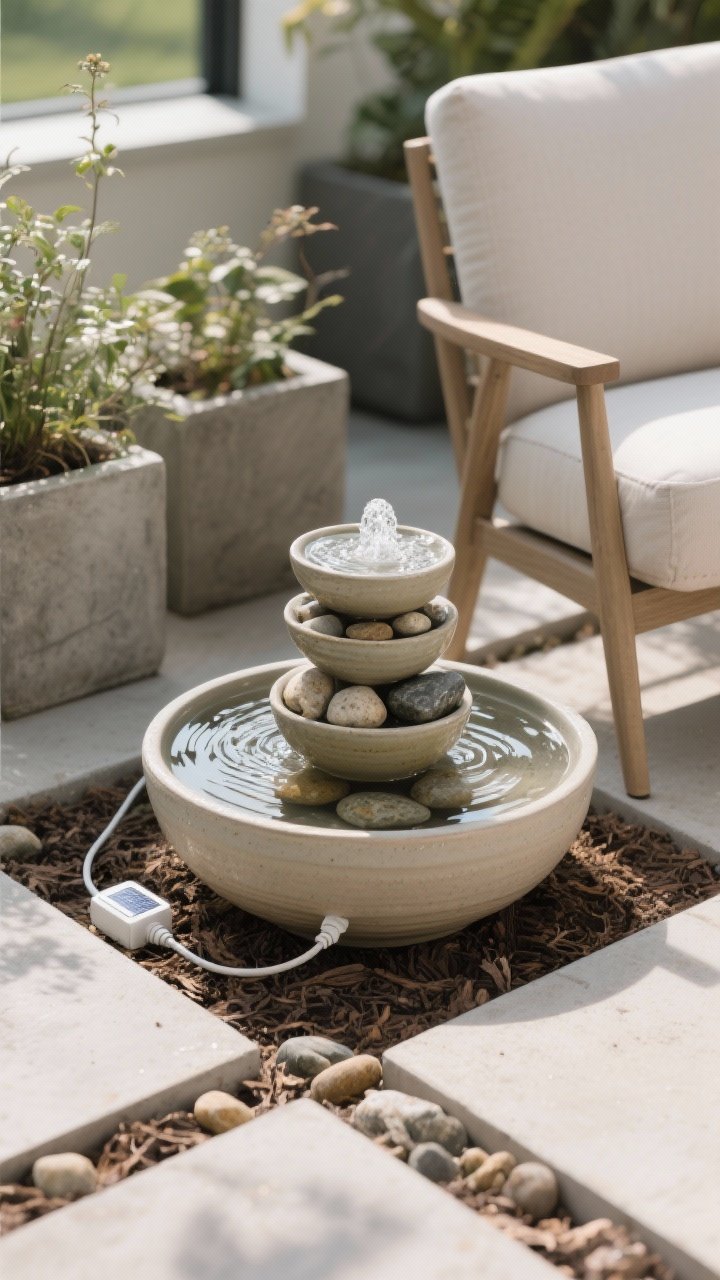
You don’t need a pond to get soothing water sounds. A simple, self-contained fountain is an instant calm button and the perfect finishing touch.
How To Do It
- Choose a plug-in or solar fountain: Ceramic urns, stacked bowls, or a small bubbler in a pot.
- Place it near seating: You’ll actually enjoy it (and it can help mask street noise).
- Hide the cord: Run it under mulch or behind planters. Add river rocks on top for a polished look.
Maintenance: Top off water weekly and clean the pump every month to keep it happy.
Weekend Shopping List (Quick Recap)
- Edging (metal or paver), mulch, landscape fabric, gravel
- Solar lights, a couple spotlights
- Raised-bed lumber (cedar), outdoor screws, compost/soil
- Plants: evergreens, ornamental grasses, perennials, herbs
- Containers in two coordinating colors
- Fire pit blocks or ring, decomposed granite or pea gravel
- Fountain kit or solar bubbler, river rocks
Final Thought: You don’t need a huge budget or a full reno to make your yard feel like a retreat. Pick one or two of these projects, knock them out this weekend, and enjoy being that person with the surprisingly amazing outdoor space. You’ve got this—now go make it pretty.