10 Kitchen Storage Ideas That Look Custom but Cost Less—you’ll Want These
You know that dreamy custom kitchen on your Pinterest board? You can get the look without selling a kidney. These budget-savvy storage tricks deliver the vibe—clean, tailored, purposeful—without the designer price tag. Bonus: they’re renter-friendly or reversible, too.
1. Build-In Vibes With Stacked, Painted Stock Cabinets
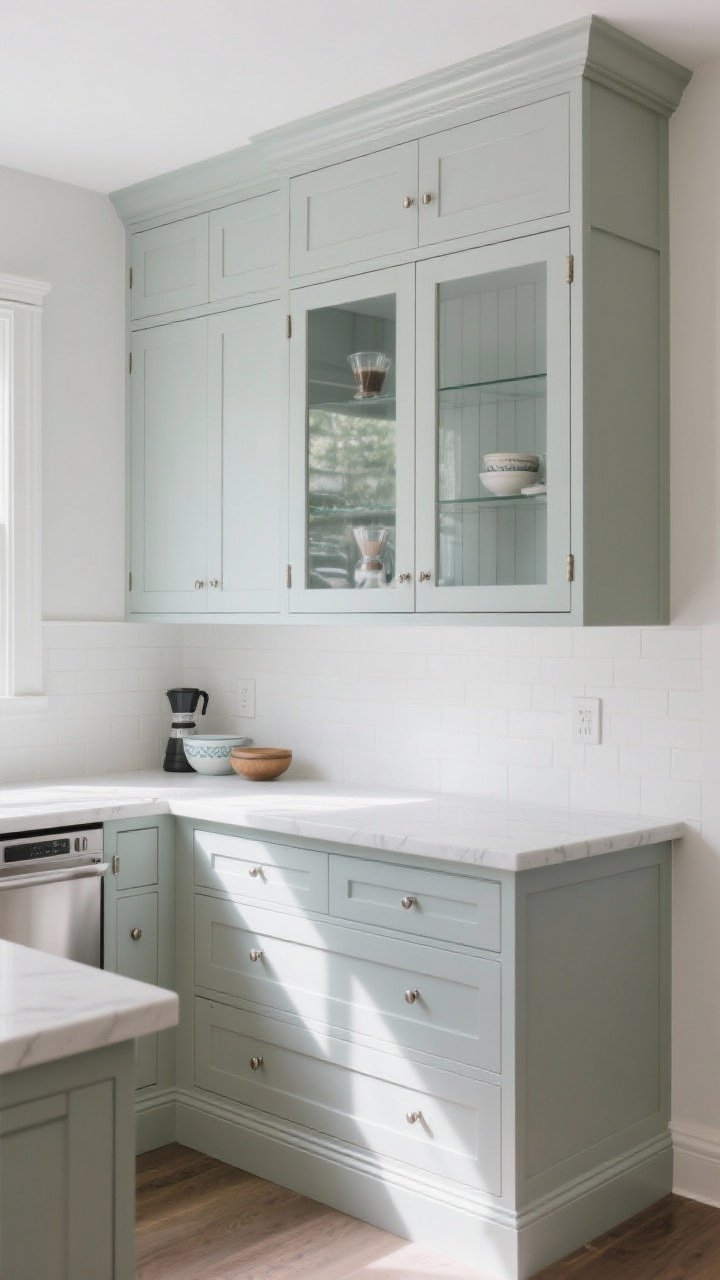
Want “custom” without commissioning a cabinet maker? Stack a short run of stock wall cabinets on your counters to fake a built-in pantry or hutch. Then paint everything—cabinets, toe kick, filler panels—the same color for that seamless, made-for-you look.
Tired of snacking when you’re not even hungry? This reset helps you stop the loop and feel back in control.
A simple reset for moments when cravings take over. Easy to use, easy to repeat, and designed to help you feel satisfied instead of stuck.
Choose shallow cabinets (12–15 inches deep) so you don’t lose counter space. Add a chunky baseboard and crown to finish the illusion. It’s like cosplay for your kitchen, but functional.
Smart Tips
- Use filler strips to close gaps and achieve that snug, built-in finish.
- Paint hinges and hardware screws to match if they peek—tiny details = high-end.
- Glass fronts on a few doors create a “custom hutch” moment for coffee gear or pretty bowls.
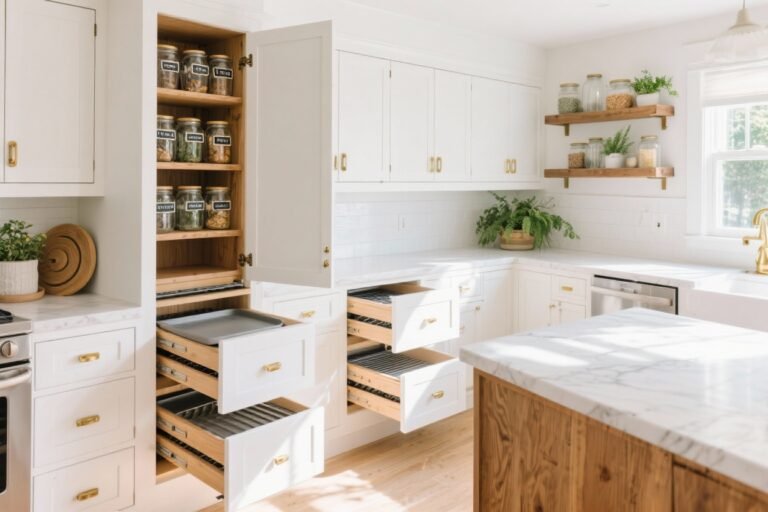
2. Add Pull-Outs to Sad Lower Cabinets
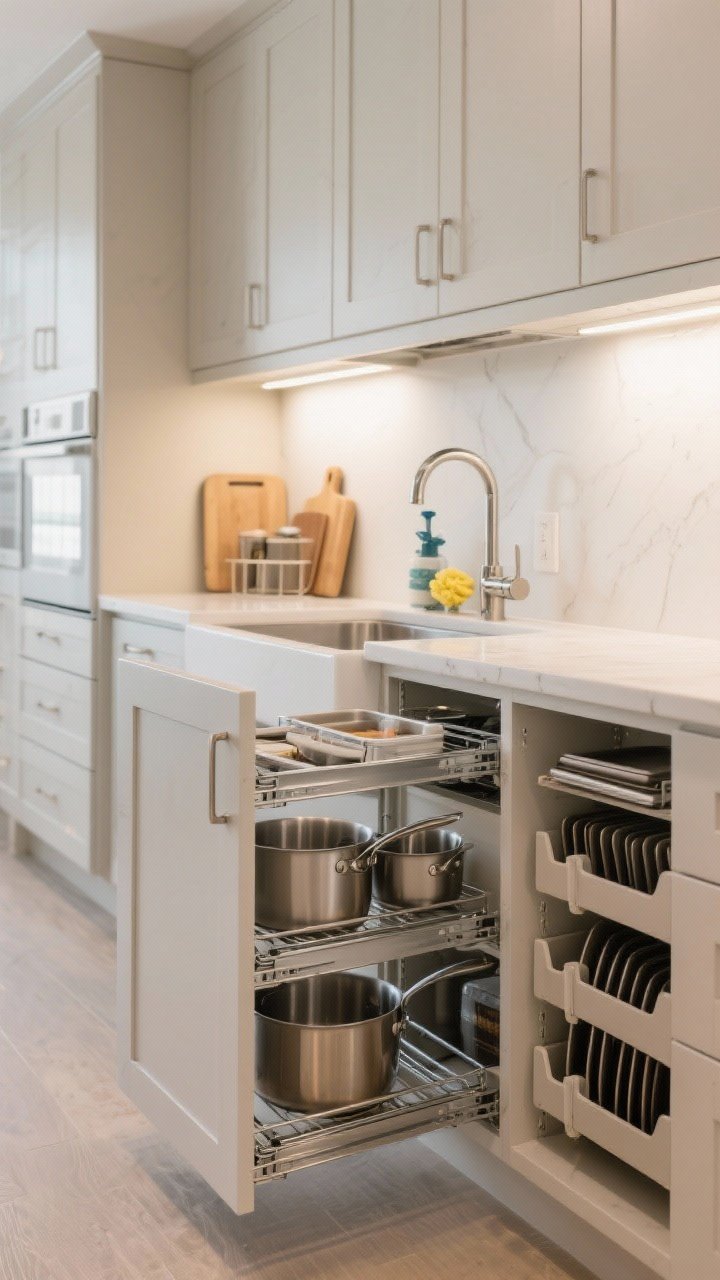
Custom kitchens love a pull-out. You can retrofit yours with roll-out shelves and slim side-mounted pull-outs for oils, baking sheets, and cleaning products. Suddenly, that black hole cabinet becomes prime real estate.
Install is beginner-friendly—just a drill and a measuring tape. You’ll open a door and see everything at once. That’s luxury.
What to Add
- Tray dividers for sheets and cutting boards (no more avalanche).
- U-shaped sink pull-outs to dodge plumbing but store sponges and sprays.
- Heavy-duty roll-outs for pots with soft-close glides (silent chic).
3. Create a “Butler’s Pantry” With Shelving + Curtains
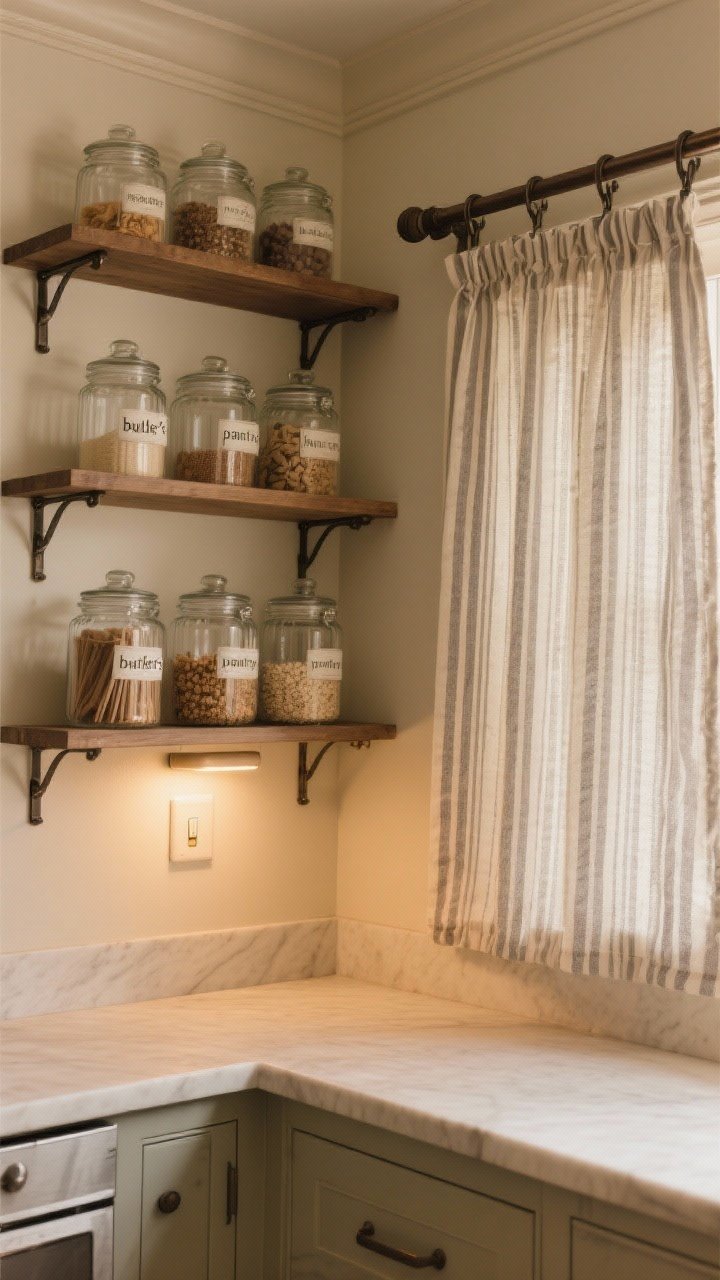
No pantry? Fake it. Install adjustable wall shelves or a freestanding metal rack in an alcove or empty corner. Then hang a simple tension rod and fabric panel for a clean, tailored cover-up.
Transform Your Home With 7,250+ Stunning Landscaping Designs—No Expensive Designers Needed!
- 🌿 Access 7,250+ stunning landscaping designs.
- 💰 Save thousands—no pro designer needed.
- 🏡 Plans for gardens, patios, walkways, and more.
- ✨ Simple, beginner-friendly DIY layouts.
- 🛠️ Customize any design to fit your yard.
It reads like a purposeful storage zone instead of “oh, we ran out of space.” And you can swap linens seasonally—instant refresh.
Style Moves
- Use linen or ticking stripe for that classic “butler’s pantry” look.
- Decant staples into matching glass jars for visual calm.
- Add a stick-on battery light under a shelf so it glows like built-in lighting.
4. High-End Drawer Chaos? Not Here—Customize With Inserts
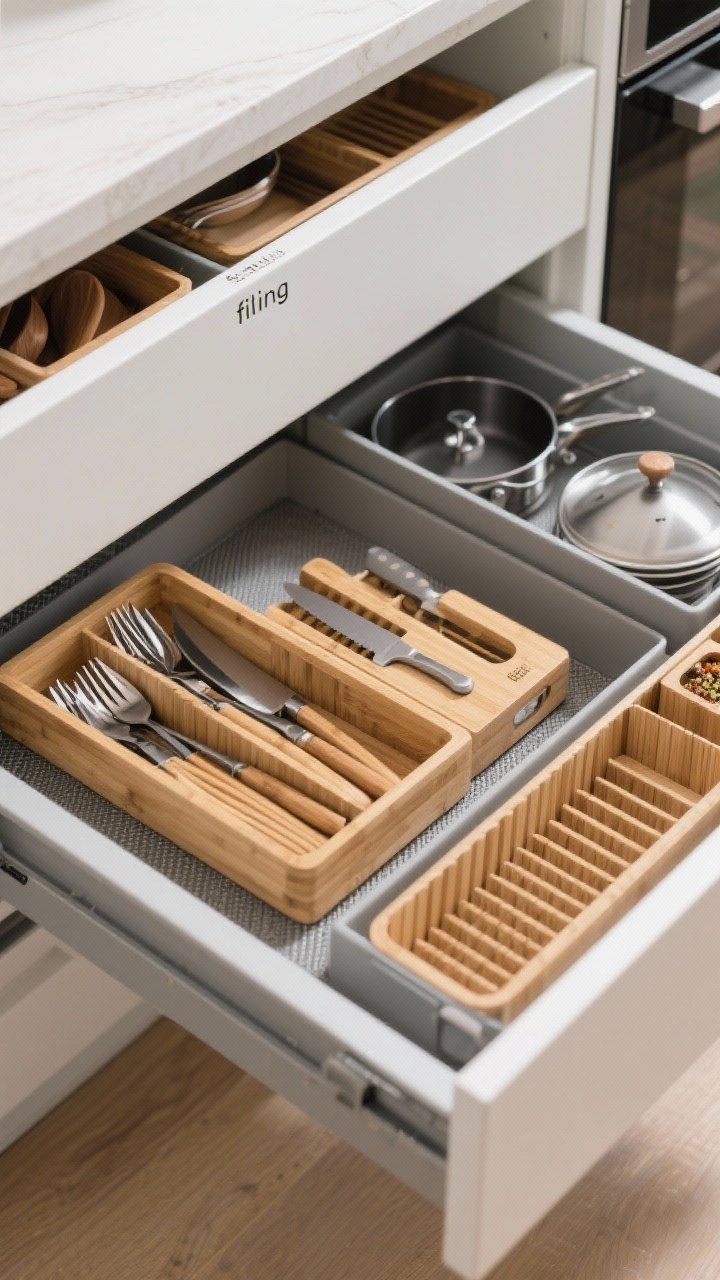
Custom means everything has a spot. Mimic that with a mix of modular drawer dividers—bamboo utensil trays, expandable cutlery organizers, knife blocks, and spice inserts. Suddenly your drawers feel architected.
FYI: Deep drawers love pot lid organizers and upright dividers so you can “file” pans and lids vertically. It’s a small change that feels oddly life-changing.
Editor’s Picks
- Expandable trays to fit weird drawer widths like a glove.
- Non-slip liners so nothing skates around (subtle luxury).
- Label the top edge of inserts so guests can actually put things back.
5. Upgrade Shelves With Affordable “Built-In” Lighting
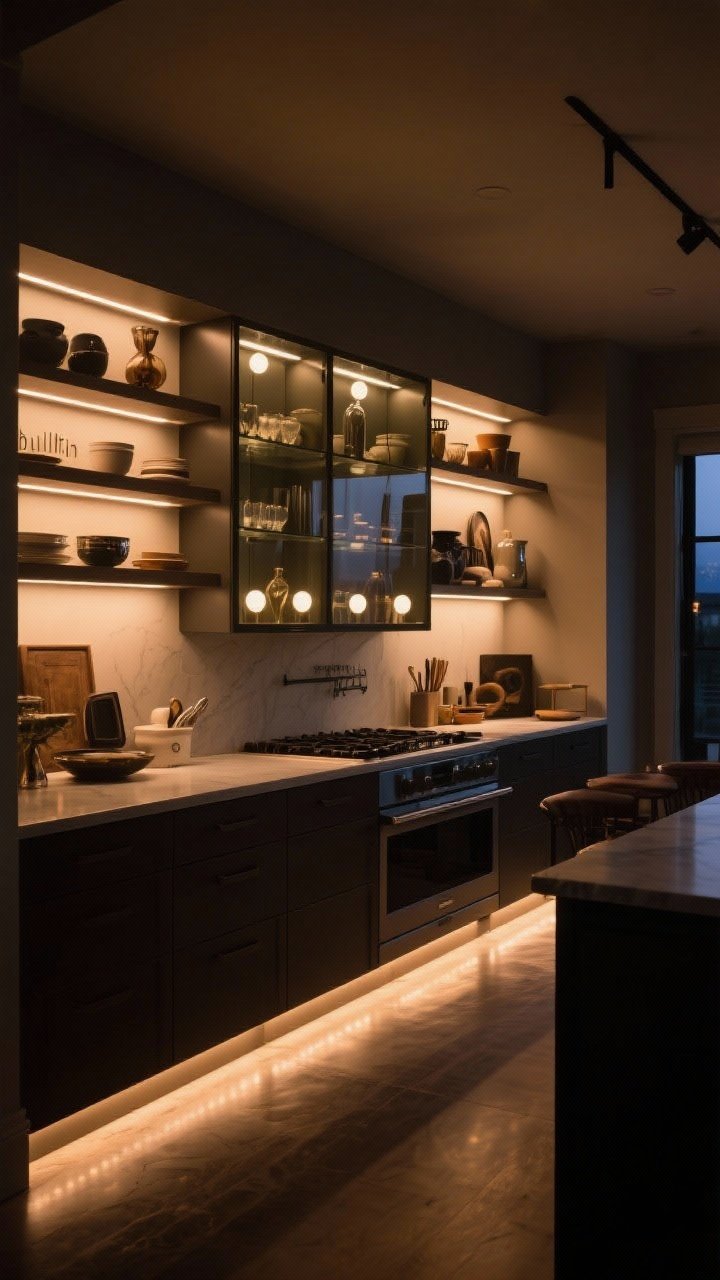
Lighting makes everything look expensive. Stick LED puck lights or motion-sensor strips inside cabinets, under shelves, or below uppers. It adds drama and helps you find the paprika without yelling into the void.
Wireless and rechargeable versions mean no electrician required. Warm temperature (2700–3000K) feels custom and cozy, not office-breakroom harsh.
Where to Place
- Under-cabinet strips for task lighting that looks built-in.
- Inside glass cabinets to spotlight pretty pieces.
- Toe-kick lights for that “chef’s kitchen at night” vibe.

6. Turn Awkward Corners Into Breakfast or Baking Stations
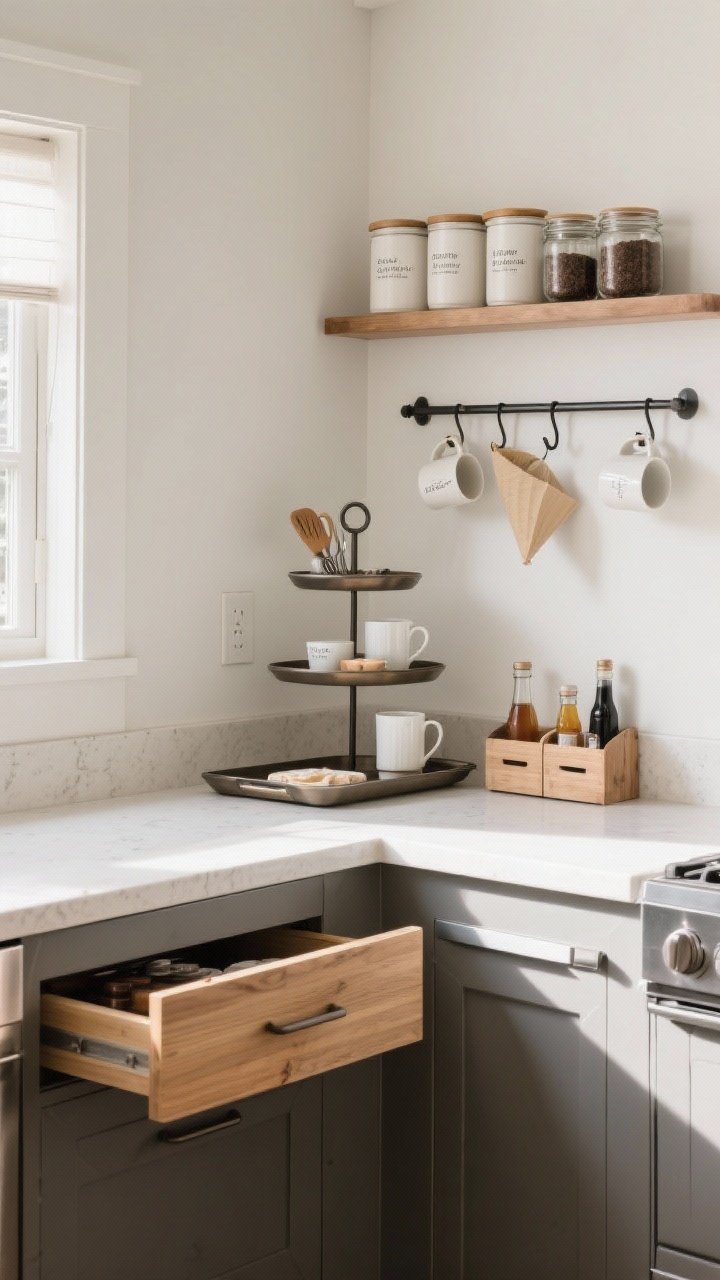
Designers zone kitchens like mini cities. Copy that by carving out a “station” in a dead corner—coffee, smoothie, baking, cocktail. Organize everything you need in one spot, and it instantly feels custom-curated.
Use a tiered stand or slim wall shelf to keep tools off the counter but at arm’s reach. Add a tray to corral the chaos and protect surfaces—visual order is half the custom look.
Station Ideas
- Coffee: Canisters, mugs on hooks, filters in a drawer, syrups in a caddy.
- Baking: Clear bins for flours, measuring tools in a peg rail, mixing bowls nested.
- Cocktails: Magnetic bottle opener, narrow shelf for bitters, ice bucket tucked below.
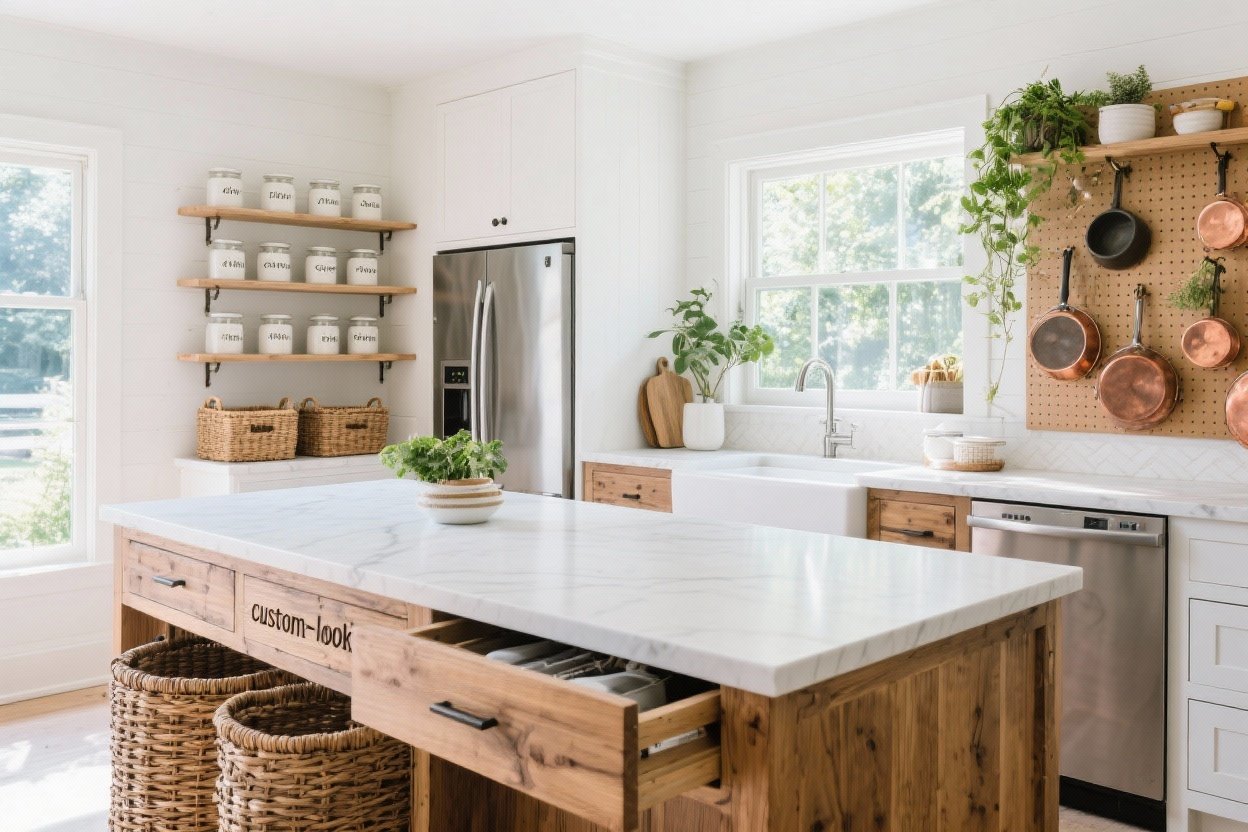
7. Use Rail Systems for a Chef’s Kitchen Moment
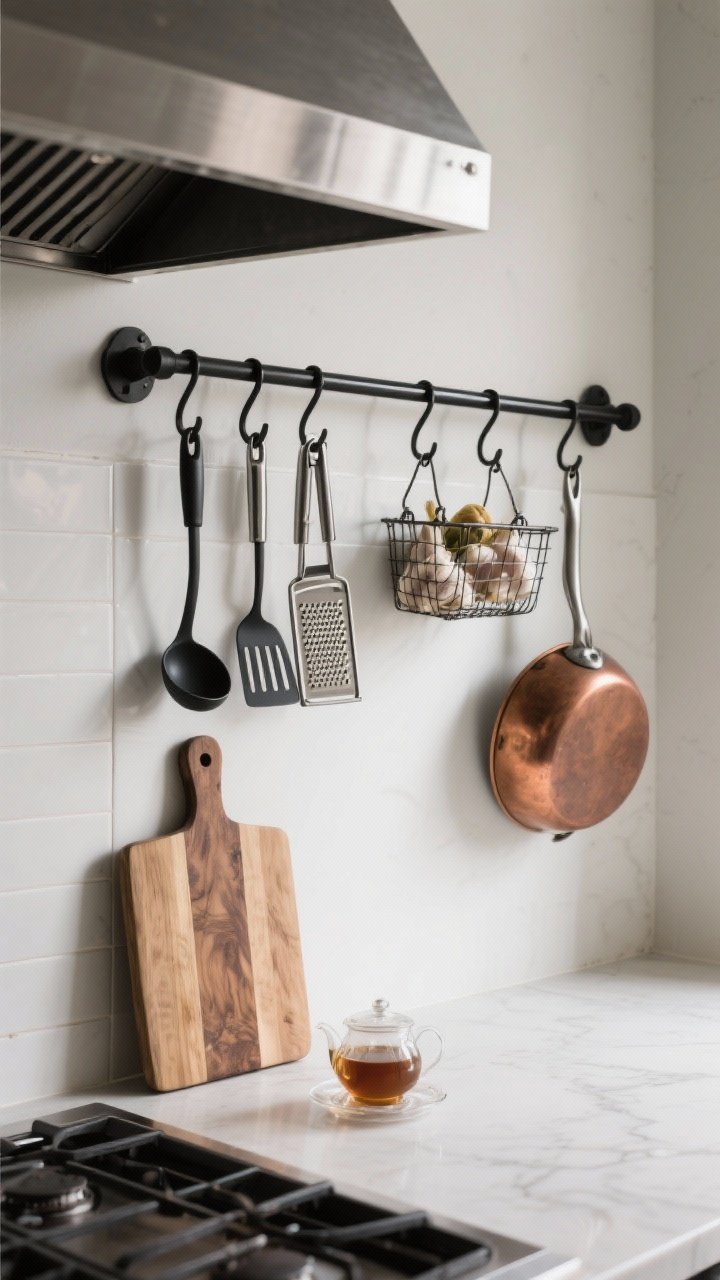
Those sleek European kitchens with everything hanging within reach? You can replicate with a wall-mounted rail and S-hooks. Hang your frequently used tools and keep counters clear. It looks intentional—and a little pro.
Mount above a backsplash, on the end of a cabinet, or on a magnetic strip if you’re renting. Keep it edited so it reads curated, not cluttered.
What to Hang
- Everyday tools: Ladles, tongs, spatulas, microplane.
- Small baskets: Garlic, shallots, tea, or dishcloths.
- Board + pan storage: A couple of pretty boards or a copper pan for style points.
8. Add Vertical Partitions to Upper Cabinets
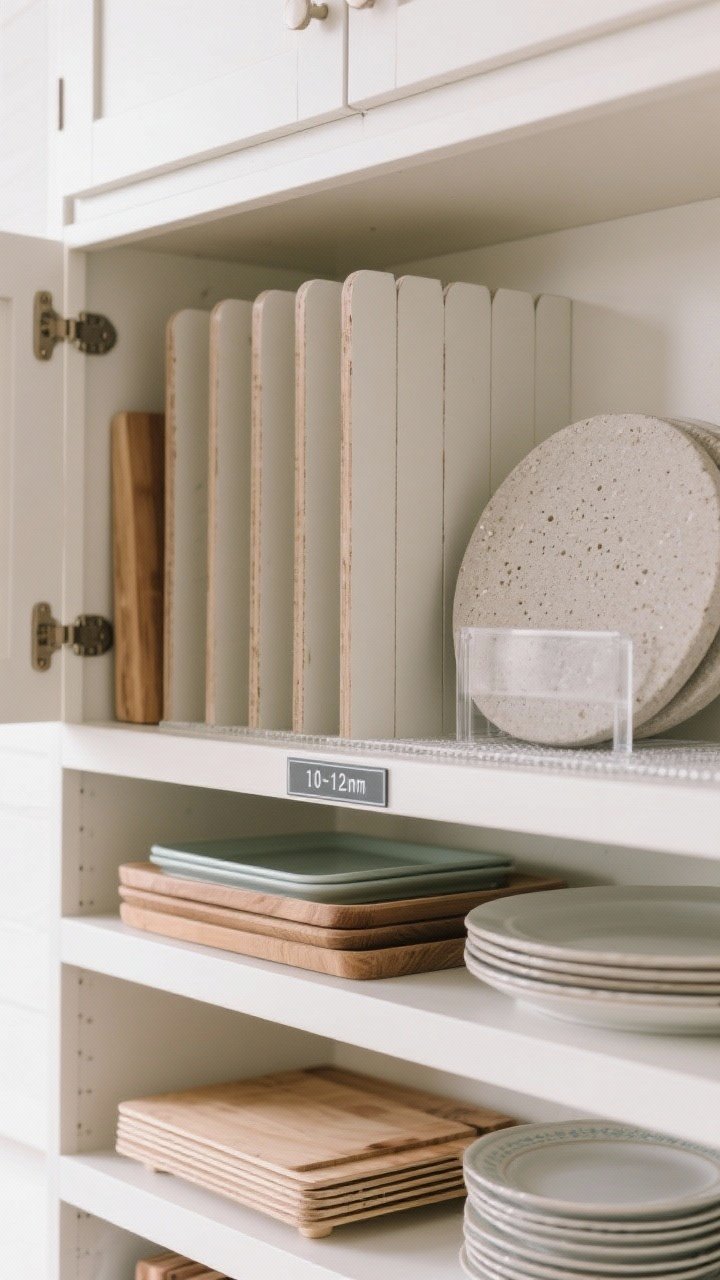
Custom uppers often have vertical dividers for trays, boards, and platters. You can DIY with pre-cut plywood, shelf pins, or tension dividers. Suddenly your cabinets are tailored to your gear, and you stop playing Jenga with bakeware.
Go 10–12 inches wide per slot. Keep one section taller for pizza stones and large platters—then nod casually when guests compliment you like, “Oh this? It’s nothing.”
Pro Moves
- Line shelves with clear grip mats to prevent slide-outs when you open doors.
- Paint dividers to match interiors for a bespoke feel.
- Label the inside door so everyone knows where things live (IMO, essential).
9. Fake Panel-Front Appliances With Peel-and-Stick Tricks
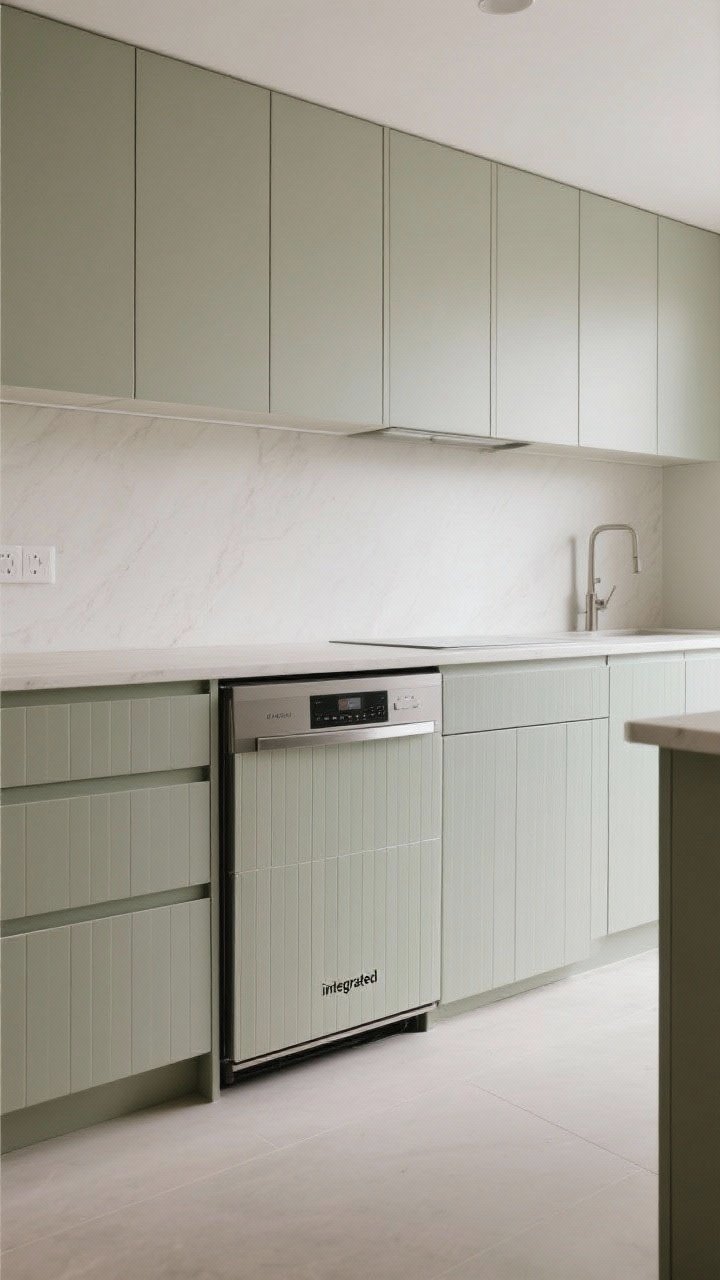
Integrated appliances scream custom. Without replacing anything, you can mimic the look by adding peel-and-stick paneling or vinyl wraps to dishwasher and fridge fronts, then matching pulls to your cabinet hardware.
It creates visual continuity and puts the appliance circus on silent mode. Perfect for older models you’re not ready to replace yet.
How to Pull It Off
- Match the finish and color to your cabinets or go bold with contrast.
- Add a long bar pull to echo a panel-front vibe.
- Use heat-resistant vinyl and clean thoroughly before applying.
10. Style Open Shelves Like a Designer, Not a Maximalist
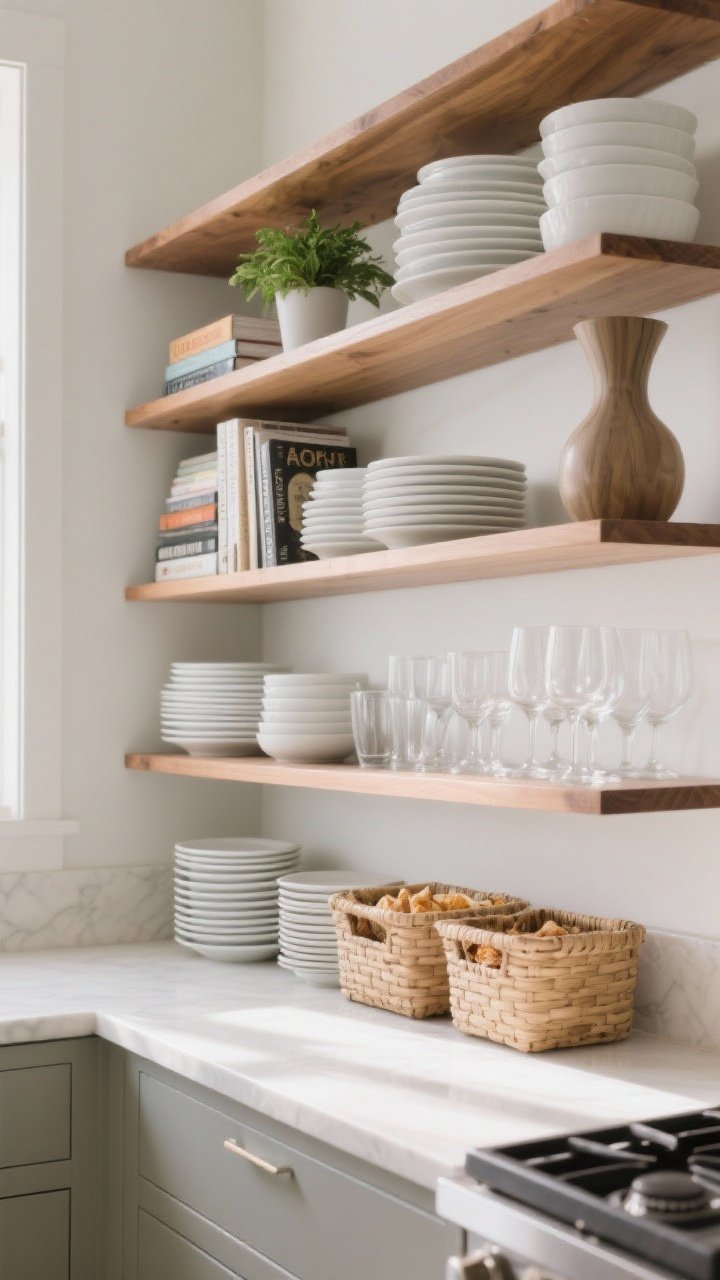
Open shelving can go “flea market” fast. Keep it looking custom by sticking to a tight palette and repeating forms—white dishes, wood accents, clear glass. Think calm, not chaos.
Store daily-use items at arm’s reach and tuck extras behind closed doors. The secret is negative space—leave a little air between stacks so it feels curated.
Shelf Styling Checklist
- Use sets: Matching bowls and glasses read intentional and upscale.
- Vary heights: Books, a small plant, and a sculptural pitcher add rhythm.
- Contain it: Bins or baskets for snacks and packets keep the visual noise down.
Bonus Styling and Budget Tips
- Hardware swap: New pulls are the fastest way to fake custom. Try longer pulls for a bespoke look.
- Color continuity: Paint cabinet interiors or backs of open shelving for a cohesive “designed” story.
- Matte finishes: They photograph and wear better—less glare, more luxe.
- Repeat materials: Wood, brass, linen—carry them across zones for instant visual harmony.
You don’t need a full reno to get that elevated, custom feel—just a few smart upgrades and a game plan. Try one or two of these ideas this weekend, and watch your kitchen go from “fine” to “who did this for you?” Spoiler: you did. And for less.