
10 Kitchen Storage Ideas That Instantly Maximize Every Cabinet—no Renovation Required
Let’s be honest: kitchen cabinets are like black holes for Tupperware and lonely lids. But with a few clever upgrades, you can transform that chaos into a super-organized, space-maximizing dream. These ideas aren’t just pretty Pinterest goals—they’re practical, renter-friendly, and seriously effective. Ready to reclaim every inch? Let’s raid those cabinets.
1. Double Your Real Estate With Shelf Risers

Most cabinets have tall, wasted space. Shelf risers slice that vertical gap into usable layers so plates and bowls don’t stack into a wobbly tower of fear. No tools, no drama—just instant extra “shelves.”
Tired of snacking when you’re not even hungry? This reset helps you stop the loop and feel back in control.
A simple reset for moments when cravings take over. Easy to use, easy to repeat, and designed to help you feel satisfied instead of stuck.
Why It Works
- Vertical efficiency: Turn one shelf into two or three.
- Less stacking: Easier to grab what you need without playing Jenga.
- Flexible: Move them around as your storage needs change.
Pro Tips
- Use narrow risers for mugs and bowls; heavy-duty metal risers for plates.
- Color-code by shelf: white risers for daily use, black for baking gear—helps your brain remember.
- Measure cabinet height first; aim for a 2-inch clearance above top items.
2. Install Pull-Out Trays So Nothing Gets Lost

If you’re still reaching into dark cabinet corners like it’s a cave expedition, it’s time for pull-out trays. They bring everything to you—no more forgotten cans or mystery pans.
Why It Works
- Full visibility: See every item in seconds.
- Back-saver: Especially helpful in base cabinets.
- Customizable widths: Fit around plumbing or odd cabinet shapes.
Pro Tips
- Opt for soft-close rails so jars don’t tip.
- Use shallow trays for spices; deeper ones for canned goods or small appliances.
- In rentals, try freestanding rolling baskets that slide like drawers—no drilling.
3. Turn Doors Into Storage With Over-The-Door Racks
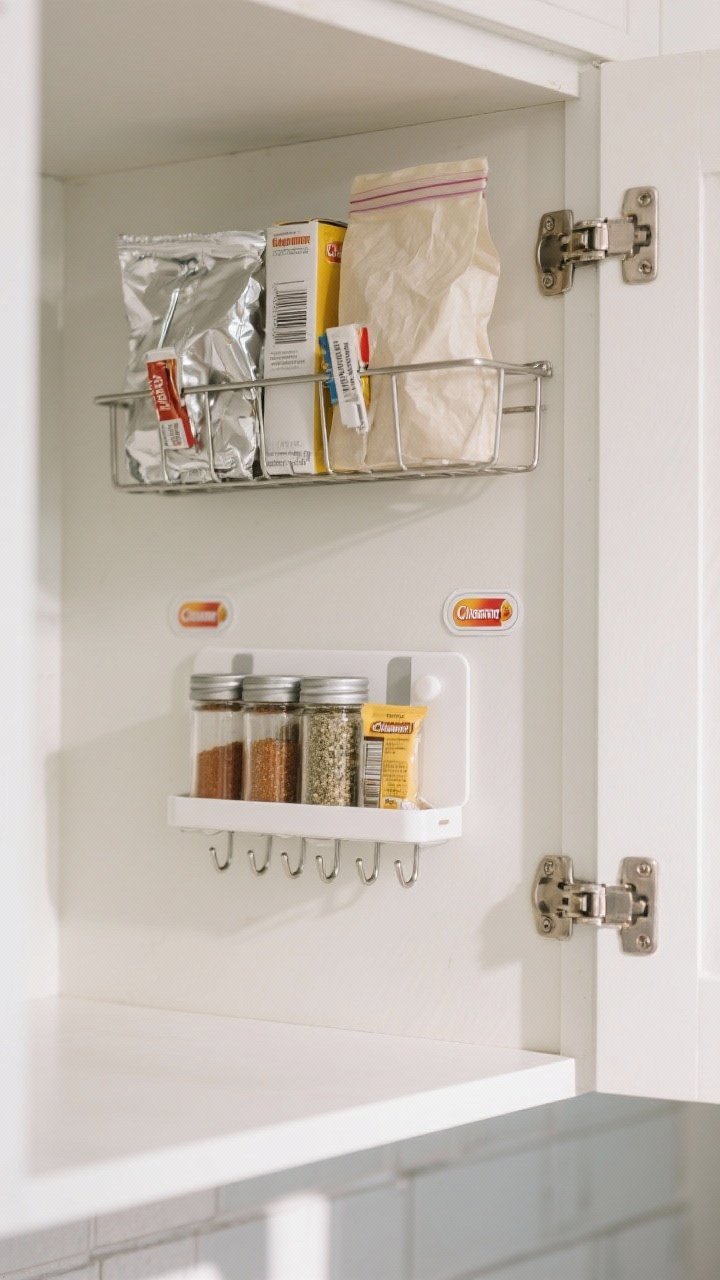
The inside of cabinet doors is prime real estate. Add slim racks for wraps, spices, or cleaning bottles. It’s basically bonus storage you didn’t know you had.
Why It Works
- Zero footprint: Uses space that’s usually ignored.
- Quick access: Open, grab, done.
- Perfect for small items: Foil, baggies, seasoning packets.
Pro Tips
- Check clearance so racks don’t hit interior shelves.
- Use Command hooks or adhesive-mounted options if drilling is a no-go.
- Mount a shallow spice clip rack on a door near the stove for a chef’s kiss workflow.
4. File, Don’t Stack: Vertical Dividers For Baking Sheets

Stacked trays clank. Vertical dividers turn chaos into quiet, and you’ll never have to unleash a cookie sheet avalanche again. Think of it like a bookshelf for your bakeware.
Why It Works
- One-motion access: Pull one out without disturbing the rest.
- Protects finishes: No scratching or warping.
- Fits awkward items: Cutting boards, platters, cooling racks.
Pro Tips
- Use adjustable metal dividers or tension dividers for flexibility.
- Place near the oven or in a narrow base cabinet.
- Label at the front lip—“Sheets,” “Boards,” “Racks”—so the system survives guests and roommates, FYI.
5. Add Lazy Susans To Corners And Spices
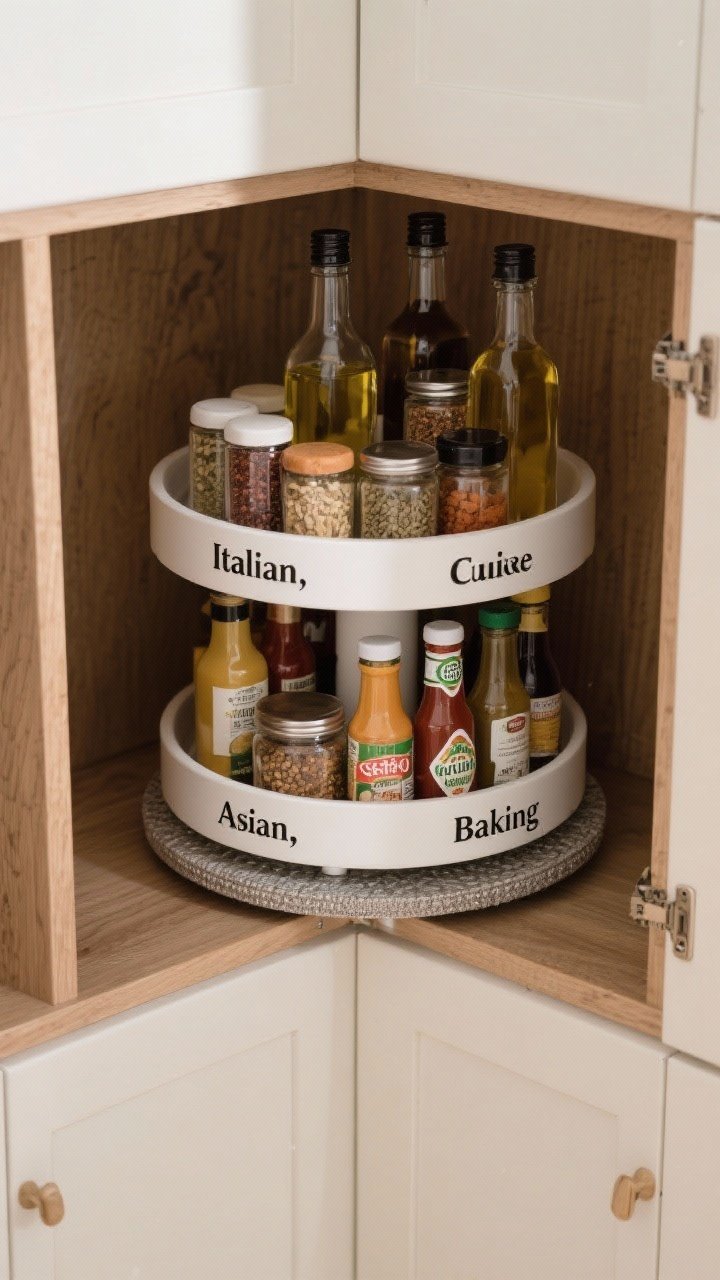
Corner cabinets love to hoard stuff. A lazy Susan makes every inch reachable—spin and win. They’re clutch for spices, sauces, oils, and even cleaning supplies.
Transform Your Home With 7,250+ Stunning Landscaping Designs—No Expensive Designers Needed!
- 🌿 Access 7,250+ stunning landscaping designs.
- 💰 Save thousands—no pro designer needed.
- 🏡 Plans for gardens, patios, walkways, and more.
- ✨ Simple, beginner-friendly DIY layouts.
- 🛠️ Customize any design to fit your yard.
Why It Works
- 360-degree access: No dead zones.
- Prevents tipping: High lips keep bottles secure.
- Scalable: Use double-tier versions for extra storage.
Pro Tips
- Choose non-slip bases so jars don’t skate.
- Match size to cabinet: 10–12 inches for uppers, 14–16 inches for base cabinets.
- Group by cuisine: “Italian,” “Asian,” “Baking”—your future self will thank you.

6. Go Clear With Stackable Bins And Canisters

Opaque packaging = mystery. Clear bins and canisters make inventory obvious and look ridiculously tidy. Bonus: fewer duplicates because you can actually see the pasta avalanche.
Why It Works
- Visibility: You know what you have at a glance.
- Stackable: Build up without wasting space.
- Crumb control: Bins corral mini-messes like snack spills.
Pro Tips
- Label with removable stickers or paint pens for flexibility.
- Use square canisters—they pack tighter than round ones.
- Create zones: “Breakfast,” “Snacks,” “Baking,” “Pasta + Grains.”
7. Use Tiered Organizers For Cans And Condiments

Stop losing tiny jars behind bigger bottles. Tiered stadium-style shelves raise back-row items so you can actually see them. They’re the concert bleachers of your cabinet.
Why It Works
- Visibility: No more double-buying cumin.
- Compact: Fits in standard-depth cabinets.
- Expandable: Many versions stretch to fit your space.
Pro Tips
- Choose non-slip tiers for jars and slender bottles.
- Keep heavy cans on lower tiers, lighter items up top.
- Pair with a cabinet light strip for high drama and low rummaging.
8. Embrace Hooks, Rails, And Under-Shelf Baskets
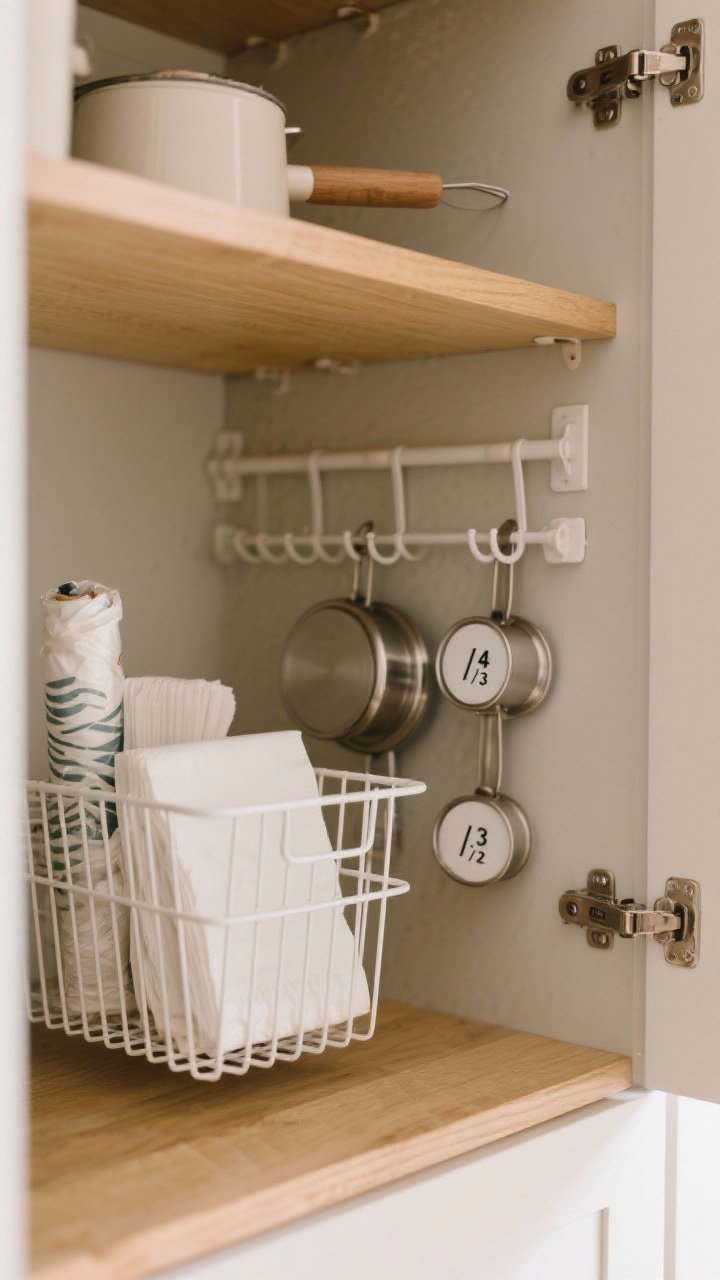
When shelf space is maxed, go under it. Under-shelf baskets add a bonus layer for wraps, napkins, or shallow bowls. Add adhesive hooks or a rail inside a cabinet for measuring cups, pot lids, or mugs.
Why It Works
- Micro-zones: Store small, frequently used items within reach.
- Uses dead air: Makes the most of that awkward gap under shelves.
- Tool-free options: Perfect for rentals, IMO.
Pro Tips
- Check for door clearance with hanging items.
- Use lid-holding rails to corral pot lids vertically.
- Hang measuring cups on labeled hooks (1/4, 1/3, 1/2) to speed up cooking.
9. Create Zones With Slide-Out Bins And Labels
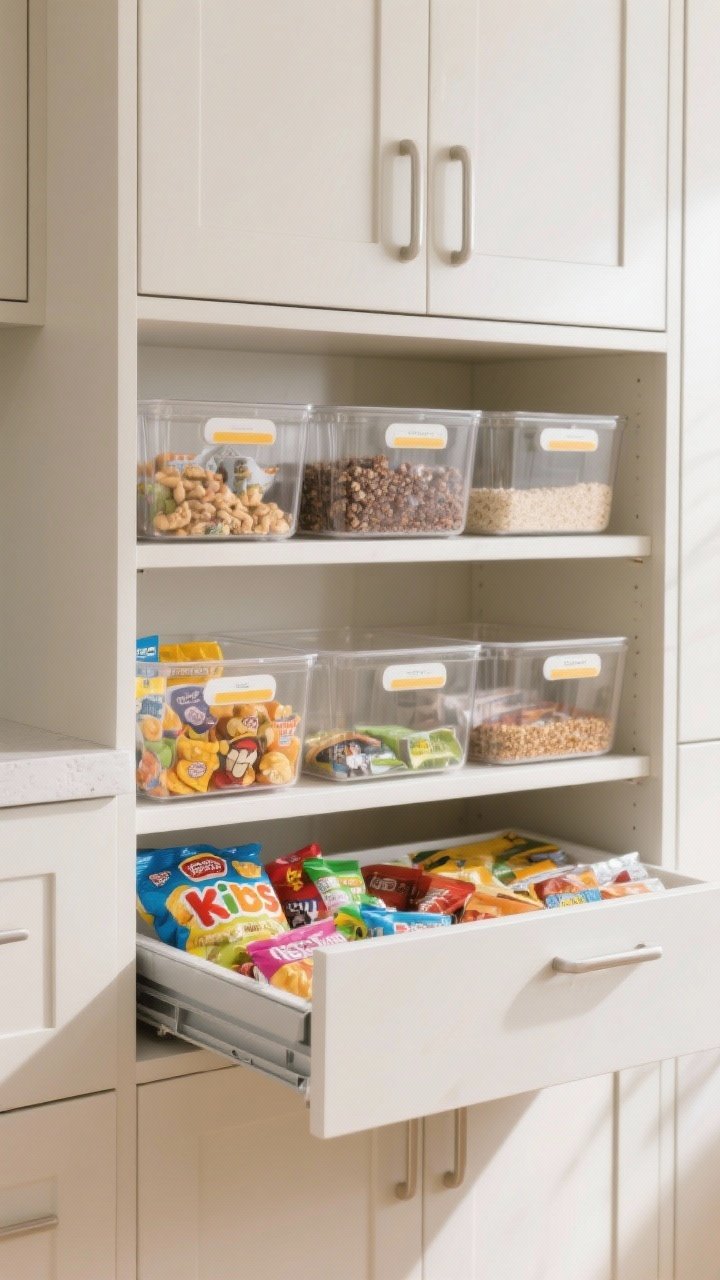
Random placement breeds chaos. Turn each cabinet into a system with slide-out bins and clear labels. When everything has a zone, cleanup becomes brainless.
Why It Works
- Grab-and-go: Pull one bin instead of 12 items.
- Category control: Snacks stay with snacks, baking with baking.
- Maintenance-friendly: Even guests can put things back correctly, FYI.
Pro Tips
- Use deep bins for kids’ snacks, shallow for packets and toppings.
- Label front and top so you can see contents whether bins are in or out.
- Choose handles or cut-outs that are comfy to grab with one hand.
10. Optimize Tall Cabinets With Adjustable Shelves And Appliance Garages

Tall cabinets often waste space at the top and bottom. Adjust the shelves so heights actually match your stuff, then dedicate a “home” for small appliances so they don’t crowd your counters.
Why It Works
- Custom fit: No 6-inch gap above cereal boxes “just because.”
- Appliance garage: Keeps mixers, blenders, and air fryers out of sight but accessible.
- Safer stacking: Heavy items live low, light ones up high.
Pro Tips
- Group appliances by use frequency: daily in the middle, weekly below, rarely used up top.
- Add a slide-out tray for the blender or toaster so cords don’t tangle.
- Use a corded bin with a small hole at the back to keep chargers and appliance cords tidy.
Bonus Micro-Strategies To Supercharge Any Cabinet
- Stick-on lights: Motion-sensor pucks help you see everything instantly.
- Slim turntables: Fit one on a fridge shelf or tight cabinet to make mini condiments accessible.
- Declutter quarterly: If you haven’t used it in 6 months, donate or relocate to deep storage.
There you go—10 simple, high-impact upgrades that make your cabinets feel custom without calling a contractor. Mix and match a few, and your kitchen will suddenly feel bigger, calmer, and way more functional. Now open a cabinet and give yourself a tiny victory lap—you earned it.


